L.R.Baggs Element Active System Bruksanvisning
L.R.Baggs ej kategoriserat Element Active System
Läs gratis den bruksanvisning för L.R.Baggs Element Active System (2 sidor) i kategorin ej kategoriserat. Guiden har ansetts hjälpsam av 29 personer och har ett genomsnittsbetyg på 4.5 stjärnor baserat på 4 recensioner. Har du en fråga om L.R.Baggs Element Active System eller vill du ställa frågor till andra användare av produkten? Ställ en fråga
Sida 1/2
INSTALLATION MANUAL & USER'S GUIDE
L.R. BAGGS PICKUPS
ELEMENT ACTIVE SYSTEM
483 N. FRONTAGE RD.
NIPOMO, CA 93444
WWW.LRBAGGS.COM
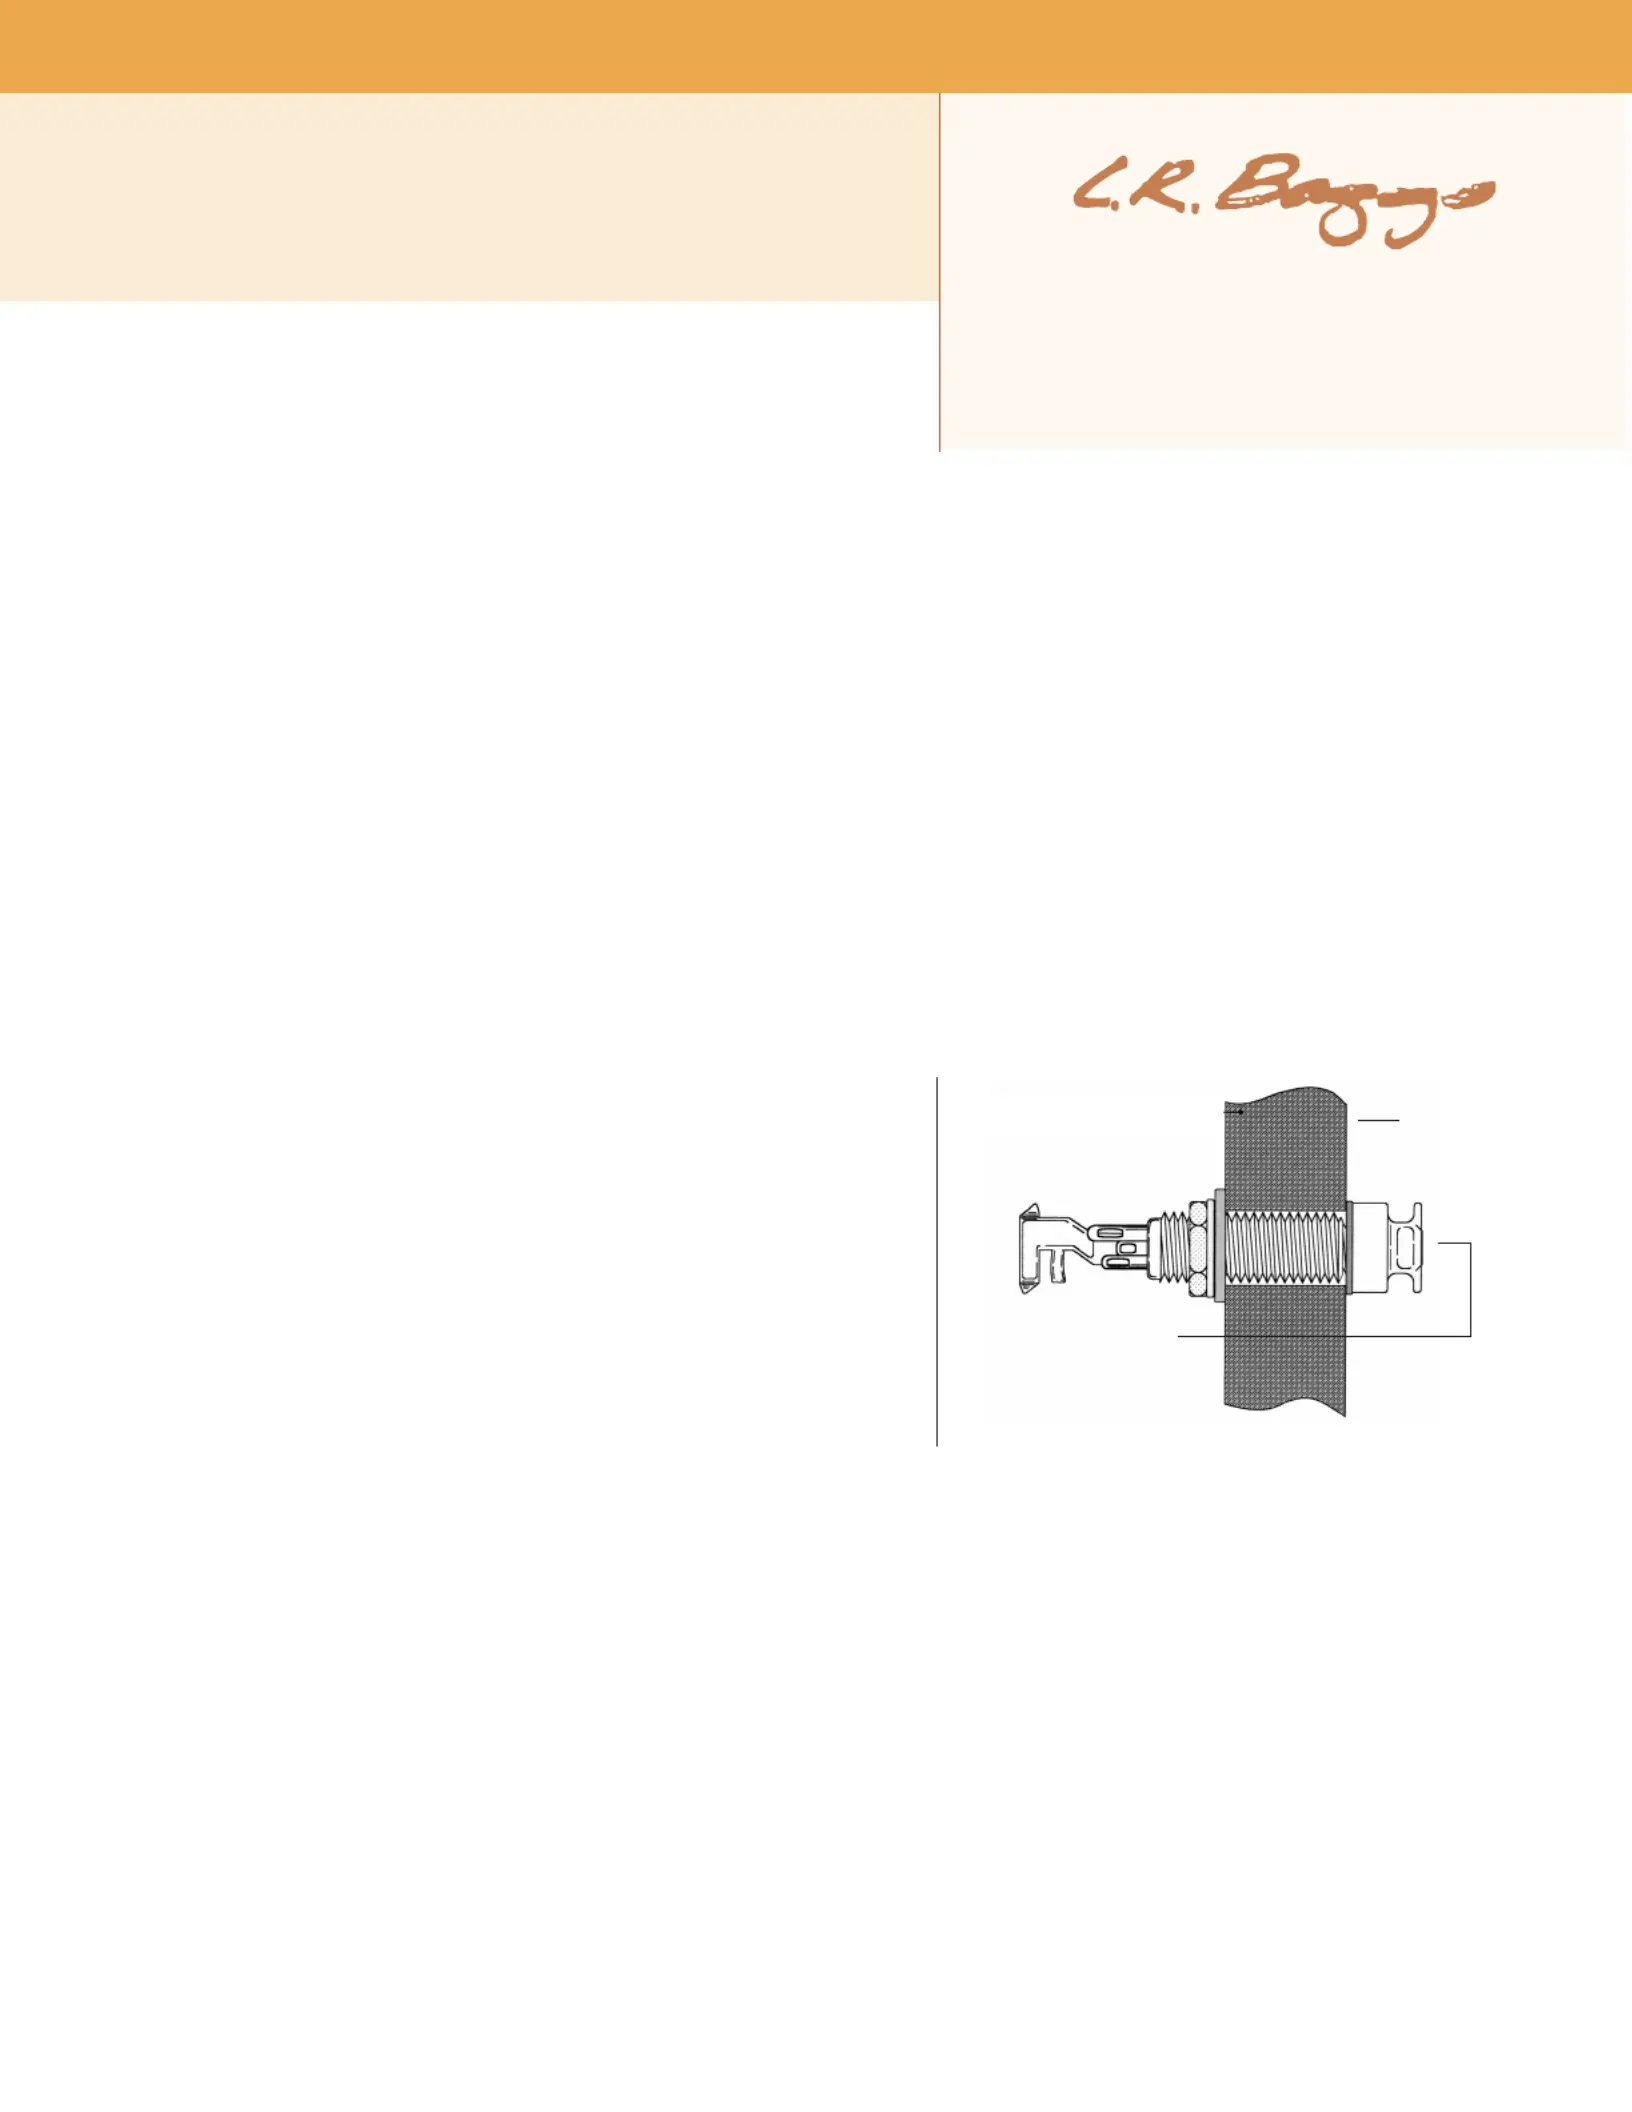
tail
block
smaller
threaded
section
protrudes
fig. 1
TABLE OF CONTENTS
1. Package contents
2. Overview and cautions
3. Strapjack/preamp installation
4. Pickup Installation
5. Finishing the installation
6. Other applications
1.PACKAGE CONTENTS
One (1) Element Active System with undersaddle pickup, endpin preamp and volume control pre-attached
One (1) Battery Bag
Three (3) self-stick wire clips
2.OVERVIEW AND CAUTIONS
The Element Active System combines Element undersaddle pickup with a pre-contoured, all-discrete class A endpin preamp. A soundhole-
mounted volume control gives you additional control and versatility without having to drill any holes in your instrument. The Element Active is
designed to interface with just about anything you plug into, but best results will be achieved with a high-quality, full-range P.A. Plugging in and
unplugging the cord will turn the preamp on and off.
We recommend that this system be installed by a professional dealer/installer. We do not provide installation advice or support for home or
hobbyist installations. Installers: please read the instructions carefully before proceeding. We will not be responsible for any damage to the guitar
or personal injury resulting from installa-tion, improper installation, use or misuse of the product.
3.STRAPJACK/PREAMP INSTALLATION
Drilling the strapjack hole:For proper installation, this jack requires a clean
1/2" hole in the tail block of the instrument. If the guitar lacks this hole, start
by placing a piece of masking tape on the outside of the instrument over the
drilling area (to avoid chipping the finish), drill a small pilot hole in the tail
block and then follow with a step drill.
Installing the strapjack: Remove the strap ring, retaining nut and one
washer from the end of the jack. There should still be one star locking washer,
one flat washer and a nut remaining on the jack. Bring the jack down through
the soundhole into the body and insert it into the pre-drilled hole in the tail
block. Using the internal nut (be sure to include the flat and star washers), set
the proper depth that will allow the entire smaller threaded section to
protrude from the instrument (see figure 1).
With the jack in place, lay the remaining washer over the threads and attach
the external retaining nut until it’s tight. Finish by attaching the strap ring (it
should cover the retaining nut and washer). Asserting too much pressure may
crack the finish. Now bring the preamp into the guitar (do not adhere it yet), connect a battery, and plug the strapjack cable into the "output"
socket. Then proceed to following section.
4.PICKUP INSTALLATION
Installation notes: For optimum performance of the Element, the bridge slot must have a clean, flat surface free of any debris or over-spray from
the finish. The slot must be a minimum of .125” (1/8”) deep, but we suggest a depth of at least .187" (3/16”) to avoid excessive saddle tilt.
The commonly-known 50/50 rule applies: The amount of saddle visible above the bridge surface (with pickup installed) should be no greater than
the amount of saddle in the slot beneath the bridge surface; otherwise the balance and output of the pickup may suffer.
8.hosaddlnoe2 Srt e t: Thfirs18othlemepicinoatiodhmnio14osadlonthtingoe t /" f e Ent kup s t cve.f I yu ot no avea imum f /" f de beyd eE hi- sr, yu
mxeienloutpothsstingemethilsmalhoioahoitothsoenhpcteay eprce ow ut n i r.o T rdy s, dirla l rzntl le n hne ed f e lto t extd te ikufup rhneur dr
the saddle (see figure 2). To drill this hole without disrupting the floor of the saddle slot, place a small jeweler's screwdriver under the tip of the
drill bit. On short saddles we also advise that the pickup exit hole be drilled into the end wall of the saddle slot rather than the slot's floor (see
figure 3) to likewise extend saddle/pickup contact at the exit end. Again use the jeweler's screwdriver to protect the saddle floor as you drill.
8.3 Installation: Remove the strings from the guitar. To duplicate the string height exactly, scribe a line along the front edge of the saddle where
it extends above the bridge. The line will later be used as a guide when removing material from the bottom of the saddle to compensate for the
thickness of the pickup (.037” total). Remove the saddle to drill the hole for the pickup. The drill bit needs to be as large as the saddle slot will
allow.
Produktspecifikationer
| Varumärke: | L.R.Baggs |
| Kategori: | ej kategoriserat |
| Modell: | Element Active System |
Behöver du hjälp?
Om du behöver hjälp med L.R.Baggs Element Active System ställ en fråga nedan och andra användare kommer att svara dig
ej kategoriserat L.R.Baggs Manualer

9 Augusti 2025
4 Augusti 2025
ej kategoriserat Manualer
Nyaste ej kategoriserat Manualer
3 April 2026
3 April 2026
3 April 2026
3 April 2026
3 April 2026
3 April 2026
3 April 2026
3 April 2026
3 April 2026