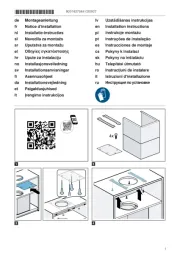
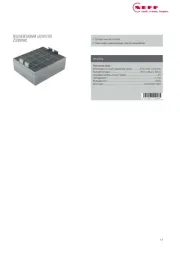
Neff Z51GIA1X3 Bruksanvisning
Neff
ventilationskåpa
Z51GIA1X3
Läs gratis den bruksanvisning för Neff Z51GIA1X3 (8 sidor) i kategorin ventilationskåpa. Guiden har ansetts hjälpsam av 3 personer och har ett genomsnittsbetyg på 4.9 stjärnor baserat på 2 recensioner. Har du en fråga om Neff Z51GIA1X3 eller vill du ställa frågor till andra användare av produkten? Ställ en fråga
Sida 1/8

1
*9001851996*
9001851996 (030417) DWZ1GK1A2; LZ11GKA13; Z51GIA1X3;
DWZ1GK1A2; JZ51GIA1X3; CZ51GIA1X3
de Montageanleitung
en Installation instructions
fr Notice d'installation
it Istruzioni d'installazione
pl
Instrukcje montażu
bg Инструкции за монтаж
cs Pokyny kinstalaci
da Installationsvejledning
el
Οδηγίες εγκατάστασης
es Instrucciones de montaje
et Paigaldusjuhised
fi Asennusohjeet
he
הנקתה תוארוה
hr Upute za instalaciju
hu Telepítési útmutató
lt Įrengimo instrukcijos
lv Uzstādīšanas instrukcijas
mk Упатства за инсталирање
nl Installatie-instructies
no Installasjonsveiledning
pt Instruções de instalação
ro Instrucţiuni de instalare
sk Pokyny na inštaláciu
sl Navodila za montažo
sq Udhëzimet e instalimit
sr Uputstva za montažu
sv Installationsanvisningar
1x
1 2
3

2
de
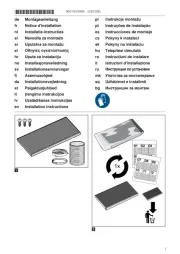
Lieferumfang
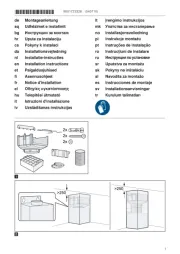
Prüfen Sie nach dem Auspacken alle Teile auf Trans-
portschäden und die Vollständigkeit der Lieferung.
→Abb.
1
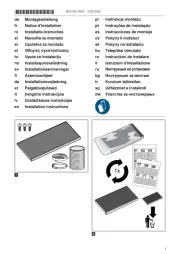
Geruchsfilter montieren
1. Den Fettfilter ausbauen.
2. Den Geruchsfilter auf die Rückseite des Fettfilters
legen und mit dem Gitter an den äußeren Löchern
fixieren.
→Abb.
2
3. Den Fettfilter einsetzen.
Informationen zum Einbauen des Fettfilters finden
Sie in der Gebrauchsanleitung Ihres Geräts.
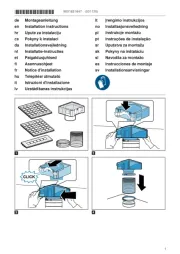
Geruchsfilter tauschen
1. Den Fettfilter ausbauen.
2. Das Gitter und den Geruchsfilter entfernen.
→Abb.
3
3. Den neuen Geruchsfilter auf die Rückseite des
Fettfilters legen und mit dem Gitter an den äuße-
ren Löchern fixieren.
→Abb.
2
4. Den Fettfilter einsetzen.
Informationen zum Einbauen des Fettfilters finden
Sie in der Gebrauchsanleitung Ihres Geräts.
5. Die alten Geruchsfilter im Restmüll entsorgen.
Die Geruchsfilter enthalten keine Schadstoffe.
en
Included with the appliance
After unpacking all parts, check for any damage in
transit and completeness of the delivery.
→Fig.
1
Installing the odour filter
1. Remove the grease filter.
2. Place the odour filter onto the rear of the grease
filter and use the grid to secure the odour filter to
the outer holes.
→Fig.
2
3. Insert the grease filter.
Information about installing the grease filter can
be found in the operating instructions for your ap-
pliance.
Replacing the odour filters
1. Remove the grease filter.
2. Remove the grid and the odour filter.
→Fig.
3
3. Place the new odour filter onto the rear of the
grease filter and use the grid to secure the odour
filter to the outer holes.
→Fig.
2
4. Insert the grease filter.
Information about installing the grease filter can
be found in the operating instructions for your ap-
pliance.
5. Dispose of old odour filters with the residual
waste.
The odour filters do not contain any harmful sub-
stances.
fr
Contenu de la livraison
Après avoir déballé le produit, inspectez toutes les
pièces pour détecter d’éventuels dégâts dus au
transport et pour vous assurer de l'intégralité de la li-
vraison.
→Fig.
1
Monter le filtre anti-odeurs
1. Démontez le filtre à graisse.
2. Fixez le filtre anti-odeurs au dos du filtre à graisse
avec la grille sur les trous extérieurs.
→Fig.
2
3. Insérez le filtre à graisse.
Vous trouverez des informations sur le montage
du filtre à graisse dans la notice d'utilisation de
votre appareil.
Remplacer le filtre anti-odeurs
1. Démontez le filtre à graisse.
2. Enlevez la grille et le filtre anti-odeurs.
→Fig.
3
3. Fixez le nouveau filtre anti-odeurs au dos du filtre
à graisse avec la grille sur les trous extérieurs.
→Fig.
2
4. Insérez le filtre à graisse.
Vous trouverez des informations sur le montage
du filtre à graisse dans la notice d'utilisation de
votre appareil.
5. Éliminer les anciens filtres à odeurs dans les dé-
chets résiduels.
Les filtres à odeurs ne contiennent aucune sub-
stance nocive.
it
Contenuto della confezione
Dopo il disimballaggio controllare che tutti i compo-
nenti siano presenti e che non presentino danni do-
vuti al trasporto.
→Fig.
1
Montaggio del filtro antiodori
1. Smontare il filtro antigrasso.
2. Collocare il filtro antiodori sulla parte posteriore
del filtro antigrasso e fissarlo con una griglia sui
fori esterni.
→Fig.
2
3. Inserire il filtro antigrasso.
Le informazioni per il montaggio del filtro antigras-
so sono contenute nelle istruzioni per l'uso dell'ap-
parecchio.
Sostituzione del filtro antiodori
1. Smontare il filtro antigrasso.
2. Rimuovere la griglia e il filtro antiodori.
→Fig.
3
3. Collocare il nuovo filtro antiodori sulla parte poste-
riore del filtro antigrasso e fissarlo con una griglia
sui fori esterni.
→Fig.
2
4. Inserire il filtro antigrasso.
Le informazioni per il montaggio del filtro antigras-
so sono contenute nelle istruzioni per l'uso dell'ap-
parecchio.
5. Smaltire i vecchi filtri antiodore nei rifiuti domestici.
I filtri odori non contengono alcuna sostanza noci-
va.
Produktspecifikationer
Varumärke: | Neff |
Kategori: | ventilationskåpa |
Modell: | Z51GIA1X3 |
Behöver du hjälp?
Om du behöver hjälp med Neff Z51GIA1X3 ställ en fråga nedan och andra användare kommer att svara dig
ventilationskåpa Neff Manualer
12 September 2025
12 September 2025
1 September 2025
1 September 2025
14 Augusti 2025
14 Augusti 2025
14 Augusti 2025
14 Augusti 2025
14 Augusti 2025
5 Juli 2025
ventilationskåpa Manualer
- PKM
- Canarm
- Kernau
- KitchenAid
- KKT Kolbe
- Sandstrøm
- Tesy
- Khind
- Master Kitchen
- Cookology
- Big Chill
- Ariston Thermo
- Wolkenstein
- Profilo
- Vox
Nyaste ventilationskåpa Manualer
12 September 2025
12 September 2025
12 September 2025
12 September 2025
12 September 2025
12 September 2025
11 September 2025
11 September 2025
11 September 2025
11 September 2025