NuTone QTXN110HL Bruksanvisning
NuTone hushålls fläkt QTXN110HL
Läs gratis den bruksanvisning för NuTone QTXN110HL (12 sidor) i kategorin hushålls fläkt. Guiden har ansetts hjälpsam av 49 personer och har ett genomsnittsbetyg på 4.4 stjärnor baserat på 4 recensioner. Har du en fråga om NuTone QTXN110HL eller vill du ställa frågor till andra användare av produkten? Ställ en fråga
Sida 1/12
Page 1
MODEL QTXN110HL
READ AND SAVE THESE INSTRUCTIONS
IMPORTANT INSTRUCTIONS
READ ALL INSTRUCTIONS BEFORE INSTALLING OR USING THIS HEATER.
To reduce the risk of fire, electric shock, or injury to persons, observe the
following:
1. Use this unit only in the manner intended by the manufacturer. If you
have questions, contact the manufacturer at the address or telephone
number listed in the warranty.
2. Before servicing or cleaning unit, switch power off at service panel and
lock the service disconnecting means to prevent power from being
switched on accidentally. When the service disconnecting means cannot
be locked, securely fasten a prominent warning device, such as a tag, to
the service panel.
3. Installation work and electrical wiring must be done by a qualified
person(s) in accordance with all applicable codes and standards,
including fire-rated construction codes and standards.
4. When cutting or drilling into wall or ceiling, do not damage electrical
wiring and other hidden utilities.
5. This heater is hot when in use. To avoid burns, do not let bare skin touch
hot surfaces. Keep combustible materials, such as furniture, pillows,
bedding, papers, clothes, etc. and curtains at least 3 feet (0.9 m) from
the front of the heater.
6. Extreme caution is necessary when any heater is used by or near children
or invalids and whenever the heater is left operating and unattended.
7. Do not operate any heater after it malfunctions. Disconnect power at
service panel and have heater inspected by a reputable electrician before
reusing.
8. Do not use outdoors.
9. To disconnect heater, turn controls to off, and turn off power to heater
circuit at main disconnect panel (or operate internal disconnect switch, if
provided).
10. Do not insert or allow foreign objects to enter any ventilation or exhaust
opening, as this may cause an electric shock or fire, or damage the
heater.
11. To prevent a possible fire, do not block air intakes or exhaust in any
manner.
12. A heater has hot and arcing or sparking parts inside. Do not use it in
areas where gasoline, paint, or flammable vapors or liquids are used or
stored.
13. Use this heater only as described in this manual. Any other use not
recommended by the manufacturer may cause fire, electric shock, or
injury to persons.
14. Install heater at least 6 inches from floor or any adjacent wall.
15. To avoid electrical shock: Do not install unit in a tub or shower enclosure
or any location where it may come in contact with water. Never place a
switch where it can be reached from a tub or shower.
16. This product is designed for installation in ceilings up to a 12/12 pitch. Duct
connector must point up. DO NOT MOUNT THIS PRODUCT IN A WALL.
17. Do not connect heater to dimmer switch or speed control.
18. Ducted fans must always be vented to the outdoors.
19. Provide a separate 20 AMP circuit. Use 12 GA. power cable of type which
meets code.
SAVE THESE INSTRUCTIONS
QTXN SERIES
HEATER / FAN / LIGHT / NIGHT LIGHT
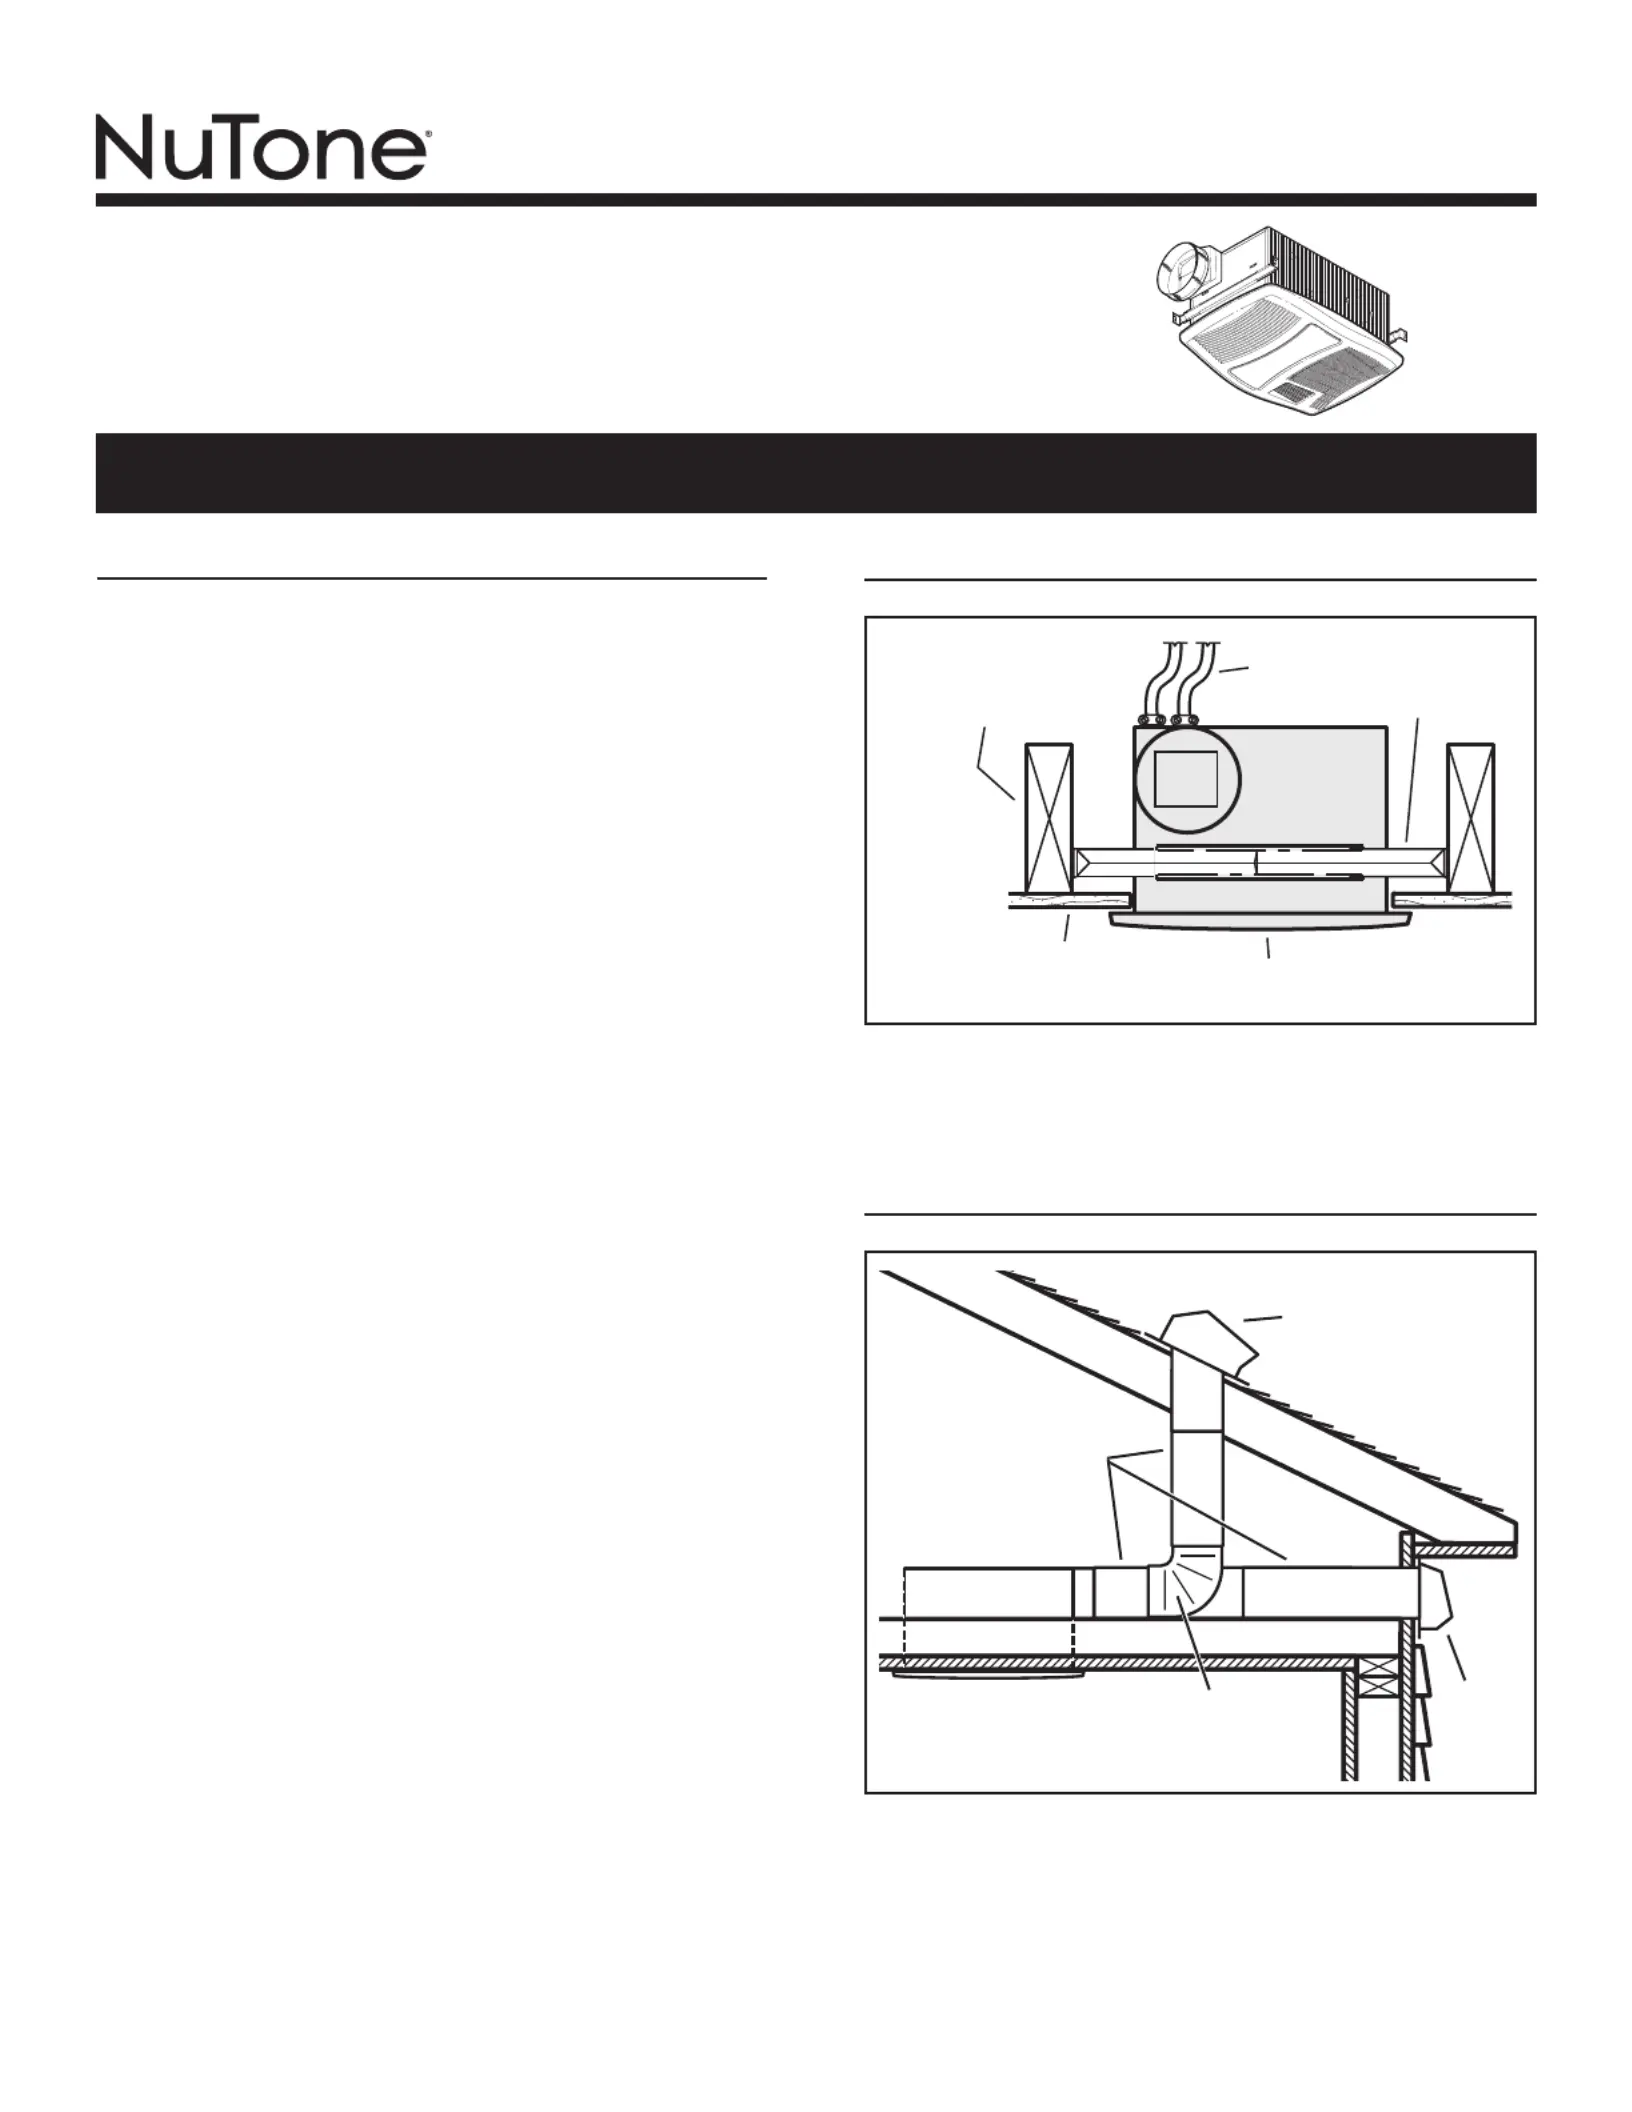
TYPICAL INSTALLATION
HOUSING
CEILING
JOIST
, TRUSS,
OR I-JOISTS
MOUNTING
CHANNELS
GRILLE
CEILING
MATERIAL
POWER
CABLES
Housing mounted directly to joists, trusses, or I-joists.
Up to 24-inches on-center.
Unit shown connected to 6-inch round ductwork.
ROOF CAP *
6-IN. ROUND
ELBOW
*
6-IN. ROUND
DUCT
*
WALL
CAP
*
* Purchase separately
PLAN THE INSTALLATION
The unit will operate most quietly and efficiently when located
where the shortest possible duct run and minimum number of
elbows will be needed.
Plan to supply the unit with proper line voltage and appropriate
power cable.
Produktspecifikationer
| Varumärke: | NuTone |
| Kategori: | hushålls fläkt |
| Modell: | QTXN110HL |
Behöver du hjälp?
Om du behöver hjälp med NuTone QTXN110HL ställ en fråga nedan och andra användare kommer att svara dig
hushålls fläkt NuTone Manualer

9 Augusti 2025
9 Augusti 2025
9 Augusti 2025
9 Augusti 2025
8 Augusti 2025
8 Augusti 2025
8 Augusti 2025
8 Augusti 2025
8 Augusti 2025
8 Augusti 2025
hushålls fläkt Manualer
Nyaste hushålls fläkt Manualer
1 April 2026
1 April 2026
26 Mars 2026
26 Mars 2026
25 Mars 2026
25 Mars 2026
24 Mars 2026
23 Mars 2026
22 Mars 2026
22 Mars 2026