OSD Audio ICE1080HD Bruksanvisning
Läs gratis den bruksanvisning för OSD Audio ICE1080HD (2 sidor) i kategorin högtalare. Guiden har ansetts hjälpsam av 35 personer och har ett genomsnittsbetyg på 4.8 stjärnor baserat på 7 recensioner. Har du en fråga om OSD Audio ICE1080HD eller vill du ställa frågor till andra användare av produkten? Ställ en fråga
Sida 1/2
18AWG minimum - for distances up to ………………………. . 10 ft
16AWG - from ……………………………………………. 10 to 50 ft
14AWG - from …………………………………………… 50 to 100ft
- Where is the best place to install the speakers
- Where do the speakers sound the best?
- Try to separate the speakers 6 - 10 feet apart.
- If you intend to paint the grilles, try to do so before installation.
Quick installation guide
- Pencil
- Drill
- Tape Measure
- Wire cutter
- Philips-head screwdriver
- Sandpaper
Tools needed for installation
STEP 4: Mounting Dog Ear
Tighten the dog-ear brackets by simply turning the screws on the
slowly clockwise. The quick-turn mounting system and frame will
"sandwich" or clamp around the wall to hold the speaker securely in
place. (See Diagram 3)
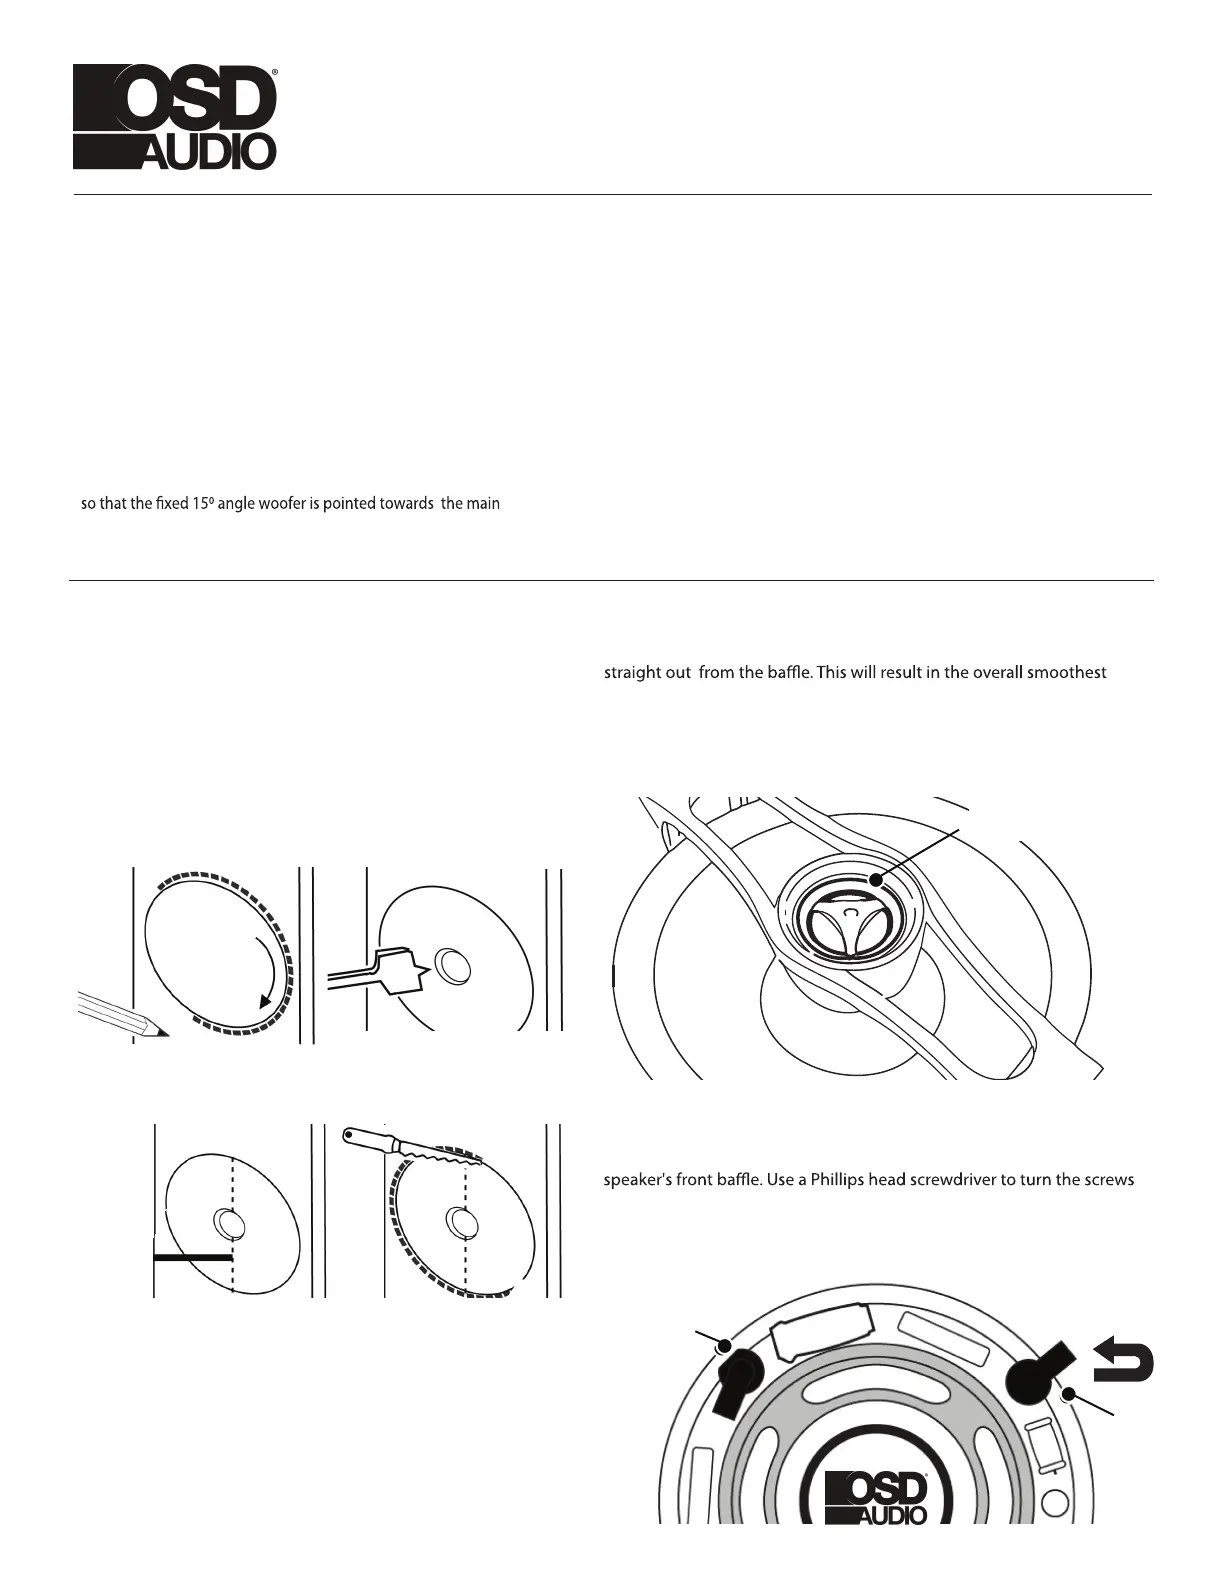
STEP 1: Cutout Tracing
Trace along the inclusive template. Cut along the traced line using a
drywall saw or rotary drill. A simple, inexpensive drywall saw (about
$10 at your local hardware store) is the best choice for beginners.
Caution: This is the most important part of the entire installation.
If you are not certain whether any obstructions exist behind the
desired mounting area, you should start by cutting a small hole in
the center of your penciled mounting hole with a drywall saw. Use a
piece of sandpaper to sand down the cut out edge for a smoother
contour. (See Diagram 1 )
STEP 3: Tweeter Adjustment
To determine the length and the gauge of speaker wire, you will need to
measure the distance between your receiver/amplifier to the speakers.
- Always buy more than you think you would need.
- Equal wire lengths should always be used to maintain an equal
balance in sound volume.
- Sound quality is lost when using thin wire gauge over a long
distance.
- Utility knife
- Safety eyewear
- Gloves
Speaker wire
In-Ceiling Speakers
Owner’s Manual
- When placing the speakers in the ceiling, try to install them
listening area. (For LCR model only)
Your in-ceiling speakers come from the factory with the tweeter facing
response. However, you can adjust the tweeter to focus the sound at
your listening location. In order to do this, gently press on the grill (See
Diagram 3). Caution: Do not touch the tweeter dome while adjusting for
your hearing preference. (See -Pivoting Tweeter Model Only.
Adjust the tweeter here
Tweeter
Diagram 1:
Diagram 2:
Dog Ear
Diagram 3:
Mounting Dog Ear
Lock
LOOSE
Diagram 2:
Run the cable into the cut out location while leaving an extra two
feet to make the connection to the speaker easier. Strip back
approximately ½ inch of the speaker cable insulation and twist
the copper wires tightly for easy insertion.
On the back of the speaker, press down on the gold-plated
compression terminal to reveal the "eye" and insert the speaker
cable through the eye for secure connection. Release the compres-
sion terminal to lock each cable securely.
STEP 2:
Connection
Produktspecifikationer
| Varumärke: | OSD Audio |
| Kategori: | högtalare |
| Modell: | ICE1080HD |
Behöver du hjälp?
Om du behöver hjälp med OSD Audio ICE1080HD ställ en fråga nedan och andra användare kommer att svara dig
högtalare OSD Audio Manualer

10 September 2025
10 September 2025
10 September 2025
10 September 2025
9 September 2025
9 September 2025
9 September 2025
9 September 2025
9 September 2025
9 September 2025
högtalare Manualer
Nyaste högtalare Manualer
3 April 2026
3 April 2026
2 April 2026
2 April 2026
1 April 2026
1 April 2026
30 Mars 2026
30 Mars 2026
29 Mars 2026
29 Mars 2026