Panduit FPONE2 Bruksanvisning
Panduit Inte kategoriserad FPONE2
Läs gratis den bruksanvisning för Panduit FPONE2 (2 sidor) i kategorin Inte kategoriserad. Guiden har ansetts hjälpsam av 34 personer och har ett genomsnittsbetyg på 4.6 stjärnor baserat på 8 recensioner. Har du en fråga om Panduit FPONE2 eller vill du ställa frågor till andra användare av produkten? Ställ en fråga
Sida 1/2
ForTechnicalSupport:www.panduit.com/resources/install_maintain.asp
INSTALLATIONINSTRUCTIONS
©PanduitCorp.2020
FS159
Page1of2
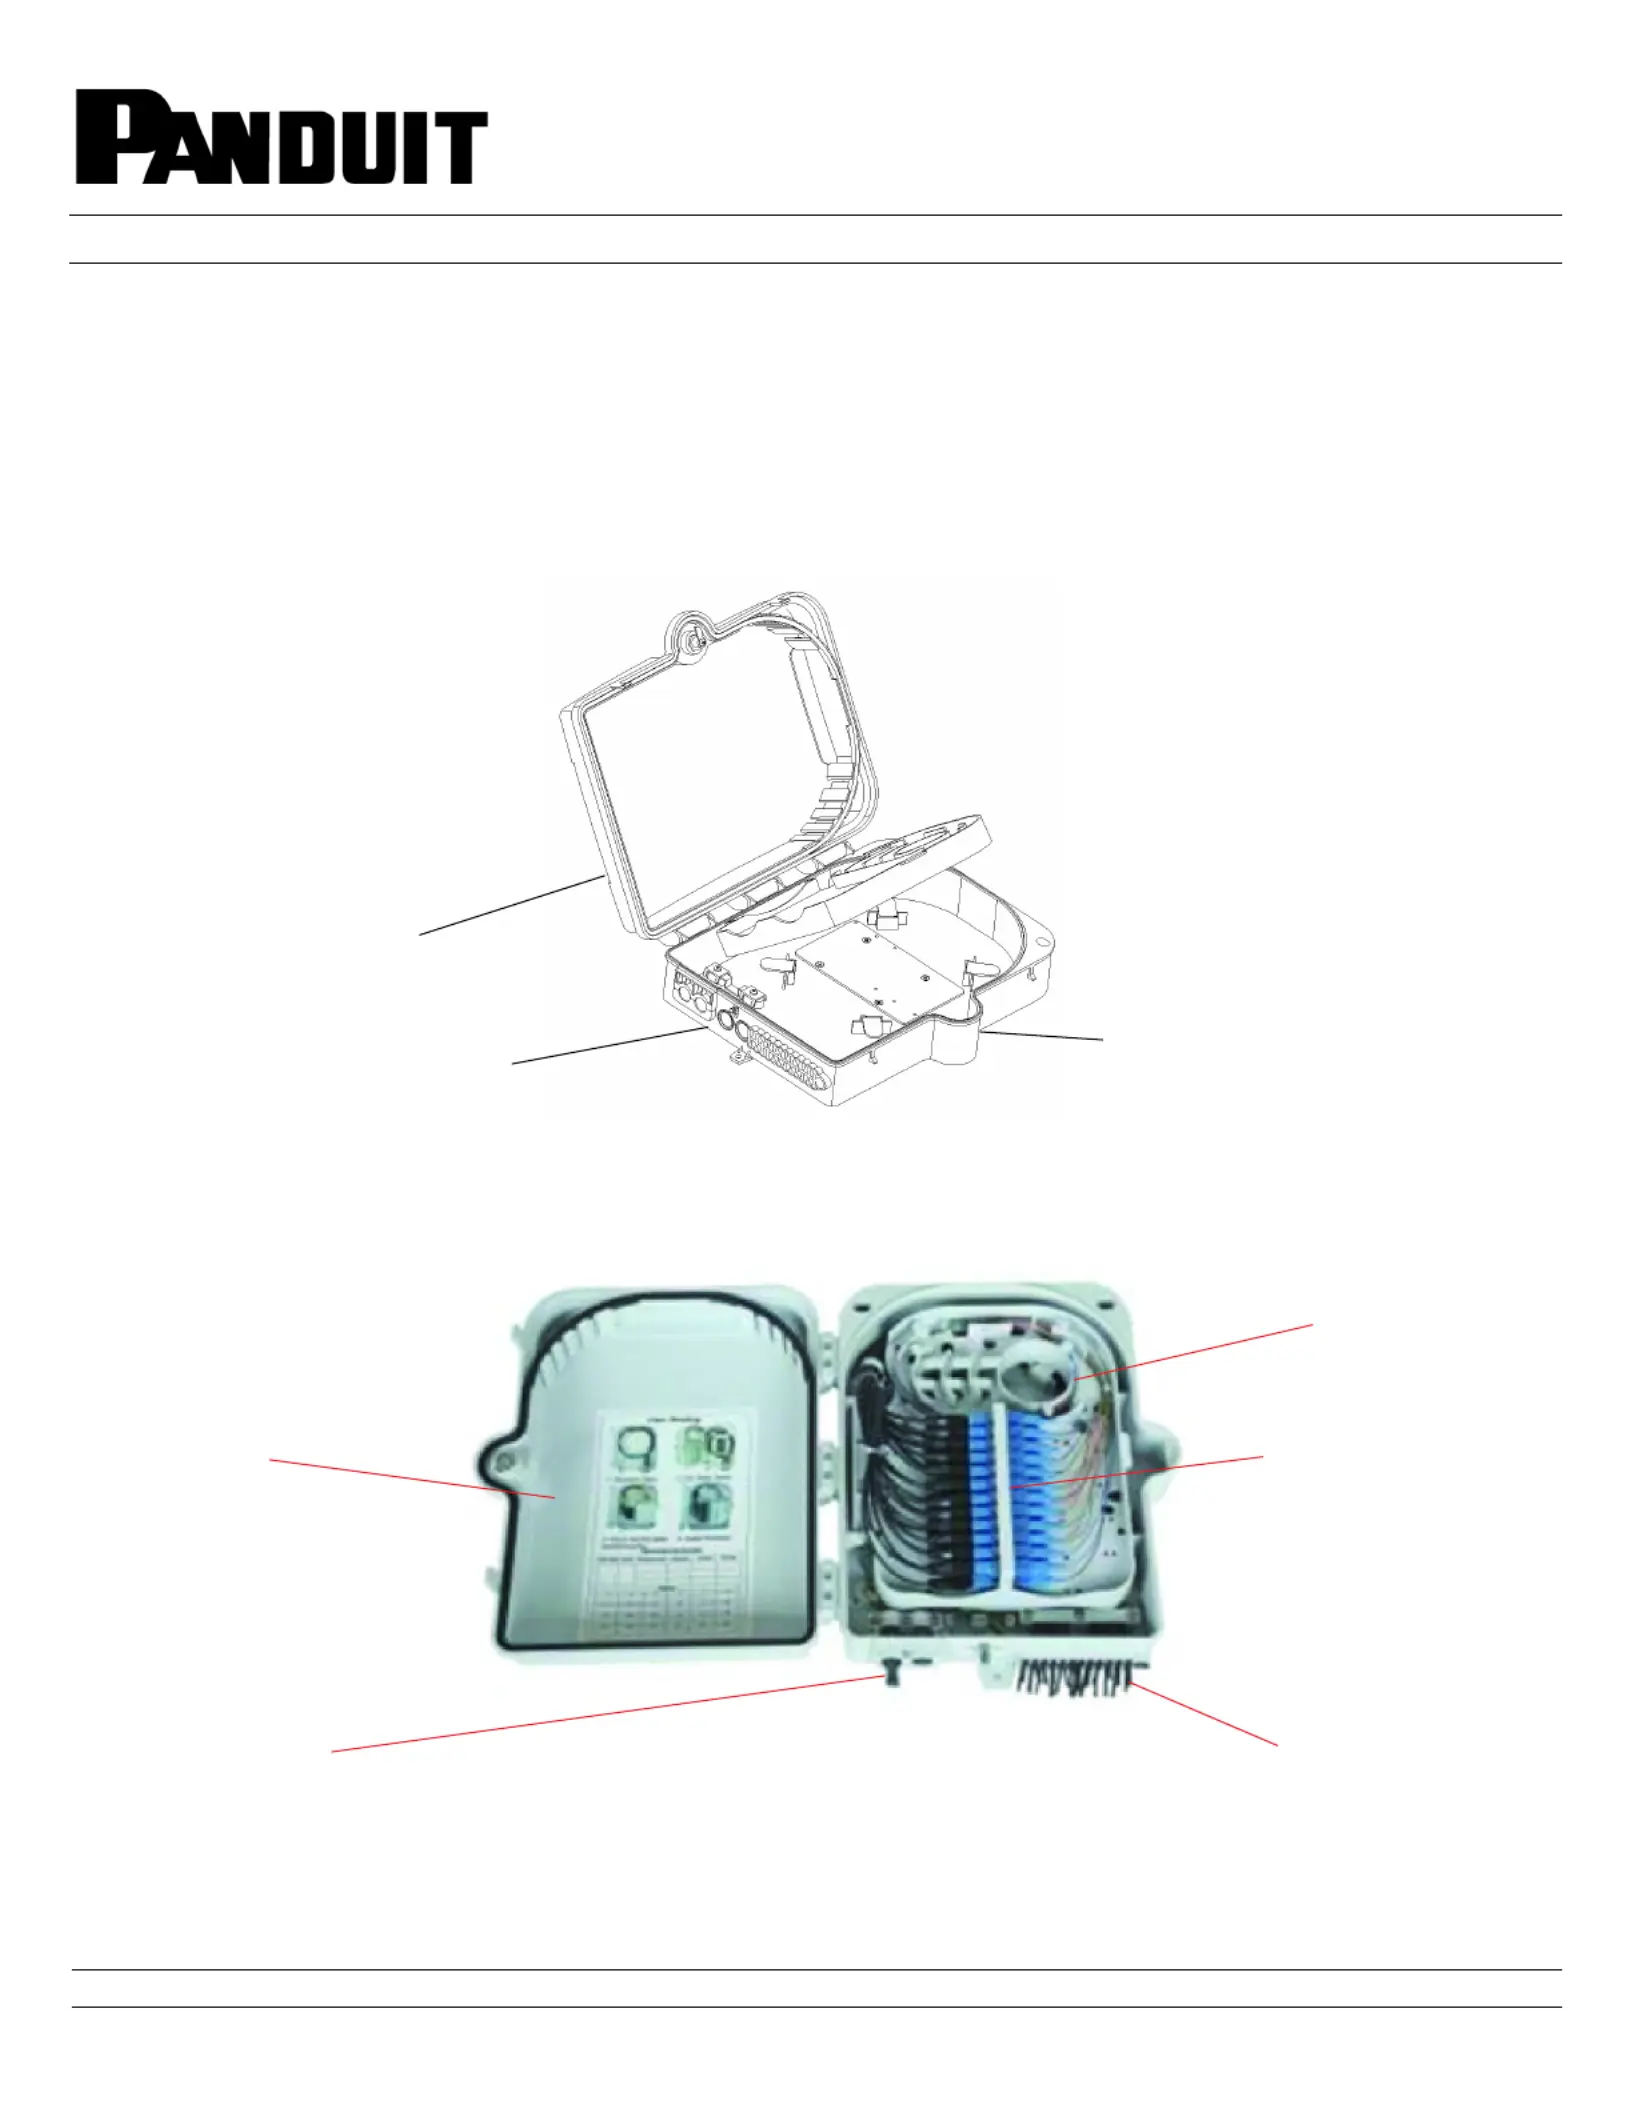
FiberPONEnclosure
PartNumber(s):FPONE2
SPECIFICATIONS:
Material:PC+ABS,waterresistant,dust-proof,IP55
Dimension(HxWxD):317x235x100mm
Color:LightGray
AdapterType:SC
NumberofAdapters:Max24
NumberofSplitters:Max1(Nx2,Nx4,andNx8,)andMax1(Nx16)
WallMount
Bottom
Front
Back
ProductStructureandCableEntry
DropCable
OSPCable
AdapterStorage
Fiber
Management
Lid
Produktspecifikationer
| Varumärke: | Panduit |
| Kategori: | Inte kategoriserad |
| Modell: | FPONE2 |
Behöver du hjälp?
Om du behöver hjälp med Panduit FPONE2 ställ en fråga nedan och andra användare kommer att svara dig
Inte kategoriserad Panduit Manualer

1 Januari 2025
1 Januari 2025
1 Januari 2025
1 Januari 2025
30 December 2025
30 December 2025
30 December 2025
30 December 2025
15 December 2024
15 December 2024
Inte kategoriserad Manualer
Nyaste Inte kategoriserad Manualer
9 April 2025
9 April 2025
9 April 2025
9 April 2025
9 April 2025
9 April 2025
9 April 2025
9 April 2025
9 April 2025
9 April 2025