Phanteks Eclipse G360A Bruksanvisning
Läs gratis den bruksanvisning för Phanteks Eclipse G360A (2 sidor) i kategorin dator box. Guiden har ansetts hjälpsam av 28 personer och har ett genomsnittsbetyg på 4.6 stjärnor baserat på 5 recensioner. Har du en fråga om Phanteks Eclipse G360A eller vill du ställa frågor till andra användare av produkten? Ställ en fråga
Sida 1/2
INSTALLATION GUIDE
INSTRUCTIONS
Thank you for choosing Phanteks. Please take a moment to
carefully go through the manual. This manual will walk you
through all of the features the Eclipse G360A has to offer and
installation steps to build a full system.
This manual is intended for:
Eclipse G360A
Phanteks will not take responsibility for any damages incurred due to incorrect
installation or usage of this product.
VERSION 1.1
| www.phanteks.com
01
USB 3.0
AUDIO/MIC
MODE BUTTON
COLOR BUTTON
POWER BUTTON
INSTALLATION GUIDE
04
| www.phanteks.com
SSD + MOTHERBOARD
SCREW
22x
MOTHERBOARD
STAND-OFF
1x
PSU SCREW
4x
D-RGB 120MM FAN
3x pre-installed
2.5” SSD BRACKET
2x pre-installed
ZIP TIE
6x
280140 FRONT AIO COOLER4X MM FANS TOP & FRONT
360360 FRONT AIO COOLER TOP AIO COOLER
The Eclipse G360A chassis allows for multiple different cooling
configuration. These are four examples to maximize the G360A’s
cooling potential.
FRONTTOPREAR
CLEARANCE
FANS
RADIATOR
120mm
120mm
3x
up to 360
**
3x
up to 360
1x
up to 120
2x
up to 280
2x
-
-
-
140mm
140mm
CPU cooler height
RAM height
GPU length
Power Supply
E-ATX
Front 360 radiator
Front 280 radiator
Top 360 Radiator
162 mm
42 mm when using top radiator
400 mm
220 / 280 mm
280 mm width
122x398x65 mm
142x330 mm
122x398 mm
AIO 360
AIO 360
AIO 280
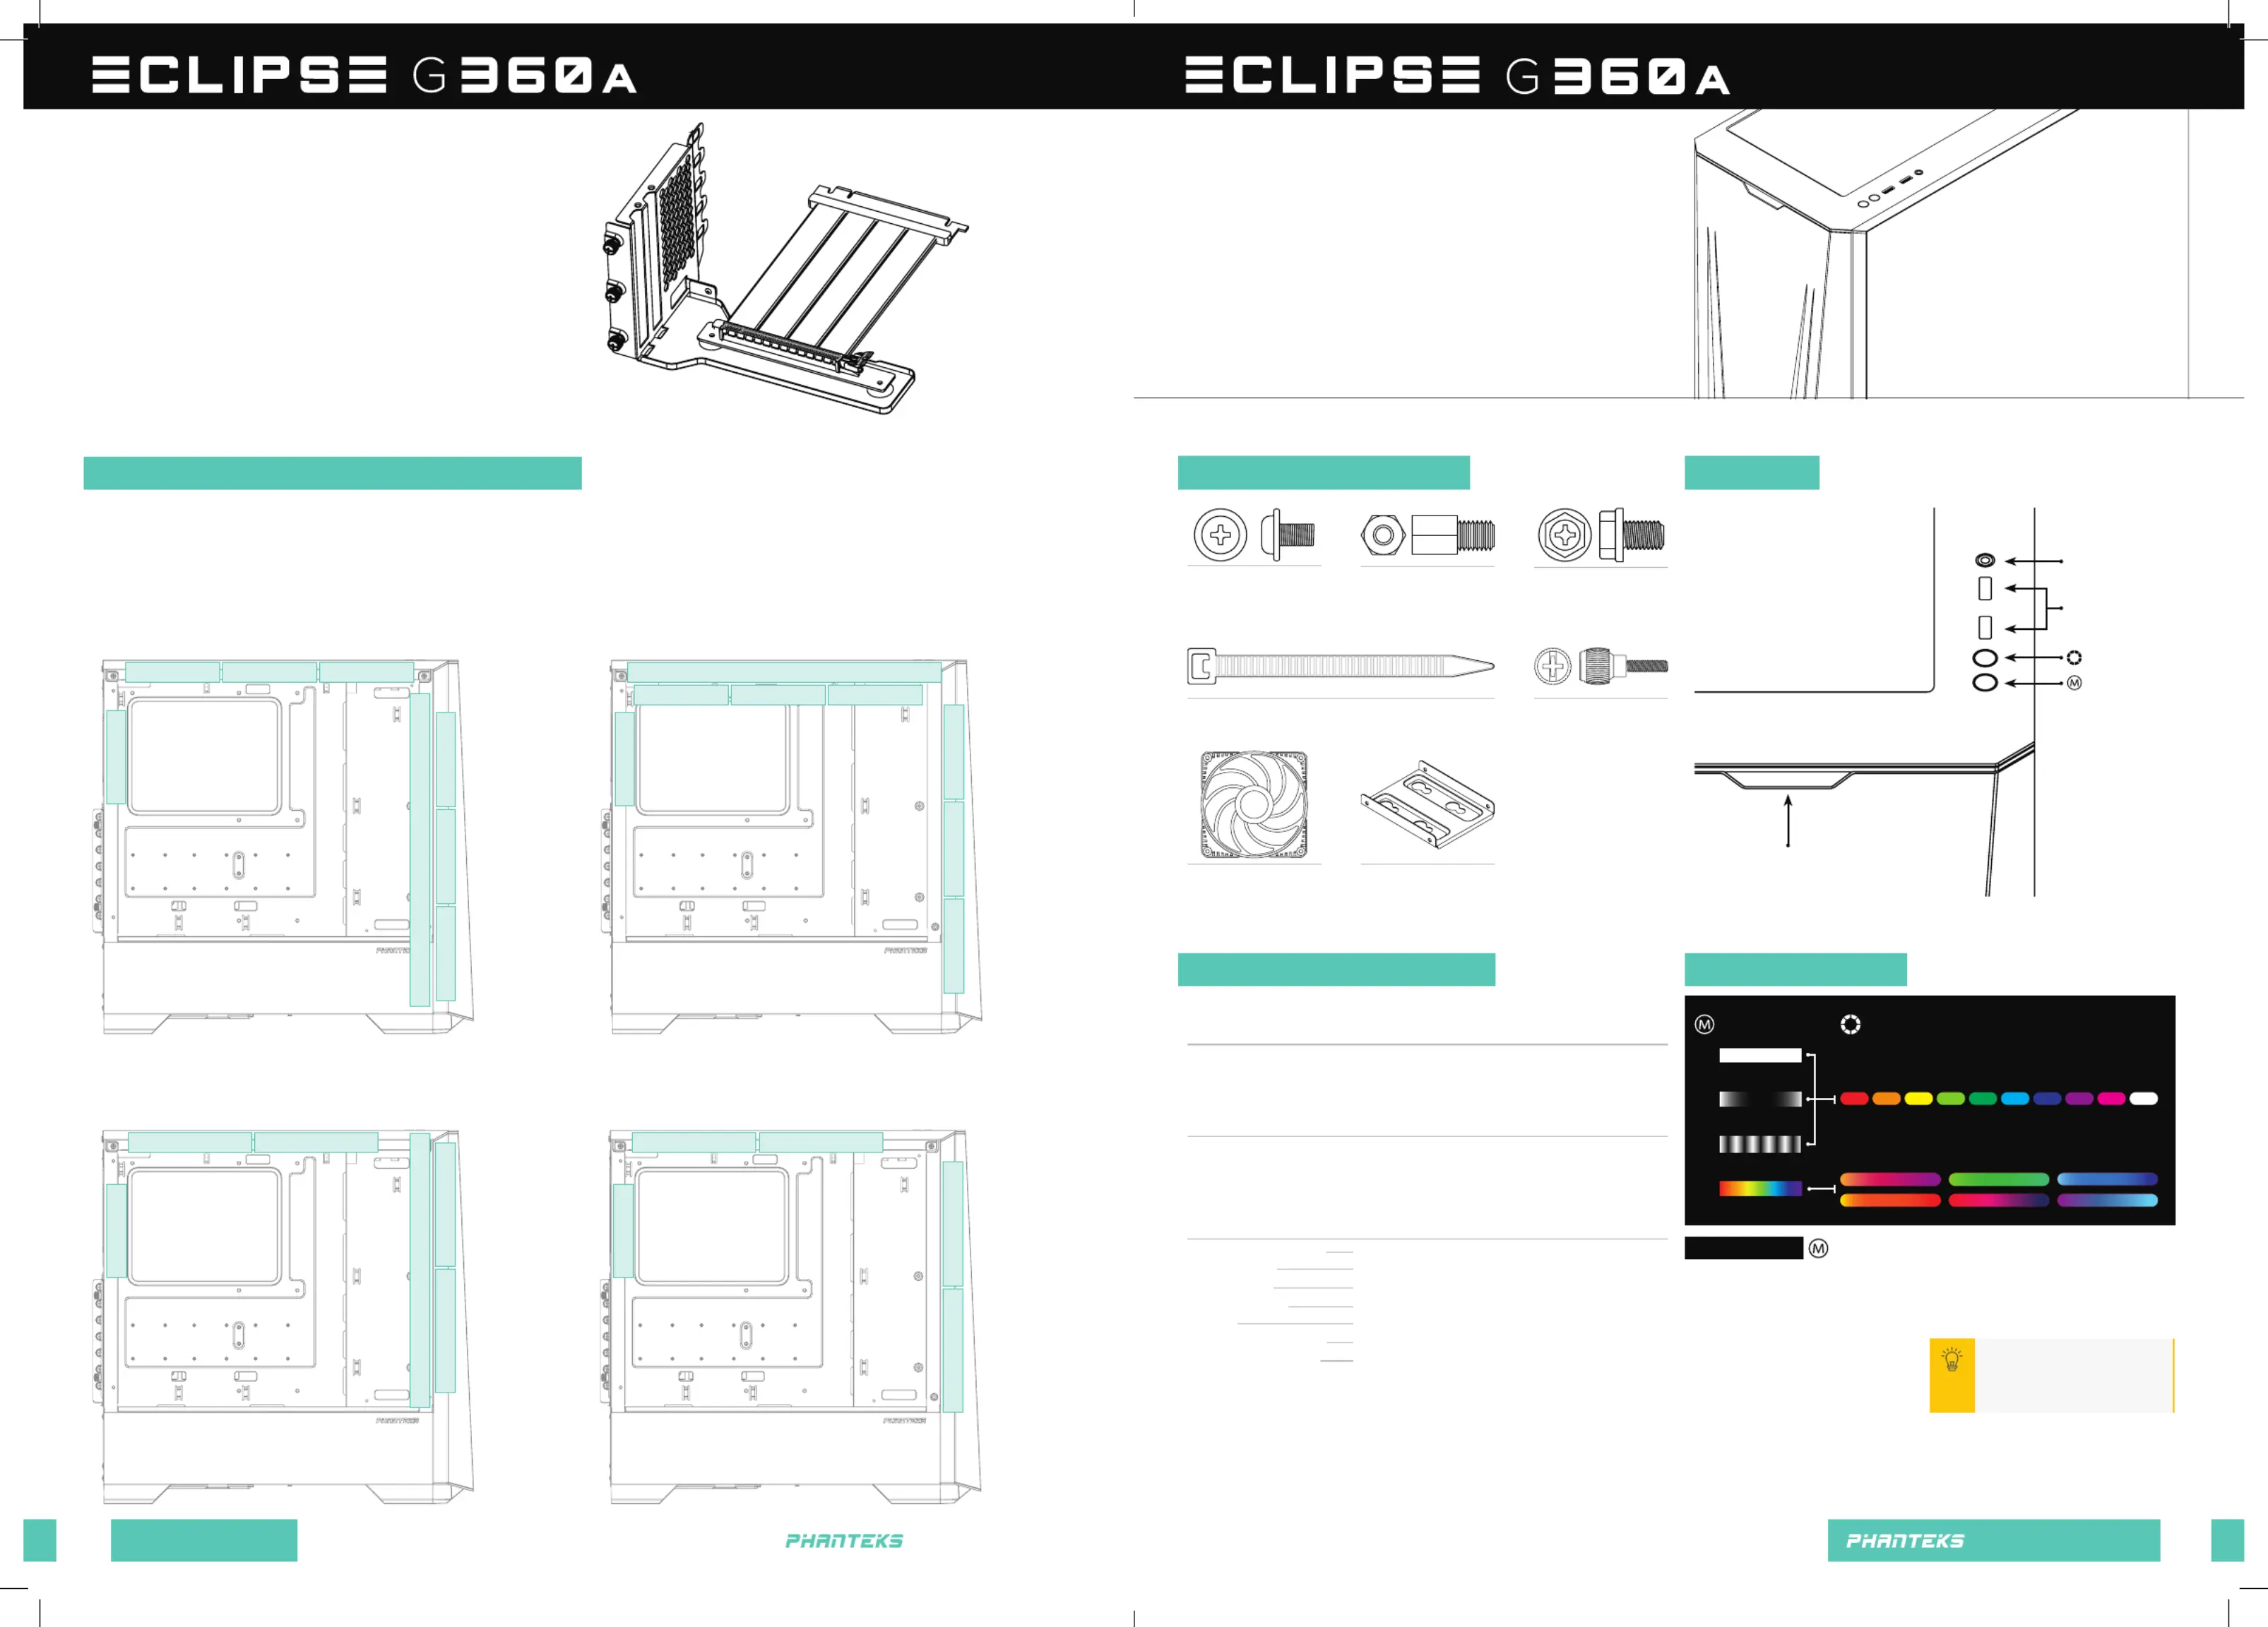
VERTICAL GPU BRACKET(PH-VGPUKT4.0_03)
The . G360A chassis supports the Phanteks Vertical GPUBracket
The Vertical GPU Bracket supports 3 and 4 slot GPU’s with access
to the GPU connectors on slot 1 and 2.
It can be easily installed in the PCI slot area. Follow the instructions
that are included with the Vertical GPU bracket.
OPTIONAL UPGRADE
MODESCOLORS
Press and hold the button for two seconds to turn MODE
off LEDs, press again to turn it ON
NOTE |D-RGB control buttons are deactivated if connected to a motherboard.
SOLID
BREATHING
SPARKLE
MUTLI-COLOR
TURN OFF LEDs
Fans can be placed on the front of the chassis behind the front panel.
Fans can be placed on the front of the chassis behind the front panel.
Maximum number of 140 mm fans
RAM Height Clearance | 42 mm
140MM
140MM
140MM
140MM
120MM
120MM
120MM
120MM
120MM
120MM
120MM
120MM
120MM
120MM
120MM
120MM
120MM120MM
120MM120MM
140MM
140MM
140MM
140MM
HDD LOCKING SCREW
2x
FAN & RADIATOR SUPPORTD-RGB CONTROLS
INCLUDED ACCESSORIES
RECOMMENDED COOLING CONFIGURATION
FRONT I/O
PRO TIP
For a more vibrant D-RGB light
effect, place the fans directly
under the front panel
It is not possible to install a 360 radiator in the front and top simultaneously
*
Produktspecifikationer
| Varumärke: | Phanteks |
| Kategori: | dator box |
| Modell: | Eclipse G360A |
| Vikt: | 6510 g |
| Bredd: | 455 mm |
| Djup: | 200 mm |
| Höjd: | 465 mm |
| Förpackningens bredd: | 513 mm |
| Belysningsplats: | Framsida |
| Material: | Stål |
| Modell: | PC |
| Strömförsörjning ingår: | Nej |
| Förbättrad kabelhantering: | Ja |
| Maximal CPU-kylarhöjd: | 162 mm |
| Maximal grafikkortslängd: | 400 mm |
| Maximal PSU-längd: | 280 mm |
| Garantiperiod: | 5 År |
| Produktens färg: | Vit |
| Låddjup: | 282 mm |
| Vikt inkl. förpackning: | 7840 g |
| Formfaktor: | Midi Tower |
| Belysning: | Ja |
| Belysningsfärg: | Multi |
| Antal USB 3.2 Gen 1 (3.1 Gen 1) typ A-portar: | 2 |
| Sidoruta: | Ja |
| Hårddiskstorlek som stöds: | 2.5, 3.5 " |
| Som stöds moderkorts formfaktorer: | ATX, EATX, Micro ATX, Mini-ITX |
| Av- och på-knapp: | Ja |
| Combo hörlurar / mikrofon-port: | Ja |
| Antalet expansionsplatser: | 7 |
| Antal 2,5 "vikar: | 3 |
| Frontfläktar installerade: | 3x 120 mm |
| Maximal främre fläktar: | 3 |
| Frontfläktdiametrar som stöds: | 120,140 mm |
| Storlek som stöds för främre radiator: | 280,360 mm |
| Antal 3,5 "vikar: | 2 |
| Panel(er) i härdat glas: | Ja |
| Antal bakfläktar som stöds (max): | 1 |
| Bakre fläktdiametrar som stöds: | 120 mm |
| Antal toppfläktar som stöds (max): | 3 |
| Toppfläktdiametrar som stöds: | 120,140 mm |
| Storlek som stöds för övre radiator: | 360 mm |
| Storlek som stöds för bakre radiator: | 120 mm |
| RGB-kontrollknapp: | Ja |
Behöver du hjälp?
Om du behöver hjälp med Phanteks Eclipse G360A ställ en fråga nedan och andra användare kommer att svara dig
dator box Phanteks Manualer

27 Februari 2026
2 September 2025
1 September 2025
31 Augusti 2025
31 Augusti 2025
31 Augusti 2025
31 Augusti 2025
31 Augusti 2025
29 Juli 2025
28 Juli 2025
dator box Manualer
Nyaste dator box Manualer
2 April 2026
1 April 2026
1 April 2026
1 April 2026
31 Mars 2026
30 Mars 2026
30 Mars 2026
30 Mars 2026
29 Mars 2026
29 Mars 2026