Pioneer CA-HR-FD-EVO.001 Bruksanvisning
Pioneer Inte kategoriserad CA-HR-FD-EVO.001
Läs gratis den bruksanvisning för Pioneer CA-HR-FD-EVO.001 (4 sidor) i kategorin Inte kategoriserad. Guiden har ansetts hjälpsam av 34 personer och har ett genomsnittsbetyg på 4.2 stjärnor baserat på 6 recensioner. Har du en fråga om Pioneer CA-HR-FD-EVO.001 eller vill du ställa frågor till andra användare av produkten? Ställ en fråga
Sida 1/4
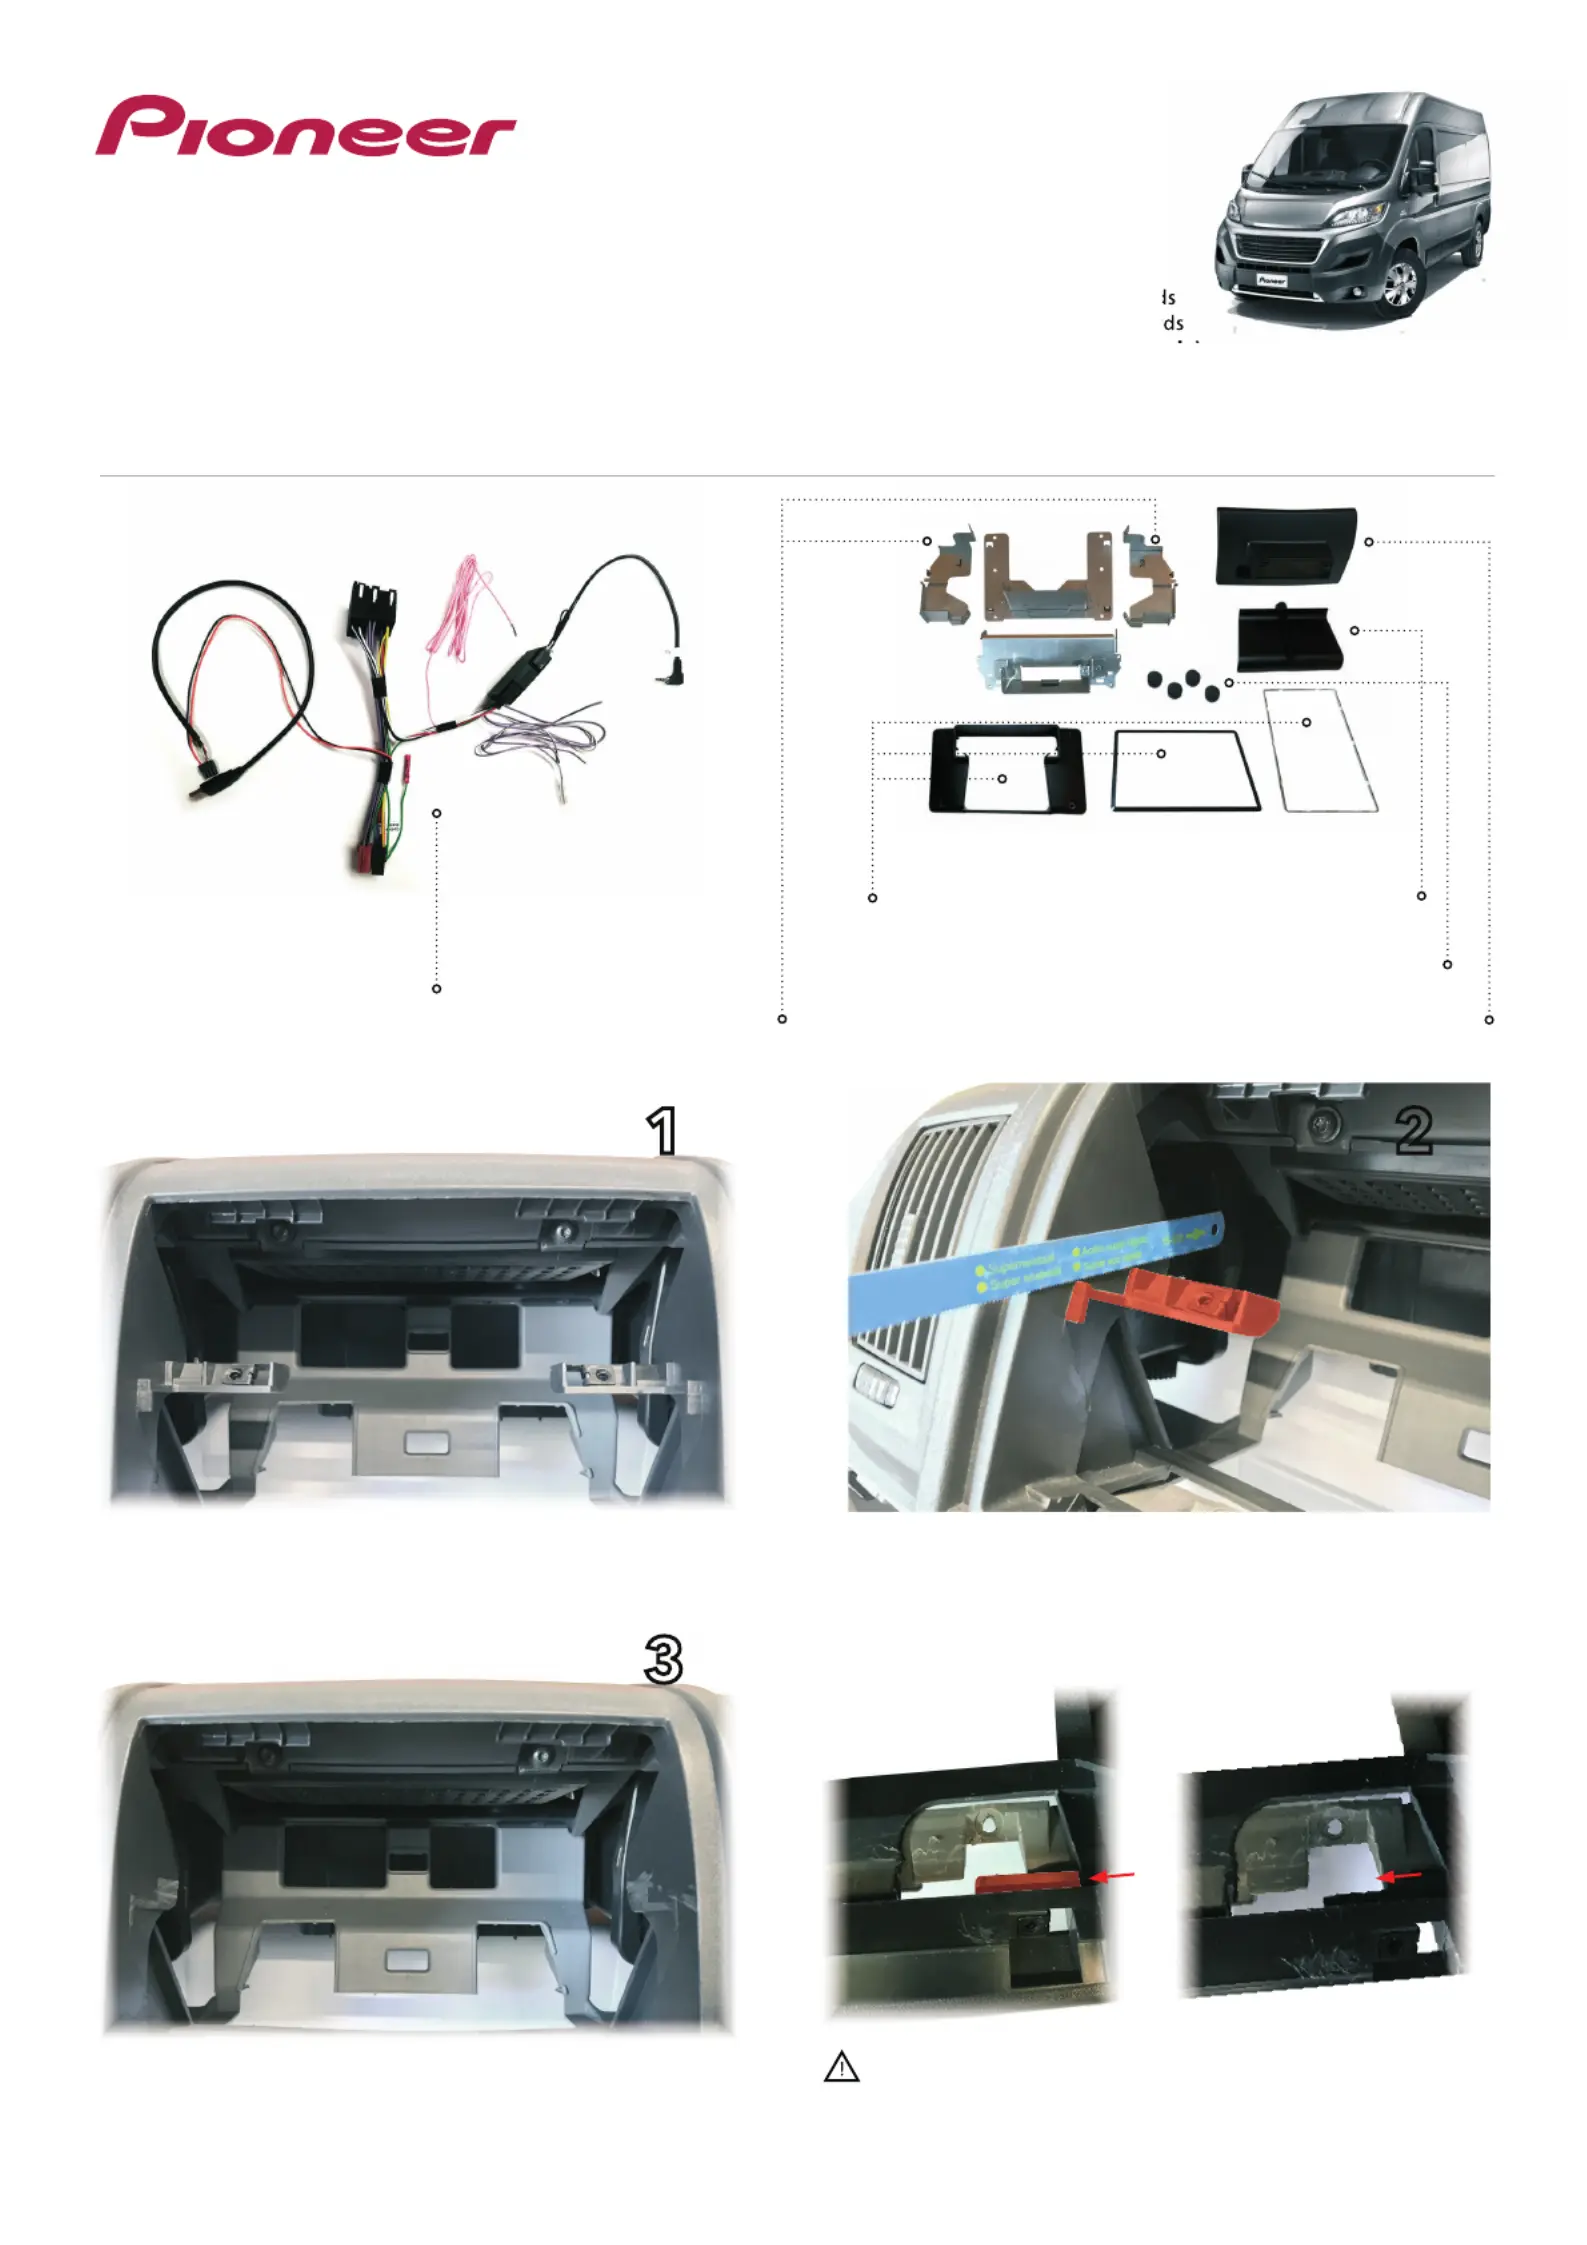
Installation manual SPH-EVO82DAB-DUC | Version 1.0
EN - Installation Manual
Original dashboard
Screen brackets
Interface
Dashboard cover
Screw covers
Cable cover
Screen cover
Result after the modification
Cut out the center supports / support bar
12
3
CA-HR-FD-EVO.001
INSTALLATION KIT FOR SPH-EVO82DAB-DUC
Compatibility:
• Fiat Ducato from 2007 onwards
• Peugeot Boxer from 2007 onward
• Citroen Jumper from 2007 onwar
(open dash platform with ISO only)
Result after the cut
If the van comes with these ridges, please remove by cutting
to make space for the metal brackets.
Produktspecifikationer
| Varumärke: | Pioneer |
| Kategori: | Inte kategoriserad |
| Modell: | CA-HR-FD-EVO.001 |
Behöver du hjälp?
Om du behöver hjälp med Pioneer CA-HR-FD-EVO.001 ställ en fråga nedan och andra användare kommer att svara dig
Inte kategoriserad Pioneer Manualer

1 Februari 2025
4 Januari 2025
1 Januari 2025
1 Januari 2025
1 Januari 2025
30 December 2025
30 December 2025
30 December 2025
21 December 2024
19 December 2024
Inte kategoriserad Manualer
Nyaste Inte kategoriserad Manualer
9 April 2025
9 April 2025
9 April 2025
9 April 2025
9 April 2025
9 April 2025
9 April 2025
9 April 2025
9 April 2025
9 April 2025