Platypus Elixir 3 Bruksanvisning
Läs gratis den bruksanvisning för Platypus Elixir 3 (1 sidor) i kategorin tält. Guiden har ansetts hjälpsam av 32 personer och har ett genomsnittsbetyg på 4.6 stjärnor baserat på 7 recensioner. Har du en fråga om Platypus Elixir 3 eller vill du ställa frågor till andra användare av produkten? Ställ en fråga
Sida 1/1
81-245-1
ELIXIR
™
3
Assembly Instructions
MOUNTAINS RAFETYESEARCH
®
© 2018 Cascade Designs, Inc.
4000 First Avenue South
Seattle, WA 98134 USA
1-800-531-9531
1-206-505-9500
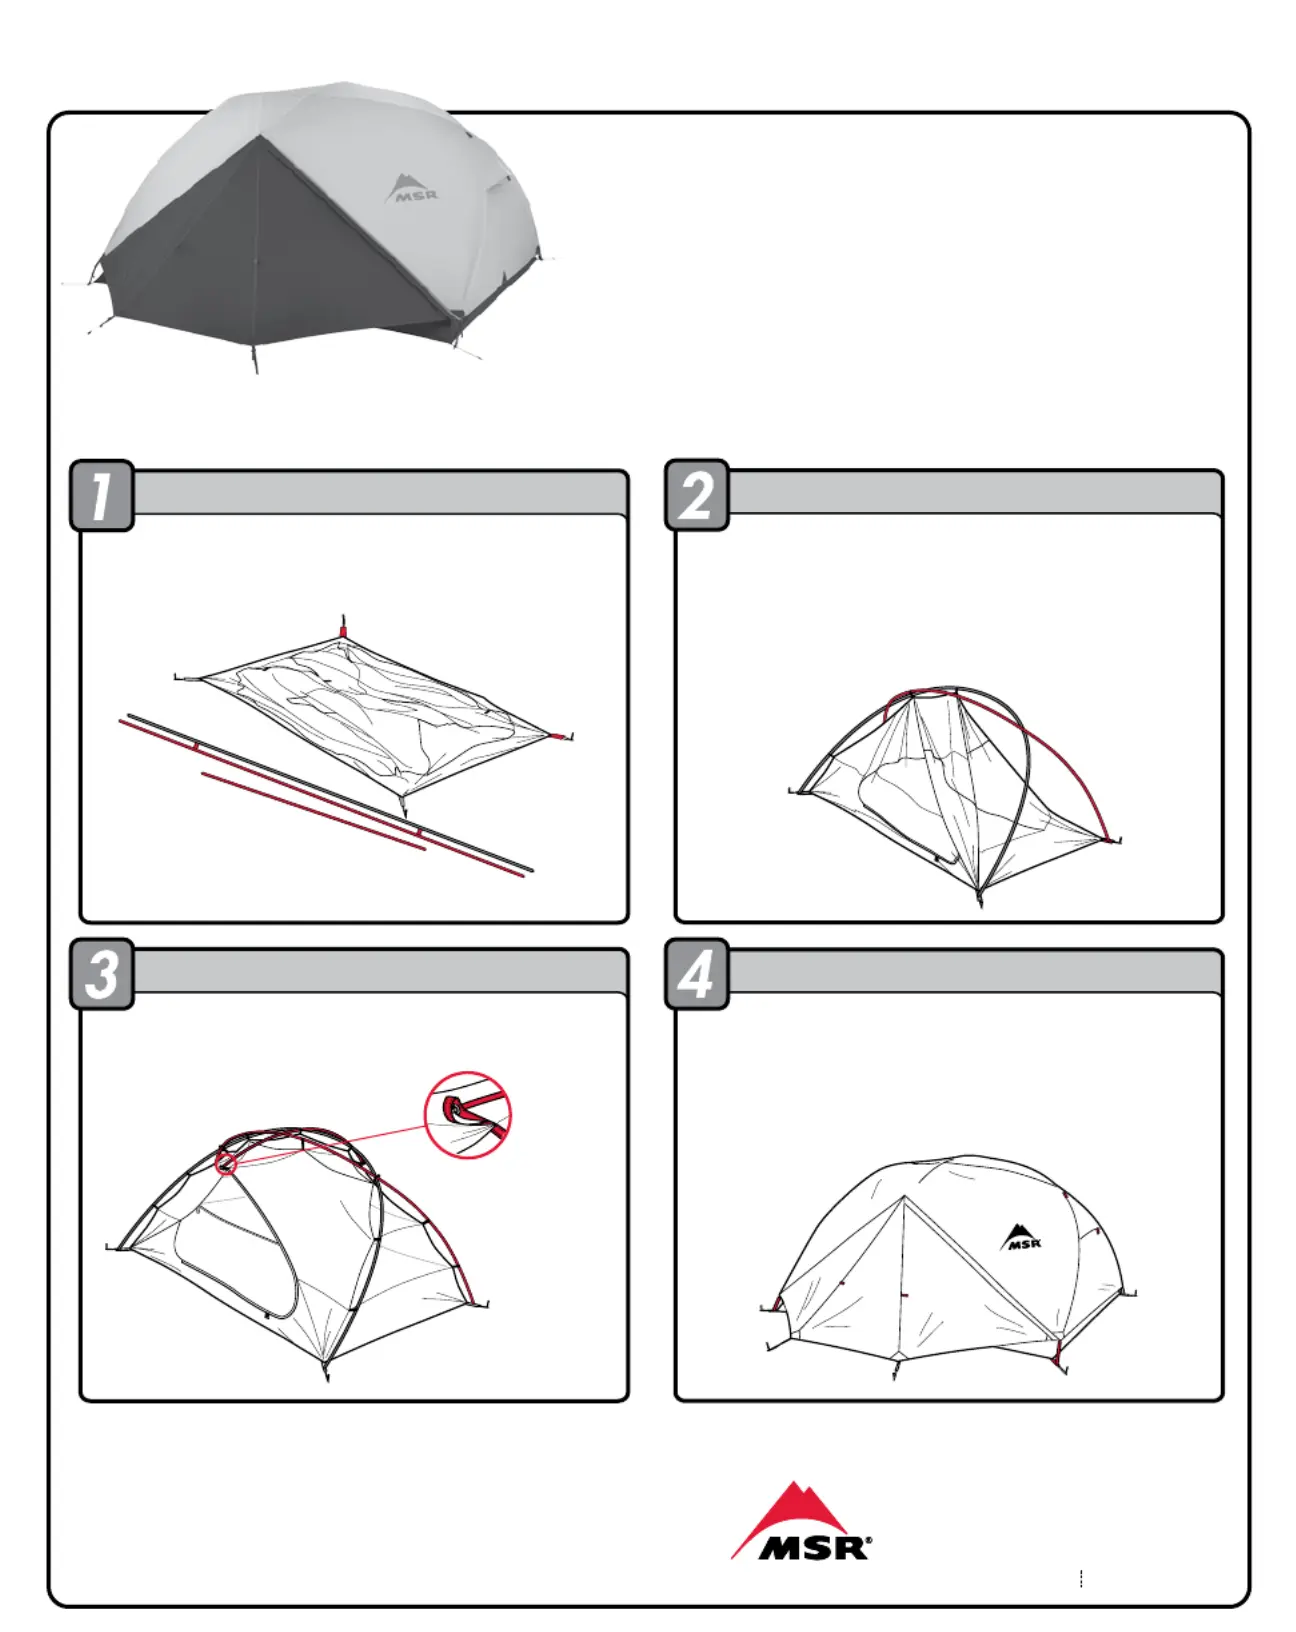
PREPARE FOR SETUP
ASSEMBLE TENT
ATTACH RIDGE POLE
ATTACH RAINFLY
1. Spread tent out and stake out four corners tightly.
2. Assemble poles.
1. Insert each red pole tip of main poles into grommets on the stake
loops with red webbing.
2. Insert each gray pole tip of main poles into grommets on the
stake loops with gray webbing.
3. Attach color-coded clips to like-color pole along entire length of
frame assembly.
1. Insert red ridge pole into grommets above doors, making sure
ridge pole rests on top of main poles.
1. Lay rainfly over tent. Attach rainfly’s midpoint grommets to
ridge pole.
2. Stretch out vestibules until taut and stake down, making sure
seams align with frame.
USE TIPS: All tents require staking; unsecured tents are susceptible
to wind damage. In some conditions, additional stakes and cord
may be required. Re-adjustment of stakes and rainfly may be
necessary to keep tent tight and weatherproof. For complete care
and use instructions, refer to the Owner’s Manual (available at
www.msrgear.com/Elixir3).
MOUNTAINS RAFETYESEARCH
®
PACKAGE INCLUDES:
Frame assembly, tent body, rainfly, stakes, MSR
®
Footprint
Produktspecifikationer
| Varumärke: | Platypus |
| Kategori: | tält |
| Modell: | Elixir 3 |
Behöver du hjälp?
Om du behöver hjälp med Platypus Elixir 3 ställ en fråga nedan och andra användare kommer att svara dig
tält Platypus Manualer

17 Augusti 2025
21 Februari 2025
30 Januari 2025
30 Januari 2025
30 Januari 2025
30 Januari 2025
30 Januari 2025
30 Januari 2025
30 Januari 2025
30 Januari 2025
tält Manualer
Nyaste tält Manualer
3 April 2026
18 Mars 2026
18 Mars 2026
11 Mars 2026
10 Mars 2026
4 Mars 2026
4 Mars 2026
4 Mars 2026
4 Mars 2026
3 Mars 2026