Proaim TP-SPH-01 Bruksanvisning
Proaim Inte kategoriserad TP-SPH-01
Läs gratis den bruksanvisning för Proaim TP-SPH-01 (4 sidor) i kategorin Inte kategoriserad. Guiden har ansetts hjälpsam av 27 personer och har ett genomsnittsbetyg på 4.5 stjärnor baserat på 7 recensioner. Har du en fråga om Proaim TP-SPH-01 eller vill du ställa frågor till andra användare av produkten? Ställ en fråga
Sida 1/4
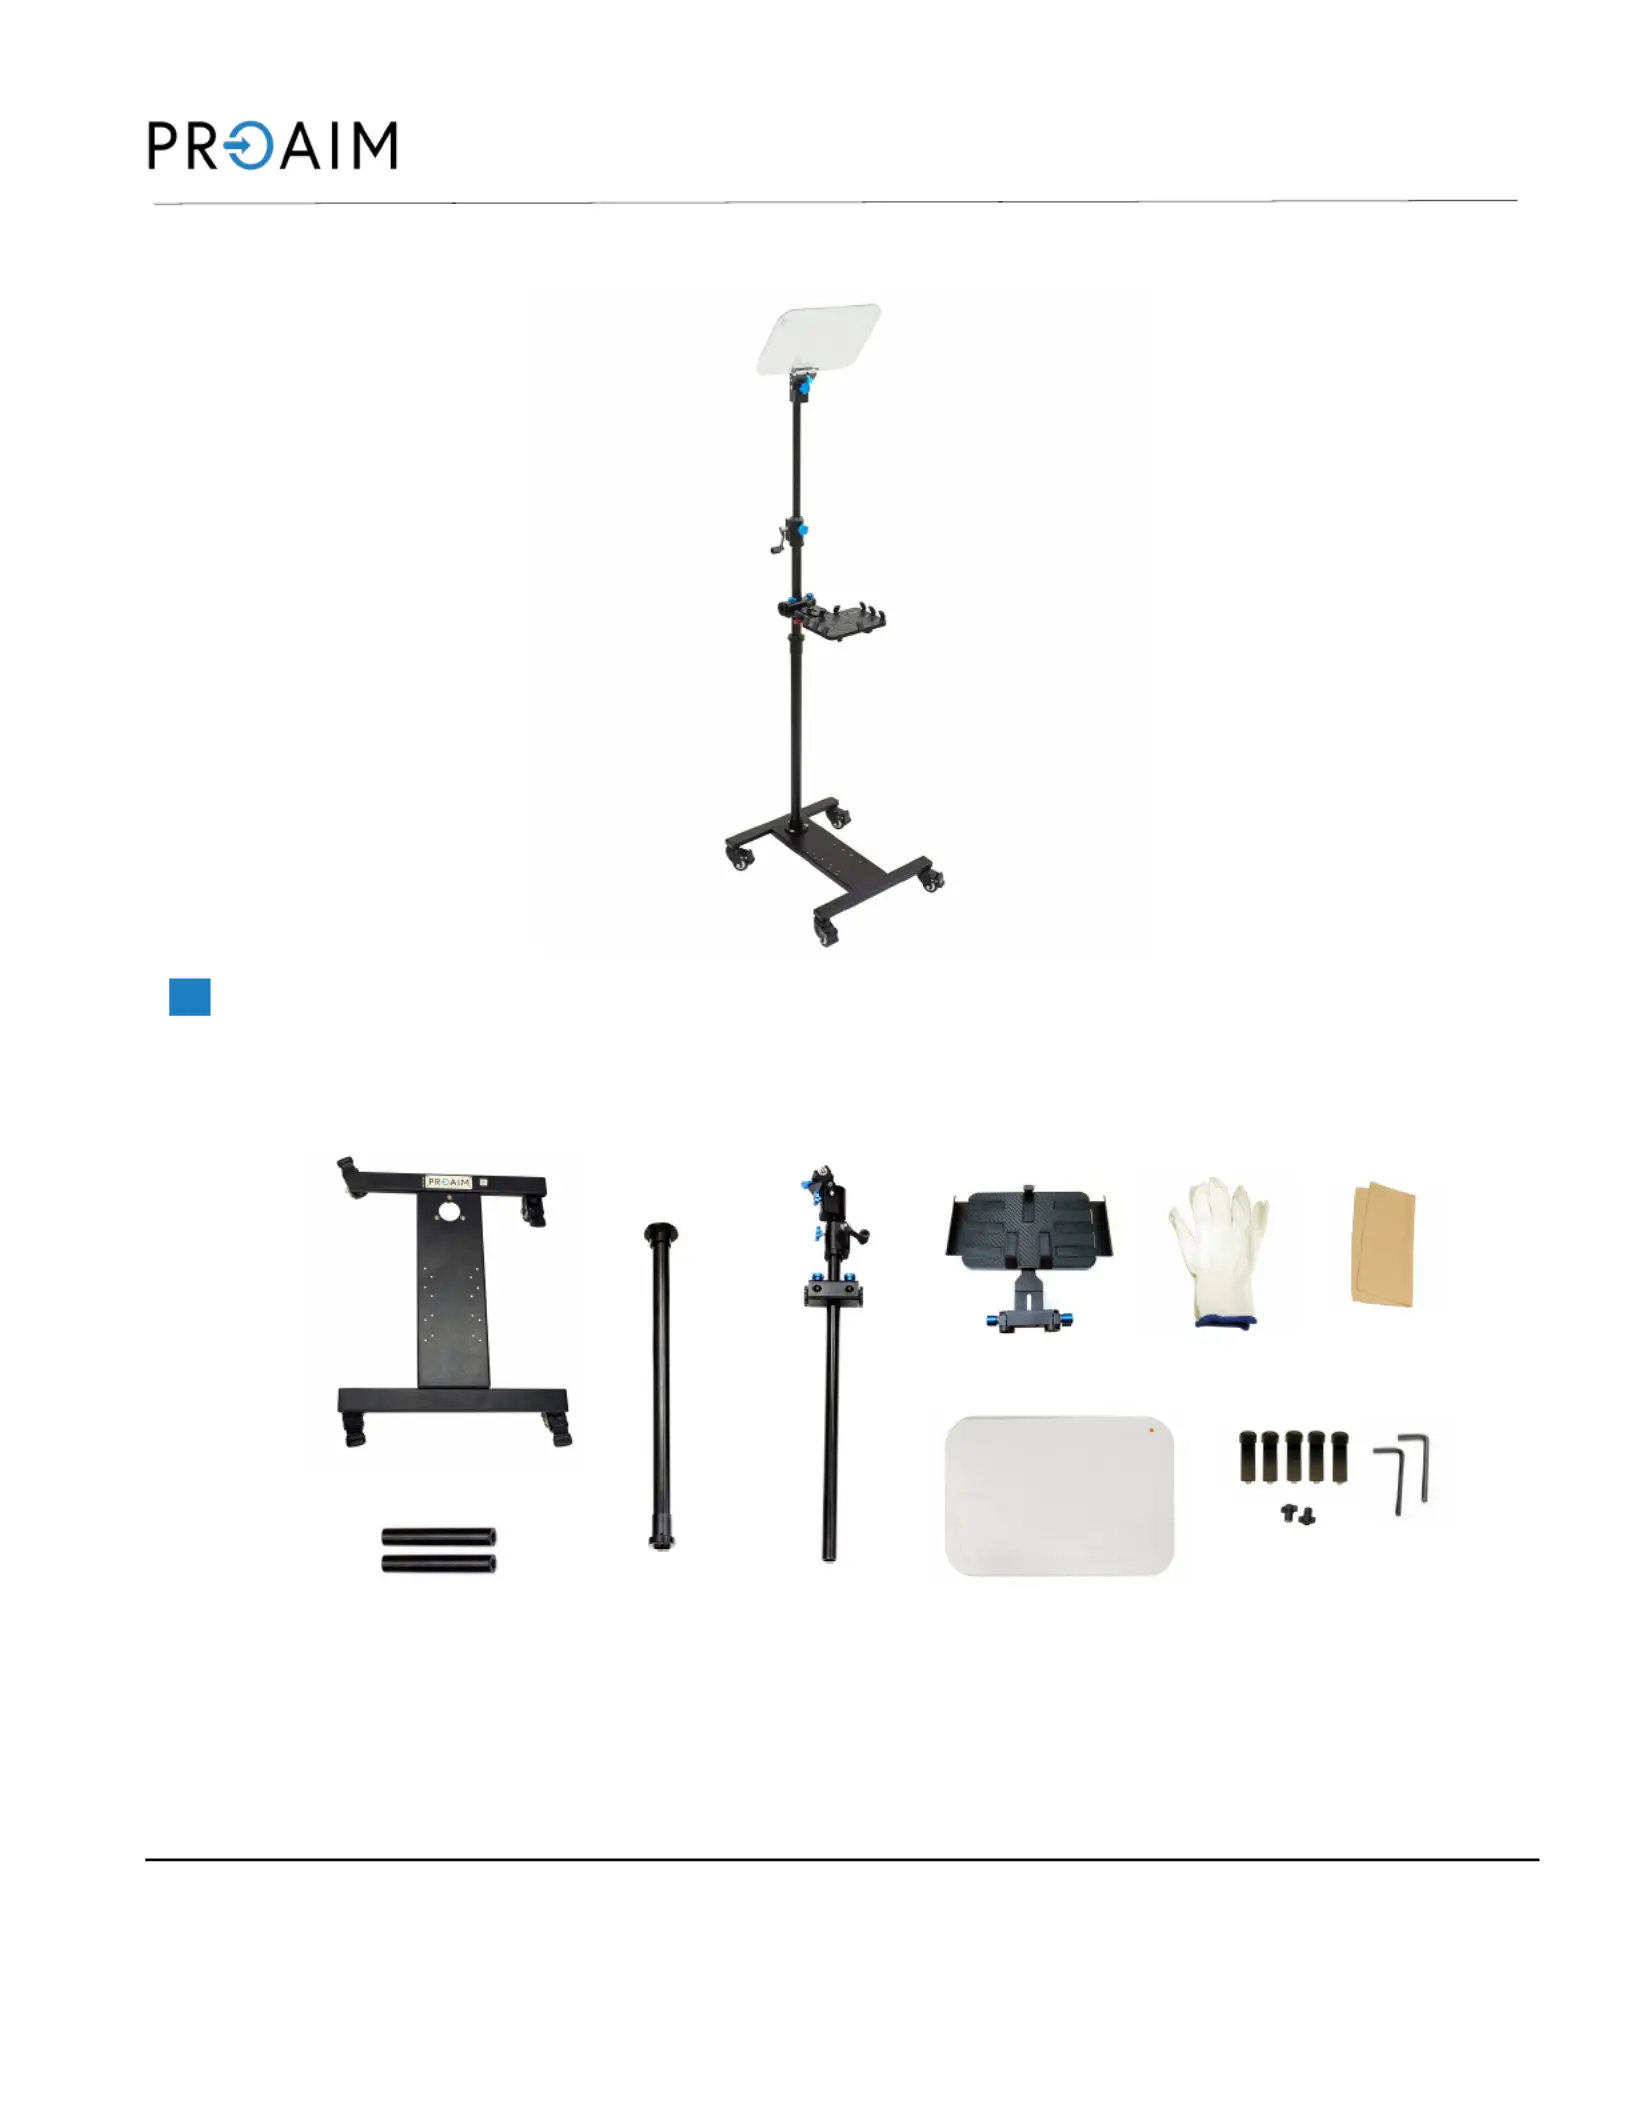
WhatIn Box’s The
Please inspect the contents of your shipped package to ensure you have received everything that is
listed below.
All rights reserved.
No part of this document may be reproduced, stored in a retrieval system, or transmied by any form or by any means,
electronic, mechanical, photocopying, recording, or otherwise, except as may be expressly permied by the applicable -
copyright statutes or in wring by the Publisher.
Professional Speech Teleprompter (TSPH)P--01
Assembly Manual
LCD Stand Base Plaorm
Accessories
Main Rod
2 x Rods
Ipad Tray-
Gloves
Glass
Telescopic
Rod
NOTE:The teleprompter glass has a different amount of reflectivity at both ends. If the glass is not
installed in proper orientation than you may experience a "double image" or "text shadow" effect on the
teleprompter. To eliminate this, we have applied a White sticker on the front side of the glass. Incase, the
mark gets removed and you face this issue, simply flip the teleprompter glass.
Glass Cleaning
Cloth
Produktspecifikationer
| Varumärke: | Proaim |
| Kategori: | Inte kategoriserad |
| Modell: | TP-SPH-01 |
Behöver du hjälp?
Om du behöver hjälp med Proaim TP-SPH-01 ställ en fråga nedan och andra användare kommer att svara dig
Inte kategoriserad Proaim Manualer

2 April 2025
2 April 2025
2 April 2025
2 April 2025
2 April 2025
31 Januari 2025
29 Januari 2025
28 December 2024
28 December 2024
28 December 2024
Inte kategoriserad Manualer
Nyaste Inte kategoriserad Manualer
9 April 2025
9 April 2025
9 April 2025
9 April 2025
9 April 2025
9 April 2025
9 April 2025
9 April 2025
9 April 2025
9 April 2025