Ryobi ACTIL02 Bruksanvisning
Ryobi Borrmaskin ACTIL02
Läs gratis den bruksanvisning för Ryobi ACTIL02 (2 sidor) i kategorin Borrmaskin. Guiden har ansetts hjälpsam av 35 personer och har ett genomsnittsbetyg på 4.3 stjärnor baserat på 4 recensioner. Har du en fråga om Ryobi ACTIL02 eller vill du ställa frågor till andra användare av produkten? Ställ en fråga
Sida 1/2
WARNING:
To reduce the risk of injury, user must read and understand the operator’s
manual for their cultivator before using this accessory. Save these instruc-
tions. Refer to them frequently and use them to instruct other users. If you
loan someone this product, loan them these instructions also.
WARNING:
Ensure compatibility and fit before using this accessory. Do not use this
accessory if a part is damaged or missing. If you are not comfortable per-
forming any of the functions described in these instructions, take your unit
to a qualified service center.
WARNING:
Always protect hands by wearing heavy gloves and/or wrapping the cutting
edges of the tines with rags and other material when installing or removing
tines. Contact with the tines could result in serious personal injury.
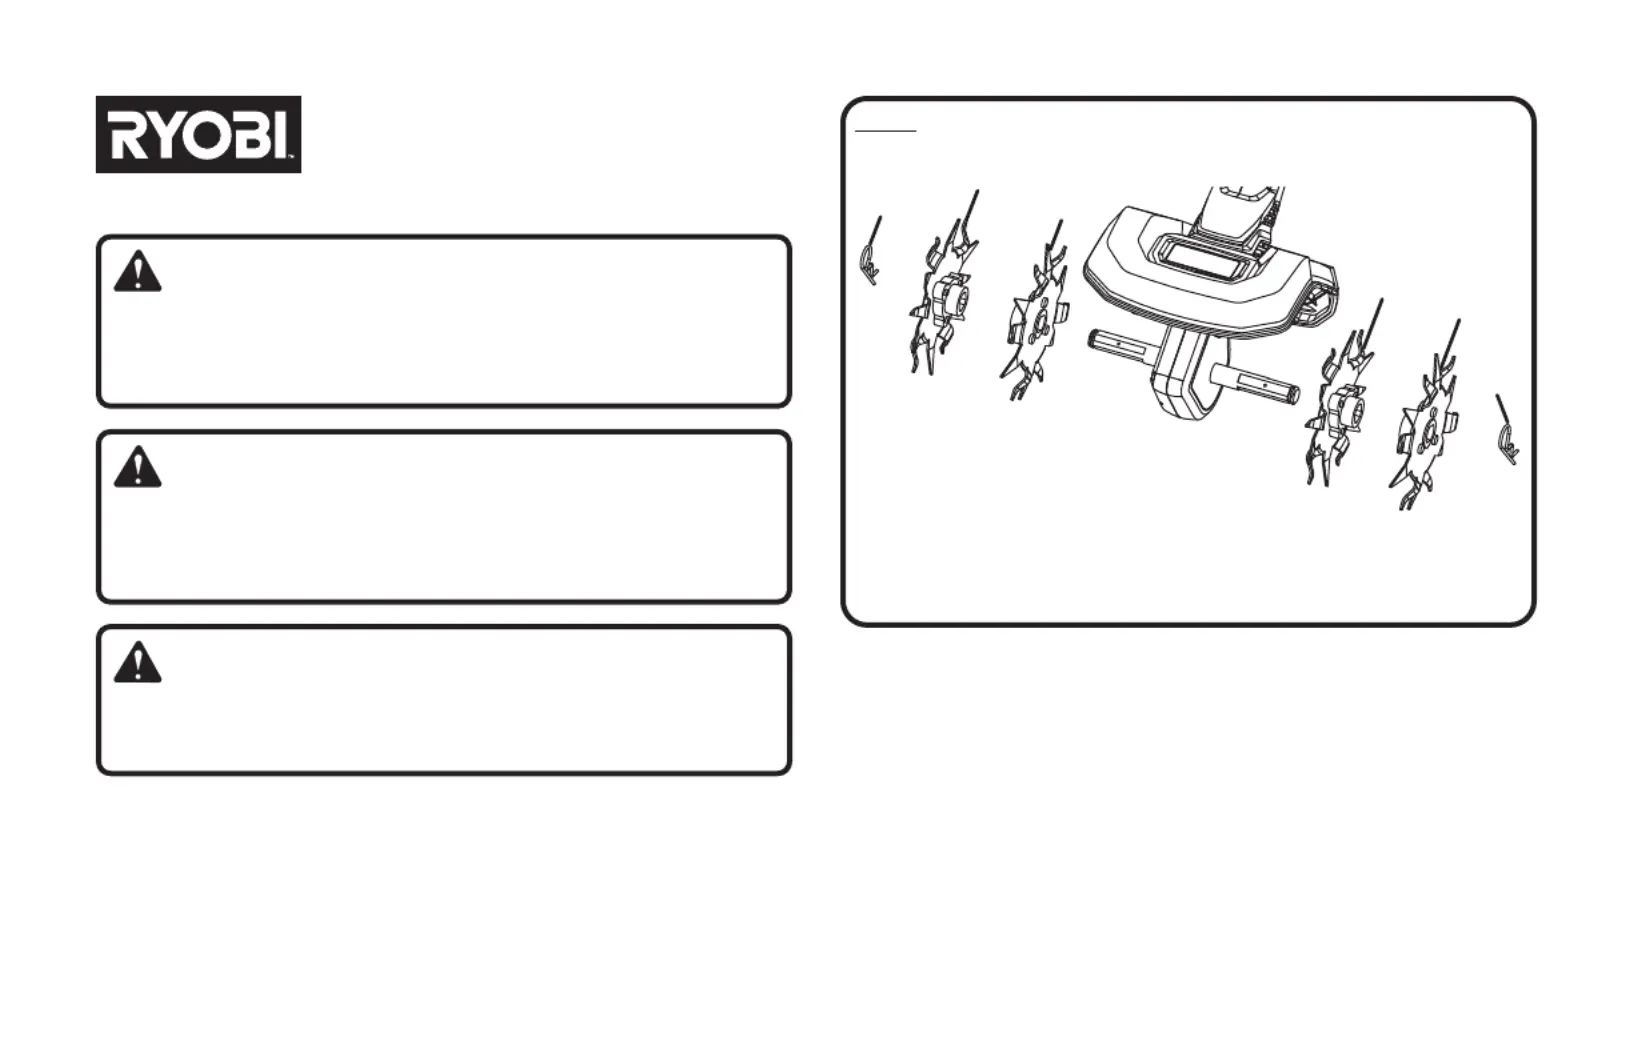
REMOVING AND REPLACING THE TINES
See Figure 1.
Remove the battery pack.
Remove the hitch pin and tines from one side of the tine shaft.
Remove vines, grass or other obstructions wrapped around the tine shaft.
Dispose of the old tines.
Install the new tines in the same order as the tines you removed and secure
with hitch pin.
Repeat these steps to install the other side of the tine shaft.
NOTE: The tool has four tines for cultivating — two inner tines stamped “B”
and “C”, and two outer tines stamped “A” and “D”. When viewed from the
front, as shown, the tines stamped “D” and “C” are on the left and the tines
stamped “A” and “B” are on the right. For correct operation of the unit, the
tines must be installed in the correct orientation.
NOTE: The unit will not operate properly if the tines are installed incorrectly.
If you notice a problem with the cultivating operation of the unit, check for
proper tine positioning.
Fig. 1
A - Outer tine “A” (right) [lame extérieure « A » (droite),
aspa exterior “A” (derecha)]
B - Inner tine “B” (right) [lame intérieure « B » (droite),
aspa interior “B” (derecha)]
C - Inner tine “C” (left) [lame intérieure« C » (gauche), aspa interior “C” (izquierdo)]
D - Outer tine “D” (left) [lame extérieure « D » (aspa exterior “D” (izquierdogauche), )]
E - Hitch pin (goupille de sûreté, pasador del enganche)
A
B
C
D
E
E
VIEW FROM THE FRONT
(VUE DE FACE, VISTA DESDE EL FRENTE)
FOR USE WITH P2705 RYOBI 18 VOLT CULTIVATOR
ACTIL02
REPLACEMENT PICK TINES
Produktspecifikationer
| Varumärke: | Ryobi |
| Kategori: | Borrmaskin |
| Modell: | ACTIL02 |
Behöver du hjälp?
Om du behöver hjälp med Ryobi ACTIL02 ställ en fråga nedan och andra användare kommer att svara dig
Borrmaskin Ryobi Manualer

25 September 2024
25 September 2024
24 September 2024
24 September 2024
24 September 2024
24 September 2024
24 September 2024
24 September 2024
11 September 2024
10 September 2024
Borrmaskin Manualer
Nyaste Borrmaskin Manualer
1 April 2026
31 Mars 2026
31 Mars 2026
30 Mars 2026
29 Mars 2026
26 Mars 2026
25 Mars 2026
21 Mars 2026
20 Mars 2026
18 Mars 2026