StarTech.com 8P6G-PCIE-SATA-CARD Bruksanvisning
StarTech.com Inte kategoriserad 8P6G-PCIE-SATA-CARD
Läs gratis den bruksanvisning för StarTech.com 8P6G-PCIE-SATA-CARD (2 sidor) i kategorin Inte kategoriserad. Guiden har ansetts hjälpsam av 45 personer och har ett genomsnittsbetyg på 4.0 stjärnor baserat på 7 recensioner. Har du en fråga om StarTech.com 8P6G-PCIE-SATA-CARD eller vill du ställa frågor till andra användare av produkten? Ställ en fråga
Sida 1/2
Quick-Start Guide
To view manuals, FAQs, videos, drivers, downloads, technical drawings, and more, visit www.startech.com/support.
Manual Revision: June 17, 2021
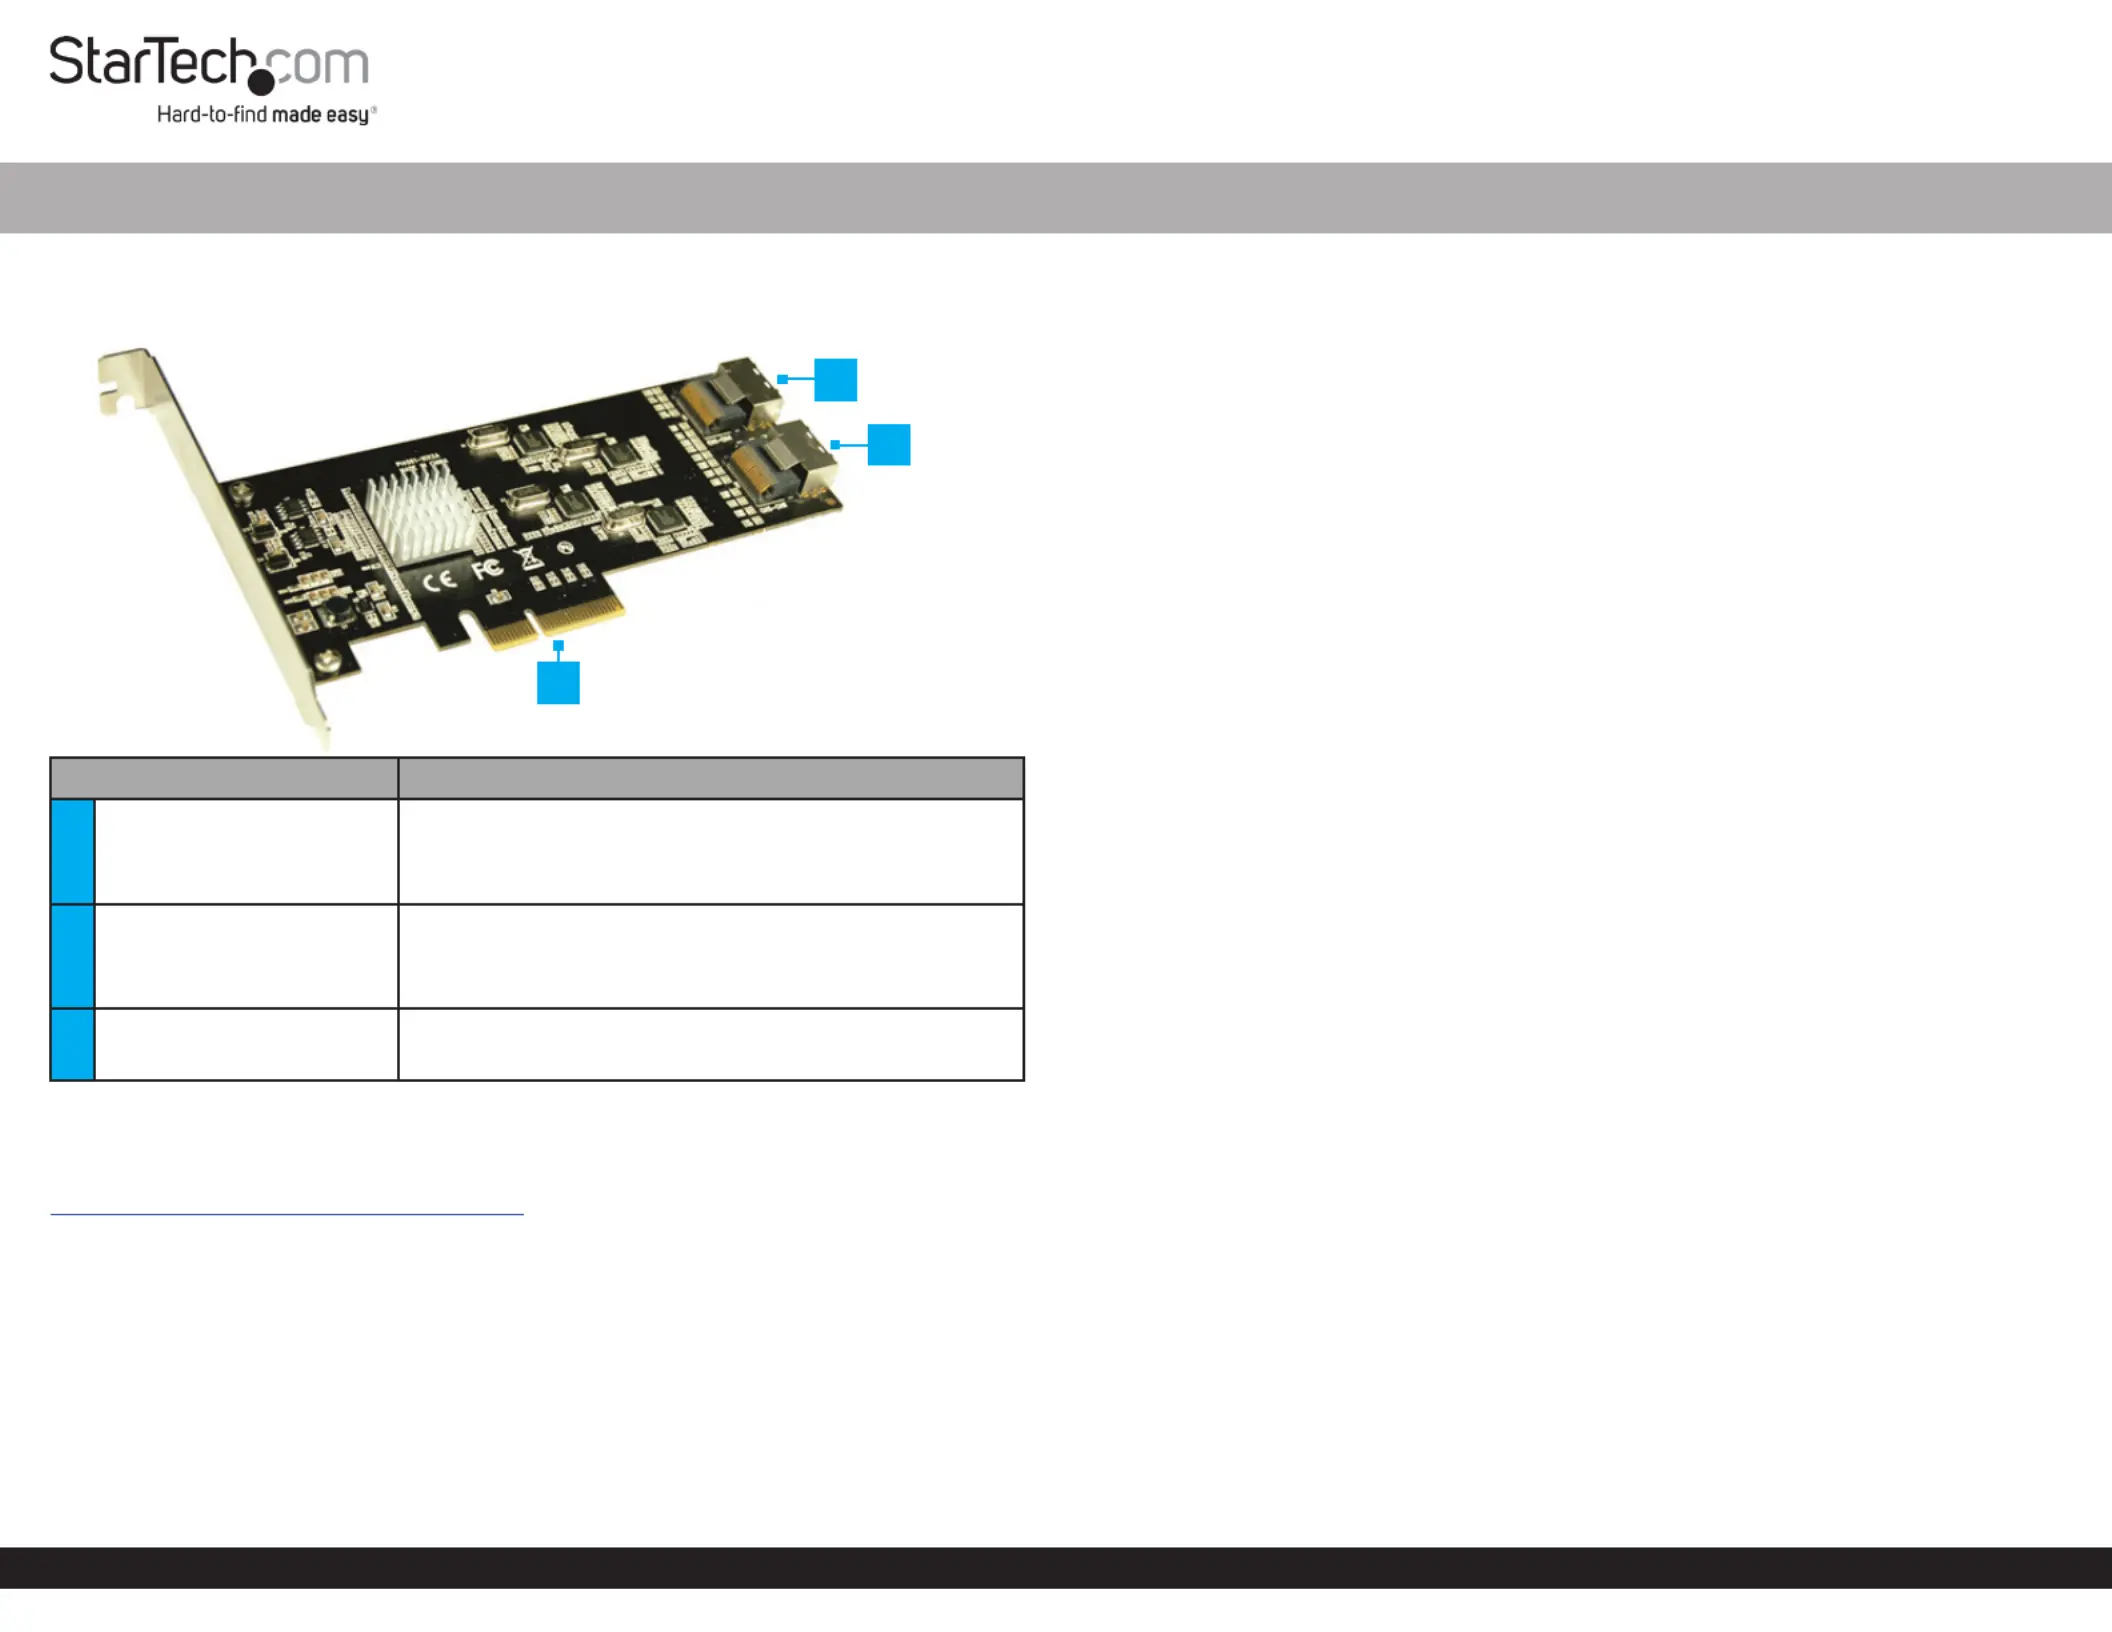
Product Diagram (8P6G-PCIE-SATA-CARD)
Front View
PortFunction
1
Mini-SAS Connector
(SFF-8087)
• Connect to the SATA Stoage DevicesPCIe SATA
CardMini-SAS to 4x SATA Cable using
• SATA Ports 1-4
2
Mini-SAS Connector
(SFF-8087)
• Connect to the SATA Stoage DevicesPCIe SATA
CardMini-SAS to 4x SATA Cable using
• SATA Ports 5-8
3PCIe p1-x4 Connector
• Connect the to the in PCIe SATA CardPCIe Slot
the Computer
Product Information
For the latest product information, technical specications, manuals, and Declarations
of Conformance, please visit:
www.startech.com/8P6G-PCIE-SATA-CARD.
Package Contents
• PCIe SATA Card x 1
• Mini-SAS to 4x SATA Cable x 2
• Full-Prole Bracket (Installed) x 1
• Low-Prole Bracket x 1
• Quick-Start Guide x 1
Requirements
• Computer with an available PCIe slot (x4/8/16)
• Phillips Head Screwdriver
8-Port SATA 6 Gbps PCI Express SATA Controller Card
Hardware Installation
Warning: PCIe Cards can be damaged by static electricity. Make sure that the
InstallerComputer Case is properly grounded before they open the or touch the
PCIe SATA Card. The should wear an when installing any InstallerAnti-Static Strap
computer component. If an is not available, discharge any built-up Anti-Static Strap
static electricity by touching a large for several seconds. Grounded Metal Surface
Only handle theby its edges and do not touch the gold connectors. PCIe SATA Card
Installing the Low-Prole Bracket
By default the is attached to the . Depending on Full-Prole BracketPCIe SATA Card
the system conguration it may be necessary to remove the to Full-Prole Bracket
replace with the (included).Low-Prole Bracket
1. Remove the 2x securing the , using a Phillips Head ScrewsFull-Prole Bracket
Phillips Head Screwdriver.
2. Remove the and replace with the Full-Prole Bracket Low-Prole Bracket
(included).
3. Install the 2x removed in step 1 and tighten, using a Phillips Head Screws Phillips
Head Screwdriver.
Installing the Card
1. Turn o the and any that are connected ComputerPeripheral Devices
(e.g. printers, external hard drives, etc.).
2. Unplug the from the rear of the and disconnect any Power CableComputer
Peripheral Devices that are connected.
3. Remove the from the . CoverComputer Case
Note: Consult the documentation that came with the for details about Computer
how to do this safely.
4. Locate an open (x4/8/16) and remove the corresponding PCIe SlotMetal Cover
PlateComputer CaseMetal Cover Plate from the rear of the . In most instances, the
is attached to the rear of the with a single . Computer CasePhillips HeadScrew
Save this for the next step. Phillips Head Screw
5. Gently insert the into the open (x4/8/16) and fasten the PCIe SATA Card PCIe Slot
BracketComputer CasePhillips HeadScrew to the rear of the , using the from step
4.
6. Connect the of each to the Mini-SAS ConnectorMini-SAS to SATA CableMini-SAS
ConnectorsPCIe SATA Card. of the
7. Connect the of the to a maximum of 8 SATA ConnectorsMini-SAS to SATA Cables
SATA Storage Devices.
8. Replace the from the that was removed in step 3.CoverComputer
9. Reconnect all of the that were disconnected in step 2.Peripheral Devices
10. Reconnect the to the rear of the .Power CableComputer
3
2
1
Produktspecifikationer
| Varumärke: | StarTech.com |
| Kategori: | Inte kategoriserad |
| Modell: | 8P6G-PCIE-SATA-CARD |
Behöver du hjälp?
Om du behöver hjälp med StarTech.com 8P6G-PCIE-SATA-CARD ställ en fråga nedan och andra användare kommer att svara dig
Inte kategoriserad StarTech.com Manualer

18 Mars 2025
18 Mars 2025
3 Januari 2025
2 Januari 2025
2 Januari 2025
2 Januari 2025
2 Januari 2025
2 Januari 2025
2 Januari 2025
2 Januari 2025
Inte kategoriserad Manualer
Nyaste Inte kategoriserad Manualer
9 April 2025
9 April 2025
9 April 2025
9 April 2025
9 April 2025
9 April 2025
9 April 2025
9 April 2025
9 April 2025
9 April 2025