StarTech.com PEX2S953LP Bruksanvisning
StarTech.com Inte kategoriserad PEX2S953LP
Läs gratis den bruksanvisning för StarTech.com PEX2S953LP (2 sidor) i kategorin Inte kategoriserad. Guiden har ansetts hjälpsam av 23 personer och har ett genomsnittsbetyg på 4.6 stjärnor baserat på 8 recensioner. Har du en fråga om StarTech.com PEX2S953LP eller vill du ställa frågor till andra användare av produkten? Ställ en fråga
Sida 1/2
Quick-Start Guide
To view manuals, FAQs, videos, drivers, downloads, technical drawings, and more, visit www.startech.com/support.
Manual Revision: December 17, 2019 9:30 AM
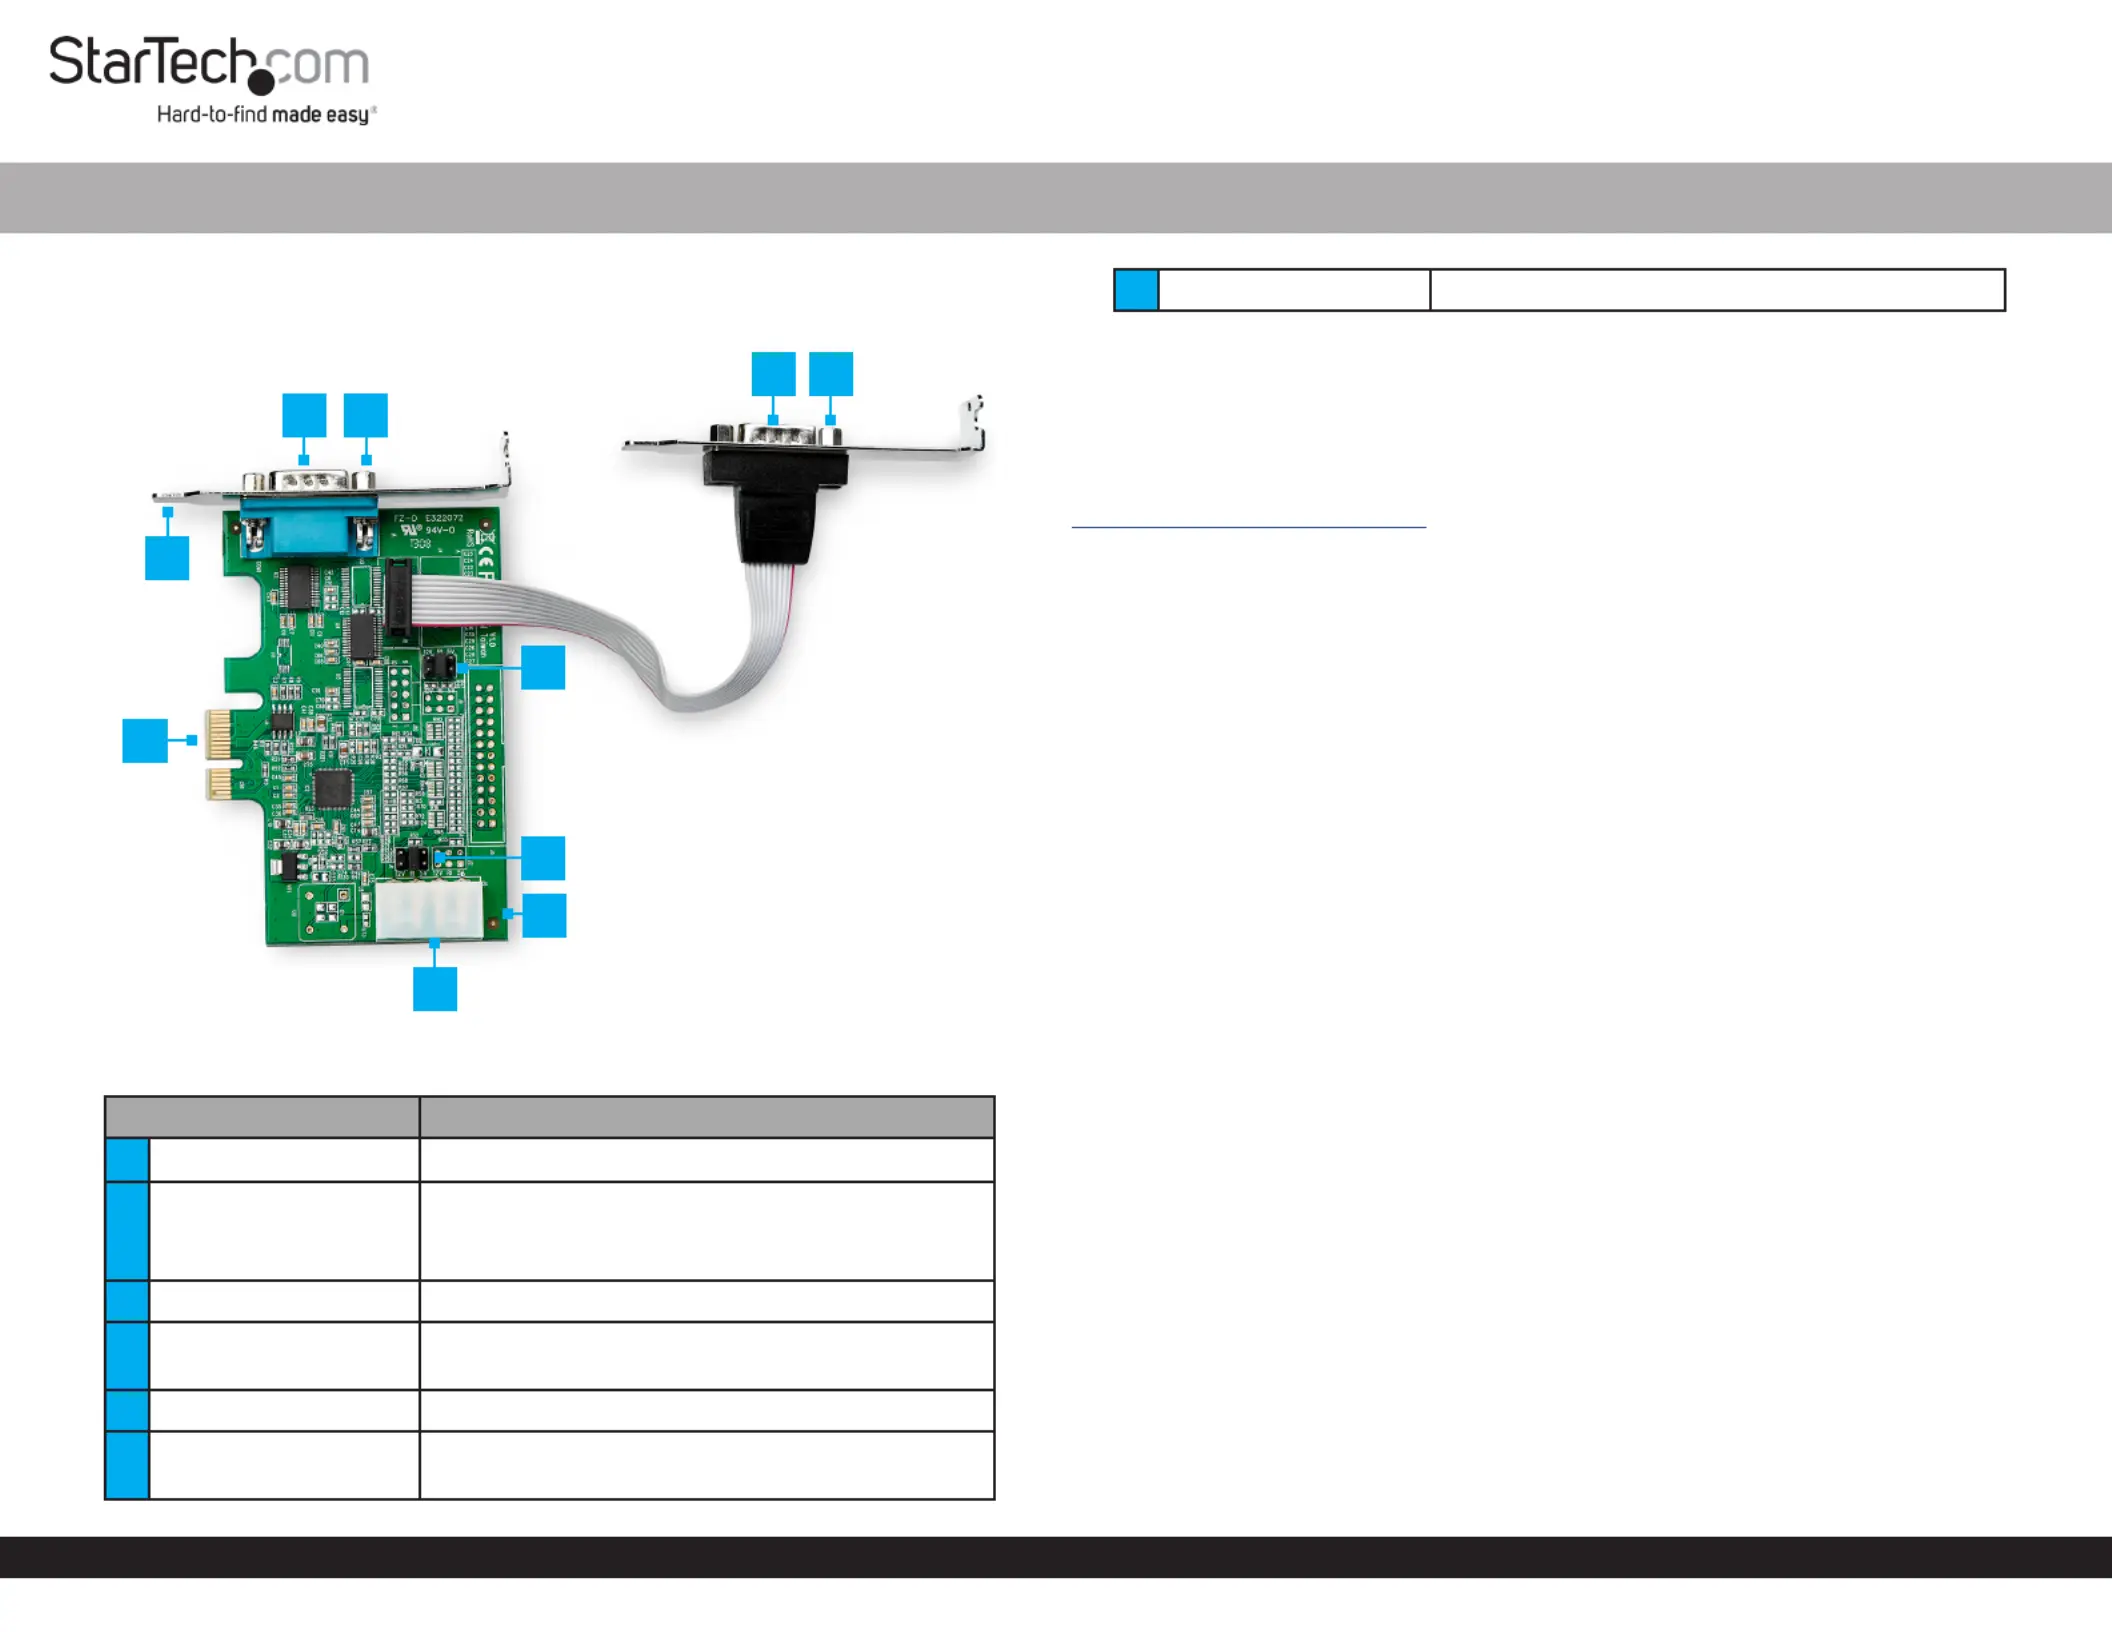
Product Diagram (PEX2S953LP)
PortFunction
1Serial Port• Used to connect Serial Devices
2Screws
• Used to attach the to the Serial PortBracket
• Used to secure a to the Serial CableSerial
Port
3Bracket• Used to attach the to the CardComputer
4
PCI Express Bus
Connector
• Used to connect the PCI Express Serial Card
to the Computer’s Motherboard
5Jumper• Used to congure power settingsSerial Port
6Printed Circuit Board
• Components such as are located on Jumpers
the Board
2-Port PCI Express Serial Card with 16950 UART - Low-Prole
7LP4 Power Connector• Used to connect a Power Source
Requirements
• PCIe Slot
• Needle-Nose Pliers
For the latest requirements and full manual, please visit
www.startech.com/PEX2S953LP.
Installation
WARNING!
PCI Express Serial Cards can be severely damaged by static electricity. Make sure
that you are properly grounded before you open your or touch the Computer Case
PCI Express Serial CardAnti-Static Strap. You should wear an when you install any
computer component. If an isn’t available, discharge any built-up Anti-Static Strap
static electricity by touching a large for several seconds. Only Grounded Metal Surface
handle the by its edges and don’t touch the gold connectors.PCI Express Serial Card
Jumper Conguration
Note: Jumper Serial Devices conguration is a requirement when connecting that
require power through a . Serial Port
This can be moved into one of three dierent positions in order to set the Jumper
power output voltage for the . The default setting for the is , Serial PortsJumpersRI
which is the setting for no power. The can be moved to one of the other two Jumper
settings for or of power. To congure the , complete the following:5V12VJumper
1. Locate the for . is located on the right hand side, labeled JumperPort OnePort One
as on the . The is labeled as on the COM1Printed Circuit BoardJumperJ1Printed
Circuit Board.
2. Carefully remove the . Lift the straight up and o of the JumperJumper PCI Express
Serial Card.
Note: Always hold the by the edges.Card
3. Determine the power setting that is required for .Port One
4. Position the over the set of that correspond with the desired JumperPinsSerial
Port Power SettingJumper. See to determine where the Figure 1 should be
positioned.
5. Push the straight down and into place.Jumper
Note: Push theall the way into position for proper contact. Jumper
12
12
4
3
5
7
6
5
Produktspecifikationer
| Varumärke: | StarTech.com |
| Kategori: | Inte kategoriserad |
| Modell: | PEX2S953LP |
Behöver du hjälp?
Om du behöver hjälp med StarTech.com PEX2S953LP ställ en fråga nedan och andra användare kommer att svara dig
Inte kategoriserad StarTech.com Manualer

18 Mars 2025
18 Mars 2025
3 Januari 2025
2 Januari 2025
2 Januari 2025
2 Januari 2025
2 Januari 2025
2 Januari 2025
2 Januari 2025
2 Januari 2025
Inte kategoriserad Manualer
Nyaste Inte kategoriserad Manualer
9 April 2025
9 April 2025
9 April 2025
9 April 2025
9 April 2025
9 April 2025
9 April 2025
9 April 2025
9 April 2025
9 April 2025