StarTech.com SSPMSVESA Bruksanvisning
StarTech.com Platt panelstöd SSPMSVESA
Läs gratis den bruksanvisning för StarTech.com SSPMSVESA (2 sidor) i kategorin Platt panelstöd. Guiden har ansetts hjälpsam av 21 personer och har ett genomsnittsbetyg på 4.6 stjärnor baserat på 7 recensioner. Har du en fråga om StarTech.com SSPMSVESA eller vill du ställa frågor till andra användare av produkten? Ställ en fråga
Sida 1/2
Quick-Start Guide
To view manuals, FAQs, videos, drivers, downloads, technical drawings, and more, visit www.startech.com/support.
Manual Revision: July 24, 2019 3:57 PM
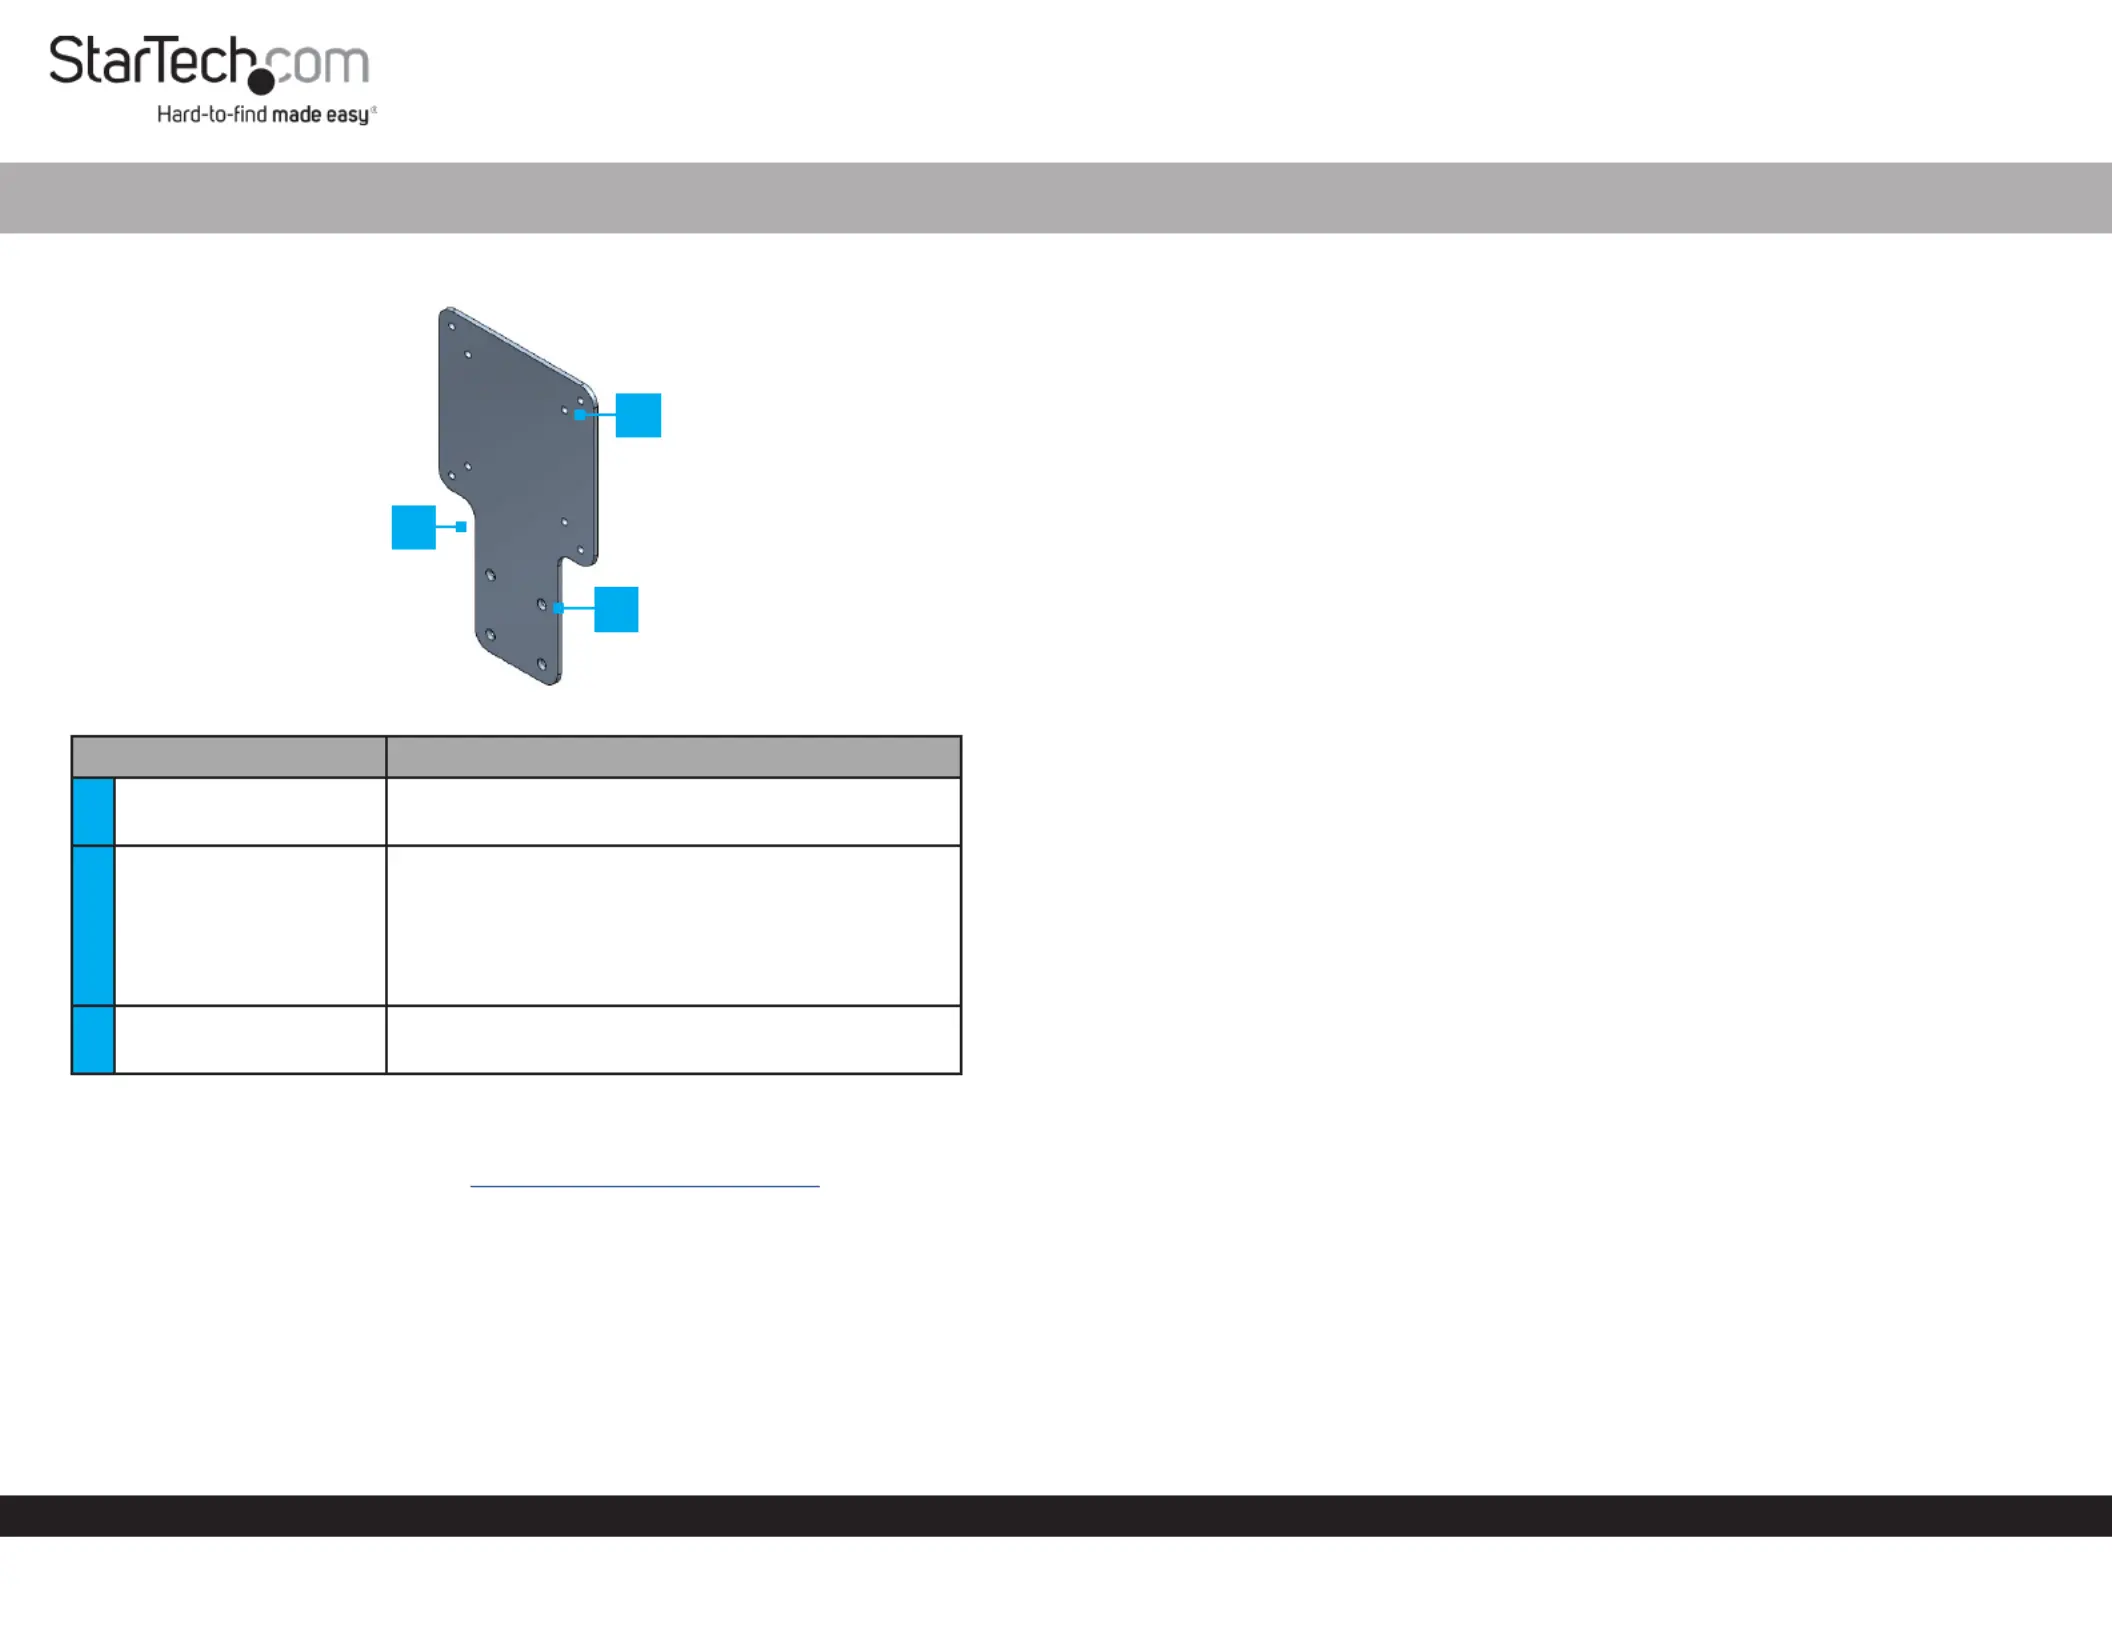
Product Diagram (SSPMSVESA)
ComponentFunction
1
VESA Mounting
Bracket
• Used to mount a StarTech.com Docking
StationHubMonitor or to the back of a .
2VESA Mounting Holes
• Used to mount the to the back of a Adapter
Monitor Monitor’s VESA Mounting ,using the
Pattern.
Note: VESA mounting sizes are 75x75 and
100x100.
3Mounting Holes
• Used to mount a StarTech.com Docking
StationHubAdapter or to the .
Requirements
For the latest requirements, please visit www.startech.com/SSPMSVESA
If you are using a that covers the on the back of Monitor StandVESA Mounting Holes
the , a VESA compatible monitor mount will be require to use the .MonitorAdapter
Package Contents
• VESA Mounting Bracket x 1
• M3 x 5 mm Screws x 4
• M4 x 12 mm Screws x 4
• M4 x 20 mm Screws x 4
VESA Mount Adapter for StarTech.com Docking Stations and Hubs
• Spacers x 4
• Quick-Start Guide x 1
Attaching a StarTech.com Docking Station or Hub
1. Align the on the with the on the Mounting HolesAdapterMounting Holes
StarTech.com Docking StationHub or . The recessed hole pattern should be facing
outward so the will t properly.M3 x 5 mm (Countersunk) Screws
2. Insert the four through the on the M3 x 5 mm ScrewsMounting HolesAdapter
and into the on the or .Mounting HolesStartech.com Docking StationHub
3. Using a (sold separately) tighten the , Phillips Head ScrewdriverM3 x 5 mm Screws
being careful not to over-tighten the .M3 x 5 mm Screws
Mounting the Adapter (Flush)
1. Place the screen facing down on a at, clean, and secure surface.Monitor
2. Align the on the with the on the Mounting HolesAdapterVESA Mounting Holes
back of the .Monitor
3. Align the with the on the back of the VESA Monitor MountVESA Mounting Hole
Adapter, Adapter VESA Monitor Mount sandwiching the between theand the
back of the. Monitor
4. Insert four of the through the and the M4 x 12 mm ScrewsVESA Monitor Mount
AdapterMounting HolesMonitor and into the on the back of the .
5. Using a , tighten the , being careful Phillips Head ScrewdriverM4 x 12 mm Screws
not to over-tighten the .M4 x 12 Screws
Mounting the Adapter (Recessed)
Note: The and provided with the can be installed on SpacersScrewsAdapter
monitors with VESA mounting holes with a maximum depth of 7mm.
1. Place the screen facing down on a at, clean, and secure surface.Monitor
2. Place the four over the on the back of the .SpacersVESA Mounting HolesMonitor
3. Align the on the with the on the back on the Mounting HolesAdapter Spacers
Monitor.
4. Align the with the on the back of the VESA Monitor MountVESA Mounting Hole
AdapterAdapterVESA Monitor Mount, sandwiching the between the and the
Spacers.
2
1
3
Produktspecifikationer
| Varumärke: | StarTech.com |
| Kategori: | Platt panelstöd |
| Modell: | SSPMSVESA |
| Vikt: | 530 g |
| Bredd: | 120 mm |
| Djup: | 214 mm |
| Höjd: | 3 mm |
| Förpackningens bredd: | 145 mm |
| Material: | Stål |
| Kompatibilitet: | DK30C2DPEP, DK30C2DPEPUE, DK30C2DPPD, DK30C2DPPDUE, TB3CDK2DP, TB3CDK2DPUE, HB31C3A1CS, HB31C4AS, HB31C2A1CGS |
| Produktens färg: | Svart |
| VESA-fäste: | Ja |
| Låddjup: | 290 mm |
| Vikt inkl. förpackning: | 600 g |
| Ytterförpackningens höjd: | 240 mm |
| Produkter per ytterförpackning: | 20 styck |
| Ytterförpackningens längd: | 300 mm |
| Ytterförpackningens bredd: | 240 mm |
| Skruvar medföljer: | Ja |
| Monteringsgränssnitt kompatibilitet (min): | 75 x 75 mm |
| Monteringsgränssnitt kompatibilitet (max): | 100 x 100 mm |
Behöver du hjälp?
Om du behöver hjälp med StarTech.com SSPMSVESA ställ en fråga nedan och andra användare kommer att svara dig
Platt panelstöd StarTech.com Manualer

20 Februari 2025
17 Januari 2025
17 Januari 2025
17 Januari 2025
17 Januari 2025
15 Januari 2025
15 Januari 2025
15 Januari 2025
15 Januari 2025
15 Januari 2025
Platt panelstöd Manualer
Nyaste Platt panelstöd Manualer
8 April 2025
3 April 2025
3 April 2025
3 April 2025
3 April 2025
3 April 2025
3 April 2025
3 April 2025
3 April 2025
3 April 2025