Techno Line WS 6610 Bruksanvisning

Techno Line WS 6610

Läs gratis den bruksanvisning för Techno Line WS 6610 (6 sidor) i kategorin . Guiden har ansetts hjälpsam av 23 personer och har ett genomsnittsbetyg på 4.8 stjärnor baserat på 12 recensioner. Har du en fråga om Techno Line WS 6610 eller vill du ställa frågor till andra användare av produkten? Ställ en fråga

Sida 1/6
KL4912 Desktop weather station
Instruction Manual
Introduction
This weather station comes with backlight, indoor and outdoor temperature &
humidity display, and alarm clock with calendar.
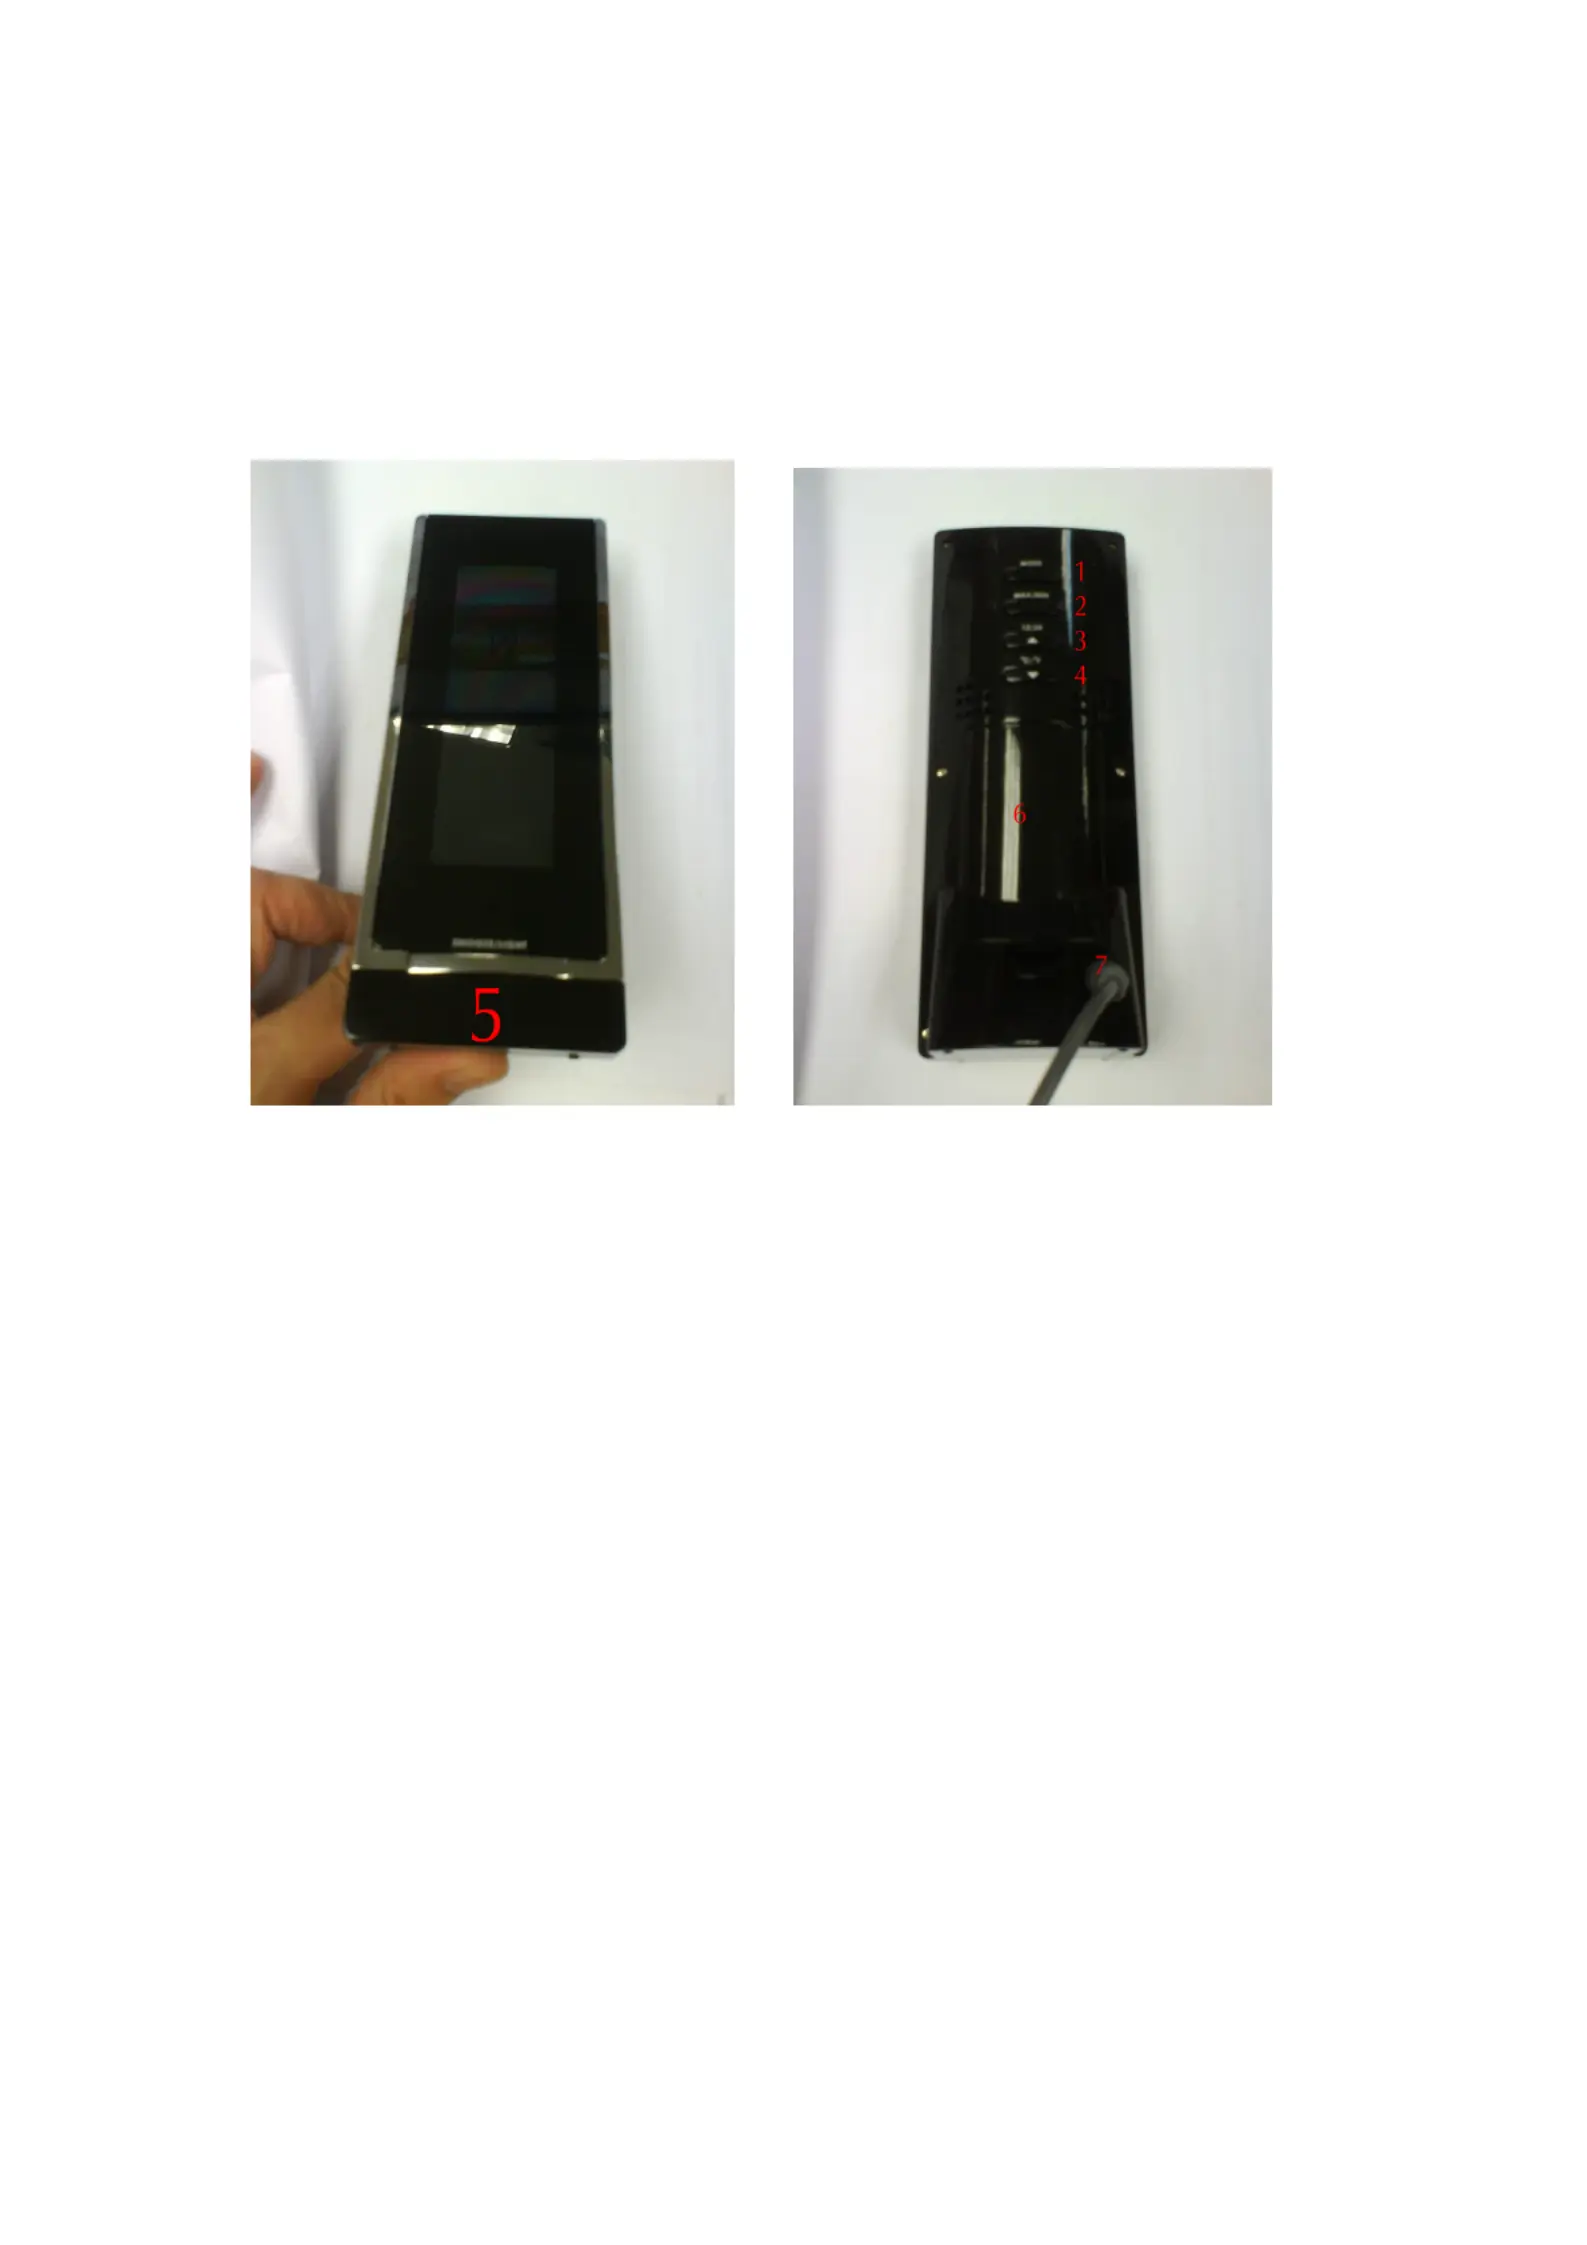
Fig. 1 Front view Fig. 2 Back view
2. MAX/MIN button
3.
CHANNEL button
4.
C/
°
F / RCC button
5. SNOOZE / LIGHT button
6. Battery compartment
7. A/C in-jack
Getting started:
Installing A/C adapter highly recommended
1. Remove all AAA batteries before plugging in A/D D/C adapter. See instructions
below.
2. Plug in A/C D/C adapter at A/C input jack (7) (see gure 2).
Batteries installation
1. Open battery compartment (6) on the back of the unit. (see gure 2)
2. Install / replace with 3x AAA size batteries in the compartment. It is
recommended that only alkaline batteries are used.
3. Replace the battery compartment (6) on the back of the unit.
4. A short beep will be heard to conrm proper installation of batteries.
Batteries safety warnings:
1. Please read all instructions carefully before use.
2. Install batteries correctly by matching the polarities (+/-).
3. Always replace a complete set of batteries.
4. Never mix used and new batteries.
5. Remove exhausted batteries immediately.
6. Remove batteries when not in use.
7. Do not recharge and do not dispose of batteries in re as the batteries may
explode.
8. Ensure batteries are stored away from metal objects as contact may cause a
short circuit.
9. Avoid exposing batteries to temperature or humidity extremes or direct sunlight.
10. Keep all batteries out of reach from children. They are a choking hazard.
11. Please retain packaging for future reference.
Note: backlight will be permanently on when the weather station is connected with the ac
adapter. When batteries are used, press
SNOOZE / LIGHT button for backlight.
Interpreting the weather forecast symbols
sunny slightly cloudy Cloudy Rainy
Figure 3.
The weather station requires at least 24 hours on acclimatizing to local weather
conditions. The weather station process and analyze the weather patterns for the past
24 hours in order to determine the future weather. Until that time has elapsed, the
predicted weather forecast may not accurately reect the actual weather for your
immediate area.
The weather station will display the symbols (see gure 3) to indicate the predicted
weather forecast for the next 12 to 24 hours for an area within a radius of approximately
30-50 km.
Note:
1. The weather forecasting is approximately 70% accurate. Accuracy rate might be
lower in extreme weather conditions. The weather forecast is only for reference
only and it is only for domestic use only. Do rely on the weather station for NOT
weather forecast if any serious matter replies on it including but not limited to:
personal health, life and death situation, any business or nancial decisions,
and/or agricultural planning.
2. The weather forecast does not display the current weather. It displays the
weather for the future.
To set time manually:
When the weather station is displaying the time, hold down the button (1) for MODE
approximately 3 seconds until the display is ashing.
Press
CHANNEL
button (3) or
C/°F / RCC
button (4) to change the AM/PM or
12-hour clock setting.
Press button (1) again. Press CHANNEL button (3) or C/°F / RCC MODE
button (4) to change the TIME ZONE setting.
Press button (1) again. Press CHANNEL button (3) or C/°F / RCC MODE
button (4) to change the hour setting.
Press button (1) again. Press MODE
CHANNEL
button (3) or
C/°F / RCC
button (4) to change the minute setting.
Press button (1) again to conrm settings. Display will no longer ash. MODE
To set calendar:
Press the button (1) until the calendar is displayed. MODE
Hold down the MODE button (1) for approximately 3 seconds until the display is
ashing.
Press button (1) again. Press CHANNEL button (3) or C/°F / RCC MODE
button (4) to change the year setting.
Press button (1) again. Press MODE
CHANNEL
button (3) or
C/°F / RCC
button (4) to change between the date/month and month/date setting.
Press button (1) again. Press CHANNEL button (3) or C/°F / RCC MODE
button (4) to change the month setting.
Press button (1) again. Press CHANNEL button (3) or C/°F / RCC MODE
button (4) to change the date setting.
Press button (1) again to conrm settings. Display will no longer ash. MODE
To set alarm time:
Press the button (1) until the alarm is displayed. AL will be shown. MODE
Hold down the MODE button (1) for approximately 3 seconds until the display is
ashing.
Press CHANNEL button (3) or C/°F / RCC button (4) to change the hour
setting.
Press button (1) again. MODE
Press CHANNEL button (3) or C/°F / RCC button (4) to change the minute
setting.
Press button (1) again. MODE
Press CHANNEL button (3) or C/°F / RCC button (4) to change the duration of
the snooze time (from 1 minute to 20 minutes).
Press button (1) again to complete. MODE
When Alarm time is shown, press
CHANNEL
button (3) to turn on and o the alarm.
will be shown when the alarm is on.
The alarm will sound for 120 seconds when the preset alarm time is reached. Hit any
button on the back of the clock to deactivate the alarm.
Hit the SNOOZE / LIGHT button (5) when the alarm is on to enter snooze mode.
will ash when the clock is it snooze mode. The alarm will sound again after the
preset snooze time has been reached. Hit any button on the back of the clock to
deactivate the alarm.
REMOTE TEMPERATURE SENSOR

Produktspecifikationer

Varumärke: Techno Line
Kategori:
Modell: WS 6610

Behöver du hjälp?

Om du behöver hjälp med Techno Line WS 6610 ställ en fråga nedan och andra användare kommer att svara dig