Tecmate OPTIMATE 4 TM146DUAL Accu oplader Bruksanvisning

Tecmate Batteriladdare OPTIMATE 4 TM146DUAL Accu oplader

Läs gratis den bruksanvisning för Tecmate OPTIMATE 4 TM146DUAL Accu oplader (44 sidor) i kategorin Batteriladdare. Guiden har ansetts hjälpsam av 34 personer och har ett genomsnittsbetyg på 4.9 stjärnor baserat på 17.5 recensioner. Har du en fråga om Tecmate OPTIMATE 4 TM146DUAL Accu oplader eller vill du ställa frågor till andra användare av produkten? Ställ en fråga

Sida 1/44
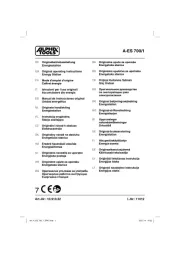
INSTRUCTIONS FOR USE
IMPORTANT: Read completely
before charging
MODE D’EMPLOI
IMPORTANT: à lire avant
d’utiliser l’appareil
ANWENDUNGSVORSCHRIFTEN
WICHTIG: Vollständig vor der
Benutzung lesen
GEBRUIKSAANWIJZING
BELANGRIJK: Lees volledig voor
gebruik
MODO DE EMPLEO
IMPORTANTE: a leer antes de
utilizar el aparato
INSTRUÇÕES DE UTILIZAÇÃO
IMPORTANTE: Ler antes de
utilizar.
ISTRUZIONI PER L’USO
IMPORTANTE: da leggere prima
di utilizzare l’apparecchio
INSTRUKTIONER
VIKTIGT: läs följande fullständiga
instruktioner för användningen
innan du använder laddaren
Automatic charger for 12V lead/acid batteries • Chargeur automatique pour
batteries 12V plomb-acide • Cargador automático para baterías 12V
plomo-ácido • Carregador automático para baterias de 12V chumbo/ácido •
Automatische Ladegerät für 12V Blei-Säure Batterien • Automatische lader
voor 12V loodzuur accu’s • Caricabatterie automatico per batterie 12V
piombo-acido • Automatisk diagnostisk laddare för 12V blybatterier
1 x 12V
STD / AGM-MF / GEL
3 - 50Ah (charge within 48 hours), up
to 70Ah for long term maintenance
+-
MODEL: TM140DUAL / TM142DUAL / TM146DUAL
AC: 220-240VAC 50-60Hz
0,095A @ 240Vac
DC: 0,8A 12V
10 sec.
2. 5.3.1. 4.
Change program: Standard CAN-bus
T
E
S
T
0.8
0.5
0.2
AMPS
T
E
T
T
S
E
E
0.8
0
.
5
0
.
2
AMPS
8
A
A
A
A
A
A
A
A
A
A
A
77
10
9
8
3.1
3.2
4.1
4.2
66
55
2
1
3.3
LED indications (illustration 1)
Early warning of battery problems (illustration 2)
Change program (illustration 3)
TEST
VOLTS 2V 12.2V 12.4V 12.5V 12.7V
STD
GEL
AGM / MF
61-80%
40-60% 61-80%
61-80%
61-80% 61-80%
61-80%
40-60%
40-60%
TEST after charging - 5 possible results
3
AUTOMATIC DIAGNOSTIC CHARGER FOR 12V LEAD-ACID BATTERIES
FROM 3Ah TO 50Ah, AS FOUND IN:
DO NOT USE FOR NiCd, NiMH, Li-Ion OR NON-RECHARGEABLE BATTERIES.
Input: 220-240V maximum 0,095A. The maximum output current is 0,8A.
IMPORTANT: READ THE FOLLOWING INSTRUCTIONS BEFORE USING THE CHARGER
This appliance is not intended for use by persons (including children) with reduced physical, sensory or
mental capabilities, or lack of experience and knowledge, unless they have been given supervision or
instruction concerning use of the appliance by a person responsible for their safety. Children should be
supervised to ensure that they do not play with the appliance.
SAFETY WARNING AND NOTES: Batteries emit EXPLOSIVE GASES - prevent flame or sparks near batteries. Disconnect AC
power supply before making or breaking DC/battery connections. Battery acid is highly corrosive. Wear protective clothing and
eyewear and avoid contact. In case of accidental contact, wash immediately with soap and water. Check that the battery posts are
not loose; if so, have the battery professionally assessed. If the battery posts are corroded, clean with a copper wire brush; if greasy
or dirty clean with a rag damped in detergent. Use the charger only if the input and output leads and connectors are in good,
undamaged condition. If the input cable is damaged, it is essential to have it replaced without delay by the manufacturer, his
authorised service agent or a qualified workshop, to avoid danger. Protect your charger from acid and acid fumes and from damp
and humid conditions both during use and in storage. Damage resulting from corrosion, oxidation or internal electrical short-
circuiting is not covered by warranty. Distance the charger from the battery during charging to avoid contamination by or exposure
to acid or acidic vapours. If using it in the horizontal orientation, place the charger on a hard, flat surface, but NOT on plastic, textile
or leather. Use the fixing holes provided in the enclosure base to attach the charger to any convenient, sound vertical surface.
EXPOSURE TO LIQUIDS: This charger is designed to withstand exposure to liquids accidentally spilled or splashed onto the
casing from above, or to light rainfall. Prolonged exposure to falling rain is inadvisable and longer service life will be obtained by
minimizing such exposure.Failure of the charger due to oxidation resulting from the eventual penetration of liquid into the electronic
components, connectors or plugs,is not covered by warranty.
BATTERY CONNECTIONS: 2 interchangeable connection sets are available, supplied with the charger is a set of battery clips for
charging the battery off-vehicle, the other connection set comes with metal eyelet lugs for permanent connection to the battery
posts, and re-sealable weatherproof cap on the connector that connects to the charger output cable. This connection set allows easy
and sure connection of the charger to maintain the battery on-vehicle. The resealable weatherproof cap is designed to protect the
connector from dirt and damp whenever the charger is not attached. Consult a professional service agent for assistance in attaching
the metal eyelets to the battery posts. Secure the connector with weatherproof cap so that it cannot foul any moving part of the
vehicle or the cable can be pinched or damaged by sharp edges. The in-line fuse in the eyelets connection set protects the battery
against such accidental shorting across positive and negative conductors. Replace any burnt fuse only with a similar new fuse of
15A rating.
CONNECTING THE CHARGER TO THE BATTERY
1. Disconnect AC power supply before making or breaking DC / battery connections.
2. If charging a battery in the vehicle with the battery clips, before making connections, first check that the battery clips can be
safely and securely positioned clear from surrounding wiring, metal tubing or the chassis. Make connections in the following
order: First connect to the battery terminal not connected to the chassis (normally positive), then connect the other battery clip
(normally negative) to the chassis well away from the battery and fuel line. Always disconnect in reverse sequence.
3. When charging a battery out of the vehicle with the battery clips, place it in a well ventilated area. Connect the charger to the
battery: RED clamp to POSITIVE (POS, P or +) terminal and BLACK clamp to NEGATIVE (NEG, N or –) terminal. Make sure the
connections are firm and secure. Good contact is important.
4. If the battery is deeply discharged (and possibly sulfated), remove from the vehicle and inspect the battery before
connecting the charger for a recovery attempt. Visually check the battery for mechanical defects such as a bulging or
cracked casing, or signs of electrolyte leakage. If the battery has filler caps and the plates within the cells can be seen from the
outside, examine the battery carefully to try to determine if any cells seem different to the others (for example, with white
matter between the plates, plates touching). If mechanical defects are apparent do not attempt to charge the battery, have the
battery professionally assessed.
5. If the battery is new, before connecting the charger read the battery manufacturer’s safety and operational instructions
carefully. If applicable, carefully and exactly follow acid filling instructions.
SAFETY
4
USING THE OPTIMATE 4
T
E
S
T
0.8
0.5
0.2
AMPS
T
E
T
T
S
E
E
T
0.8
0
.
5
0
.
2
AM
PS
8
A
A
A
A
A
A
77
10
9
8
3
.1
3
.2
4
.1
4
.2
66
55
2
1
3
.3
DUAL PROGRAM: OptiMate 4 is equiped with two charging programs. Only one program can operate at a time.
Selected models of OptiMate 4 will be delivered with program 1 (STANDARD) or program 2 (CAN-bus) set as default.
Program 1 (STANDARD) is the normal charging program for direct connection to a battery in any condition. All program features are
active, including Standard, TURBO and PULSE desulfation mode.
Program 2 (CAN-bus) automatically activates a 12V outlet on vehicles fitted with CAN-bus, to charge, test and maintain the battery
when the vehicle is in storage. The standard and high voltage TURBO desulfation mode are de-activated. The low voltage PULSE
desulfation mode remains active, to recover a discharged battery that remains connected to vehicle wiring.
Program 2 can also be used to directly charge and maintain a battery in or out the vehicle, but cannot recover a sulfated battery. To
recover a sulfated battery select program 1 and follow instructions under VERY FLAT NEGLECTED BATTERIES.
Program indication when not connected to a 12V outlet or battery.
STANDARD – only the power LED#1 remains on.
CAN-bus – the POWER LED#1 remains on and DESULFATE LED#3 and CHARGE LED#4 briefly flash together at regular intervals.
To change from one program to the other:
1. Disconnect the charger from AC supply.
2. Attach the battery clip set to the charger and connect the negative clip directly to the positive clip.
3. Re-connect the charger to AC supply.
4. Observe the following LED indications:
LEDs #3,4,5,6 and 7 flash 12 times during selection of the alternate program (5x slow, 5x fast, 2x slow).
After the program change the following indications can be observed (with battery clips still connected together):
Changed from CAN-bus to STANDARD : only the POWER LED#1 remains on.
Changed from STANDARD to CAN-bus : LED #3 and LED #4 flash together at regular intervals with LED #8 immediately
following.
5. Disconnect the battery clips. OptiMate 4 is ready to charge a battery according to the selected program.
PROCEEDING TO CHARGE
POWER ON: LED #1 - Confirms AC power supply to the charger..
REVERSE POLARITY PROTECTION: LED #2 - Lights when the battery connections are incorrect. The charger is electronically
protected so no damage will result, and the output will remain disabled until the connections are corrected.
CHARGE CURRENT BAR: LED #8, 9, 10 - Light when pulsed or continuous current is delivered to the battery.
Current level indications: LED #8: 0,2A LED#8 and 9: 0,5A LED #8, 9 and 10: 0,8A
5
PROGRAM 1 - STANDARD
VERY FLAT NEGLECTED BATTERIES: If the battery is deeply discharged (and possibly sulfated), remove from the
vehicle and inspect the battery before connecting the charger for a recovery attempt.
The charger’s TURBO recovery mode cannot engage if it senses that the battery is still connected to a vehicle wiring circuit
which effectively offers a lower electrical resistance than the battery on its own. However, if the deep-discharged battery is not
removed for recovery, neither battery nor vehicle electronics will be damaged. Pay particularly close attention to the following
which is especially important for relatively small batteries such as those used on motorcycles, lawn tractors, jet-ski’s,
snowmobiles and similar: A battery left deep-discharged for an extended period may develop permanent damage in one or more
cells. Such batteries may heat up excessively during high current charging.
Monitor the battery temperature during the first hour, then hourly there-after. Check for unusual signs, such as bubbling or leaking
electrolyte, heightened activity in one cell compared to others, or hissing sounds. If at any time the battery is uncomfortably hot to
touch or you notice any unusual signs, DISCONNECT THE CHARGER IMMEDIATELY.
PRE-QUALIFICATION TEST: LEDs #5 / 6 / 7
TEST LEDs #5/6/7 indicate the condition of the battery prior to charging. Charging commences after 10 seconds.
Consult the “EARLY WARNING OF BATTERY PROBLEMS” table on page 2 (illustration 2) for TEST LED indications.
LED #7 (red) flashing: OptiMate 4 is injecting a test signal to see if the battery is recoverable. Once the indication becomes
steady for up to 10 seconds charging will commence. If flashing continues the battery cannot be successfully recovered.
RECOVERY / DESULFATE: LED #3
This mode engages if during pre-qualification LED #7 (red) or LED #6 (yellow) or both indicated. The program will
determine the correct charge mode. Charge time: Minimum 15 minutes, maximum 2 hours.
STANDARD recovery for neglected batteries - LED #3 steady on : Up to 16V is applied with current limited to
0,2A. If the battery is unable to accept a charge TURBO recovery will engage after 5 seconds. Batteries able to
accept 0,2A of charge current will advance to PULSE recovery.
TURBO recovery for very badly neglected batteries - LED #3 flashing: Output voltage increases to a maximum
of 22V with current limited to 0,2A.
PULSE recovery -final 15 minutes - LED #3 steady on: Current up to 0,8A is delivered in pulses to prepare the
battery to accept normal charge. This mode is particularly effective for recovery of factory activated /
“hi-performance” pure lead or cyclic cell AGM batteries.
CHARGE: LED #4
BULK charge - LED #4 steady on: A constant current of 0,8A up to a voltage of 14,2 -14,4V is delivered to the battery.
FINAL charge - LED #4 flashing: Pulsed absorption step: Current is delivered in pulses, varying between 0,2 and 0,8A and up to
a voltage of 14,2 - 14,4V, to bring the battery to full charge in the shortest possible time. Verification step: Once the current
demand is less than 0,2A the charging voltage is now limited at 13,6V whilst the battery's charge level is verified.
If the battery requires further charging the program will revert to pulsed absorption.
If the battery has accepted as much charge as its basic condition allows the voltage retention step follows.
NOTE: For safety reasons there is an overall charge time limit of 48 hours.
VOLTAGE RETENTION TEST: LED #5 flashing
Delivery of current to the battery is interrupted for 30 minutes to allow the program to determine the battery's ability to retain
charge. For batteries with a good state of health LED #5 (green) should continue to flash for the full 30 minute period. Consult the
“EARLY WARNING OF BATTERY PROBLEMS” table on page 2 for LED indications other than LED #5 (green).
A significant problem exists if the battery is unable to retain sufficient charge during the 30 minute test period. Read the section
NOTES ON TEST RESULTS on reasons for poor test results or how to test a battery that returns a good result but cannot deliver
sufficient power once it is returned to service.
MAINTENANCE CHARGE: LED #5 / 6 / 7 steady on
For 30 minutes the circuit offers current to the battery within a safe 13,6V voltage limit whilst the result of the voltage retention
test is displayed. Consult the “EARLY WARNING OF BATTERY PROBLEMS” table on page 2 for LED indications other than LED
#5 (green). The 30 minute float charge maintenance periods follow and alternate wih the 30 minute VOLTAGE RETENTION TEST
periods until the battery is disconnected. A more detailed description of the automatic maintenance cycle for long term battery
storage can be found under the section AUTOMATIC BATTERY MAINTENANCE.
6
PROGRAM 2 - CAN-bus
IMPORTANT: High voltage STANDARD and RECOVERY CHARGE modes are disabled. This program is designed for charging, testing
and long term maintenance of batteries mounted in vehicles fitted with CAN-bus.
RECOMMENDED: Charge through the 12V outlet with the appropriate O-2 (12V outlet connector for auto and DIN socket) or O-9
(Extended 12V DIN connector).
LED INDICATIONS BEFORE CONNECTION TO THE BATTERY:
LED #3 and 4 flashing: The program is sending a signal to detect and activate a CAN-bus controlled 12V outlet.
LED #3, 4, 5, 6 and 7 flashing: A short circuit has been detected across the output terminals, or if LED #2 (REVERSE POLARITY)
is also indicating the battery connections are incorrect. The charger is electronically protected so no damage will result, and the
output will remain disabled until the connections are corrected.
PRE-QUALIFICATION TEST: LEDs #5 / 6 / 7
TEST LEDs #5/6/7 indicate successful activation of the CAN-bus controlled 12V outlet and the condition of the battery
prior to charging. Charging commences after 10 seconds. Consult the "EARLY WARNING OF BATTERY PROBLEMS" table on
page 2 (illustration 2) for TEST LED indications.
NOTE: Non activation may be due to one of the following: Program 1 is selected / Poor connection to the 12V outlet / Battery too
low to power CAN-bus / Outdated CAN-bus programming on the vehicle - consult with the vehicle manufacturer.
RECOVERY / DESULPHATE: LED #3
This mode engages if during pre-qualification LED #7 (red) or LED #6 (yellow) or both indicated. The CAN-bus
program can only select low voltage PULSE recovery mode. Charge time: 15 minutes.
PULSE recovery - LED #3 steady on: Current up to 0,8A is delivered in pulses to prepare the battery to accept full
current charge.
CHARGE: LED #4
BULK charge - LED #4 steady on: A constant current of 0,8A up to a voltage of 14,2 -14,4V is delivered to the battery.
FINAL charge - LED #4 flashing: Pulsed absorption step: Current is delivered in pulses, varying between 0,2 and 0,8A and up to
a voltage of 14,2 - 14,4V, to bring the battery to full charge in the shortest possible time. Verification step: Once the current
demand is less than 0,2A the charging voltage is now limited at 13,6V whilst the battery's charge level is verified.
If the battery requires further charging the program will revert to pulsed absorption.
If the battery has accepted as much charge as its basic condition allows the voltage retention step follows.
NOTE 1: The program automatically resets 2 minutes after manual disconnection or if the CAN-bus system has de-activated the
controlled 12V outlet and the program could not re-activate the outlet within 2 minutes.
NOTE 2: For safety reasons there is an overall charge time limit of 48 hours.
VOLTAGE RETENTION TEST: LED #5 flashing
Delivery of current to the battery is interrupted for 30 minutes to determine the battery's ability to retain charge. This will prompt
the CAN-bus system to disable the 12V outlet within it's own set time limit, disconnecting the battery from the charger. At the
conclusion of the test period the program will once again initialize the CAN-bus controlled 12V outlet to measure the battery's
voltage and then proceed to MAINTENANCE CHARGE during which the result of the test is displayed.
Consult the “EARLY WARNING OF BATTERY PROBLEMS” table on page 2 for LED indications. Read the section NOTES ON TEST
RESULTS on reasons for poor test results or how to test a battery that returns a good result but cannot deliver sufficient power
once it is returned to service. NOTE: If during the test the charger is manually disconnected from the 12V outlet or battery it will
not automatically reset until the end of the test period.
MAINTENANCE CHARGE: LED #5 / 6 / 7 steady on
For 30 minutes the circuit offers current to the battery within a safe 13,6V voltage limit whilst the result of the voltage retention
test is displayed. The 30 minute float charge maintenance periods follow and alternate wih the 30 minute VOLTAGE RETENTION
TEST periods until the battery is disconnected. A more detailed description of the automatic maintenance cycle for long term
battery storage can be found under the section AUTOMATIC BATTERY MAINTENANCE.
NOTE 1: The program automatically resets 2 minutes after manual disconnection or if the CAN-bus system has de-activated the
controlled 12V outlet and the program could not re-activate the outlet within 2 minutes.
7
NOTES ON TEST RESULTS:
1. For any test result other than green #5, disconnect the battery from the electrical system it supports, and reconnect the OptiMate.
If a better test result is now obtained, this suggests that the power losses are partly due to an electrical problem in the electrical
system and not in the battery itself. If the poor result persists, you are advised to take the battery to a professional service workshop
equipped with professional equipment for a more thorough investigation.
2. During the maintenance charge cycle the TEST result will continue to be displayed until the TEST and MAINTENANCE cycle is
repeated. If the decline in voltage resulted from a current drain out of the battery which was only of a temporary nature, the LED
indication can revert to a better level.
3. If the red LED #7 alone, or the yellow #6 and red LED #7 indicate together, a significant problem exists. The red / yellow+red LEDs
(or yellow LED alone for a sealed battery) mean that after being charged the battery’s voltage is not being sustained or that despite
recovery attempts the battery was irrecoverable. This may be due to a defect in the battery itself, such as a short-circuited cell or
total sulphation, or, in the case of a battery still connected to the electrical system it supports, the red LED #7 may be signalling a
loss of current through deteriorated wiring or a degraded switch or contact, or in-circuit current-consuming accessories. A sudden
load such as vehicle headlights being switched on while the charger is connected can also cause the battery voltage to dip
significantly.
4. GOOD TEST RESULT, but the battery cannot deliver sufficient power: Permanent damage within the battery may be causing
excessive self discharge (caused by the battery itself, even a partly damaged battery may initially retain sufficient power, but lose
power faster than normal there-after). Disconnect the battery from the OptiMate. After at least 12 hours reconnect and observe the
TEST result during the PRE-QUALIFICATION TEST.
AUTOMATIC BATTERY MAINTENANCE: The MAINTENANCE CHARGE CYCLE consists of 30 minute float charge periods
followed by and alternating with a 30 minute ‘rest’ periods, during which there is no charge current. This “50% duty cycle” prevents
loss of electrolyte in sealed batteries and minimizes gradual loss of water from the electrolyte in batteries with filler caps, and
thereby contributes significantly to optimizing the service life of irregularly or seasonally used batteries. The circuit offers current to
the battery within a safe 13,6V voltage limit (“float charge”), allowing it to draw whatever small current is necessary to sustain it at
(or close to) full charge and compensate for any small electrical loads imposed by vehicle accessories or on-board computer, or the
natural gradual self-discharge of the battery itself.
Maintaining a battery for extended periods: The OptiMate will maintain a battery whos basic condition is good, for months
at a time. At least once every two weeks, check that the connections between the charger and battery are secure, and, in the case of
batteries with filler caps on each cell, disconnect the battery from the charger, check the level of the electrolyte and if necessary, top
up the cells (with distilled water, NOT acid), then reconnect. When handling batteries or in their vicinity, always take care to
observe the SAFETY WARNINGS above.
Charging time
The minimum time required for the OptiMate 4 to complete a charge and test cycle and provide a result, even on a fully charged
battery, is 45 minutes. Charge time on a flat but otherwise undamaged battery is roughly equal to the battery’s Ah rating, so a 20Ah
battery should take no more than about 20 hours to progress to the self-discharge check (§ 5). Deep-discharged batteries may take
significantly longer.
If using the OptiMate 4 on a severely discharged automobile battery of larger capacity, a full charge may not be achieved within the
48 hour charge safety limit. In this case follow the reset procedure below.
Resetting the charge or test cycle
Disconnect from the AC mains. Wait for the POWER ON LED #1 to go out. Upon reconnection to AC power all LEDs except #1,2, 8, 9
and 10 will flash twice to confirm micro processor health, irrespective if the charger remains connected to a battery or not.
LIMITED WARRANTY
TecMate (International) SA, Sint-Truidensesteenweg 252, B-3300 Tienen, Belgium, makes this limited warranty to the original
purchaser at retail of this product. This limited warranty is not transferable. TecMate (International) warrants this battery
charger for three years from date of purchase at retail against defective material or workmanship. If such should occur the unit
will be repaired or replaced at the option of the manufacturer. It is the obligation of the purchaser to forward the unit together
with proof of purchase (see NOTE), transportation or mailing costs prepaid, to the manufacturer or its authorized representative.
This limited warranty is void if the product is misused, subjected to careless handling, or repaired by anyone other than the
factory or its authorized representative. The manufacturer makes no warranty other than this limited warranty and expressly
excludes any implied warranty including any warranty for consequential damages.
THIS IS THE ONLY EXPRESS LIMITED WARRANTY AND THE MANUFACTURER NEITHER ASSUMES NOR AUTHORIZES ANYONE TO
ASSUME OR MAKE ANY OTHER OBLIGATION TOWARDS THE PRODUCT OTHER THAN THIS EXPRESS LIMITED WARRANTY. YOUR
STATUTORY RIGHTS ARE NOT AFFECTED.
NOTE: Details at www.tecmate.com/warranty.
copyright © 2012 TecMate International
OptiMate 4 and the names of other battery care products mentioned in these instructions such as BatteryMate, TestMateand
TestMate mini, are registered trademarks of TecMate International NV.
WARRANTY in Canada, USA, Central America and South America:
TecMate North America, Oakville, ON, Canada, as a wholy owned subsidiary of TecMate International, assumes the
responsibility for product warranty in these regions.
More information on TecMate products can be found at www.tecmate.com.
8
CHARGEUR AUTOMATIQUE À FONCTION DIAGNOSTIC POUR BATTERIES
PLOMB-ACIDE À PARTIR DE 3Ah - 50Ah, COMME CELLES DES :
NE CONVIENT PAS POUR LES BATTERIES NiCd, NiMH, Li-Ion OU NON RECHARGEABLES.
Entrée : 220-240V maximum 0,095A. Le courant de sortie maxi est 0,8A.
IMPORTANT : LIRE ENTIÈREMENT LES INSTRUCTIONS SUIVANTES
AVANT D’UTILISER LE CHARGEUR
Cet appareil n'est pas destiné à être utilisé par des personnes (y compris des enfants) possédant des
capacités physiques, sensorielles ou mentales réduites, ou manquant d'expérience et de connaissance,
sauf si elles bénéficient d'une surveillance ou ont reçu des instructions concernant l'utilisation de
l'appareil d'une personne responsable de leur sécurité. Les enfants doivent faire l'objet d'une surveillance
pour s'assurer qu'ils ne jouent pas avec l'appareil.
AVERTISSEMENT DE SÉCURITÉ et REMARQUES: Les batteries émettent des GAZ EXPLOSIFS - il faut interdire les
flammes ou les étincelles à proximité.
Avant d’établir ou de rompre les connexions de courant continu à la batterie, déconnecter l’alimentation secteur. L’acide des
batteries est un puissant corrosif. Porter des vêtements et lunettes protecteurs et éviter tout contact. En cas de contact accidentel,
laver immédiatement à l’eau et au savon. S’assurer que les bornes des batteries ne sont pas branlantes ; le cas échéant la batterie
doit subir une évaluation professionnelle. Si les bornes sont corrodées, nettoyer à l’aide d’une brosse de cuivre ; s’ils sont gras ou
sales, nettoyer à l’aide d’un torchon trempé dans du détergent. Utiliser uniquement le chargeur si les câbles et connecteurs d’entrée
et de sortie sont en bon état et non endommagés. Si le câble d’entrée est endommagé, il est essentiel de le faire remplacer par le
constructeur, son agent de service autorisé ou un atelier qualifié, pour éviter tout danger. Protéger le chargeur contre les acides et
fumées acides, l’humidité et un environnement humide, aussi bien durant l’usage que l’entreposage. Les dégâts résultant de la
corrosion, de l’oxydation ou de courts-circuits internes ne sont pas couverts par la garantie. Durant le chargement, éloigner le
chargeur de la batterie pour éviter la contamination par l’acide ou les vapeurs acides ou l’exposition à ceux-ci. En cas d’utilisation
horizontale, placer le chargeur sur une surface dure et plane, PAS en plastique, tissu ou cuir. Utiliser les trous de fixation de la base
pour fixer le chargeur sur toute surface verticale appropriée et solide.
EXPOSITION AUX LIQUIDES : Ce chargeur est conçu pour résister à l’exposition aux liquides qui tomberaient accidentellement
sur le boîtier, ou à une pluie légère. Une exposition prolongée à des liquides tombants ou à la pluie est à déconseiller. Une durée de
vie supérieure résultera d’une telle précaution. Une panne due à l’oxydation résultant d’une pénétration de liquide dans les
composants électroniques,bloc connecteurs ou fiches,ne sera pas couverte par la garantie.
CONNEXIONS DE BATTERIE : l’appareil est livré avec deux jeux de connexion interchangeables, l’un muni de pinces crocodiles
pour le chargement de batteries hors véhicule, l’autre, optionnel, disposant de cosses à œillets pour la connexion permanente aux
bornes de batterie, ainsi qu’un capuchon intempérisé réouvrable sur le connecteur relié au chargeur. Ce jeu de connexion permet la
connexion sûre et facile du chargeur à la batterie sur véhicule. Le capuchon intempérisé réouvrable est conçu pour protéger le
connecteur contre la saleté et l’humidité lorsque le chargeur n’est pas connecté. Consulter un agent de service professionnel pour
toute assistance à la connexion des œillets métalliques aux bornes de batterie. Assurer le connecteur avec le capuchon intempérisé
de manière à ce qu’il ne puisse gêner aucune pièce mobile du véhicule et pour éviter le pincement du câble ou son
endommagement par des bords tranchants. Le fusible en ligne du jeu de connecteurs à œillets protège la batterie contre le
court-circuitage accidentel des pôles positif et négatif. Remplacer un fusible sauté uniquement par un autre similaire de 15A.
BRANCHEMENT DU CHARGEUR A LA BATTERIE
1. Débranchez l'alimentation secteur avant d'effectuer un branchement CC/batterie ou de le débrancher.
2. Si vous chargez une batterie installée dans le véhicule avec les pinces pour batterie, avant les branchements, vérifiez d'abord
que les pinces pour batterie peuvent être positionnées en toute sécurité loin du câblage voisin, d'un tube métallique ou du
châssis. Respectez l'ordre qui suit : branchez d'abord la borne de la batterie non raccordée au châssis (normalement positive)
puis, branchez l'autre pince pour batterie (normalement négative) au châssis à un endroit bien éloigné de la batterie et du
conduit de carburant. Débranchez toujours dans l'ordre inverse.
3. Lorsque vous chargez une batterie hors du véhicule avec les pinces pour batterie, placez-la dans un endroit bien ventilé.
Branchez le chargeur à la batterie : La pince ROUGE sur la borne POSITIVE (POS, P ou +) et la pince NOIRE sur la borne
NÉGATIVE (NEG, N ou –).Vérifiez que les branchements sont bien fixés. Un bon contact est important.
4. Si la batterie est complètement déchargée (et probablement sulfatée), retirez-la du véhicule et inspectez la batterie
avant de brancher le chargeur pour une tentative de récupération. Vérifiez visuellement la batterie à la recherche de
défauts mécaniques tels qu'un gonflement ou un boîtier craquelé ou encore de signes de fuite d'électrolyte. Si la batterie
présente des bouchons de remplissage et que les plaques des cellules sont visibles de l'extérieur, examinez soigneusement la
batterie pour tenter de déterminer si certaines cellules semblent différentes des autres (par exemple, de la matière blanche
entre les plaques, les plaques qui entrent en contact). Si vous avez détecté des défauts mécaniques, ne chargez pas la batterie
et faites-la examiner par un professionnel.
5. Si la batterie est neuve, avant de brancher le chargeur, lisez attentivement les instructions d'utilisation et de sécurité fournies
par le fabricant de la batterie. Si besoin est, suivez attentivement et exactement les instructions relatives au remplissage de
l'acide.
SÉCURITÉ
9
UTILISATION DE L’OPTIMATE 4
T
E
S
T
0.8
0.5
0.2
AMPS
T
E
T
T
S
E
E
T
0.8
0
.
5
0.
2
AMP
S
8
8
A
A
A
A
A
A
77
10
9
8
3.1
3.2
4.1
4.2
66
55
2
1
3.3
PROGRAMME DOUBLE: OptiMate 4 est doté de deux programmes de charge. Un seul programme à la fois
peut être lancé. Selon le modèle, OptiMate 4 sera livré avec le programme 1 (STANDARD) ou le programme 2 (CAN-bus)
sélectionné par défaut.
Programme 1 (STANDARD) est le programme de charge normal pour une connexion directe à la batterie en toute condition.
Toutes les fonctionnalités du programme sont actives, y compris les modes de désulfatation Standard, TURBO et
IMPULSION.
Programme 2 (CAN-bus) active automatiquement une sortie 12 V sur les véhicules équipés de CAN-bus, pour charger, tester
et maintenir la batterie lorsque le véhicule n’est pas utilisé. Les modes de désulfatation TURBO standard et haut voltage sont
désactivés. Le mode de désulfatation par impulsions à bas voltage reste actif, pour récupérer une batterie déchargée qui
reste connectée aux câbles du véhicule.
Le programme 2 peut aussi être utilisé pour charger et maintenir directement une batterie à l'intérieur ou à l'extérieur du
véhicule, mais ne peut récupérer une batterie sulfatée. Pour récupérer une batterie sulfatée, sélectionnez le programme 1 et
suivez les instructions sous BATTERIES DÉGRADÉES TRÈS FAIBLES.
Indication de Programme lorsque non connecté à une sortie 12 V ou une batterie:
STANDARD - seule l’alimentation de LED#1 est maintenue.
CAN-bus - la LED#1 POWER (ALIMENTATION) reste allumée, la LED#3 DÉSULFATER et la LED#4 CHARGE clignotent ensemble à
intervalles réguliers.
Pour passer d’un programme à l’autre:
1. Déconnectez le chargeur de la prise CA.
2. Connectez le set de pinces au chargeur et connectez la pince négative directement sur la pince positive.
3. Rebranchez le chargeur sur la prise CA.
4. Observez les indications suivantes :
LED#3+4+5+6+7 clignotent 12 fois pendant la sélection du programme alterné (5 x long, 5 x court, 2 x long).
Après le changement de programme les indications suivantes peuvent survenir (avec les pinces de batterie toujours connectées
entre elles):
Passage de CAN-bus à STANDARD : seule la LED#1 POWER (alimentation) est maintenue.
Passage de STANDARD à CAN-bus : LED#3 et LED#4 clignotent ensemble à intervalles réguliers, la LED#8 se mettant à
clignoter juste après.
5. Déconnectez les pinces. OptiMate 4 est prêt à charger une batterie selon le programme sélectionné
COMMENCER LA CHARGE
MARCHE : LED#1 - Confirme la présence d’alimentation AC vers le chargeur.
PROTECTION POLARITÉ INVERSE : LED #2 - s’allume lorsque les connexions à la batterie sont erronnées. Le
chargeur bénéficie d’une protection électronique évitant l’endommagement, il n’y a aucun courant de sortie aussi longtemps que les
connexions ne sont pas corrigées.
INDICQTIONS DE COURANT DE CHARGE : LED #8, 9, 10 - s’allument lorsque du courant est délivré à la batterie par
impulsion ou en continu. Indications du niveau d’alimentation : LED #8 : 0,2A LED #8+9 : 0,5A LED #8+9+10 : 0,8A
10
PROGRAMME 1 - STANDARD
BATTERIES DÉGRADÉES ET TRÈS FAIBLES: Si la batterie est complètement déchargée (et peut être même sulfatée),
retirez-la du véhicule et examinez-la avant de la connecter au chargeur pour une tentative de récupération.
Le mode récupération TURBO du chargeur ne peut pas s’engager s’il capte une connexion entre la batterie et le circuit
câblé du véhicule ce qui permet une résistance électrique plus faible qu’avec la batterie seule. Cependant, si la batterie
complètement déchargée n’est pas retirée pour récupération, ni la batterie, ni le véhicule ne seront endommagés. Tenir
spécialement compte de ce qui suit, surtout pour les batteries relativement petites comme celles des motos,
tracteur-tondeuses, jet ski, motoneiges et similaires: Les cellules d’une batterie restée en décharge profonde durant une
longue période peuvent être endommagées à titre permanent. Ces batteries peuvent chauffer excessivement durant la charge à
courant élevé.
Vérifier la température de la batterie durant la première heure, puis chaque heure suivante. Vérifier la présence de signes inhabituels
comme des bulles ou fuites d’électrolyte, une activité plus importante d’une cellule par rapport aux autres, ou des sifflements. Si à
un moment quelconque, la batterie devient trop chaude au toucher ou si vous constatez des signes inhabituels, DÉCONNECTER
IMMÉDIATEMENT LE CHARGEUR.
TEST DE PRÉ-QUALIFICATION : LED #5 / 6 / 7
LES LED DE TEST #5/6/7 indiquent l'état de la batterie avant de commencer à recharger. La charge commence au bout
de 10 secondes. Consultez le tableau «AVERTISSEMENTS ANTICIPÉS DES PROBLÈMES DE BATTERIE» en page 2 (illustration
2) pour les indications des LED TEST.
LED #7 (rouge) clignotante : OptiMate 4 envoie un signal test pour vérifi er si la batterie est récupérable. Dès que les indications
sont stables pendant 10 secondes, la charge commence. Si le clignotement continue, la récupération de la batterie échouera.
RÉCUPÉRATION/DÉSULFATATION : LED #3
Ce mode se déclenche si pendant la pré-qualification LED #7 (rouge) ou LED #6 (jaune) donnaient un signal. Le
programme va déterminer le bon mode de charge. Temps de charge : minimum 15 minutes, maximum 2 heures.
Récupération STANDARD pour batteries dégradées - LED #3 fixe : Jusqu’à 16 V sont applicables avec un
courant limité à 0,2A. Si la batterie ne peut pas recevoir la charge, la récupération TURBO se déclenche au bout de
5 secondes. Les batteries pouvant accepter 0,2 A de charge électrique iront vers une récupération par IMPULSION.
La récupération TURBO pour des batteries en très mauvais état - LED #7 clignotante : le voltage du débit
augmente jusqu’au maximum de 22 V avec un courant limité à 0,2 A.
La récupération IMPULSION - 15 dernières minutes - LED #3 fi xe : le courant qui va jusqu’à 0,8 A est envoyé
par impulsions pour préparer la batterie à recevoir la charge.
CHARGE : LED #4
Charge PRINCIPALE - LED #4 fixe : un courant de charge constant de 0,8 A jusqu’à 14,2 - 14,4 V est délivré à la batterie.
Charge FINALE - LED #4 clignotante : étape d’absorption par impulsion : le courant passe par impulsion, variant de 0,2 et 0,8 A
jusqu’au voltage de 14,2 - 14,4 V, pour amener la batterie à une charge complète en un temps minimum. Étape de vérification :
lorsque la demande effective est inférieure à 0,2 A, le voltage de charge est alors limité à 13,6 V tandis que le niveau de charge
de la batterie est vérifié.
Si la batterie nécessite plus de charge, le programme passera à l'absorption par impulsion.
Si la batterie a accepté autant de charge que son état initial le permet, le programme passe à l'étape de rétention de voltage
suivante.
REMARQUE : pour des raisons de sécurité, il y a une limite de charge absolue de 48 heures.
TEST DE RÉTENTION DE VOLTAGE : LED #5 clignotante
L'arrivée du courant dans la batterie est interrompue pendant 30 minutes pour permettre au programme de déterminer la
capacité de la batterie à retenir la charge. Pour des batteries en bon état, LED #5 (verte) devrait continuer à clignoter pendant
toute la période des 30 minutes. Consultez le tableau «AVERTISSEMENT ANTICIPÉ DES PROBLÈMES DE BATTERIE» page 2
pour les indications des LED autres que LED #5 (verte). Un problème significatif existe si la batterie est incapable de retenir
suffisamment de charge pendant le test de 30 minutes. Lisez le chapitre REMARQUES SUR LES RÉSULTATS DES TESTS
concernant les raisons des mauvais tests ou comment tester une batterie qui renvoie un bon résultat au test, mais qui ne peut
fournir assez de puissance lors de sa remise en service.
CHARGE DE MAINTENANCE : LED #5 / 6 / 7 fixes
Pendant 30 minutes, le circuit donne du courant à la batterie avec une limite raisonnable de 13,6 V alors que le résultat du test
de rétention de voltage est affiché. Consultez le tableau «AVERTISSEMENT ANTICIPÉ DES PROBLÈMES DE BATTERIE» page 2
pour les indications des LED autres que LED #5 (verte). Les périodes de charge de maintien de 30 minutes alternent avec des
périodes de test de RÉTENTION DE VOLTAGE jusqu'à déconnexion de la batterie. Une description plus détaillée du cycle de
maintenance automatique pour le stockage à long terme de la batterie se trouve sous le chapitre MAINTENANCE AUTOMATIQUE
DE LA BATTERIE.
13
SEGURIDAD
CARGADOR DE DIAGNÓSTICO AUTOMÁTICO PARA BATERÍAS PLOMO-
ÁCIDO DE 12 V A PARTIR DE 3Ah - 50Ah ENCONTRADAS EN:
NO UTILIZAR CON BATERÍAS DE NiCd, NiMH, Li-Ion O BATERÍAS NO RECARGABLES.
Entrada: 220-240V máximo 0,095A. La corriente máxima de salida está 0,8A.
IMPORTANTE: LEA COMPLETAMENTE LAS SIGUIENTES INSTRUCCIONES ANTES DE UTILIZAR
EL CARGADOR
Este aparato no puede ser utilizado por que lo utilicen personas (incluidos niños) con capacidades físicas,
sensoriales o mentales disminuidas, o bien con falta de experiencia y conocimientos, a menos que una
persona responsable de su seguridad las supervise o les dé instrucciones sobre el uso del aparato. Es
necesario supervisar a los niños para asegurarse de que no juegan con el aparato.
AVISOS Y PRECAUCIONES DE SEGURIDAD: Las baterías emiten GASES EXPLOSIVOS, evite la posibilidad de llamas o
chispas cerca de las baterías. Desconecte de la red CA antes de realizar o deshacer conexiones en la batería. El ácido de la
batería es altamente corrosivo. Utilice ropa y gafas de protección y evite el contacto con el ácido. En caso de contacto accidental,
enjuague inmediatamente la zona afectada con agua y jabón. Compruebe que los polos de la batería no estén sueltos, y si lo están,
lleve la batería a un servicio técnico. Si los bornes presentan corrosión, límpielos con un cepillo de hilo de cobre, y si presentan
grasa o suciedad, límpielos con un trapo humedecido en detergente. Utilice el cargador solamente si los cables y conectores de
entrada y salida se encuentran en buenas condiciones y sin daños. Si el cable de entrada está dañado, es fundamental que el
fabricante, el servicio técnico autorizado o un taller capacitado lo sustituyan sin demora para evitar riesgos. Proteja el cargador del
ácido y de las emisiones de gases de ácido y de ambientes húmedos o superficies mojadas durante su utilización y
almacenamiento. La garantía no cubre daños derivados de la corrosión, oxidación o cortocircuitos eléctricos internos. Coloque el
cargador a una distancia adecuada de la batería durante la recarga para evitar la contaminación o la exposición al ácido o vapores
de ácido. Si se utiliza en posición horizontal, coloque el cargador en una superficie dura y plana, PERO NUNCA sobre plástico, tela o
piel. Utilice los orificios de fijación de la base de la carcasa para fijar el cargador en una superficie cómoda y totalmente horizontal.
EXPOSICIÓN A LÍQUIDOS: Este cargador fue desarrollado para resistir a líquidos que hubieran sido derramados de form
accidental o a intemperies ligeras. No obstante, no se recomiendan las exposiciones prolongadas, que podrían menguar la duración
de vida del cargador. Los desgastes, resultado de la oxidación debida al ataque eventual de líquidos en los componentes
electrónicos, los conectadores o enchufes no se cubren por la garantía.
CONEXIONES DE BATERÍA: Hay 2 juegos de conectores intercambiables. Se suministran con el cargador un juego de pinzas de
batería para recargarla fuera del vehículo, y un juego de conexión opcional que comporta unos orificios metálicos que se conecatan
permanentemente a los bornes de la batería. Hay una tapa impermeable que protege la otra extremidad del conector. Este tipo de
conector permite una conexión fácil y segura al cargador sin tener que sacar la batería del vehículo. La tapa impermeable está
diseñada para proteger el conector de la suciedad y la humedad cuando el cargador no esté conectado. Pregunte a un mecánico
profesional antes de conectar el conector con orificios a los bornes de la batería. Asegure los los conectores para evitar que se
enganchen con alguna pieza móvil del vehículo o estropeen o dañen algún cable con los bordes afilados. El fusible en línea del juego
de conectores con orifi cios protege la batería contra loscortocircuitos accidentales entre los conductores positivo y negativo.
Sustituya los fusibles quemados con un fusible nuevo similar de 15 A.
CONEXIÓN DEL CARGADOR A LA BATERÍA
1. Desconecte la alimentación CA antes de efectuar o deshacer las conexiones en la batería.
2. Si se va a cargar una batería montada en el vehículo con las pinzas, compruebe primero que las pinzas se pueden colocar de
forma segura y correcta, lejos del cableado, los tubos metálicos o del chasis, antes de efectuar las conexiones. Realice las
conexiones en este orden: realice primero la conexión al terminal de la batería que no está conectado con el chasis
(normalmente positivo), luego conecte la otra pinza de batería (normalmente negativa) al bastidor a una distancia sufi ciente de
la batería y de la tubería de combustible. Desconecte siempre realizando los pasos anteriores en orden inverso.
3. Cuando cargue una batería fuera del vehículo con las pinzas, colóquela en un lugar bien ventilado. Conecte el cargador a la
batería: pinza ROJA con el terminal POSITIVO (POS, P o +) y pinza NEGRA con el terminal NEGATIVO (NEG, N o –). Asegúrese de
que las conexiones son firmes y seguras. Es importante que hagan bien contacto.
4. Si la batería está excesivamente descargada (y posiblemente sulfatada), retírela del vehículo e inspecciónela antes de
conectar el cargador para intentar recuperarla. Examine visualmente la batería en busca de desperfectos mecánicos, como
combas o fisuras en la carcasa, o indicios de fugas de electrólito. Si la batería tiene tapones de llenado y se pueden ver desde
fuera las placas del interior de las células, examine detenidamente la batería para comprobar si hay células que parezcan
distintas de las demás (por ejemplo, con materia blanca entre las placas o placas en contacto). Si se han detectado
desperfectos mecánicos, no intente cargar la batería, encargue su evaluación a personal cualificado.
5. Si la batería es nueva, lea atentamente las instrucciones de seguridad y uso del fabricante de la misma antes de conectar el
cargador. En su caso, siga estrictamente las instrucciones de llenado de ácido.
14
UTILIZAR EL OPTIMATE 4 DUAL
T
E
S
T
0.8
0.5
0.2
AMPS
T
E
T
T
S
E
E
T
0.8
0
.
5
0.2
AMP
S
8
8
A
A
A
A
A
A
77
10
9
8
3.1
3.2
4.1
4.2
66
55
2
1
3.3
PROGRAMA DUAL: OptiMate 4 está equipado con dos programas de carga. Solo puede utilizarse un programa a la
vuelta. El OptiMate 4 DUAL incluye el programa 1 (ESTÁNDAR) y el programa 2 (CAN-bus). El programa 1 esta preseleccionado por
defecto.
Programa 1 (ESTÁNDAR) es el programa normal de carga para la conexión directa a una batería, cual que sea su estado. Todas
las funciones del programa están activas, incluidos los modos de desulfatación Estándar, TURBO y POR IMPULSOS.
Programa 2 (CAN-bus) activa automáticamente una salida de 12V en vehículos equipados con CAN-bus para cargar, probar y
mantener la batería, cuando el vehículo está almacenado. El modo de desulfatación estándar y el TURBO de alta tensión están
desactivados. El modo de desulfatación POR IMPULSOS de baja tensión permanece activo para recuperar una batería descargada
que sigue conectada al cableado del vehículo.
El programa 2 también puede usarse directamente y mantener una batería dentro o fuera del vehículo, pero no puede recuperar una
batería sulfatada. Para recuperar una batería sulfatada, seleccione el programa 1 y siga las instrucciones en BATERÍAS
INUTILIZADAS MUY DESCARGADAS.
Señalización del programa, cuando no está conectadO a una salida de 12V o a una batería.
ESTÁNDAR: solo se mantiene encendido el LED #1 de alimentación.
CAN-bus: el LED #1 DE ALIMENTACIÓN permanece encendido, mientras que el LED #3 DE DESULFATACIÓN y el LED #4 DE CARGA
parpadean brevemente al mismo tiempo a intervalos periódicos.
Para cambiar de un programa al otro:
1. Desconecte el cargador de la red CA.
2. Fije las pinzas entre ellas, creando un contacto directo entre la positiva y la negativa.
3. Conecte de nuevo el cargador a la toma CA.
4. Observe las siguientes indicaciones LED:
Los LED #3, 4, 5, 6 y 7 parpadean 12 veces durante la selección del programa alterno (5 lento, 5 rápido, 2 lento).
Una vez que se ha cambiado el programa, pueden observarse las siguientes indicaciones (con los clips de la batería todavía
conectados):
Cambio de CAN-bus hacia ESTÁNDAR: solo sigue encendido el LED #1 DE POTENCIA.
Cambio de ESTÁNDAR a CAN-bus: los LED #3 y #4 parpadean conjuntamente a intervalos periódicos, seguidos inmediatamente
del LED #8.
5. Desconecte los clips de la batería. OptiMate 4 está listo para cargar una batería según el programa seleccionado.
INICIAR LA CARGA
POTENCIA ACTIVADA (LED #1): Este LED confirma la alimentación AC hacia el cargador.
PROTECCIÓN DE POLARIDAD INVERTIDA (LED #2): Se enciende cuando las conexiones de la batería son incorrectas. El
cargador cuenta con una protección electrónica, por lo tanto no se producirá ningún daño, y la corriente de salida permanecerá
desactivada hasta que se corrijan las conexiones.
BARRA DE CORRIENTE DE CARGA (LED #8, 9 y 10): Se iluminan cuando se suministra corriente pulsada o continua a la
batería.
Indicaciones del nivel de corriente: LED #8: 0,2A LED #8 y 9: 0,5A LED #8, 9 y 10: 0,8A
15
PROGRAMA 1: ESTÁNDAR
BATERÍAS INUTILIZADAS O MUY DESCARGADAS: Si la batería está excesivamente descargada (y posiblemente
sulfatada), retírela del vehículo e inspecciónela antes de conectar el cargador para intentar recuperarla.
El modo de recuperación TURBO del cargador no puede activarse si detecta que la batería está todavía conectada a un
circuito de cableado del vehículo, que ofrece de forma efectiva una resistencia eléctrica inferior a la batería misma. Sin
embargo, si la batería muy descargada no se retira para su recuperación, no se dañará ni la batería ni la electrónica del
vehículo. Preste especial atención a los siguientes puntos, que son especialmente importantes en el caso de baterías
relativamente pequeñas, como pueden ser de motocicletas, tractores de jardín, motos de agua, motos de nieve y similares:
Una batería que haya permanecido descargada durante un periodo largo puede desarrollar daños permanentes en una o más
células. Esas baterías pueden calentarse en exceso durante la fase de alta tensión. Pare inmediatamente la carga de la batería si
está demasiado caliente al tacto.
Controle la temperatura de la batería durante la primera hora, a partir de entonces, contrólela cada hora. Permanezca atento a
señales inusuales, como pueden ser el burbujeo o la fuga de electrolito, una mayor actividad en una célula en comparación con las
otras o sonidos silbantes. Si en cualquier momento la batería está demasiado caliente o nota cualquier señal que no sea normal,
DESCONECTE EL CARGADOR INMEDIATAMENTE.
PRUEBA DE PRECUALIFICACIÓN: LED #5, 6 y 7
Los LED DE PRUEBA #5, 6 y 7 indican el estado de la batería antes de cargarla. La carga comienza transcurridos 10 segundos.
Consulte la tabla de «ADVERTENCIA PRECOZ DE PROBLEMAS CON LA BATERÍA» de la página 2 (ilustración 2) para averiguar
las indicaciones del LED DE PRUEBA.
El LED #7 (rojo) parpadea:
OptiMate 4 está enviando una señal de prueba para ver si la batería es recuperable. Una vez que la señal
se mantiene hasta 10 segundos comenzará la carga. Si el parpadeo continúa, la batería no puede recuperarse satisfactoriamente.
RECUPERACIÓN / DESULFATACIÓN: LED #3
Este modo se activa si durante la precualificación el LED #7 (rojo) o el LED #6 (amarillo) o ambos se iluminan. El
programa determinará el modo de carga adecuado. Tiempo de carga: mínimo 15 minutos, máximo 2 horas.
Recuperación ESTÁNDAR para baterías inutilizadas (LED #3 fijo): se aplican hasta 16V, limitándose la corriente
a 0,2A. Si la batería no puede aceptar una carga, la recuperación TURBO se activará tras 5 segundos. Las baterías
que pueden aceptar 0,2A de corriente de carga pasarán a la recuperación POR IMPULSOS.
Recuperación TURBO para baterías descuidadas (LED #3 parpadea): la tensión de salida aumenta a un
máximo de 22V, con la corriente limitada a 0,2A.
Recuperación POR IMPULSOS (últimos 15 minutos, LED #3 fijo): se suministra hasta 0,8A de corriente por
impulsos para preparar a la batería a que acepte una carga normal. Este modo es especialmente eficaz para la
recuperación de baterías activadas de fábrica / baterías «de alto rendimiento» de plomo puro o baterías AGM con
células cíclicas.
CARGA: LED #4
Carga PRINCIPAL (LED #4 fijo): se suministra a la batería una corriente constante de 0,8A hasta una tensión de 14,2-14,4V.
Carga FINAL (LED #4 parpadea):
etapa de absorción pulsada; la corriente se suministra por impulsos, variando entre 0,2 y 0,8A y
hasta una tensión de 14,2-14,4V, para cargar por completo la batería en el menor tiempo posible. Etapa de verificación: una vez que
la petición de corriente es inferior a 0,2A la tensión de carga se limita a 13,6V, mientras se verifica el nivel de carga de la batería.
Si la batería necesita más carga, el programa volverá a la absorción pulsada.
Si la batería ha aceptado tanta carga como su estado básico permite, se procederá con el paso de retención de tensión.
OBSERVACIÓN: por razones de seguridad hay un límite temporal de carga general de 48 horas.
PRUEBA DE RETENCIÓN DE TENSIÓN: LED #5 parpadea
El suministro de corriente a la batería se interrumpe durante 30 minutos para permitir que el programa determine la capacidad
de la batería de retener la carga. Para las baterías en buen estado, el LED #5 (verde) debería seguir parpadeando durante el
período completo de 30 minutos. Consulte la tabla «ADVERTENCIA PRECOZ DE PROBLEMAS CON LA BATERÍA» de la página 2
para averiguar las indicaciones de LED distintas del LED #5 (verde). Existe un problema importante si la batería no puede retener
suficiente carga durante el período de prueba de 30 minutos. Lea el apartado OBSERVACIONES SOBRE LOS RESULTADOS DE LA
PRUEBA para averiguar las razones de resultados de pruebas deficientes o cómo probar una batería que ofrece un buen
resultado, pero no puede suministrar suficiente potencia una vez que está de nuevo operativa.
CARGA DE MANTENIMIENTO: LED #5, 6 y 7 fijos
Durante 30 minutos, el circuito suministra corriente a la batería dentro de un límite de tensión seguro de 13,6V, mientras se
muestra el resultado de la prueba de retención de tensión. Consulte la tabla «ADVERTENCIA PRECOZ DE PROBLEMAS CON LA
BATERÍA» de la página 2 para averiguar las indicaciones de LED distintas del LED #5 (verde). Tienen lugar los períodos de
mantenimiento de carga flotante de 30 minutos, que alternan con los períodos de PRUEBA DE RETENCIÓN DE TENSIÓN de 30
minutos hasta que se desconecta la batería. En el apartado MANTENIMIENTO AUTOMÁTICO DE LA BATERÍA, se encontra una
descripción más detallada del ciclo de mantenimiento automático para el almacenamiento a largo plazo de las baterías.
16
PROGRAMA 2: CAN-bus
IMPORTANTE: los modos de alta tensión ESTÁNDAR y CARGA DE RECUPERACIÓN están desactivados. Este programa está
diseñado para la carga, la prueba y el mantenimiento a largo plazo de baterías montadas en vehículos equipados con CAN-bus.
RECOMENDADO: carga a través de la toma 12 V de la moto utilizando nuestro conector DIN/mechero O-2 o O-9.
SEÑALIZACIONES LED ANTES DE CONECTAR LA BATERÍA:
Los LED #3 y 4 parpadean: el programa envía una señal para detectar y activar una salida de 12V controlada por CAN-bus.
Los LED #3, 4, 5, 6 y 7 parpadean: se ha detectado un cortocircuito en los terminales de salida, o si el LED #2 (POLARIDAD
INVERSA) también se ilumina, las conexiones de la batería son incorrectas. El cargador está protegido electrónicamente, con lo
que no se producirá ningún daño, y la salida permanecerá desactivada hasta que se corrijan las conexiones.
PRUEBA DE PRECUALIFICACIÓN: LED #5, 6 y 7
Los LED DE PRUEBA #5, 6 y 7 señalan la activación correcta de la salida de 12V controlada por CAN-bus y el estado de
la batería antes de la carga. La carga comienza tras 10 segundos. Consulte la tabla de «ADVERTENCIA PRECOZ DE
PROBLEMAS CON LA BATERÍA» de la página 2 (ilustración 2) para averiguar las indicaciones del LED DE PRUEBA.
OBSERVACIÓN: la no activación puede deberse a una de las siguientes razones: se ha seleccionado el programa 1 / conexión
deficiente con la salida de 12V / batería demasiado baja para activar el CAN-bus / programación obsoleta de CAN-bus en el
vehículo: consulte al fabricante del vehículo.
RECUPERACIÓN / DESULFATACIÓN: LED #3
Este modo se activa si durante la precualificación el LED #7 (rojo) o el LED #6 (amarillo) o ambos se iluminan. El
programa de CAN-bus solo puede seleccionar el modo de recuperacion de baja tensión POR IMPULSOS. Tiempo de
carga: 15 minutos.
Recuperación POR IMPULSOS (LED #3 fijo): se suministra hasta 0,8A de corriente por impulsos para preparar la
batería a aceptar una carga completa de corriente.
CARGA: LED #4
Carga PRINCIPAL (LED #4 fijo): se suministra a la batería una corriente constante de 0,8A con una tensión de hasta
14,2-14,4V.
Carga FINAL (LED #4 parpadea): paso de absorción pulsada; la corriente se suministra por impulsos, variando entre 0,2 y 0,8A
y hasta una tensión de 14,2-14,4V, para cargar por completo la batería en el menor tiempo posible. Etapa de verificación: una
vez que la petición de corriente es inferior a 0,2A la tensión de carga se limita a 13,6V, mientras se verifica el nivel de carga de
la batería.
Si la batería necesita más carga, el programa volverá a la absorción pulsada.
Si la batería ha aceptado tanta carga como su estado básico permite, se procederá con el paso de retención de tensión.
OBSERVACIÓN 1: el programa se reinicia automáticamente 2 minutos después de la desconexión manual, o si el sistema de
CAN-bus ha desactivado la toma de 12V de la moto y el programa no pudo reactivar la salida en un plazo de 2 minutos.
OBSERVACIÓN 2: por razones de seguridad, hay un límite temporal de carga general de 48 horas.
PRUEBA DE RETENCIÓN DE TENSIÓN: LED #5 parpadea
El suministro de corriente a la batería se interrumpe durante 30 minutos para determinar la capacidad de retención de carga de
la batería. Esto hará que el sistema de CAN-bus desactive la toma 12V de la moto dentro de su propio límite temporal fijado,
desconectando la batería del cargador. Al finalizar este período de prueba, el programa inicializará de nuevo dicha toma para
medir la tensión de la batería y proceder después a la CARGA DE MANTENIMIENTO durante la cual se mostrará el resultado de la
prueba.
Consulte la tabla «ADVERTENCIA PRECOZ DE PROBLEMAS CON LA BATERÍA» de la página 2 para averiguar las indicaciones de
los LED. Lea el apartado OBSERVACIONES SOBRE LOS RESULTADOS DE LA PRUEBA para averiguar las razones de resultados de
pruebas deficientes o cómo probar una batería que ofrece un buen resultado, pero no puede suministrar suficiente potencia una
vez que está de nuevo operativa. OBSERVACIÓN: si durante la prueba el cargador se desconecta manualmente de la salida de
12V o de la batería, no se reiniciará automáticamente hasta el final del período de prueba.
CARGA DE MANTENIMIENTO: LED #5, 6 y 7 fijos
Durante 30 minutos, el circuito suministra corriente a la batería dentro de un límite de tensión seguro de 13,6V, mientras se
muestra el resultado de la prueba de retención de tensión. Tienen lugar los períodos de mantenimiento de carga flotante de 30
minutos, que alternan con los períodos de PRUEBA DE RETENCIÓN DE TENSIÓN de 30 minutos hasta que se desconecta la
batería. En el apartado MANTENIMIENTO AUTOMÁTICO DE LA BATERÍA, hallará una descripción más detallada del ciclo de
mantenimiento automático para el almacenamiento a largo plazo de las baterías.
OBSERVACIÓN 1: el programa se reinicia automáticamente 2 minutos después de la desconexión manual, o si el sistema de
CAN-bus ha desactivado la salida de 12V controlada y el programa no pudo reactivar la salida en un plazo de 2 minutos.
17
OBSERVACIONES SOBRE LOS RESULTADOS DE LA PRUEBA:
1. Con cualquier resultado de prueba distinto a #5 verde, desconecte la batería del sistema eléctrico al que está conectado y vuelva
a conectar el optimate. si obtiene mejores resultados esta vez, esto sugiere que las pérdidas de corriente son debidas en parte a un
problema eléctrico en el sistema eléctrico y no en la propia batería. Si los resultados bajos persisten, se recomienda que llevar la
batería a un taller profesional equipado con equipos profesionales para que realicen un diagnóstico más exhaustivo.
2. Durante el ciclo de carga de mantenimiento, el resultado de la PRUEBA seguirá iluminándose hasta que se repita el ciclo de
PRUEBA y MANTENIMIENTO. Si la caida de voltaje proviene de una fuga temporal de la batería, el indicador LED cambiará hacia un
estado mejor.
3. Si se ilumina únicamente el LED #7 rojo, o bien el LED #6 amarillo y el LED #7 rojo al mismo tiempo, esto indica que existe un
problema importante. Los LED #6 y #7 amarillo + rojo, (o el LED #6 amarillo en una batería sellada) quieren decir que tras la carga
no se mantiene el voltaje de la batería o que a pesar de los intentos de recuperación, la batería es irrecuperable. Esto puede deberse
a un defecto propio de la batería, tal como un cortocircuito en una celda o un sulfatado total, o en el caso de una batería conectada
al sistema eléctrico al que suministra corriente, el LED #7 rojo puede indicar una pérdida de corriente por un cable o contacto
defectuoso, o un accesorio del circuito que esté consumiendo corriente. Una carga repentina como por ejemplo el encendido de las
luces mientras el cargador está conectado, también puede hacer que el voltaje de la batería baje de forma significativa.
4. RESULTADO SATISFACTORIO DE LA PRUEBA, pero la batería no puede suministrar sufi ciente potencia: el daño permanente en la
batería puede estar causando una autodescarga excesiva ((causada por la propia batería; incluso una batería parcialmente
deteriorada puede conservar inicialmente una potencia sufi ciente, pero después pierde potencia más rápidamente de lo normal).
Desconecte la batería de OptiMate. Transcurridas al menos 12 horas, conéctela de nuevo y observe el resultado de la PRUEBA
durante la PRUEBA DE PRECUALIFICACIÓN.
MANTENIMIENTO AUTOMÁTICO DE LA BATERÍA: El CICLO DE CARGA DE MANTENIMIENTO consiste en ciclos de carga
otante de 30 minutos seguidos por periodos alternos de “descansos” de 30 minutos durante los que no hay corriente de carga.
Este “ciclo de trabajo del 50%” evita la pérdida de electrolito en baterías selladas y minimiza la pérdida gradual de agua del
electrolito en baterías con tapones, y por tanto, contribuye de forma signifi cativa a optimizar la vida útil de baterías usadas de forma
irregular o en determinados periodos. El circuito suministra corriente a la batería con un voltaje de seguridad de 13,6 V (carga
otante), permitiéndole proporcionar la corriente que sea necesaria para mantenerla en carga completa (o casi completa) y
compensar cualquier pequeña carga eléctrica impuesta por los accesorios del vehículo, el ordenador de a bordo o el grado de
descarga gradual natural de la batería misma.
MANTENIMIENTO DE LA BATERÍA DURANTE PERÍODOS PROLONGADOS: El OptiMate mantendrá una batería cuyo
estado es bueno, en total seguridad durante varios meses.
Al menos una vez cada dos semanas, compruebe que las conexiones entre el cargador y la batería están correctas, y en el caso de
baterías con un tapones, desconecte la batería del cargador, compruebe el nivel de electrólito y si es necesario, rellene las células
(con agua destilada, NO ácido), y vuelva a conectarla. Al manipular baterías o junto a las mismas, tenga en cuenta las
ADVERTENCIAS DE SEGURIDAD mencionadas anteriormente.
Tiempo de carga
El tiempo mínimo necesario para una carga completa y un ciclo de prueba y resultados del OptiMate 4, incluso con una batería
totalmente cargada, es de 45 minutos. El tiempo de carga para una batería muy descargada pero sin ninguna avería es comparable
al valor de capacidad nominal en Ah. Una batería de 20Ah no debería tardar más de 20 horas en realizar la comprobación de
autodescarga (§ 5). Las baterías totalmente descargadas pueden tardar bastante más tiempo.
Si utiliza OptiMate 4 con una batería de automóvil de gran capacidad muy descargada, es posible que no se realice una carga
completa dentro del límite de 48 horas impuesto electrónicamente por razón de seguridad.
Reiniciar el ciclo de carga o de prueba
Desconecte de la red de CA. Espere a que el LED #1 DE ALIMENTACIÓN ACTIVADA se apague. Tras la reconexión a la potencia de
red, todos los LED, salvo #1, 2, 8, 9 y 10, parpadearán dos veces para confi rmar el estado del microprocesador, independientemente
de si el cargador sigue conectado a la batería o no.
GARANTÍA LIMITADA
TecMate (International) SA, Sint-Truidensesteenweg 252, B-3300 Tienen, Bélgica, establece esta garantía limitada en favor del
primer propietario que utilice este aparato. Esta garantía limitada no es transferible. TecMate (International) garantiza este
aparato durante los tres años siguientes a la fecha de compra por su primer usuario contra las fallos de materiales y de
montaje. En este caso y a discreción del fabricante el aparato podrá ser reparado ó reemplazado. La gestión y los costes
relativos al transporte del aparato acompañado por una prueba de compra (véase "NOTA") al fabricante ó a uno de sus
representantes autorizados serán por cuenta del cliente. Esta garantía limitada se anula en caso de uso ó tratamiento
inadecuado, ó de reparación hecha por toda persona o organización otra diferente al fabricante ó uno de sus representantes
autorizados. El fabricante no cumple con otra garantía que esta garantía limitada y expresamente excluye toda forma de
garantía contra otros daños que los que sufra el aparato por sí mismo.
ESTO CONSTITUYE LA UNICA GARANTÍA LIMITADA VALIDA. El FABRICANTE NO RECONOCE A QUIENQUIERA EL DERECHO DE
EJERCER Ó DE TRANSMITIR NINGUN DERECHO RELATIVO AL PRODUCTO VENDIDO QUE SEA OTRO QUE EL QUE SE DERIVA DE
ESTA GARANTÍA LIMITADA EXPRESA. LAS SUS DERECHAS ESTATUTARIAS NO SON AFECTADAS.
NOTA: Véase www.tecmate.com/warranty ó contacte warranty@tecmate.com
copyright © 2012 TecMate International
OptiMate 4 y los nombres de los otros aparatos mencionados en este texto como BatteryMate, TestMate y TestMate mini, son
marcas registradas de TecMate International SA.
Se puede encontrar más información sobre los productos de TecMate en www.tecmate.com.
21
PROGRAMA 2 - CAN-bus
IMPORTANTE: Os modos PADRÃO e CARGA DE RECUPERAÇÃO estão desactivados. Este programa é concebido para carregar,
testar e conservar baterias a longo prazo quando estas se encontram montadas em veículos equipados com CAN-bus.
RECOMENDADO:
carregue através da tomada de 12V com o O-2 (conector de tomada de 12V para automóvel e ficha DIN) ou o O-9
(conector DIN de 12V aumentado) apropriado.
INDICAÇÕES DE LED ANTES DA LIGAÇÃO À BATERIA:
LED #3+4 intermitente: o programa envia um sinal para detectar e activar uma tomada de 12V controlada pelo CAN-bus.
LED #3+4+5+6+7 intermitente: foi detectado um curto-circuito nos terminais de saída ou, se o LED #2 (POLARIDADE INVERSA)
também estiver aceso, as ligações da bateria estão incorrectas. O carregador é protegido electronicamente para que não
ocorram danos e a saída permanece desactivada até que as ligações sejam corrigidas.
TESTE DE PRÉ-QUALIFICAÇÃO: LEDs #5 / 6 / 7
Os LEDs de TESTE #5/6/7 indicam que a tomada de 12V controlada pelo CAN-bus foi activada com êxito e a condição da
bateria antes de ser carregada. A carga começa após 10 segundos. Consulte a tabela “AVISO ANTECIPADO DE
PROBLEMAS DA BATERIA” na página 2 (ilustração 2) para obter indicações sobre o LED de TESTE. NOTA: a não activação
poderá dever-se a um dos seguintes motivos: programa 1 seleccionado / má ligação à tomada de 12V / bateria demasiado fraca
para alimentar o CAN-bus / programação do CAN-bus obsoleta no veículo - consulte o fabricante do veículo
.
RECUPERAÇÃO / DESSULFATIZAÇÃO: LED #3
Este modo é activado se o LED #7 (vermelho), o LED #6 (amarelo) ou ambos acenderem durante a pré-
qualificação. O programa do CAN-bus apenas pode seleccionar o modo de recuperação PULSE de baixa tensão.
Tempo de carga: 15 minutos.
Recuperação PULSE - LED #3 constantemente ligado: é fornecida corrente até 0,8A em impulsos para preparar
a bateria para aceitar a carga de corrente total.
CARGA: LED #4
Carga BULK (bruto) - LED #4 constantemente ligado: é fornecida uma corrente constante de 0,8A com uma tensão de 14,2
-14,4V à bateria.
Carga FINAL - LED #4 intermitente: fase de absorção dos impulsos: a corrente é fornecida em impulsos, variando entre 0,2 e
0,8A e com uma tensão de 14,2 - 14,4V, para que a bateria fique completamente carregada no menor tempo possível. Fase de
verificação: uma vez que a necessidade de corrente é inferior a 0,2A, a tensão de carga é limitada a 13,6V enquanto o nível de
carga da bateria é verificado.
Caso a bateria necessite de mais carga, o programa volta para absorção de impulsos.
Caso a bateria tenha aceitado a quantidade máxima de carga que a sua condição básica permite, segue-se a fase de retenção
de tensão.
NOTA 1: o programa é reiniciado automaticamente 2 minutos após a desconexão manual ou caso o sistema do CAN-bus tenha
desactivado a tomada de 12V controlada e o programa não tenha conseguido reactivar a tomada em 2 minutos.
NOTA 2: por motivos de segurança, existe um limite de tempo de carga total de 48 horas.
TESTE DE RETENÇÃO DE TENSÃO: LED #5 intermitente
O fornecimento de corrente à bateria é interrompido durante 30 minutos para determinar a capacidade de retenção de carga da
bateria Isto fará com que o sistema do CAN-bus desactive a tomada de 12V dentro do seu próprio limite de tempo definido,
desligando a bateria do carregador. Quando o período de teste estiver concluído, o programa inicia novamente a tomada de 12V
controlada pelo CAN-bus para medir a tensão da bateria e, em seguida, continua com a CARGA DE MANUTENÇÃO durante a qual
é apresentado o resultado do teste. Consulte a tabela “AVISO ANTECIPADO DE PROBLEMAS DA BATERIA” na página 2 para
obter indicações sobre os LEDs. Leia a secção NOTAS SOBRE OS RESULTADOS DE TESTE para obter informações sobre os
motivos dos maus resultados de teste ou sobre como testar uma bateria que tenha um bom resultado, mas que não consiga
fornecer energia eléctrica suficiente depois de estar novamente em funcionamento. NOTA: se o carregador for desligado
manualmente da tomada de 12V ou da bateria durante o teste, não será reiniciado automaticamente enquanto não terminar o
período de teste
CARGA DE MANUTENÇÃO: LED #5 / 6 / 7 constantemente ligados
Durante 30 minutos, o circuito fornece corrente à bateria dentro de um limite de tensão seguro de 13,6V, enquanto é
apresentado o resultado do teste de retenção de tensão. Seguem-se os períodos de manutenção de carga flutuante de 30
minutos que se alternam com os períodos de TESTE DE RETENÇÃO DE TENSÃO até que a bateria seja desligada. É possível
encontrar uma descrição mais detalhada do ciclo de manutenção automática para armazenamento de baterias a longo prazo na
secção MANUTENÇÃO AUTOMÁTICA DE BATERIAS.
NOTA 1: o programa é reiniciado automaticamente 2 minutos após a desconexão manual ou caso o sistema do CAN-bus.
22
NOTAS SOBRE RESULTADOS DE TESTE:
1. No caso de qualquer outro resultado de teste diferente de #5 verde, desconecte a bateria do sistema eléctrico que suporta, e
volte a conectar o optimate. caso se obtenha agora um resultado de teste melhor, isto sugere que as perdas de potência se devem
parcialmente a um problema eléctrico no sistema eléctrico e não na própria bateria. Se o resultado fraco persistir, recomenda-se
levar a bateria a uma oficina profissional equipada com verificadores profissionais para uma examinação mais minuciosa.
2. Durante o ciclo de carga de manutenção, o resultado de TESTE continuará a ser apresentado até que o ciclo de TESTE e
MANUTENÇÃO seja repetido. Se o declínio na tensão tiver resultado de um consumo de corrente da bateria apenas temporário, a
indicação de LED pode regressar a um nível melhor.
3. Se o LED #7 vermelho acender sozinho ou juntamente com o LED #6 amarelo, existe um problema signifi cativo. Os LEDs #6 e 7
vermelho/amarelo+vermelho, (ou o LED #6 amarelo sozinho para uma bateria selada) significam que, depois de carregada, a tensão
da bateria não está a ser mantida, ou que, apesar das tentativas de recuperação, não foi possível recuperar a bateria. Isto pode
acontecer devido a um defeito na própria bateria, como uma célula em curto-circuito ou sulfatação total, ou, no caso de uma bateria
ainda ligada ao sistema eléctrico que suporta, o LED #7 vermelho pode estar a sinalizar uma perda de corrente através de fios
deteriorados, um interruptor ou um contacto degradado, ou acessórios consumidores de corrente dentro do circuito. Uma carga
repentina, como ligar os faróis do veículo enquanto o carregador está ligado, também pode causar uma descida significativa da
tensão da bateria.
4. BOM RESULTADO DE TESTE, mas a bateria não consegue fornecer energia eléctrica sufi ciente: um dano permanente na bateria
poderá estar a causar uma autodescarga excessiva (causada pela própria bateria; mesmo uma bateria parcialmente danifi cada
poderá reter inicialmente energia eléctrica sufi ciente, mas depois perder energia mais rapidamente do que o normal). Desligue a
bateria do OptiMate. Após, pelo menos, 12 horas volte a ligá-la e observe o resultado de TESTE durante o TESTE DE PRÉ-
QUALIFICAÇÃO.
MANUTENÇÃO AUTOMÁTICA DA BATERIA: O CICLO DE CARGA DE MANUTENÇÃO consiste em períodos de carga flutuante de
30 minutos seguidos de e em alternância com períodos de “descanso” de 30 minutos durante os quais não há corrente de carga.
Este “ciclo de funcionamento a 50%” evita a perda de electrólito em baterias seladas e minimiza a perda gradual de água do
electrólito em baterias com invólucro, contribuindo assim significativamente para optimizar a vida útil de baterias usadas
irregularmente ou por épocas. O circuito fornece corrente à bateria dentro de um limite de tensão seguro de 13,6V (“carga
flutuante”), permitindo que a bateria retire toda a baixa corrente necessária para se manter em carga total (ou próximo) e
compensar quaisquer pequenas cargas eléctricas impostas pelos acessórios do veículo ou pelo computador de bordo, ou pela
auto-descarga gradual natural da própria bateria.
MANTER UMA BATERIA POR PERÍODOS ALARGADOS: O OptiMate manterá uma bateria cujo estado seja bom, em
qualquer segurança durante vários meses.
Pelo menos uma vez em cada duas semanas, certifique-se de que as ligações entre o carregador e a bateria estão seguras, e, no
caso de baterias com invólucro em cada célula, desconecte a bateria do carregador, verifique o nível de electrólito, e, se necessário,
encha as células (com água destilada, NÃO ácido), e volte a conectar. Quando lidar com baterias ou na zona em redor, tenha
sempre o cuidado de observar os AVISOS DE SEGURANÇA descritos anteriormente.
Tempo de carga
O tempo mínimo necessário para o OptiMate 4 realizar um carga, testar o ciclo e fornecer um resultado, mesmo numa bateria
carregada totalmente, é de 45 minutos. O tempo de carga de uma bateria totalmente descarregada, mas não danificada, é
comparável ao valor de capacidade nominal em Ah da bateria, portanto uma bateria de 20Ah não deverá demorar mais do que cerca
de 20 horas para progredir para a verificação de auto-descarga (§ 5). As baterias profundamente descarregadas podem demorar
significativamente mais tempo.
Caso esteja a usar o OptiMate 4 numa bateria de automóvel profundamente descarregada de maior capacidade, um carga total
poderá não ser alcançado dentro do limite de segurança de carga de 48 horas.
Reiniciar o ciclo de carga ou de teste
Desligue da alimentação de CA. Espere até que o LED #1 de LIGADO se apague. Depois de voltar a ligar o equipamento à energia
eléctrica de CA, todos os LEDs excepto os LEDs #1,2, 8, 9 e 10 piscam duas vezes para confi rmar que o microprocessador se
encontra em funcionamento, independentemente de o carregador permanecer ligado a uma bateria ou não.
GARANTIA LIMITADA
TecMate (International) NV, Sint-Truidensesteenweg 252, B-3300, Belgium, consente a presente garantia ao primeiro utilizador deste
produto, sem possibilidade de transmissibilidade. TecMate (International) NV garante este carregador durante três anos a partir da
data de compra ao importador, contra os defeitos dos componentes ou de montagem. Se for o caso, o carregador será reparado ou
substituído à discrição do fabricante. O comprador deve enviar por sua própria conta, o aparelho assim como uma prova de compra
(veja "NOTA"), ao fabricante ou ao seu representante. Esta garantia limitada, torna-se nula se o aparelho for utilizado ou manipulado
de forma inadequada ou se tiver sido reparado por toda outra pessoa física ou moral que o fabricante ou o seu representante. O
fabricante não oferece nenhuma outra garantia que a presente, e excluí expressamente toda garantia conta danos consequenciais.
ESTA É A ÚNICA GARANTIA EXPRESSAMENTE CONSENTIDA PELO FABRICANTE. ESTE NÃO ASSUME E NÃO AUTORIZA QUEM QUER QUE
SEJA A ASSUMIR OU ESTABELECER TODA OUTRA OBRIGAÇÃO LIGADA A ESTE PRODUTO, OUTRA QUE ESTA GARANTIA LIMITADA
EXPRESSAMENTE CONSENTIDA. SUAS DIREITAS ESTATUTÁRIAS NÃO SÃO AFETADAS.
NOTA: Veja www.tecmate.com/warranty ou contatem warranty@tecmate.com
copyright © 2012 TecMate International
OptiMate 4 e os nomes dos outros aparelhos mencionados neste texto como BatteryMate, TestMate e TestMate mini, são marcas
registadas de TecMate International SA.
Pode-se encontrar mais informação sobre os produtos de TecMate em www.tecmate.com.
23
SICHERHEIT
AUTOMATISCHES DIAGNOSE-LADEGERÄT FÜR 12V BLEIAKKUS VON 3Ah
BIS 50Ah IN:
NICHT VERWENDEN FÜR NiCd, NiMH, Li-Ion ODER NICHT AUFLADBARE BATTERIEN.
Eingang : 220-240V maximal 0,095A. Der maximale Ausgangsstrom ist 0,8A.
WICHTIG: LESEN SIE VOR GEBRAUCH DES LADEGERÄTS
DIE FOLGENDEN ANWEISUNGEN VOLLSTÄNDIG
Dieses Gerät ist nicht dafür vorgesehen, von Personen (einschließlich Kindern) verwendet zu werden, die
über beschränkte körperliche, sensorische und mentale Fähigkeiten oder mangelnder Erfahrung bzw.
unzureichendem Wissen verfügen, sofern diese nicht durch eine für die Sicherheit verantwortliche Person
zur korrekten Verwendung des Geräts eingewiesen wurden oder das Gerät ohne Aufsicht bedienen. Kinder,
die sich in der Nähe des Geräts befinden, sollten beaufsichtigt werden, um sicherzustellen, dass diese nicht
mit dem Gerät spielen.
SICHERHEITSWARNUNG und HINWEISE: Batterien sondern EXPLOSIVE GASE ab - halten Sie Flammen oder Funken von
Batterien fern. Klemmen Sie die Wechselstromversorgung ab, bevor Sie Gleichstrom-/Batterieverbindungen herstellen oder
unterbrechen. Batteriesäure ist stark ätzend. Schutzkleidung und Schutzbrille tragen und Kontakt vermeiden. Bei versehentlicher
Berührung sofort mit Wasser und Seife waschen. Prüfen, ob die Batteriepole lose sind, wenn ja, die Batterie von einem Fachmann
überprüfen lassen. Korrodierte Batteriepole mit einer Kupferdrahtbürste reinigen; verschmutzte oder fettige Pole mit einem in
Reinigungsmittel befeuchteten Tuch reinigen. Ladegerät nur benutzen, wenn die Zuleitungen und Batterieklemmen in einwandfreiem,
unbeschädigten Zustand sind. Wenn das Eingangskabel beschädigt ist, muss es unverzüglich vom Hersteller, seinem ermächtigten
Serviceagenten oder einer qualifizierten Werkstatt ersetzt werden, um Gefahren zu vermeiden. Schützen Sie Ihr Ladegerät bei
Benutzung und Lagerung vor Säure und Säuredämpfen, sowie vor Feuchtigkeit. Schäden durch Korrosion, Oxidation oder interne
Kurzschlüsse sind nicht durch die Garantie abgedeckt. Stellen Sie das Ladegerät während des Ladevorgangs von der Batterie
entfernt auf, um Kontaminierung oder Beschädigung durch Säure oder Säuredämpfe zu vermeiden. Bei Verwendung in horizontaler
Ausrichtung muss das Ladegerät auf eine feste, ebene Fläche gestellt werden, jedoch NICHT auf Kunststoff, Textilien oder Leder.
Bringen Sie mittels der Befestigungsöffnungen im Gehäuseboden das Ladegerät an einer geeigneten, stabilen senkrechten Fläche an.
AUSGESETZTSEIN ZU DEN FLÜSSIGKEITEN: Dieses Ladegerät ist konstruiert, um Ausgesetztsein zu den Flüssigkeiten, die
versehentlich auf das Gehäuse von oben verschüttet werden oder gespritzt sind, oder zum Nieselregen, zu widerstehen. Jedoch ist
verlängertes Ausgesetztsein nicht ratsam und längere Lebensdauer wird erreicht, indem man solches Ausgesetztsein minimiert.
Ausfall des Gerätes wegen der Oxidation, die aus dem etwaigen Durchgriff der Flüssigkeit in die elektronischen Bauelemente,
Verbindungsstücke oder Stecker resultiert, wird nicht durch die Garantie abgedeckt.
BATTERIEANSCHLÜSSE: 2 austauschbare Anschluss-Sets sind erhältlich, mit dem Ladegerät geliefert wird ein Satz
Batterieklemmen, um die Batterie außerhalb des Fahrzeugs zu laden, das optionale Anschluss-Set ist mit Metallösen zum
permanenten Anschließen an die Batteriepole versehen sowie mit Schutzkappen am Stecker zum Anschließen des Ausgangskabels
des Ladegeräts. Dieses Anschluss-Set erlaubt das problemlose und sichere Anschließen des Ladegeräts, wenn die Batterie im
Fahrzeug bleiben soll. Die abnehmbare Schutzkappe schützt den Anschluss vor Schmutz und Feuchtigkeit, wenn das Ladegerät nicht
angeschlossen ist. Wenden Sie sich an einen Fachmann, um die Metallösen an den Batteriepolen befestigen zu lassen. Sichern Sie
den Anschluss mit der Schutzkappe, sodass er nicht in bewegende Teile des Fahrzeugs gerät und das Kabel nicht eingeklemmt oder
durch scharfe Kanten beschädigt werden kann. Die Leitungssicherung im Ösenanschluss schützt die Batterie vor Kurzschlüssen
zwischen Plus- und Minusleiter. Ersetzen Sie durchgebrannte Sicherungen nur durch gleiche neue 15A-Sicherungen.
ANSCHLUSS DES LADEGERÄTS AN DIE BATTERIE
1. Die AC-Stromversorgung muss unterbrochen werden, bevor Sie das Ladegerät an DC/die Batterie anschließen bzw. die
Verbindung trennen.
2. Wenn Sie die Batterie im Fahrzeug belassen und mithilfe der Batterieklemmen aufladen möchten, müssen Sie zunächst
sicherstellen, dass die Klemmen sicher in einem Abstand zu den Kabeln, Metallrohren oder dem Fahrgestell positioniert werden
können. Befolgen Sie beim Anschluss die nachstehende Reihenfolge: Schließen Sie zunächst eine Klemme an den
Batterieanschluss, der nicht mit dem Fahrgestell verbunden ist (in der Regel der Pluspol) an. Schließen Sie anschließend die
andere Klemme (in der Regel der Minuspol) an das Fahrgestell, in einem weiten Abstand zur Batterie und Benzinleitung, an.
Beim Abklemmen ist die entgegengesetzte Reihenfolgen einzuhalten.
3. Wenn Sie die Batterie außerhalb des Fahrzeuges über die Batterieklemmen aufladen, müssen Sie für eine ausreichende
Belüftung sorgen. Schließen Sie das Ladegerät an die Batterie an: ROTE Klemme an PLUSPOL (POS, P oder +) und SCHWARZE
Klemme an Minuspol (NEG, N oder –).Stellen Sie sicher, dass die Klemmen fest sitzen. Ein guter Kontakt ist wichtig.
4. Eine tiefentladene (und möglicherweise sulfatierte) Batterie ist vor einem Wiederbelebungsversuch auszubauen und
zu überprüfen. Überprüfen Sie die Batterie auf mechanische Defekte wie Ausbeulungen oder Risse im Gehäuse oder auf ein
Auslaufen der Säure. Wenn die Batterie über Einfüllverschlüsse verfügt und die Platten zwischen den Zellen von außen
erkennbar sind, müssen Sie sicherstellen, dass alle Zellen gleich aussehen (beispielsweise das weiße Material zwischen den
Platten, der Abstand der Platten usw.). Laden Sie die Batterie nicht auf, wenn mechanische Defekte erkennbar sind. Lassen Sie
die Batterie in diesem Fall von einem Fachmann untersuchen.
5. Wenn es sich um eine neue Batterie handelt, lesen Sie vor dem Anschluss des Ladegeräts die Sicherheitshinweise und
Betriebsanweisungen des Herstellers genau durch. Befolgen Sie gegebenenfalls die Anweisungen zum Auffüllen der Säure
genau.
24
VERWENDEN DES OPTIMATE 4
T
E
S
T
0.8
0.5
0.2
AMPS
T
E
T
T
S
E
E
T
0.8
0.5
0.2
AMP
S
8
8
A
A
A
A
A
A
77
10
9
8
3.1
3.2
4.1
4.2
66
55
2
1
3.3
ZWEI PROGRAMME: Der OptiMate 4 verfügt über zwei Ladeprogramme. Es kann jeweils nur ein Programm
betrieben werden. Ausgewählte Modelle des OptiMate 4 werden mit der Voreinstellung Programm 1 (STANDARD) oder Programm 2
(CAN-Bus) ausgeliefert.
Programm 1 (STANDARD) ist das normale Ladeprogramm für eine direkte Verbindung zu einer Batterie in beliebigem Zustand.
Alle Programmfunktionen stehen zur Verfügung, darunter die Modi Standard, TURBO und IMPULS (Sulfatentfernung).
Programm 2 (CAN-Bus) aktiviert automatisch einen 12-V-Ausgang bei Fahrzeugen mit CAN-Bus, um die Batterie während der
Standzeit des Fahrzeugs zu laden, zu testen und zu warten. Der Modus Standard sowie der Hochspannungs-
Sulfatentfernungsmodus TURBO sind deaktiviert. Der Niederspannungs-Sulfatentfernungsmodus IMPULS bleibt aktiv,
um eine entladene Batterie wieder herzustellen, die mit dem Fahrzeug verbunden ist.
Programm 2 kann auch zum direkten Aufl aden und Warten einer Batterie in- und außerhalb des Fahrzeugs verwendet werden. Eine
sulfatierte Batterie lässt sich jedoch nicht wieder herstellen. Wenn Sie eine sulfatierte Batterie wieder herstellen möchten, wählen
Sie Programm 1, und befolgen Sie die Anweisungen unter STARK ENTLADENE BATTERIEN.
Programmanzeige, wenn keine Verbindung zu einem 12-V-Ausgang oder zu einer Batterie besteht.
STANDARD – nur die Netz-LED 1 leuchtet.
CAN-Bus – Die NETZ-LED 1 leuchtet, und die SULFATENTFERNUNGS-LED 3 sowie die LADE-LED 4 blinken kurz in regelmäßigen
Intervallen.
So wechseln Sie das Programm:
1. Trennen Sie das Ladegerät von der Netzspannung.
2. Bringen Sie den Batterieklemmensatz am Ladegerät an und verbinden Sie die negative Klemme direkt mit der positiven.
3. Verbinden Sie das Ladegerät wieder mit der Netzspannung.
4. Beachten Sie die folgenden LED-Anzeigen:
Die LEDs 3+4+5+6+7 blinken während der Auswahl eines anderen Programms 12 Mal (5x langsam, 5x schnell, 2x langsam).
Nach dem Programmwechsel erfolgt (bei verbundenen Batterieklemmen) diese Anzeige:
Wechsel von CAN-bus zu STANDARD: nur die NETZ-LED 1 leuchtet.
Wechsel von STANDARD zu CAN-Bus: LED 3 und LED 4 blinken regelmäßig, LED 8 folgt direkt.
5. Ziehen Sie die Batterieklemmen ab. Der OptiMate 4 kann nun die Batterie nach dem gewählten Programm laden.
LADUNGSPROZEDUR
NETZ: LED 1 - Zeigt an, dass das Ladegerät mit Wechselstrom versorgt wird.
SCHUTZ VOR POLARITÄTSUMKEHR: LED 2 - Leuchtet auf, wenn die Batterie falsch angeschlossen ist. Das Ladegerät ist
elektronisch geschützt, sodass kein Schaden eintritt, der Ausgang wird automatisch deaktiviert, bis die Verbindungen korrigiert sind.
LADESTROMANZEIGE: LED 8, 9, 10 - Leuchtet auf, wenn die Batterie mit Wechsel- oder Gleichstrom versorgt wird.
Stromstärkeanzeige: LED 8: 0,2 A LED 8+9: 0,5 A LED 8+9+10: 0,8 A


Produktspecifikationer

Varumärke: Tecmate
Kategori: Batteriladdare
Modell: OPTIMATE 4 TM146DUAL Accu oplader

Behöver du hjälp?

Om du behöver hjälp med Tecmate OPTIMATE 4 TM146DUAL Accu oplader ställ en fråga nedan och andra användare kommer att svara dig