Vango Nadina 600 Bruksanvisning

Vango tält Nadina 600

Läs gratis den bruksanvisning för Vango Nadina 600 (6 sidor) i kategorin tält. Guiden har ansetts hjälpsam av 2 personer och har ett genomsnittsbetyg på 4.2 stjärnor baserat på 1.5 recensioner. Har du en fråga om Vango Nadina 600 eller vill du ställa frågor till andra användare av produkten? Ställ en fråga

Sida 1/6
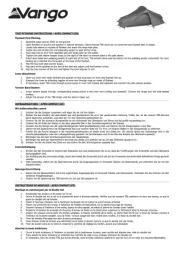
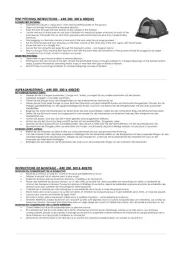
TENT PITCHING INSTRUCTIONS NADINA 600 (UK)
FLYSHEET FIRST PITCHING:
Open out flysheet and position in required direction
Securely peg out the rear corners of the tent
Insert the roof pole section into the rear pole sleeve and attach leg sections
Locate one end of each pole at one side of the tent into the metal pin system
attached to the groundsheet
flysheet seams to pin system
Tighten all the tensions straps at the base of the poles.
Stand the completed rear pole uprightso that it can stand unaided using the
tension from the rear panel. (Stand pole completely vertical then move the ends of
the pole back approx. 30cm)
Repeat this process for the remaining poles
Work toward the front of the tent, inserting poles and propping them upright
• “Walk” flysheet forward, away from pegged points, until tent takes shape
Pull the tent until the groundsheet is taut and peg out the main corners at the
other end of the te nt
Ensure the tent is in a straight line
The groundsheet should be flat and wrinkle free
Peg out the remaining poles and pegging points using pin pegs at the base of poles
Attach all flysheet pole clips onto poles
Peg out ALL guy lines using pin-pegs ensuring that guy line fabric attachment points are evenly tensioned.
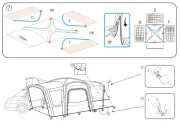
PRE-ATTACHED FRONT EXTENSION:-
• To erect the pre-attached canopy, insert the pole into the sleeve, connect to Ring and Pin system, tighten the tension straps and attach pole ps to pole. cli
• Pull canopy away from tent until roof of canopy is taut
• Pull porch taut, away from main body of tent and peg down the corners of the porch through the shock-cord pegging points using pin-pegs
• To roll away the pre-attached canopy, roll it away along the top until the guylines and webbing are rolled away neatly, flip the already rolled section to the
underside of the canopy and continue rolling
• Secure with the toggles provided
INNER ATTACHMENT:
Open out inner tent inside flysheet and position doorways to correspond with the living area
Suspend the inner by attaching toggles of inner tent through rings on inside of flysheet
The inner attachments are colour coded to match the clips on the roof of the flysheet
Do the rear first and work forward
It is advisable to remove the inner when taking down the tent when wet.
RING & PIN SYSTEM:
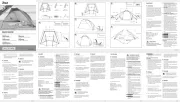
Locate one end of pole onto the corresponding metal pin (FIGURE1).
Peg the corners of the tent through the metal rings using pin-pegs (FIGURE2).
Pegs should be positioned at a 45 degree angle to ensure maximum grip.
………………………………………………………………………………………………………………………………………………………………………………………………………
TENT PITCHING INSTRUCTIONS NADINA 600 (DE)
MIT AUßENZELTAUFBAU ZUERST:
Außenzelt auslegen und korrekt ausrichten.
Stecken Sie die hinteren Ecken des Zelts fest aus.
Setzen Sie die Dachstange in die hintere Stangenhülle ein und befestigen Sie die Fußteile
Befestigen Sie ein Ende jeder Stange auf einer Seite des Zelts in dem an der Bodenplane befestigte Metallstiftsystem.
Achten Sie darauf, dass die Stangen in das korrekte Stift-System eingesteckt werden; alle Stangen verlaufen an den zugehörigen Außenzeltnähten entlang
zum Stift-System.
Alle Spanngurte unten an den Stangen fest anziehen.
Stellen Sie die komplette hintere Stange aufrecht hin, so dass sie ohne Hilfe durch die Spannung der Rückwand stehen kann. (Stellen Sie die Stange ganz
vertikal auf, ziehen Sie dann die Enden der Stange ca. 30cm nach hinten)
Wiederholen Sie dies mit den übriggebliebenen Stangen
Arbeiten Sie sich zur Vorderseite des Zelts durch, setzen Sie Stangen ein und stellen Sie sie aufrecht hin
Mit dem Außenzelt vorwärts "gehen", weg von den Verankerungspunkten, bis das Zelt Gestalt annimmt.
Zelt ziehen, bis die Bodenplane straff ist, und die Hauptecken auf der anderen Seite des Zelts mit Heringen feststecken.
Achten Sie darauf, dass sich das Zelt in einer geraden Linie ausgerichtet befindet.
Die Bodenplane sollte glatt und knitterfrei sein.
Übrige Stangen und Verankerungspunkte mithilfe der Stiftheringe unten an den Stangen fixieren.
Befestigen Sie alle Außenzelt-Halterungsklemmen an den Stangen.
ALLE Abspannleinen mit Stiftheringen fixieren, wobei darauf zu achten ist, dass die Befestigungspunkte der Abspannleinen an der Plane gleichmäßig
festgezogen sind.
VORBEFESTIGTES VORZELT:
• Um das vorbefestigte Vordach aufzustellen, setzen Sie die Stange in die Hülle ein, verbinden Sie sie mit dem Ring-und-Stift-System, straffen Sie die
Spannungsbänder und befestigen Sie die Stangenclips an der Stange.
• Ziehen Sie das Vordach vom Zelt weg bis das Dach des Vordachs gespannt ist
• Ziehen Sie den Vorbau straff und vom Hauptzelt weg und fixieren Sie die Ecken des Vorbaus durch die mit Gummizug ausgestatteten Befestigungspunkte mit
Stiftheringen.
• Um das vorbefestigte Vordach einzurollen, rollen Sie es entlang des Daches ein, bis die Spannschnüre und Verschlussbänder ordentlich eingerollt sind, drehen
Sie den schon eingerollten Teil auf die Unterseite des Vordachs und rollen Sie weiter ein
• Mit den enthaltenen Schnüren befestigen
INNENBEFESTIGUNG:
Legen Sie die Innenzelte im Außenzelt aus und richten Sie die Eingänge so aus, dass sie in den Wohnbereich führen.
Die Aufhängung des Innenzelts erfolgt, indem die Knebel des Innenzelts durch die auf der Innenseite des Außenzelts befindlichen Ringe gesteckt werden.
Die Innenhalterungen sind farbcodiert und farblich auf die auf dem Dach des Außenzelts befindlichen Klemmen abgestimmt.
Beginnen Sie hinten und arbeiten Sie sich nach vorn.
Es ist ratsam, das Innenzelt zu lösen, wenn Sie das Zelt bei Nässe abbauen.
RING-UND-STIFT-SYSTEM:
Fixieren Sie ein Ende der Vorbaustange am dazu passenden Metallstift
Stecken Sie die Ecken des Zelts durch die Metallringe, indem Sie die Arretierstifte benutzen.
Die Heringe sollten in einem Winkel von 45 Grad platziert werden, um maximalen Halt zu erzielen.
………………………………………………………………………………………………………………………………………………………………………………………………………
.
TENT PITCHING INSTRUCTIONS NADINA 600 (FR)
MONTAGE EN COMMENÇANT PAR LE DOUBLE TOIT:
Déferler le double toit et orienter dans le sens requis
Attacher et sécuriser les coins arrière de la tente
Insérer la barre de toit dans le fourreau de l'arceau arrière et fixer les pieds
• Situer un bout de chaque mât dans l'œillet du tapis de sol sur la longueur d'un côté de la tente
S'assurer que les mâts joignent à la cheville correspondante, tous les mâts suivent les coutures du double toit
Reserrer toutes les sangles de tension en bas de chaque mât
Tenir debout l'arceau arrière monté, de sorte qu'il puisse tenir sans aide, en utilisant la tension provenant du panneau arrière. (Maintenir l'arceau entièrement
à la verticale, puis reculer l'extrémité d'environ 30 cm)
• Répéter cette manœuvre pour les arceaux restants
Travailler vers l'avant de la tente, en insérant les arceaux et en les mettant en position verticale
S'éloigner, en tenant le double toit, des points piquetés, pour que la tente 'prenne forme'
Tirer la tente pour tensionner le tapis de sol, et en piqueter les coins principaux de l'autre côté de la tente
S'assurer que la tente soit montée en ligne droite
Le tapis de sol devrait être à plat et sans plis
Planter le reste des piquets, en utilisant les points de piquetage en bas des mâts
Attacher aux mâts tous les crochets des mâts du double toit
Planter tous les cordes d'ancrage avec des piquets, en s'assurant que les points d'attache soient sous tension égale
PREINGRESSO PRE-MONTATO:
• Per erigere la veranda pre-montata, inserire il palo nella guaina, attaccarlo al sistema anello-paletto, fissare le cinghie di tensione e collegare i ganci del
palo al palo.
• Allontanare la veranda dalla tenda fino a quando il tetto della veranda è ben teso
• Tirare la veranda cosicché sia tesa e lontana dal corpo principale della tenda e, usando i picchetti di fissaggio, picchettare gli angoli della veranda
mediante i punti di aggancio in corda resistente agli urti
• Per srotolare la veranda pre-montata, srotolarla lungo la parte superiore fino a quando i cavi e le fettucce sono distesi e liberi, piegare la parte già srotolata
sotto il lato inferiore della veranda e continuare a srotolare
• Fissare con i bloccacorde forniti
ATTACHER LA TENTE ANTÉRIEURE:
Déferler la tente intérieure sous le double toit et orienter les portes selon le compartiment
Faire pendre la tente intérieure en attachant les crochets de celle-ci aux anneaux intérieurs du double toit
Les attaches intérieures sont codifiées par couleurs pour faciliter les connections du double toit
Commencer par derrière et travailler vers l'avant
Il est recommandé de retirer l'intérieur, en cas d'humidité, lorsque l'on démonte la tente.
SYSTÈME DE FIXATION RING & PIN:
Placer une extrémité de l'arceau de la porche sur la cheville de métal
Fixer les coins de la tente aux anneaux de métal, à l'aide de chevilles de fixation
Les piquets doivent se planter à un angle de 45 degrés pour le maximum de prise
………………………………………………………………………………………………………………………………………………………………………………………………………

Produktspecifikationer

Varumärke: Vango
Kategori: tält
Modell: Nadina 600

Behöver du hjälp?

Om du behöver hjälp med Vango Nadina 600 ställ en fråga nedan och andra användare kommer att svara dig