Ambient Weather EZ-30-12 Bruksanvisning
Ambient Weather ej kategoriserat EZ-30-12
Läs gratis den bruksanvisning för Ambient Weather EZ-30-12 (7 sidor) i kategorin ej kategoriserat. Guiden har ansetts hjälpsam av 26 personer och har ett genomsnittsbetyg på 4.3 stjärnor baserat på 7 recensioner. Har du en fråga om Ambient Weather EZ-30-12 eller vill du ställa frågor till andra användare av produkten? Ställ en fråga
Sida 1/7
Page 1
Ambient Weather
6845 W. Frye Road
Chandler, AZ 85226
TEL 480-346-3380 FAX 480-346-3381
www.AmbientWeather.com
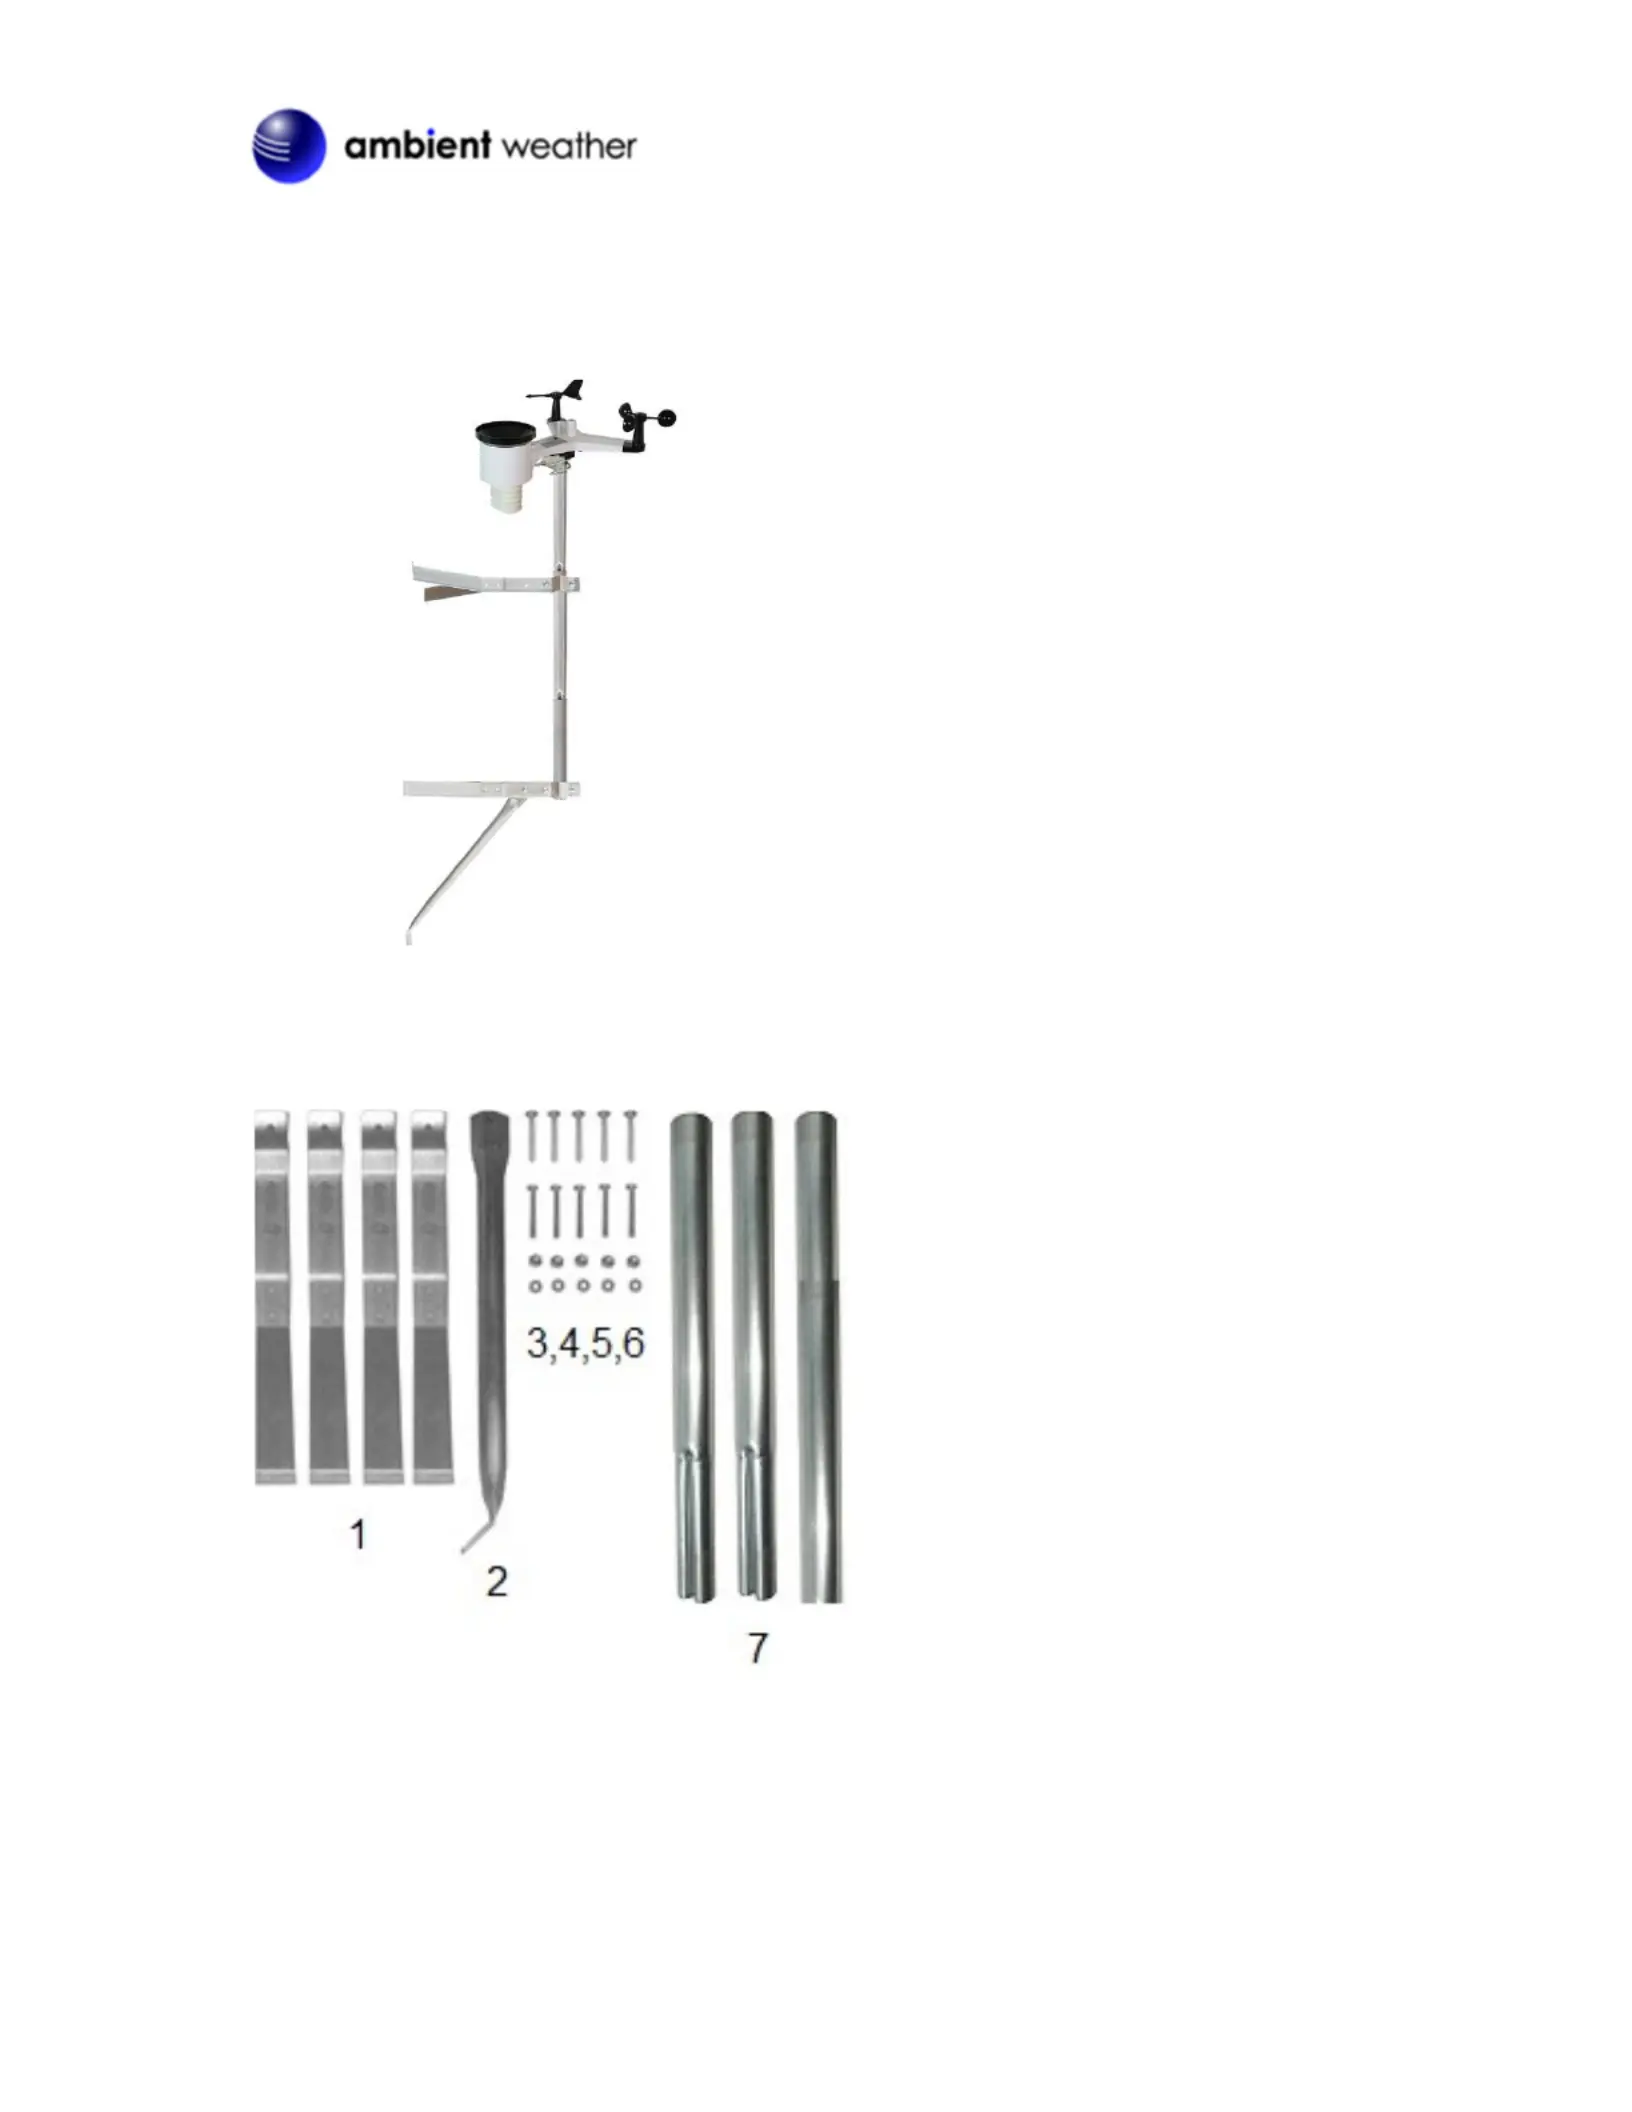
EZ-30-12 Weather Station Stable Gable Mounting Kit with Mast
The EZ-30-12 mounting pole kit provides a
stable weather station mounting solution, ideal
for mounting to a vertical wall, chimney, eve, or
fence post.
Ambient Weather pole mounting kit constructed
of rust proof 10-steel tubing, galvanized using
the Flo-Coat (zinc-chromate polymer) for
excellent corrosion proof protection.
Mounting hardware includes two horizontal
mounting brackets and a support brace.
Pole is made of three assemblable 14" x 1.25"-
diameter masts. Add a mast extension (see
below) to extend the pole an additional 35".
Array pictured is not included.
Figure 1
Components
The EZ-30-12 Stable Gable Mounting Kit includes the following components:
1.Qty 4: 12” Mounting Assemblies
(these will be assembled into two
brackets in Step 1)
2.Qty 1: Support Brace
3.Qty 5: Lag Screws
4.Qty 9: 7/16” Nuts
5.Qty 9: Bolts
6.Qty 9: Lock Washers
7.Qty 3: Assemblable 14” x 1.25”
Masts
Tools and Materials Needed
7/16” deep socket or wrench
Level or Plumb
Electric drill with flat head screw tip
Produktspecifikationer
| Varumärke: | Ambient Weather |
| Kategori: | ej kategoriserat |
| Modell: | EZ-30-12 |
Behöver du hjälp?
Om du behöver hjälp med Ambient Weather EZ-30-12 ställ en fråga nedan och andra användare kommer att svara dig
ej kategoriserat Ambient Weather Manualer

19 Augusti 2025
19 Augusti 2025
19 Augusti 2025
18 Augusti 2025
18 Augusti 2025
18 Augusti 2025
18 Augusti 2025
18 Augusti 2025
18 Augusti 2025
18 Augusti 2025
ej kategoriserat Manualer
Nyaste ej kategoriserat Manualer
12 Mars 2026
12 Mars 2026
12 Mars 2026
12 Mars 2026
12 Mars 2026
12 Mars 2026
12 Mars 2026
12 Mars 2026
12 Mars 2026
12 Mars 2026