Atdec TH2050-VFM-TAA Bruksanvisning
Atdec ej kategoriserat TH2050-VFM-TAA
Läs gratis den bruksanvisning för Atdec TH2050-VFM-TAA (2 sidor) i kategorin ej kategoriserat. Guiden har ansetts hjälpsam av 26 personer och har ett genomsnittsbetyg på 4.6 stjärnor baserat på 3 recensioner. Har du en fråga om Atdec TH2050-VFM-TAA eller vill du ställa frågor till andra användare av produkten? Ställ en fråga
Sida 1/2
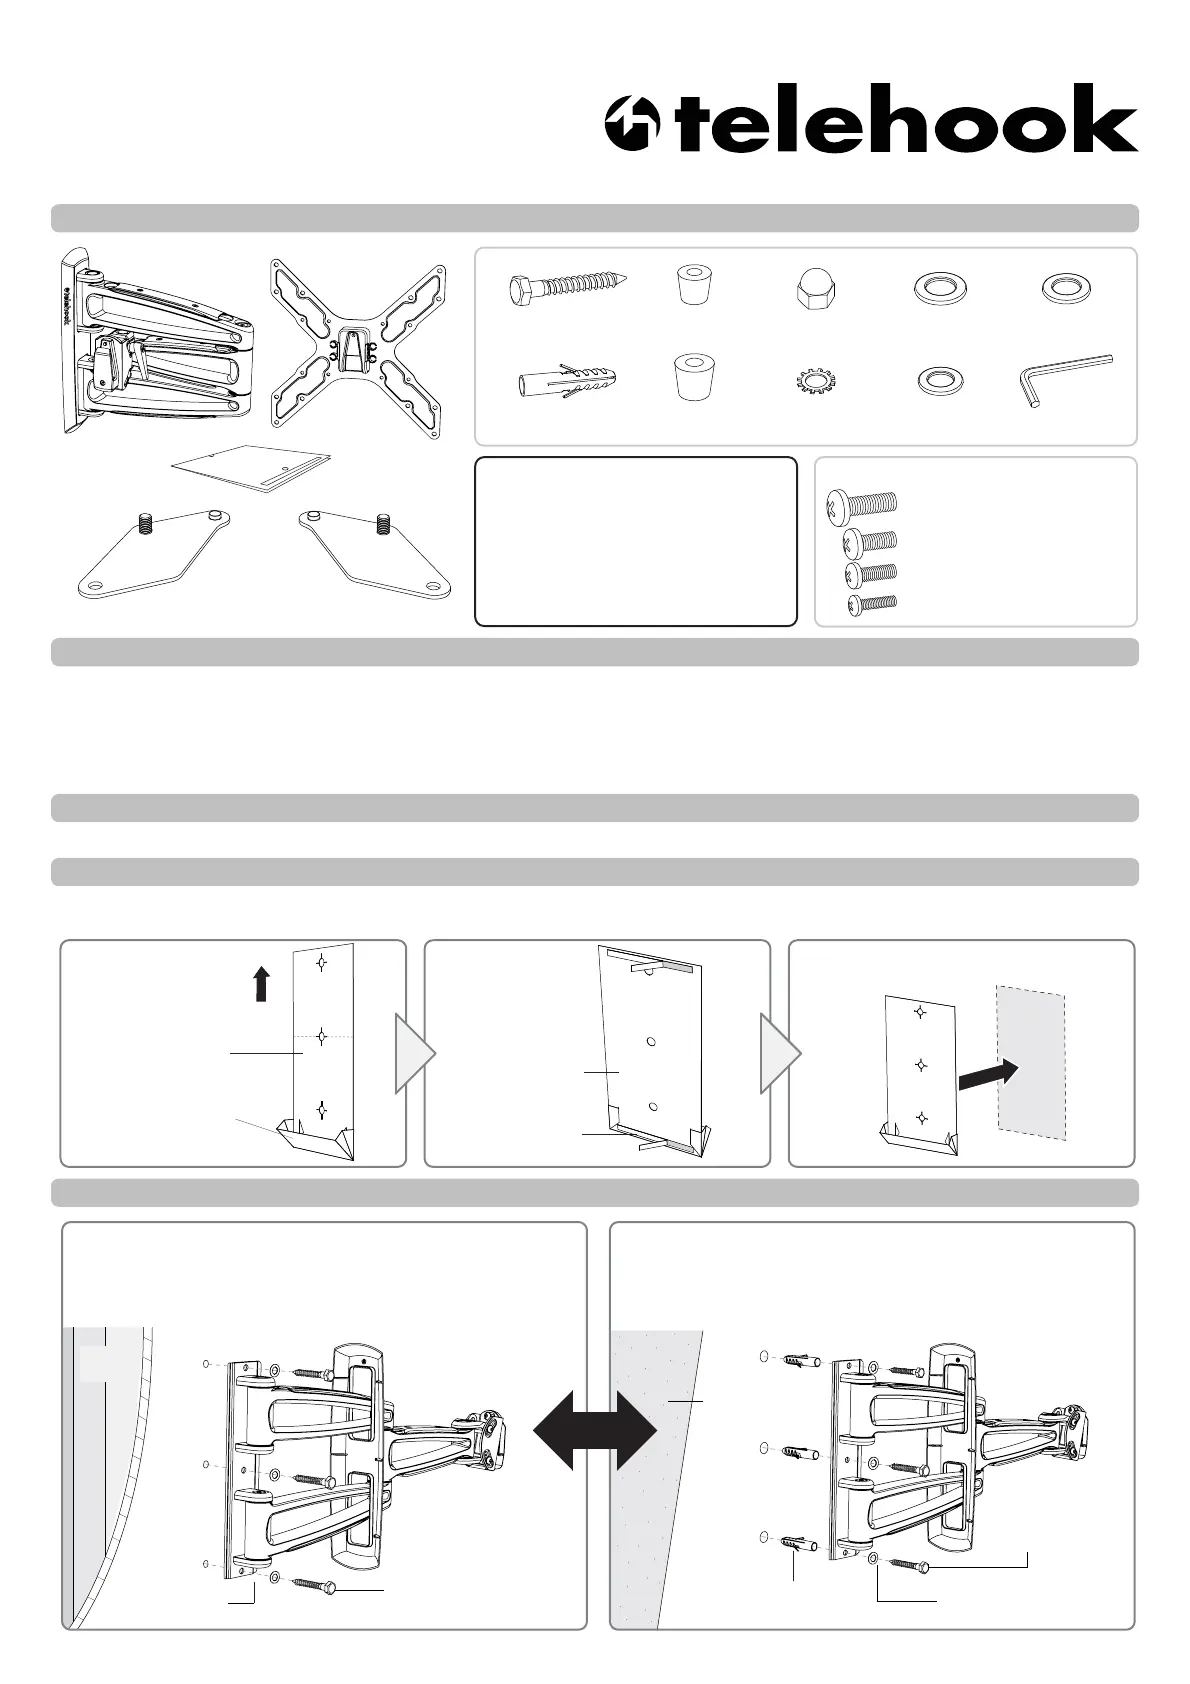
Installation Instructions
TH-2050-VFM
Components Checklist
Flat Screen Wall Mount | Full Motion
TOOLS REQUIRED:
!"#$%&
!"!'(%)
!*'(%)
Hardware
+%
,%-"
+%.&
*
$*(
-*
,
($/-"
$/-!01$/-*-*
$*-!01$*--*
$-!01$--*
$0-!01$0-"-*
,
$/-"
Mounting Screws
$*1
2-*
$01/
2-*
$/
32-*
(
-*
IMPORTANT INFORMATION
+2+
45+
%6
72
5-%%+-5-%%-
$(
-*
! IMPORTANT - Install Telehook Wall Mount as per Installation Instructions.
89'($2%2&6%62"'6::;<45+%)62%=
!-!"-*->2%65-%%2
-!"-"*-">2%65-%%2
-*-*>2%65-%%2
89$%2)2%%;&)%%%
Step 1. Check Components
,'&26%,%%,'%;
Step 2. Locate Drilling Position
(+
?%>)%6
72%%
2,
2;>
-
%672
+,.
&
;'%6)
2;>
%%672&%
2%6
,%)&29'($2%<%2%622&2%);2<22%62%
?%672'2%
2,
%672
@AB39
Top
Step 3. Attaching the Articulated Arm to the Wall
Timber Stud Wall
>?%6%672<<
>2$2%62%6,%
,(2
Masonry Wall
>?%6%672<!"#<
>2$2%62%6,<
,(%+%2
,
$/-"
,
$/-"
$%&
Wall
9;
2
+%
,%-"
,
($/-"
,(
$/-"
OR
Produktspecifikationer
| Varumärke: | Atdec |
| Kategori: | ej kategoriserat |
| Modell: | TH2050-VFM-TAA |
Behöver du hjälp?
Om du behöver hjälp med Atdec TH2050-VFM-TAA ställ en fråga nedan och andra användare kommer att svara dig
ej kategoriserat Atdec Manualer

10 Oktober 2025
10 Oktober 2025
10 Oktober 2025
9 Oktober 2025
9 Oktober 2025
ej kategoriserat Manualer
Nyaste ej kategoriserat Manualer
3 April 2026
3 April 2026
3 April 2026
3 April 2026
3 April 2026
3 April 2026
3 April 2026
3 April 2026
3 April 2026