Atdec ProAV TH-VWV Bruksanvisning
Atdec ej kategoriserat ProAV TH-VWV
Läs gratis den bruksanvisning för Atdec ProAV TH-VWV (5 sidor) i kategorin ej kategoriserat. Guiden har ansetts hjälpsam av 16 personer och har ett genomsnittsbetyg på 5.0 stjärnor baserat på 4 recensioner. Har du en fråga om Atdec ProAV TH-VWV eller vill du ställa frågor till andra användare av produkten? Ställ en fråga
Sida 1/5
TH-VWV
TH-VWVP
TH-VWP-050
TH-VWP-080
TH-VWP-100
TH-VWP-160
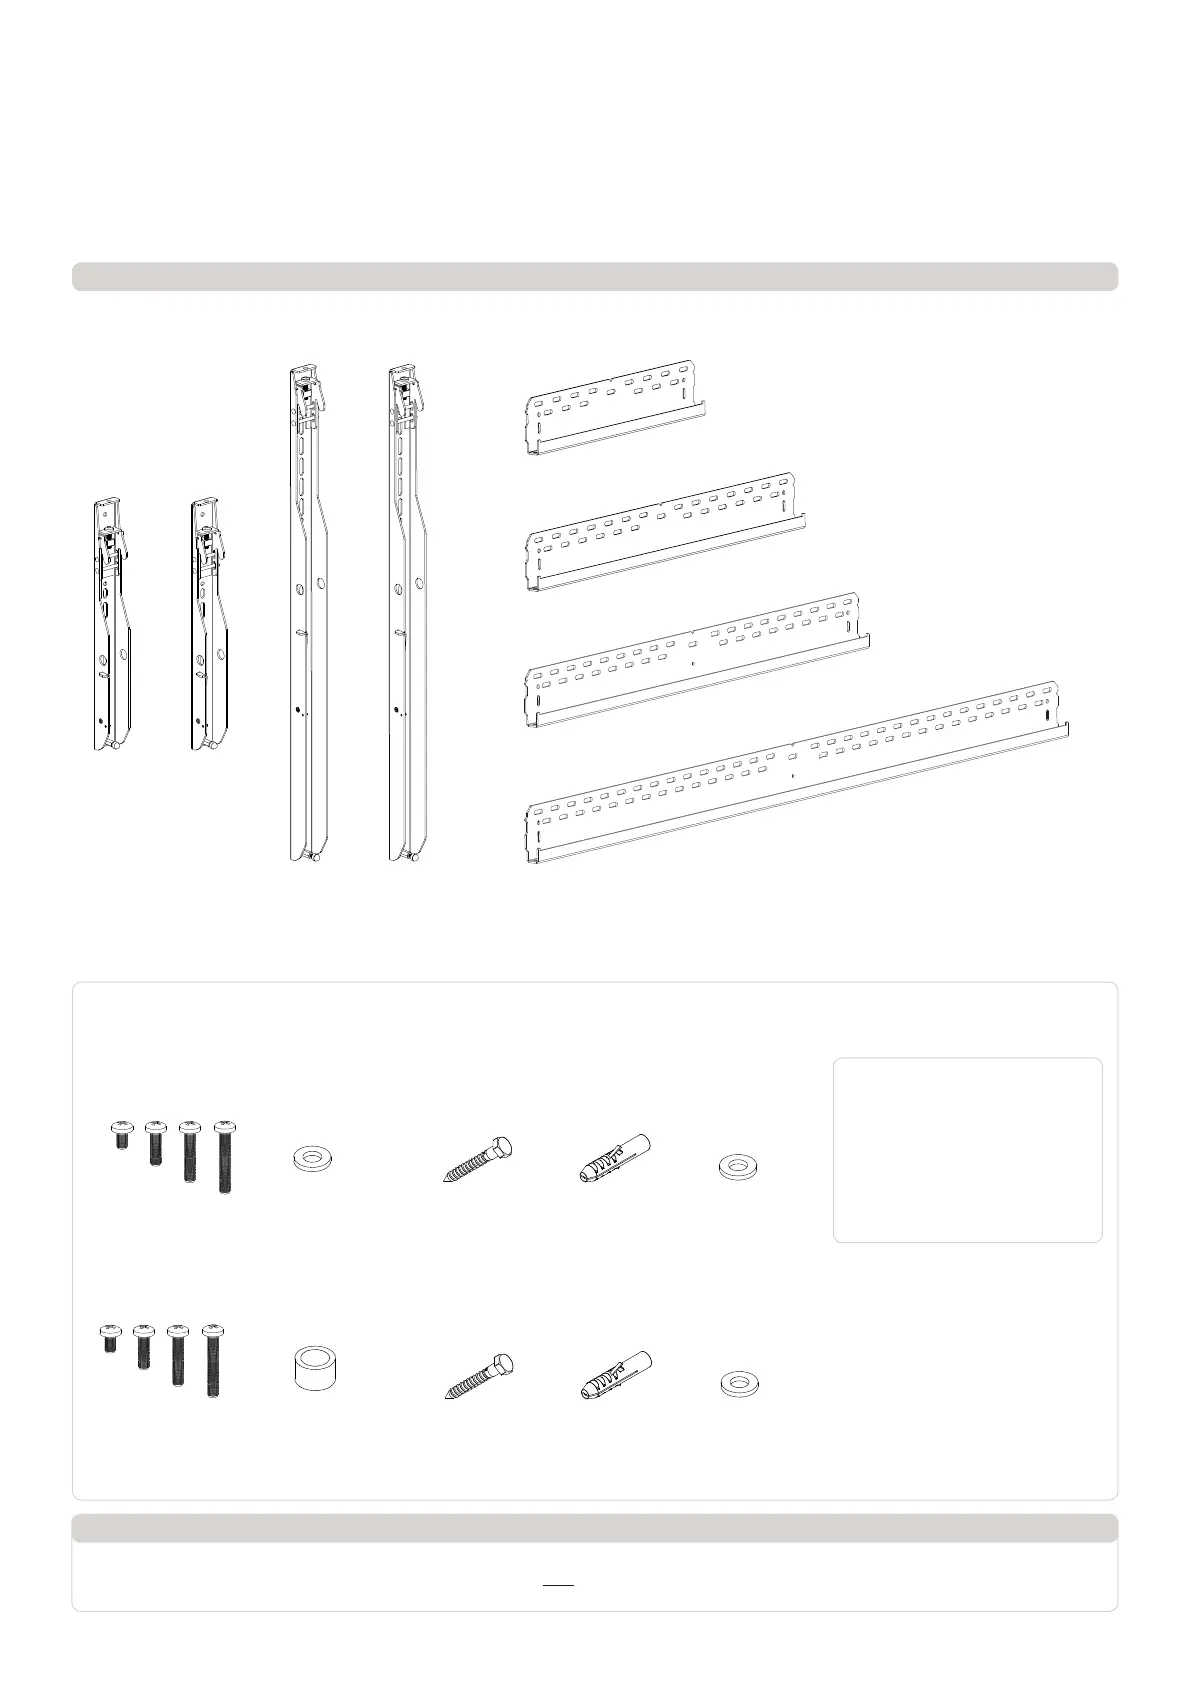
Component Checklist
Universal Video Wall
! IMPORTANT - Install Video Wall as per installation instruction.
! This product supports a maximum load of 165kg (363lbs.) per panel or screen.
! The manufacturer accepts no responsibility for incorrect installation.
IMPORTANT INFORMATION:
Mounting Bracket (x2)
TH-VWVP
Mounting Bracket (x2)
TH-VWV
Wall Plate (1.6m)
TH-VWP-160
Wall Plate (0.8m)
TH-VWP-080
Wall Plate (0.5m)
TH-VWP-050
Wall Plate (1m)
TH-VWP-100
HARDWARE
Mounting Brackets
(TH-VWV, TH-VWVP)
Wall Plate 0.5m, 0.8m, 1m
(TH-VWP-050, TH-VWP-080, TH-VWP-100)
Wall Plate 1.6m
(TH-VWP-160)
Coach Screw
(x2)
Coach Screw
(x3)
M6 x 16/30/45/60
(x4)
M8 x 16/30/50/65
(x4)
Nylon
Anchor (x2)
Nylon
Anchor (x3)
8mm Washer (x2)
8mm Washer (x3)
Tools Required:
• Power Drill
• 8mm (0.31”) Drill Bit
• 10mm (0.39”) Masonry Drill Bit
• 13mm (0.51”) Socket Wrench
Shifter
• Phillips Head Screwdriver
• Spirit Level
• Tape Measure
M6 Washer (x4)
Spacer (x8)
Installation Instructions
Produktspecifikationer
| Varumärke: | Atdec |
| Kategori: | ej kategoriserat |
| Modell: | ProAV TH-VWV |
| Vikt: | 3200 g |
| Bredd: | 130 mm |
| Djup: | 490 mm |
| Höjd: | 70 mm |
| Förpackningens bredd: | 270 mm |
| Material: | Stål |
| Produktens färg: | Svart |
| Låddjup: | 520 mm |
| Vikt inkl. förpackning: | 13400 g |
Behöver du hjälp?
Om du behöver hjälp med Atdec ProAV TH-VWV ställ en fråga nedan och andra användare kommer att svara dig
ej kategoriserat Atdec Manualer

10 Oktober 2025
10 Oktober 2025
10 Oktober 2025
9 Oktober 2025
9 Oktober 2025
ej kategoriserat Manualer
Nyaste ej kategoriserat Manualer
3 April 2026
3 April 2026
3 April 2026
3 April 2026
3 April 2026
3 April 2026
3 April 2026
3 April 2026
3 April 2026