Atlona AT-OME-EX-RX Bruksanvisning
Atlona Audio/video-omvandlare AT-OME-EX-RX
Läs gratis den bruksanvisning för Atlona AT-OME-EX-RX (12 sidor) i kategorin Audio/video-omvandlare. Guiden har ansetts hjälpsam av 56 personer och har ett genomsnittsbetyg på 5.0 stjärnor baserat på 5 recensioner. Har du en fråga om Atlona AT-OME-EX-RX eller vill du ställa frågor till andra användare av produkten? Ställ en fråga
Sida 1/12
1
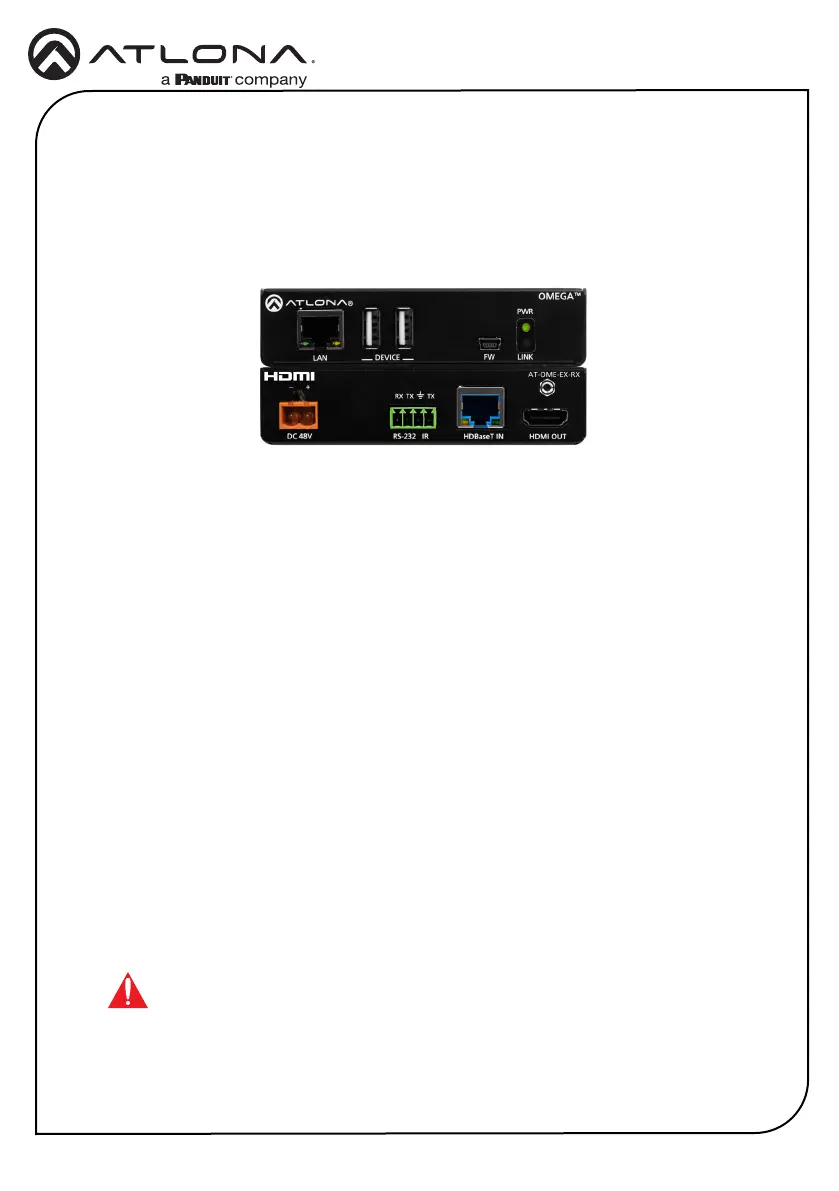
Installation Guide
AT-OME-EX-RX
Omega
™
4K/UHD
HDMI Over HDBaseT Receiver with USB, Control, and PoE
AT-OME-EX-RX
The Atlona AT-OME-EX-RX is an HDBaseT receiver for video up to 4K/60 4:2:0, plus embedded
audio, control, Ethernet, and USB over distances up to 330 feet (100 meters). Part of the
Omega™ Series of integration products for modern AV communications and collaboration,
the OME-EX-RX is HDCP 2.2 compliant and receives IR, RS-232, and IP control signals. With
a matching HDBaseT transmitter, the integrated USB extension is ideal for software video
conferencing and the use of touch or interactive displays. The OME-EX-RX includes two USB
interfaces for devices such as a camera or display. This receiver is ideal for use with Omega
Series transmitters as well as switchers with HDBaseT outputs. Also available is the OME-EX-
KIT which includes the OME-EX-TX and OME-EX-RX.*
* The AT-OME-EX-RX is not compatible with the AT-UHD-HDVS-300 system for extending USB.
IMPORTANT: Visit http://www.atlona.com/product/AT-OME-EX-RX for the
latest rmware updates and User Manual.
1 x AT-OME-EX-RX
1 x Captive screw connectors, 4-pin
2 x Mounting plates
4 x Mounting screws
1 x 48 V DC power supply
1 x Installation Guide
Package Contents
Produktspecifikationer
| Varumärke: | Atlona |
| Kategori: | Audio/video-omvandlare |
| Modell: | AT-OME-EX-RX |
| Vikt: | 430 g |
| Bredd: | 109 mm |
| Djup: | 127 mm |
| Höjd: | 26 mm |
| LED-indikatorer: | Ja |
| Ljudformat som stöds: | LPCM |
| Videolägen som stöds: | 480i, 480p, 576i, 576p, 720p, 1080i, 1080p |
| Maximal upplösning: | 4096 x 2160 pixlar |
| Certifiering: | CE, RoHS, FCC |
| HDCP: | Ja |
| Grafikupplösningar som stöds: | 2048 x 1080,3840 x 2160,4096 x 2160 |
| Modell: | AV-mottagare |
| Färgdjup: | 24 bit |
| USB-anslutning: | Mini-USB A, USB Type-A |
| Ljudutgångskanaler: | 7.1 kanaler |
| HDBaseT-certifierad: | Ja |
| RJ-45 utgångsportar: | 1 |
| HDCP-version: | 2.2 |
| Antal HDMI-utgångar: | 1 |
| Kabeltyper som stöds: | Cat5e, Cat6, Cat6a, Cat7 |
| Antal USB-portar: | 3 |
| Strömförbrukning (vanlig): | 18.76 W |
| Temperatur vid drift: | -18 - 50 ° C |
| Temperaturintervall (förvaring): | -20 - 60 ° C |
| Intervall för relativ operativ luftfuktighet: | 20 - 90 % |
| AC-inspänning: | 100 - 240 V |
| Anslutningsteknologi: | Kabel |
| Nätverksansluten (Ethernet): | Ja |
| Strömkälla av typen: | DC |
| Växelström Frekvens: | 50 - 60 hz |
| Modulator: | PCM |
| Maximal överföringshastighet avstånd: | 100 m |
| RS-232-ingångar: | 1 |
Behöver du hjälp?
Om du behöver hjälp med Atlona AT-OME-EX-RX ställ en fråga nedan och andra användare kommer att svara dig
Audio/video-omvandlare Atlona Manualer

31 December 2025
25 September 2024
25 September 2024
25 September 2024
25 September 2024
22 September 2024
22 September 2024
22 September 2024
10 September 2024
10 September 2024
Audio/video-omvandlare Manualer
Nyaste Audio/video-omvandlare Manualer
7 April 2025
3 April 2025
2 April 2025
2 April 2025
1 April 2025
1 April 2025
1 April 2025
29 Mars 2025
29 Mars 2025
26 Mars 2025