Autocue iPad Portable Bruksanvisning
Autocue
ej kategoriserat
iPad Portable
Läs gratis den bruksanvisning för Autocue iPad Portable (2 sidor) i kategorin ej kategoriserat. Guiden har ansetts hjälpsam av 14 personer och har ett genomsnittsbetyg på 4.5 stjärnor baserat på 7.5 recensioner. Har du en fråga om Autocue iPad Portable eller vill du ställa frågor till andra användare av produkten? Ställ en fråga
Sida 1/2
Guide
iPad
Portable
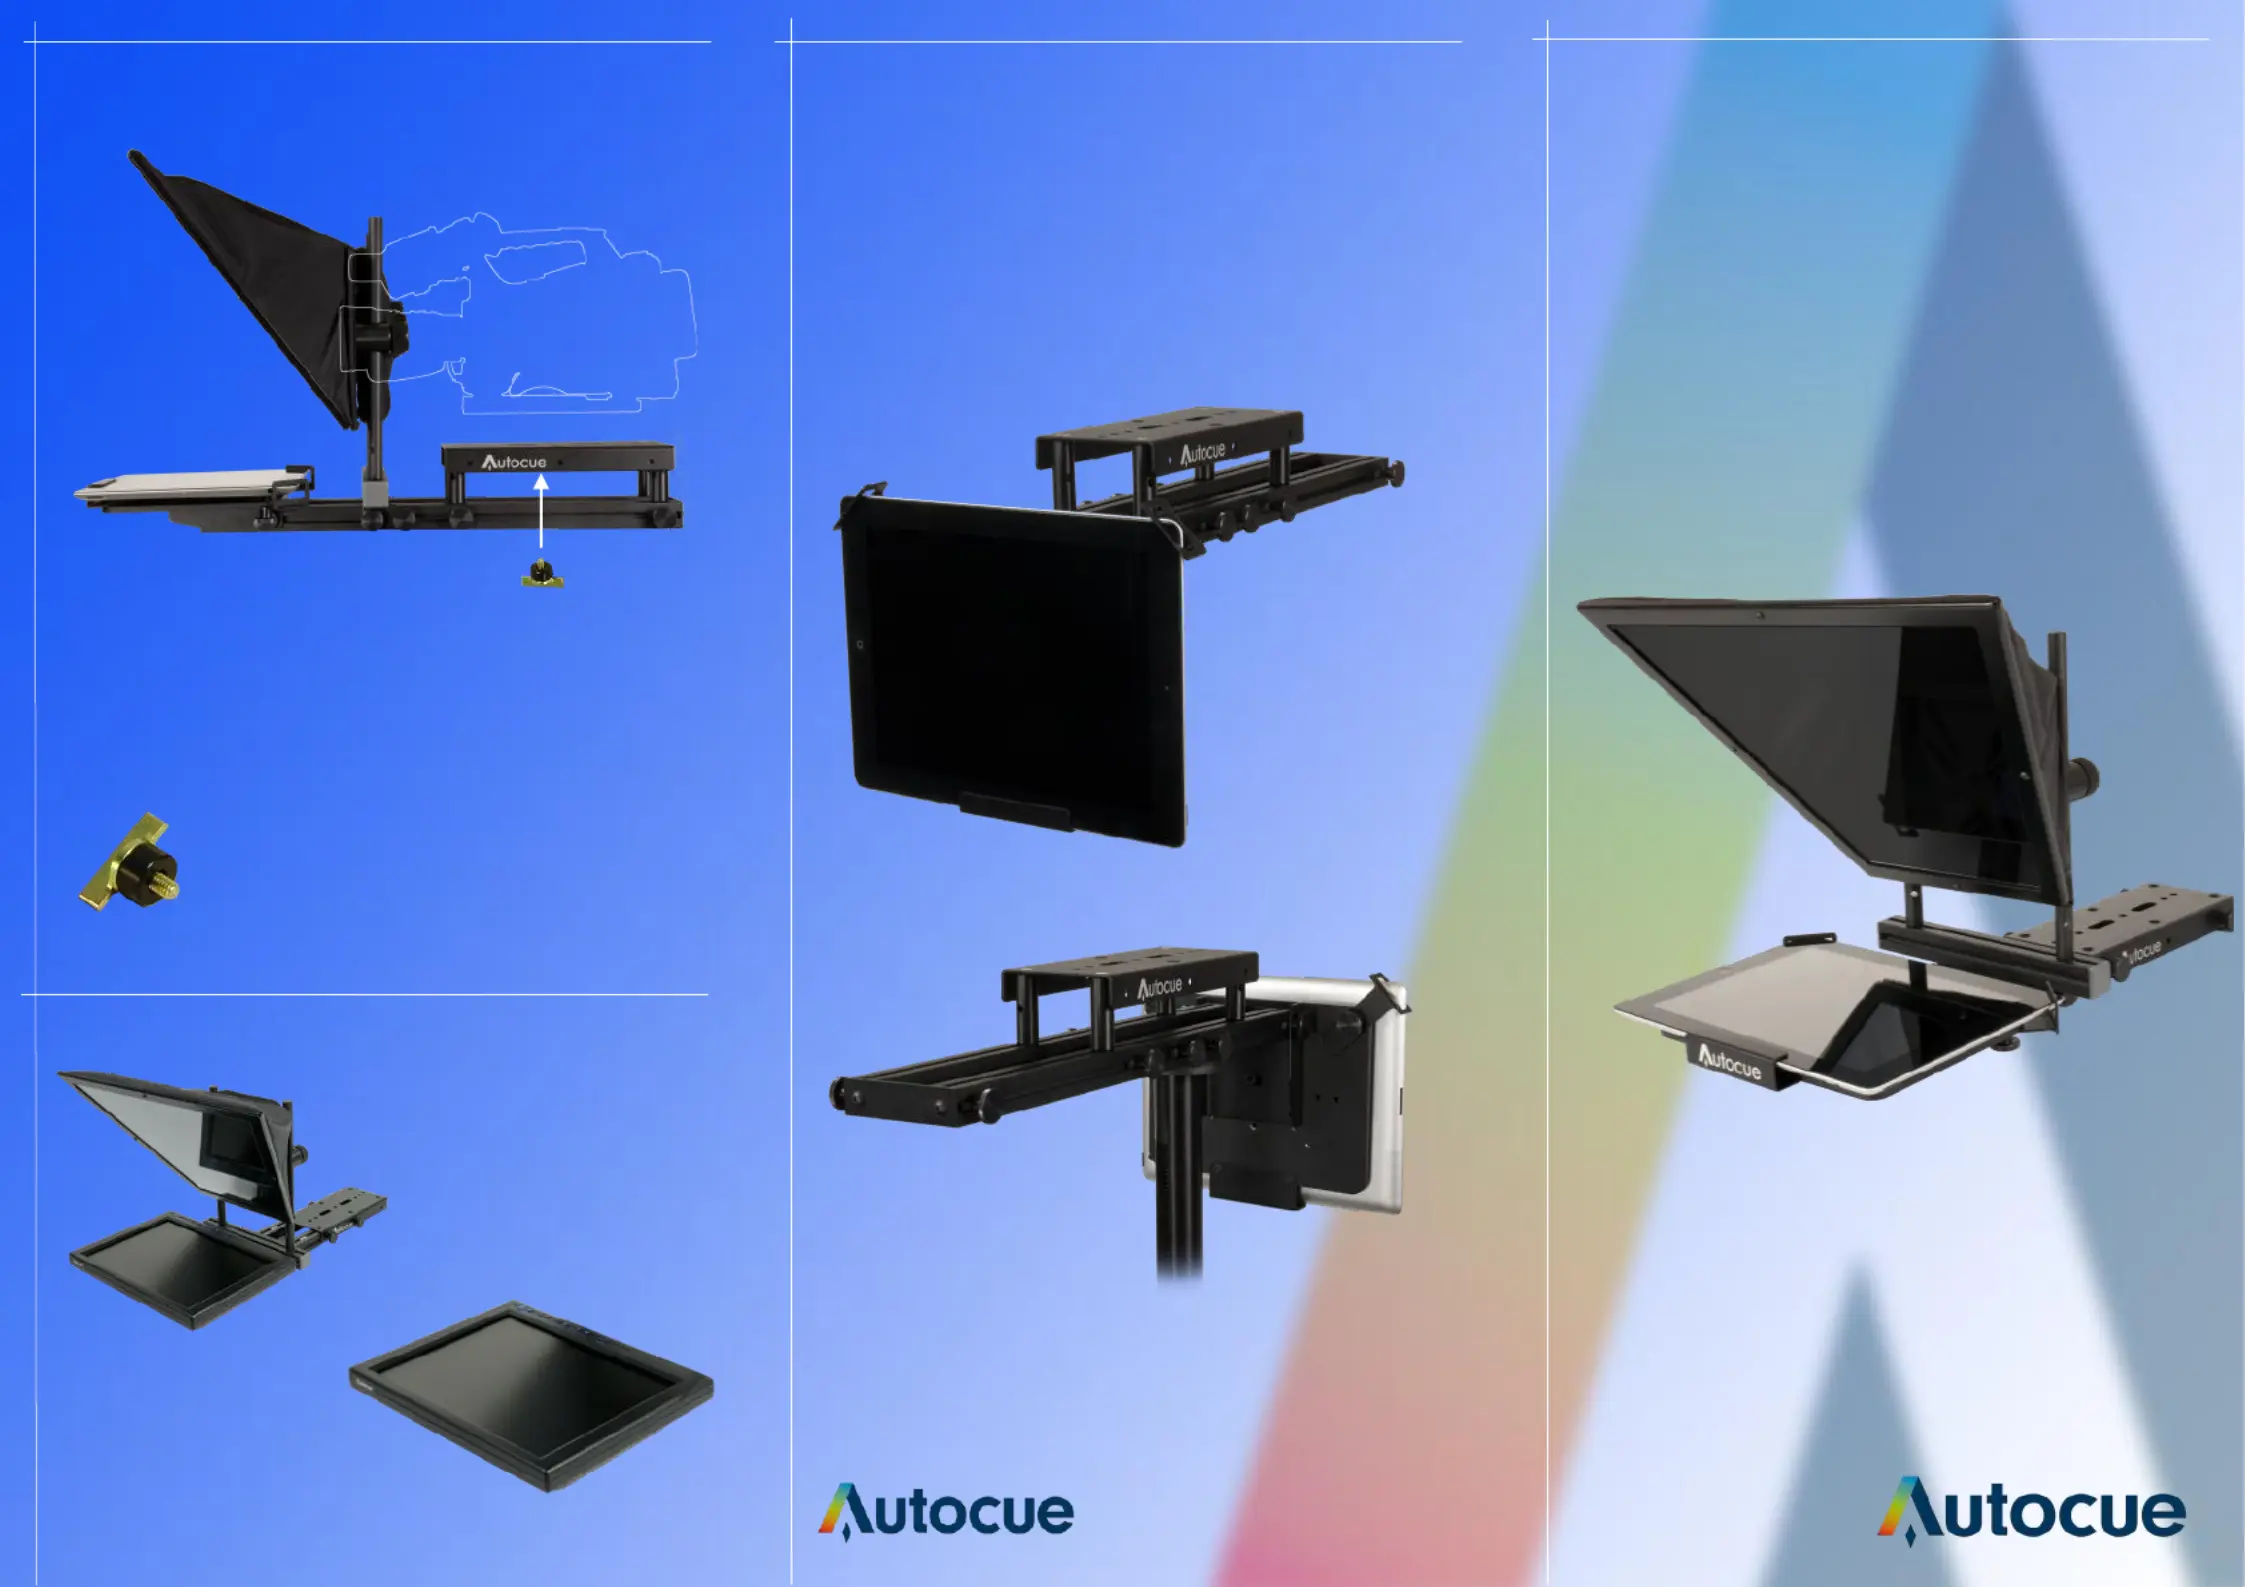
It is important that the camera lens is in the centre of
the aperture at the rear of the hood. This is achieved
by raising and lowering the camera mounting plate
and hood.
Fix the camera in place
using the camera screw
provided.
1/4” BSW
Alternative Configuration
autocue.com
Correct iPad
orientation for
straight read
Camera Screw
Camera Fixing
The iPad Portable can be reconfigured to straight
read mode. To achieve this remove the hood unit
by loosening the two thumb screws of the iPad
holder and move the monitor to the vertical
position.
By replacing the iPad
holder with the 10” display
it is possible to convert
your iPad Portable into an
SSP10.
SSP10
Produktspecifikationer
| Varumärke: | Autocue |
| Kategori: | ej kategoriserat |
| Modell: | iPad Portable |
Behöver du hjälp?
Om du behöver hjälp med Autocue iPad Portable ställ en fråga nedan och andra användare kommer att svara dig
ej kategoriserat Autocue Manualer
28 Juli 2025
ej kategoriserat Manualer
- Berkel
- Acti
- Bendix King
- Cretors
- Akg
- Blustream
- Hexinverter Electronique
- FSR
- Viscount
- Sonnenkonig
- Tecno
- Ulsonix
- Elektron
- LD Systems
- Barefoot Sound
Nyaste ej kategoriserat Manualer
23 Oktober 2025
23 Oktober 2025
23 Oktober 2025
23 Oktober 2025
23 Oktober 2025
23 Oktober 2025
23 Oktober 2025
23 Oktober 2025
23 Oktober 2025
23 Oktober 2025