Caliber HWP 101E Bruksanvisning
Läs gratis den bruksanvisning för Caliber HWP 101E (2 sidor) i kategorin Smart hem. Guiden har ansetts hjälpsam av 61 personer och har ett genomsnittsbetyg på 4.3 stjärnor baserat på 9 recensioner. Har du en fråga om Caliber HWP 101E eller vill du ställa frågor till andra användare av produkten? Ställ en fråga
Sida 1/2
WWW.CALIBER.NL
CALIBER EUROPE BV
•
Kortakker 10
4264 AE Veen
•
The Netherlands
For all info on the disposal
of items with the Wheelie
bin icon, please see:
webshop.caliber.nl/media/
forms/wheeliebin.pdf
HWP 101E
USER MANUAL
• GB • FR • DE • NL •
Button activities and LED indicator:
1. Press and hold the button for 5 seconds to enter into Wi-Fi connection (or conguration). The
LED indicator will blink rapidly (EZ mode) or slowly (AP mode). EZ mode connection is set as
default in Wi-Fi conguration. Press and hold the button for 5 seconds will enable the device
switch between EZ mode and AP mode.
2. Short press the button to manually ON/OFF control the device. The LED indicator will light ON/
OFF when plug is ON/OFF.
Activités des boutons et voyant LED :
1. Appuyez et maintenez la pression pendant 5 secondes sur le bouton pour passer en connexion
(ou conguration) Wi-Fi. Le voyant LED clignote rapidement (mode EZ) ou lentement (mode
AP). La connexion en mode EZ est réglée par défaut dans la conguration Wi-Fi. Appuyez
et maintenez la pression pendant 5 secondes sur le bouton pour permettre à l’appareil de
basculer entre les modes EZ et AP.
2. Appuyez brièvement sur le bouton pour allumer/éteindre manuellement l’appareil. Le voyant
LED s’allume/s’éteint lorsque la che est allumée/éteinte.
Tasten-Aktivitäten und LED-Kontrollleuchte:
1. Halten Sie die Taste für 5 Sekunden gedrückt, um auf die WLAN-Verbindung (oder
Konguration) zuzugreifen. Die LED-Kontrollleuchte blinkt schnell (EZ-Modus) oder langsam
(AP-Modus). Der EZ-Modus ist in der WLAN-Konguration als Standard festgelegt. Wenn Sie
die Taste für 5 Sekunden gedrückt halten, wird am Gerät der Wechsel zwischen EZ-Modus und
AP-Modus aktiviert.
2. Drücken Sie die Taste kurz, um das Gerät manuell EIN-/AUSZUSCHALTEN.
Die LED-Kontrollleuchte geht EIN/AUS, wenn der Stecker EIN/AUSGESCHALTET ist.
Knopactiviteiten en LED-indicator:
1. Houd de knop 5 seconden ingedrukt om naar de Wi-Fi-verbinding (of conguratie) te gaan. De
LED-indicator zal snel knipperen (EZ-modus) of langzaam (AP-modus). EZ-modusverbinding
is als standaard ingesteld als wi-conguratie. Houd de knop nogmaals 5 seconden ingedrukt
te schakelen tussen de EZ-modus en de AP-modus.
2. Druk kort op de knop om het apparaat handmatig in of uit te schakelen.
De LED-indicator zal AAN/UIT gaan branden als de stekker AAN/UIT is.
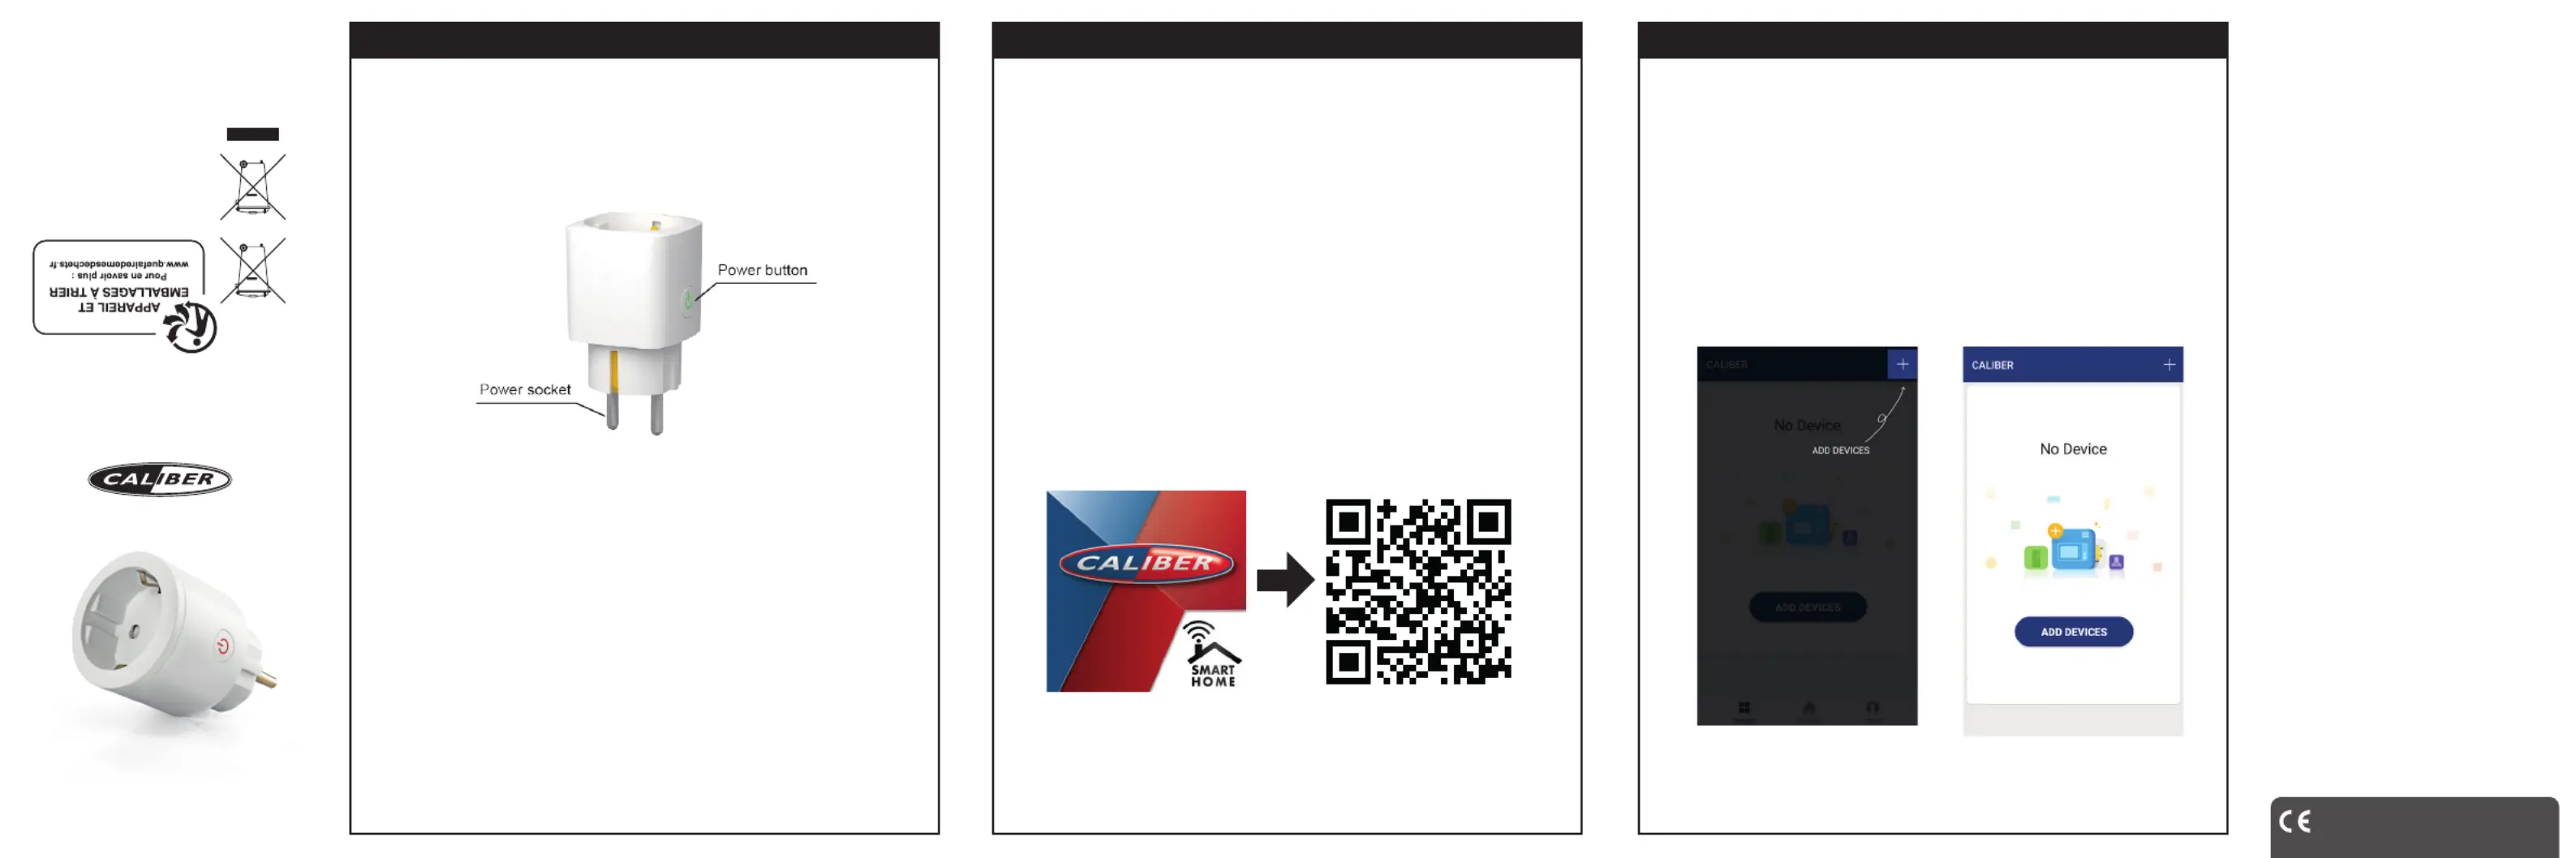
APP download and Account binding
1. Scan the QR code below to download APP for Android and iOS system. Or you can download
the ‘Caliber smart home’ APP on Apple Store and Google Play.
2. Start the APP and register an account with your email address/mobile number and then log-in
with the registered account.
Téléchargement de l’application et liaison de compte
1. Scannez le code QR ci-dessous pour télécharger l’application pour systèmes Android et iOS.
Alternativement, vous pouvez télécharger l’application « Caliber smart home » sur l’Apple
Store et Google Play.
2. Lancez l’application, créez un compte à l’aide de votre adresse email/numéro de téléphone
portable, puis authentiez-vous avec le compte créé.
App herunterladen und Konto einbinden
1. Scannen Sie den unten abgebildeten QR-Code, um die App für Android- und iOS-Systeme
herunterzuladen. Oder laden Sie die „Caliber Smart Home“-App im Apple Store bzw. bei
Google Play herunter.
2. Starten Sie die App und registrieren Sie ein Konto mit Ihrer E-Mail-Adresse/Handynummer
und melden Sie sich anschließend bei Ihrem registrierten Konto an.
APP downloaden en account registratie
1. Scan de onderstaande QR-code om APP te downloaden voor Android- en iOS-systemen. Of u
kunt de app ‘Caliber smart home’ downloaden in Apple Store en Google Play.
2. Start de APP en registreer een account met uw e-mailadres / mobiele nummer en log
vervolgens in met de geregistreerde account.
Add Device
Click “ADD Devices” and select the Device Type ”Smart Plug”.
Ajouter un appareil
Cliquez sur « ADD Devices » (« AJOUTER des appareils »), puis sélectionnez le type
d’appareil « Smart Plug » (« Fiche intelligente »).
Gerät hinzufügen
Klicken Sie auf „Geräte HINZUFÜGEN“ und wählen Sie den Gerätetyp „Intelligenter
Stecker“.
Voeg apparaat toe
Klik op “Apparaten toevoegen” en selecteer het apparaattype “Smart Plug”.
GBCaliber hereby declares that the item HWP101E is in compliance with the
essential requirements and other relevant provisions of Directive 2011/65/EU
(RoHS) and 2014/53/EU (RED) Par la présente Caliber déclare que l’appareil FR
HWP101E est conforme aux exigences essentielles et aux autres dispositions
pertinentes de la directive 2011/65/EU (RoHS) et 2014/53/EU (RED) DE Hiermit
erklärt Caliber, dass sich das Gerät HWP101E in Übereinstimmung mit den
grundlegenden Anforderung und übrigen einschlägigen Bestimmungen der
Richtlinie 2011/65/EU (RoHS) und 2014/53/EU (RED) bendet. Con la presente IT
Caliber dichiara che questo HWP101E è conforme ai requisiti essenziali ed alle
alte disposizioni pertinenti stabilite dalla directtiva 2011/65/EU (RoHS) e 2014/53/
EU (RED) Por medio de la presente Caliber declara que el HWP101E cumple ES
con los requisitos esenciales y otra disposiciones aplicables o exigibles de la
Directiva 2011/65/EU (RoHS) y 2014/53/EU (RED) Caliber declara que este PT
HWP101E está conforme com os requisitos essenciais e outras disposições da
Directiva 2011/65/EU (RoHS) e 2014/53/EU (RED) Härmed intygar Caliber att S
denna HWP101E Pro står i överensstämmelse med de väsentliga egenskapskrav
och övriga relevanta bestämmelser som framgår av direktiv 2011/65/EU (RoHS)
och 2014/53/EU (RED) Niniejszym Caliber oświadcza, źe HWP101E jest PL
zgodne z zasadniczymi wymaganiami oraz innymi stosownymi postanowieniami
Dyrektywy 2011/65/EU (RoHS) i 2014/53/EU (RED) Undertegnede Caliber DK
erklærer hermed, at følgende udstyr HWP101E overholder de væsentlige krav
og øvrige relevante krav i direktiv 2011/65/EU (RoHS) og 2014/53/EU (RED) EE
Käesolevaga kinnitab Caliber seadme HWP101E vastavust direktiivi 2011/65/EU
(RoHS) ja 2014/53/EU (RED) pöhinõuetele ja nimetatud direktiivist tulenevatelle
teistele asjakohastele sätetele.Šiuo Caliber deklaruoja, kad šis HWP101E LT
atitinka esminius reikalavimus ir kitas 2011/65/EU (RoHS) ir 2014/53/EU (RED)
Direktyvos nuostatas. Caliber vakuuttaa täten että HWP101E tyyppinen laite on FI
direktiivin 2011/65/EU (RoHS) ja 2014/53/EU (RED) oleellisten vaatimusten ja sitä
koskevien direktiivin muiden ehtojen mukainen. Hér með lýsi Caliber yr ϸvi að IS
HWP101E erί samræmi við grunnkröfur og aðrar kröfur, sem gerðar eru í tilskipun
2011/65/EU (RoHS) og 2014/53/EU (RED) Caliber erklærer herved at utstyret NO
HWP101E er i samsvar med de grunn-leggende krav og øvrige relevante krav i
drektiv 2011/65/EU (RoHS) og 2014/53/EU (RED) Hierbij verklaart Caliber dat NL
het toestel HWP101E in overeenstemming is met de essentiële eisen en de andere
relevante bepalingen van richtlijn 2011/65/EU (RoHS) en 2014/53/EU (RED)
Latest declaration form can be found at:
www.caliber.nl/media/forms/DeclarationHWP101E.pdf
SPECIFICATIONS
Communication Mode: Wi-Fi 802.11 b/g/n (2.4GHz)
Power supply: 220V-250VAC 50HZ/60Hz
Rated Current: 16A (3680W)
Case Material: re resistant PC
1. PRODUCT OVERVIEW
Smart Plug is a Wi-Fi switch which can be used
to remotely ON/OFF control the plugged devices
after paired to the Wi-Fi network. Users can also
monitor the on/off status of the plugged devices
on mobiles devices from anywhere.
2.PRODUCT FEATURES
• Amazon Alexa and Google Assistant compatible
• Wi-Fi connection supported
• Timing setting available
• Firmware OTA upgrade supported
• Over-current protection supported
• CE, RoHS certied
• Energy monitoring
• APP support: iOS 8.0 or Android 4.1 and higher
Button & LED indicator
INSTALLATION INSTRUCTIONS #1INSTALLATION INSTRUCTIONS #2INSTALLATION INSTRUCTIONS #3
Produktspecifikationer
| Varumärke: | Caliber |
| Kategori: | Smart hem |
| Modell: | HWP 101E |
Behöver du hjälp?
Om du behöver hjälp med Caliber HWP 101E ställ en fråga nedan och andra användare kommer att svara dig
Smart hem Caliber Manualer

17 Augusti 2025
13 Augusti 2024
Smart hem Manualer
Nyaste Smart hem Manualer
3 April 2026
2 April 2026
24 Mars 2026
22 Mars 2026
22 Mars 2026
22 Mars 2026
22 Mars 2026
21 Mars 2026
21 Mars 2026
20 Mars 2026