Cambridge TV2 Bruksanvisning
Läs gratis den bruksanvisning för Cambridge TV2 (1 sidor) i kategorin Soundbar. Guiden har ansetts hjälpsam av 49 personer och har ett genomsnittsbetyg på 4.1 stjärnor baserat på 8 recensioner. Har du en fråga om Cambridge TV2 eller vill du ställa frågor till andra användare av produkten? Ställ en fråga
Sida 1/1
PLACEMENT! TV2 IS DESIGNED TO BE PLACED UNDER YOUR TV. THE TV MUST HAVE A BASE NO WIDER THAN 550MM
(21.5”) AND NO DEEPER THAN 300MM (12”) AND MUST WEIGH NO MORE THAN 30KG (66LBS). IF THE TV BASE IS TOO
LARGE TO FIT, PLACE TV2 ON A LOWER SHELF OF YOUR TV RACK.
TOP TIPS
SOUND MODES
There are 4 dierent modes that can be selected to enhance your sound
experience. You can also Increase or decrease the Subwoofer output.
TV: Greatly improved TV sound.
Music: Enhances stereo music and music videos.
Film: Designed to get the best sound from movies.
Voice: Enhances voices to improve intelligibility.
AUTO POWER DOWN
To save power, TV2 will
automatically turn o after 20
minutes if no sound is playing
from your TV.
AUTO POWER ON
When you turn on your TV,
TV2 will detect the sound and
automatically turn on.
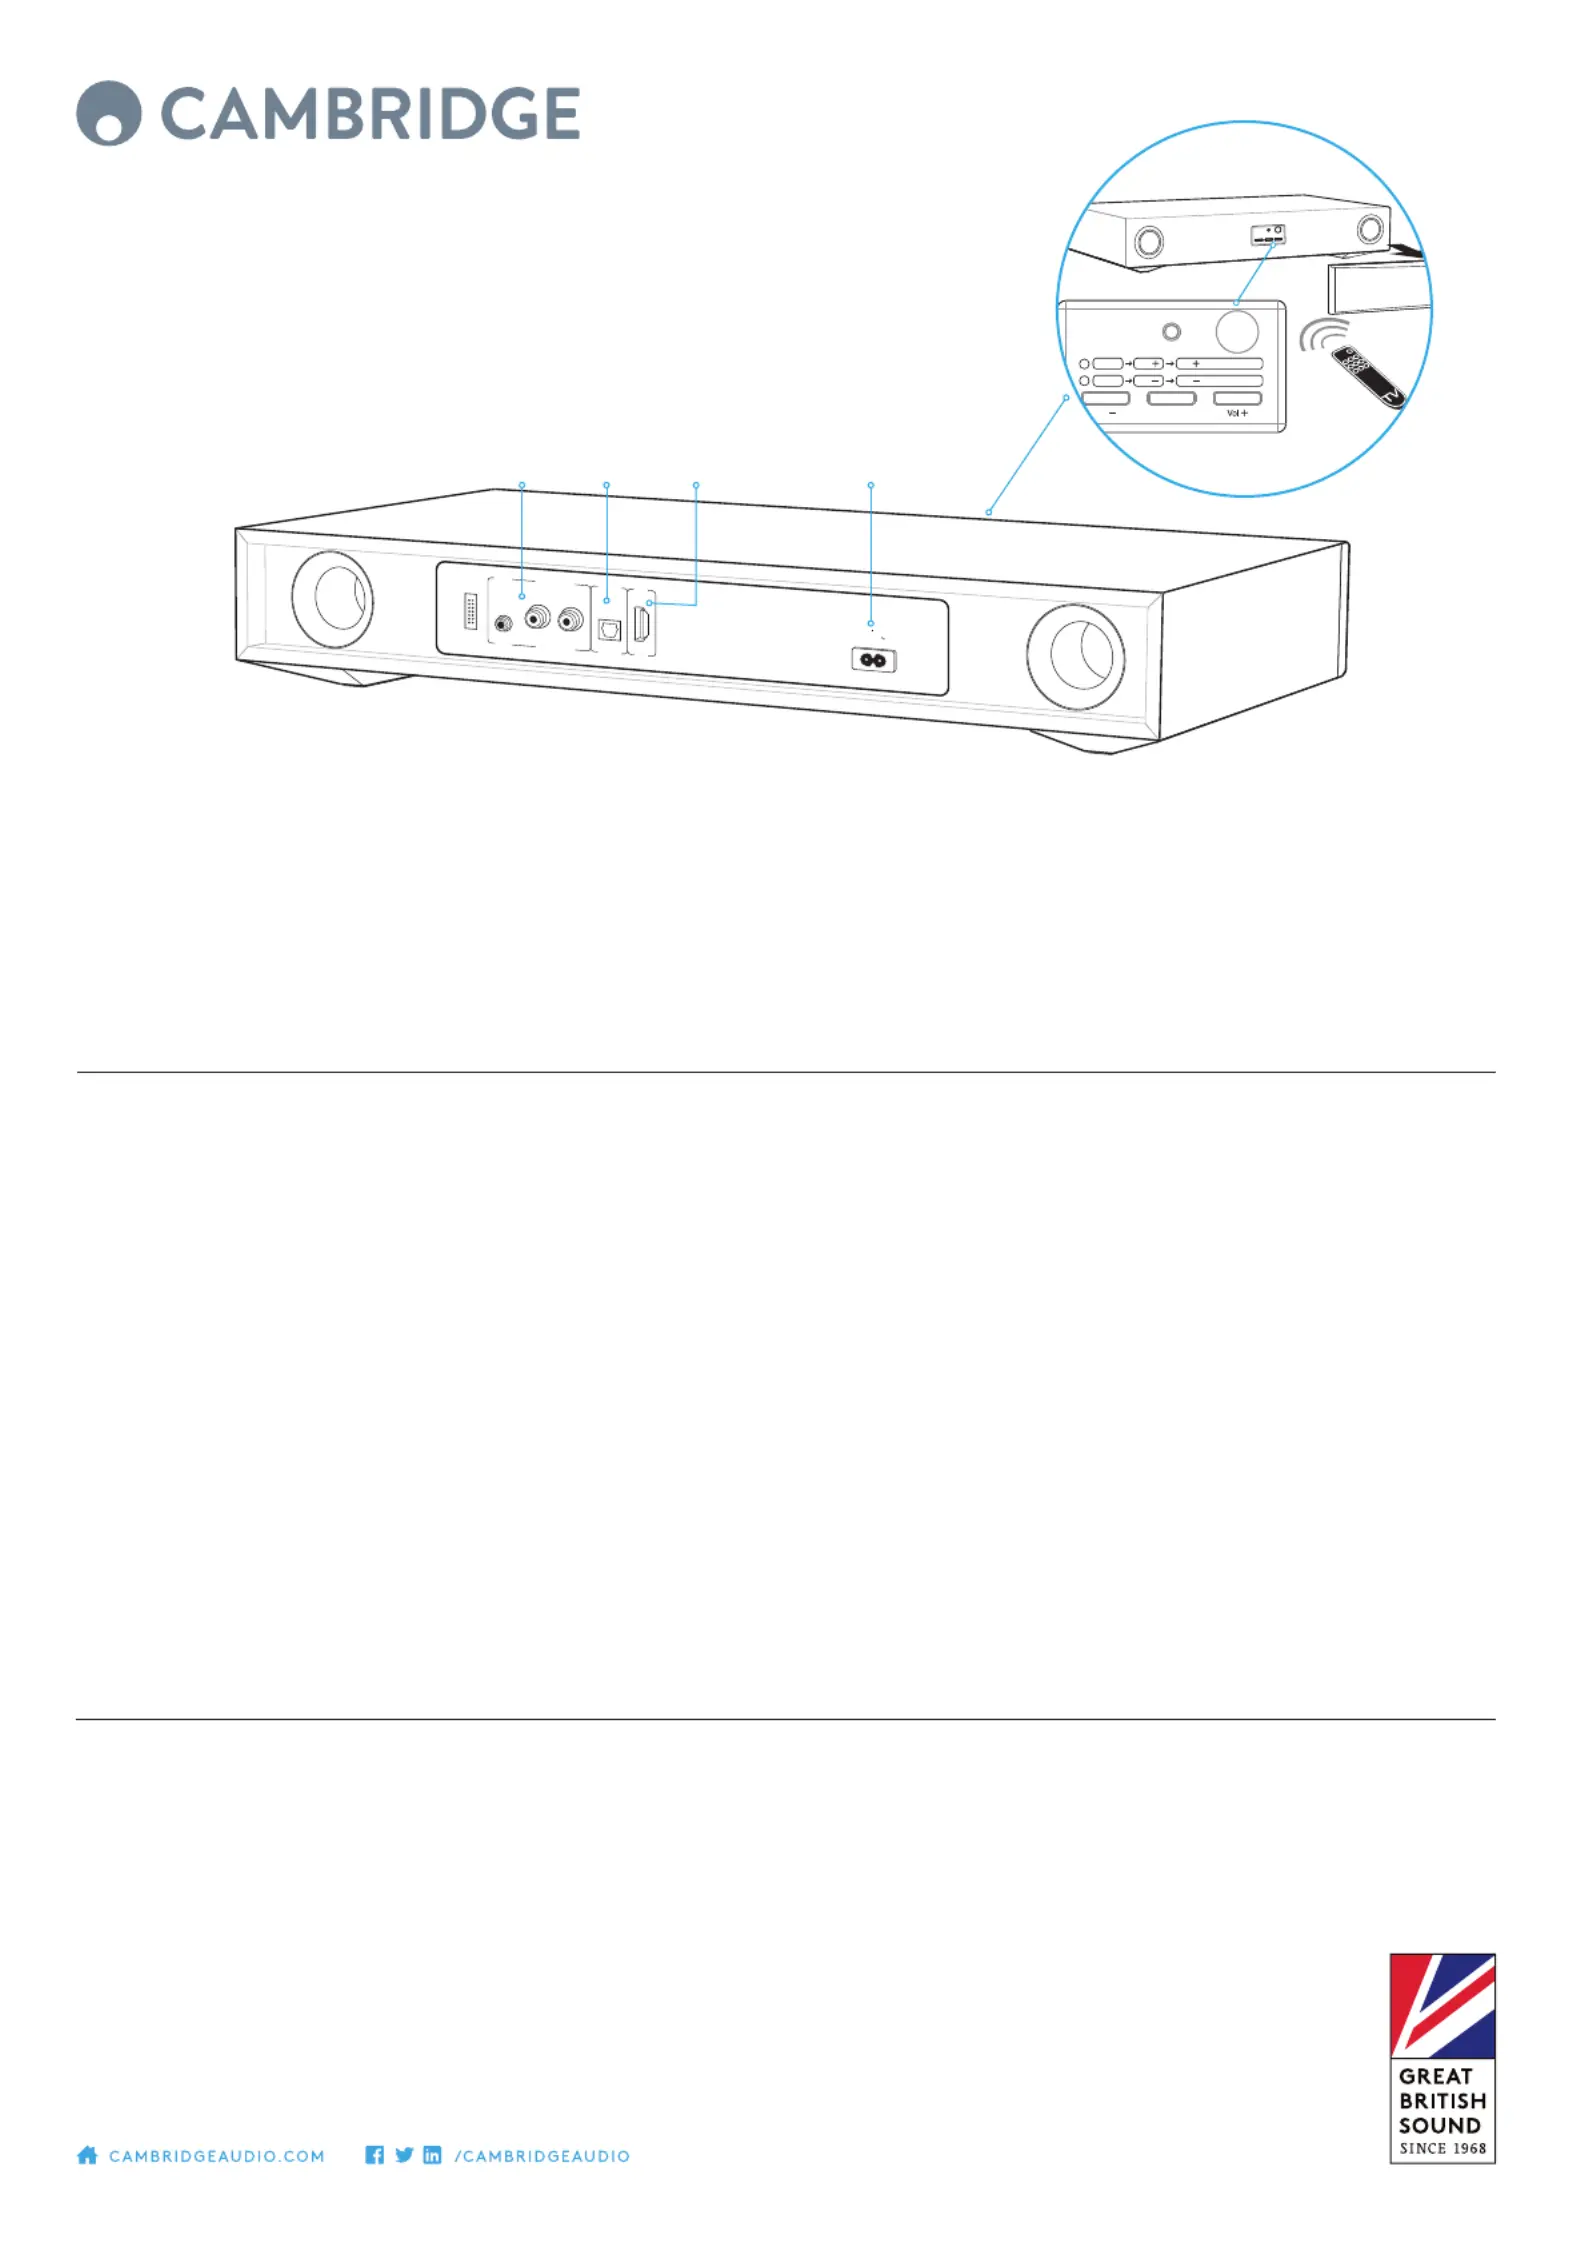
TV CONNECTIONS
Only one audio connection to your TV is
required, in order of preference:
1. Optical: If available on your TV, use this for
best quality.
2. ARC: If your TV has a socket labelled ARC
use this connection.
3. RCA: Connect both left and right channels
to your TV.
4. AUX In: Connect to the headphone output
of your TV if neither ARC or optical are
available on your TV.
Note: If the 3.5mm socket is used it takes
priority over the RCA input which will be muted.
Once paired, music from your device will play
through the unit.
To add another Bluetooth device, repeat from
step 2. TV2 will store up to 8 paired devices
in memory.
LEARNING YOUR TV REMOTE
Remove the fabric grille and locate the
control panel. Follow the instructions
remembering to point your TV remote at the
control panel whilst learning.
BLUETOOTH SET-UP
TV2 is equipped with Bluetooth to allow
wireless playback from any Bluetooth
equipped phone, tablet or computer.
1. Select the Bluetooth input BT on the
remote.
2. To connect a Bluetooth device to TV2,
press and hold the BT button and the
Blue LED will blink.
3. Consult the instructions of the Bluetooth
device to connect to TV2. Successful
pairing will be signalled by a ‘beep’ from
the unit and the Blue LED will stop
ashing.
Service
Only
100-240V AC ~ 50/60Hz
Power AC
Max Power Consumption: 120W
Aux InRLAudio InOptical InARC
Optical InRLAudio InAux InARC
Vol(2secs)Learn
1
2
Learn Vol
Vol on TV remote
Learn Vol
Vol
on TV remote
AUX Line inOptical inAC power socket ARC
TV2 tv sound plinth with bluetooth
To talk to us, call +44 (0)203 514 1521 (UK Local) or 1-877-357-8204 (USA)
TV2 is only able to decode LPCM(PCM) 2.0 format signal, Please ensure your source output setting is set to LPCM(PCM).
AP35051/1
Produktspecifikationer
| Varumärke: | Cambridge |
| Kategori: | Soundbar |
| Modell: | TV2 |
Behöver du hjälp?
Om du behöver hjälp med Cambridge TV2 ställ en fråga nedan och andra användare kommer att svara dig
Soundbar Cambridge Manualer

4 Oktober 2024
31 Augusti 2024
10 Augusti 2024
Soundbar Manualer
Nyaste Soundbar Manualer
19 Mars 2026
18 Mars 2026
12 Mars 2026
11 Mars 2026
8 Mars 2026
7 Mars 2026
5 Mars 2026
3 Mars 2026
3 Februari 2026
1 Februari 2026