Crestron CLW-DIMEX-P Bruksanvisning
Läs gratis den bruksanvisning för Crestron CLW-DIMEX-P (2 sidor) i kategorin Dimmer. Guiden har ansetts hjälpsam av 47 personer och har ett genomsnittsbetyg på 4.9 stjärnor baserat på 24 recensioner. Har du en fråga om Crestron CLW-DIMEX-P eller vill du ställa frågor till andra användare av produkten? Ställ en fråga
Sida 1/2

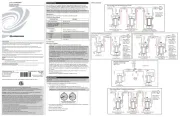
CLW-DIMEX-P
Cameo
®
Wireless In-Wall Dimmer, 120 V
Operations & Installation Guide
Description
The Crestron
®
CLW-DIMEX-P is a Cameo
®
in-wall dimmer that features eld-replaceable,
engravable buttons. Along with the entire line of new Cameo products, it can be
congured with various button layouts and designer colors, making the CLW-DIMEX-P
more versatile and affordable than previous generations of in-wall dimmers. Its streamlined
design matches the entire line of Cameo dimmers, switches, and keypads, making it a
great addition to new or retrot installations. In addition to its attractive look and feel,
inNET EX
®
communication technology brings proven reliability to the CLW-DIMEX-P.
CLW-DIMEX-P Specications
Additional Resources
Visit the product page on the Crestron website (www.crestron.com) or
scan the QR code to the right for additional information and the latest
rmware updates.
WARNING: To avoid re, shock, or death, turn off power at circuit breaker or fuse and
test that power is off before wiring!
WARNING: New installations should be checked for short circuits prior to installing a
CLW-DIMEX-P dimmer. With power off, close the circuit and restore power. If the lights
do not work or a breaker trips, check and correct the wiring or xture (if necessary).
Install the dimmer only when the short is no longer present. The warranty is void if the
dimmer is installed and operated with a shorted load.
CAUTION: TO REDUCE THE RISK OF OVERHEATING AND POSSIBLE DAMAGE TO
OTHER EQUIPMENT, DO NOT INSTALL TO CONTROL A RECEPTACLE, A
MOTOR-OPERATED APPLIANCE, A FLUORESCENT LIGHTING FIXTURE, OR A
TRANSFORMER-SUPPLIED APPLIANCE.
ATTENTION : GRADATEURS COMMANDANT UN BALLAST-AFIN DE RÉDUIRE LE
RISQUE DE SURCHAUFFE ET LA POSSIBILITÉ D’ENDOMMAGEMENT À D’AUTRES
MATÉRIELS, NE PAS INSTALLER POUR COMMANDER UNE PRISE, UN APPAREIL
D’ÉCLAIRAGE FLUORESCENT, UN APPAREIL OPÉRÉ DE MOTEUR OU UN APPAREIL
ALIMENTÉ PAR UN TRANSFORMATEUR.
NOTES: Observe the following points.
• Codes: This product should be installed and used in accordance with appropriate
electrical codes and regulations.
• Installation: This product should be installed by a qualied electrician.
• Wiring: Use copper wire only. For supply connections, use wires rated for at least
75°C (167°F).
• Lamp Type: For use with permanently installed incandescent, magnetic low voltage,
tungsten-halogen, or dimmable CFL only.
• Temperature: For use where temperatures are between 32° to 104°F (0° to 40°C).
• Electrical Boxes: Devices mount in standard electrical boxes. For easy installation,
use 3 1/2 in (89 mm) deep electrical boxes. Several devices can be installed in one
electrical box (multigang). This requires derating of the dimming device. For a
smooth appearance, one-piece multigang faceplates (not supplied) can be installed.
• Switches: Mechanical 3- or 4-way switches do not work with CLW-DIMEX-P
dimmers.
• Spacing: If mounting one device above another, leave at least 4 1/2 in (115 mm)
vertical space between them.
Installation
NOTE: Before using the CLW-DIMEX-P, ensure the device is using the latest rmware.
Check for the latest rmware for the CLW-DIMEX-P at www.crestron.com/rmware.
Firmware is loaded onto the device using Crestron Toolbox™.
NOTE: The device may be warm to the touch during operation. This is normal.
Multigang Installations
In multigang installations, several devices are grouped horizontally in one electrical box.
For a smooth appearance, one-piece multigang faceplates (not supplied) can be installed.
NOTE : When installing into a multigang box, do not fully tighten devices to the box until
the faceplate has been aligned.
The load capacity for each device in the electrical box must be derated. Refer to the
following diagrams for derating information. The VA ratings are for input power to the
transformer. If you do not know the input power requirement of the transformer, use the
bulb’s wattage rating to determine proper rating.
Derating Information for CLW-DIMEX-P Dimmers
750 VA
600 VA
600 VA 600 VA 600 VA400 VA
The following describes the installation of a CLW-DIMEX-P dimmer.
1. Turn power off at the circuit breaker.
2. Wire the device as shown in the following diagrams.
NOTE : The dimmer can operate with or without a direct connection to the neutral.
NOTE: Switch mode requires a dedicated neutral.
Black
White
NEU
DIM
HOT
REM
Line
120 V~
Load
White
Black
To One or More
CLW-SLVU-P
1
(Optional)
3. Push all power wires back into the electrical box and fasten the device to the electrical
box with the provided screws.
4. Attach the decorative faceplate.
5. Ensure all buttons, including the program button, actuate without sticking.
NOTE : To operate the device in Switch mode, follow the instructions in "Switching
Between Dim Mode and Switch Mode" before restoring power.
6. Restore power at the circuit breaker.
NOTE : For optimal performance, the neutral should be connected. If the neutral is
not connected, the minimum required load is 50 watts.
Changing the Button Assemblies
The button assembly can be removed and replaced with other button assemblies.
1. Remove the button assembly by squeezing the sides of the bezel near the bezel
snaps.
NOTE: When the button assembly is removed, power to the unit and load is
removed automatically.
2. Remove the button from the front of the button assembly.
3. Insert the new buttons through the front of the bezel and snap them into place.
Ensure that the LED strip is on the left side.
4. Attach button assembly to the device. Ensure that the LED strip is on the left side.
5. Once power has been restored, press and hold the program button. After 5 seconds,
the LEDs associated with the old button layout begin to flash. Continue to hold the
button and proceed to step 6.
Squeeze at the arrow
points and pull to
remove the button
assembly.
Gently spread the
frame apart to remove
the buttons.
Gently spread the
frame apart to insert
the buttons.
Operation
Basic Operation
The operations described in this guide assume the CLW-DIMEX-P is operating in Local
mode (without the use of a control system). The device can also operate in Remote mode,
in which button behavior is dictated entirely by the control system program. The
CLW-DIMEX-P is shipped with a rocker switch already installed. In this conguration, the
unit functions as described below.
The LEDs indicate the load
level. When all loads are
off, the top LED remains
dimly lit to act as a night
light.
In Switch mode, the top
LED indicates the on or off
status only. All other LEDs
are off.
Press to turn on the
load. Press and hold
to raise the light level.
Press to turn off the
load. Press and hold
to lower the light level.
1. For details, refer to the CLW-SLVU-P Installation Guide (Doc. 7364) at www.crestron.com/manuals.
* Derating applies for multigang installations. Refer to “Multigang Installations” for more information.
Switching Between Dim Mode and Switch Mode
The CLW-DIMEX-P is capable of operating in Switch mode. Toggling between Dim and
Switch mode is useful if the load is not dimmable or if it is preferred to not dim the load.
1. Open the air-gap switch as described in “Disconnecting the Power.”
2. While power is off, press and hold the top and bottom button caps (regardless of
button conguration) simultaneously while closing the air-gap switch.
3. After 5 seconds, the top LED blinks 3 times to indicate Dim mode or 5 times to
indicate Switch mode.
4. To commit the new setting, release the buttons within the next 5 seconds.
6. While holding the program button, press all of the buttons in the new layout. The
LED next to the pressed button lights.
NOTE: If the rocker switch is installed, press the top and bottom of the rocker.
7. After all of the buttons have been pressed, release the program button to save the
settings.
NOTE: Changing the button conguration alters the device’s behavior. Refer to
the "Default Button Functions" for details.
YesNo
Do not insert the wires behind the screw head.
Insert the wires into the wire entry holes.
Step 5:
Press and hold
the program
button.
Step 7:
Release the
program button
to save the
settings.
Step 6:
Tap each of the
installed buttons
on the device.
• Low Voltage Applications: Use with core and coil (magnetic) low voltage transformers
only. Do not use any solid-state electronic low voltage transformers. Operation of a
low voltage circuit with all lamps inoperative or removed may result in current ow in
excess of normal levels. To avoid transformer overheating and premature transformer
failure, Crestron recommends the following:
> Do not operate low voltage circuits without operative lamps in place.
> Replace burned-out lamps as quickly as possible.
> Use transformers that incorporate thermal protection or fuse transformer primary
windings to prevent transformer failure due to overcurrent.
SPECIFICATION
DETAILS
Load Ratings
Incandescent or
Tungsten Halogen
750 watts*
Magnetic Low Voltage 750 VA/750 watts*
Minimum Load 25 watts (with dedicated neutral connected);
50 watts (no dedicated neutral)
Power Requirements 120 Vac, 60 Hz, line power
Environmental
Temperature 32° to 104°F (0° to 40°C)
Humidity 10% to 90% RH (non-condensing)
Enclosure 1-gang mountable in a 3 1/2 inch deep electrical box;
Requires decorator style faceplate (not included)
Produktspecifikationer
| Varumärke: | Crestron |
| Kategori: | Dimmer |
| Modell: | CLW-DIMEX-P |
Behöver du hjälp?
Om du behöver hjälp med Crestron CLW-DIMEX-P ställ en fråga nedan och andra användare kommer att svara dig
Dimmer Crestron Manualer
19 Augusti 2025
19 Augusti 2025
18 Augusti 2025
18 Augusti 2025
18 Augusti 2025
18 Augusti 2025

2 April 2025

12 Mars 2025
Dimmer Manualer
- Intertechno
- EtiamPro
- VAMA
- Tradim
- InterBar
- Mueller
- Handson
- Schneider Electric
- BeamZ
- Adastra
- DIO
- GAO
- Mercury
- Sonoro
- Eurolite
Nyaste Dimmer Manualer
12 September 2025
12 September 2025
10 September 2025
10 September 2025
10 September 2025
10 September 2025
9 September 2025
30 Augusti 2025

27 Augusti 2025

27 Augusti 2025