Hisense WZXX90-BEW001 Bruksanvisning
Hisense ej kategoriserat WZXX90-BEW001
Läs gratis den bruksanvisning för Hisense WZXX90-BEW001 (2 sidor) i kategorin ej kategoriserat. Guiden har ansetts hjälpsam av 18 personer och har ett genomsnittsbetyg på 4.6 stjärnor baserat på 3 recensioner. Har du en fråga om Hisense WZXX90-BEW001 eller vill du ställa frågor till andra användare av produkten? Ställ en fråga
Sida 1/2
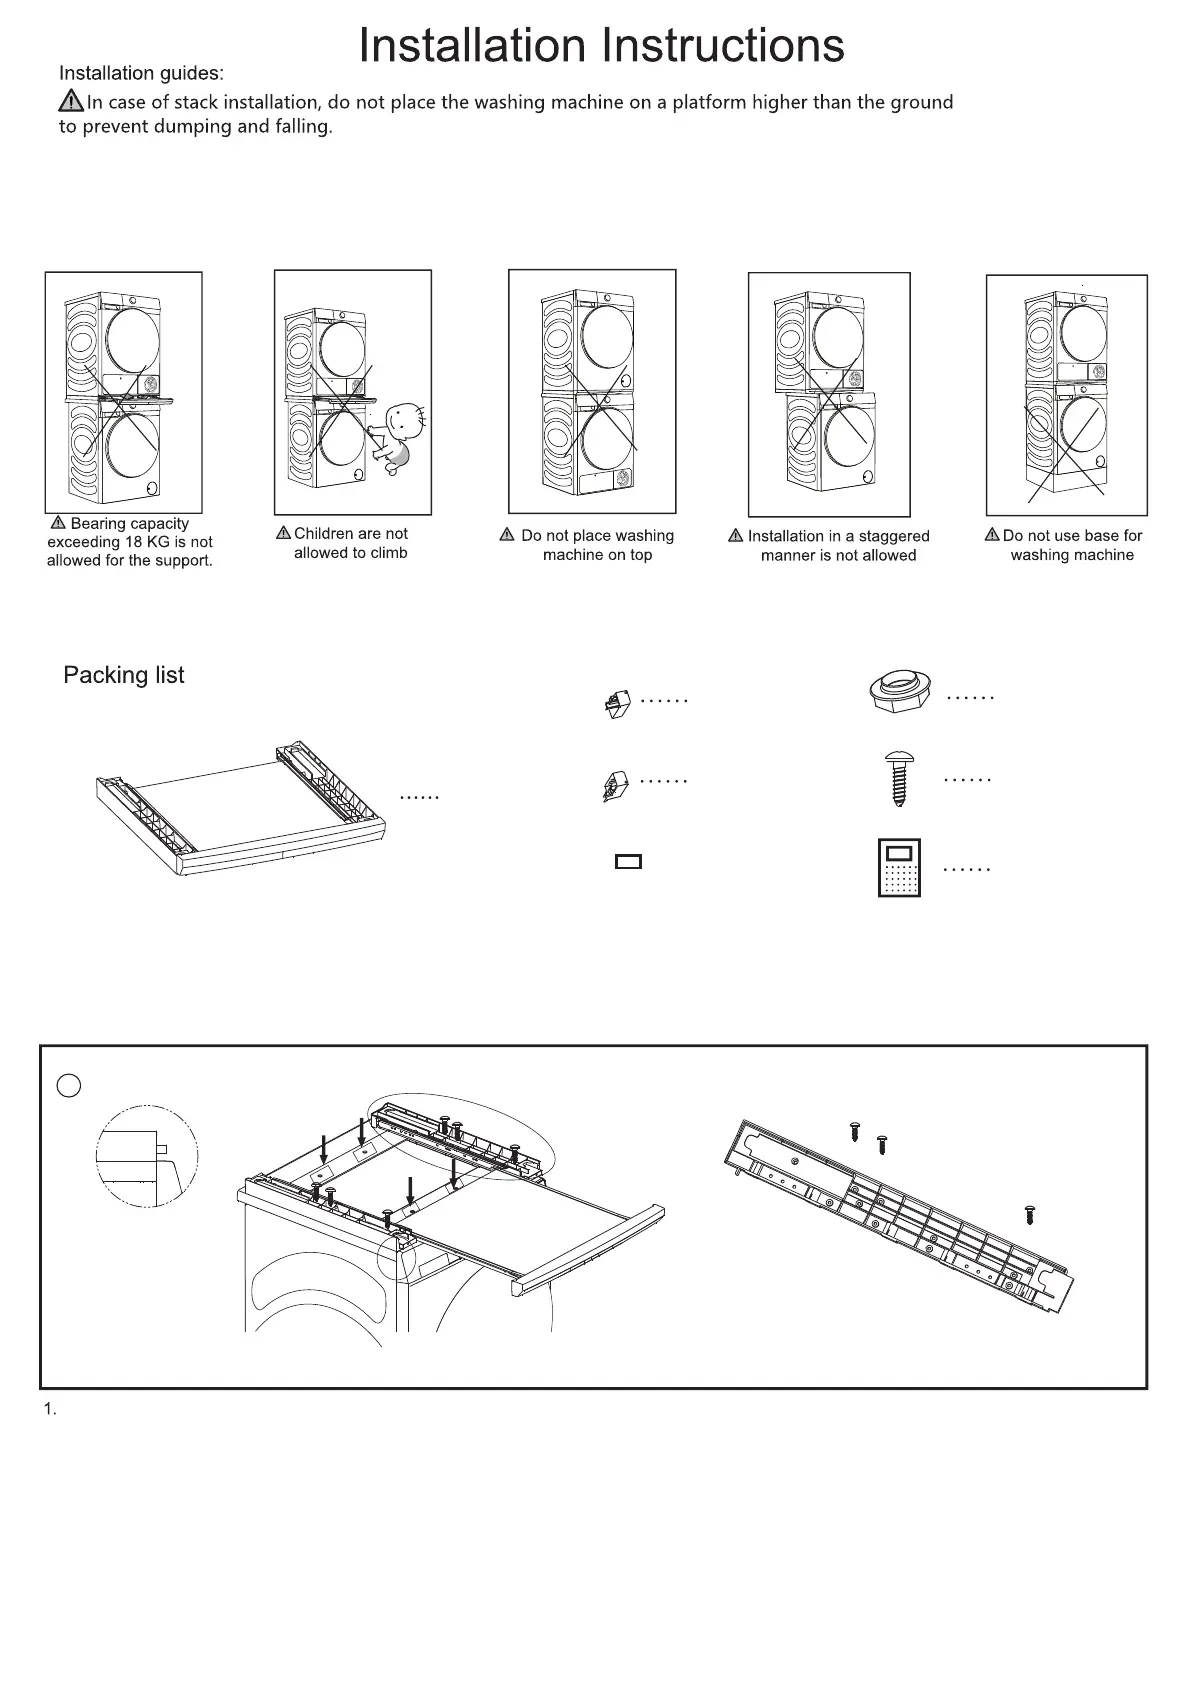
Note: the pictures shown are schematic diagrams.
Support× 1
Left fixing clip × 1
Right fixing clip × 1
Foot
accessory × 4
Round head
screw × 8
Instruction × 1
1.
Do not strip the screws, you must use the attachment screws to prevent them from becoming mismatched after replacement.
2.
During installation, two people must work together while keeping a safe distance from the wall.
3.Be careful to prevent the bracket and wooden support from falling out and causing injury.
......
3M tape×4
1
......
......
......
Place the bracket flat on the top cover of the washing machine. Align the front end of the bracket with the side panel according to the
enlarged diagram on the left side. Pull out the drawer to its maximum distance to expose the two middle connecting plates. At the
four screw holes on the connecting plates, as shown in the diagram, attach the four pieces of 3M tape provided in the accessories
between the connecting plate and the washing machine top cover. Lean forward and press the 3M tape position for more than three
minutes. Then, according to the enlarged diagram on the right side, use three round head screws to fix the bracket on the top cover
of the washing machine through the outermost three screw holes of the bracket. Please NOTE: this will result in small holes being
made in the top cover of the washing machine.
3M tape ×4
Produktspecifikationer
| Varumärke: | Hisense |
| Kategori: | ej kategoriserat |
| Modell: | WZXX90-BEW001 |
| Produkttyp: | Utdragbar låda |
| Vikt: | 4500 g |
| Bredd: | 595 mm |
| Djup: | 590 mm |
| Höjd: | 45 mm |
| Förpackningens bredd: | 670 mm |
| Produktens färg: | Vit |
| Låddjup: | 710 mm |
| Vikt inkl. förpackning: | 7000 g |
| Antal per förpackning: | 1 styck |
Behöver du hjälp?
Om du behöver hjälp med Hisense WZXX90-BEW001 ställ en fråga nedan och andra användare kommer att svara dig
ej kategoriserat Hisense Manualer

9 Oktober 2025
8 Oktober 2025
8 Oktober 2025
8 Oktober 2025
8 Oktober 2025
ej kategoriserat Manualer
Nyaste ej kategoriserat Manualer
3 April 2026
3 April 2026
3 April 2026
3 April 2026
3 April 2026
3 April 2026
3 April 2026
3 April 2026
3 April 2026