Hozelock Select Plus Controller 2224 Bruksanvisning
Hozelock Bevattningskontroll Select Plus Controller 2224
Läs gratis den bruksanvisning för Hozelock Select Plus Controller 2224 (37 sidor) i kategorin Bevattningskontroll. Guiden har ansetts hjälpsam av 43 personer och har ett genomsnittsbetyg på 4.5 stjärnor baserat på 7 recensioner. Har du en fråga om Hozelock Select Plus Controller 2224 eller vill du ställa frågor till andra användare av produkten? Ställ en fråga
Sida 1/37
?
www.hozelock.com
3
Year guarantee
Ans de garantie
Jahre Garantie
Jaar garantie
Años de garantia
Χρόνια εγγύηση
Hozelock-Exel
891 route des Frênes - 69653
Villefranche-sur-Saône Cedex
Tél : +33 (0)4 74 62 48 48
Hozelock Ltd.
Midpoint Park, Birmingham,
B76 1AB. England
Tel: +44 (0) 121 313 1122
www.hozelock.com
Réf. 585483
(ABN 83 154 891 648)
Unit 22 / 456 St Kilda Road,
Melbourne, Victoria 3004
1300 275175
Hozelock Australia Pty Ltd
2220
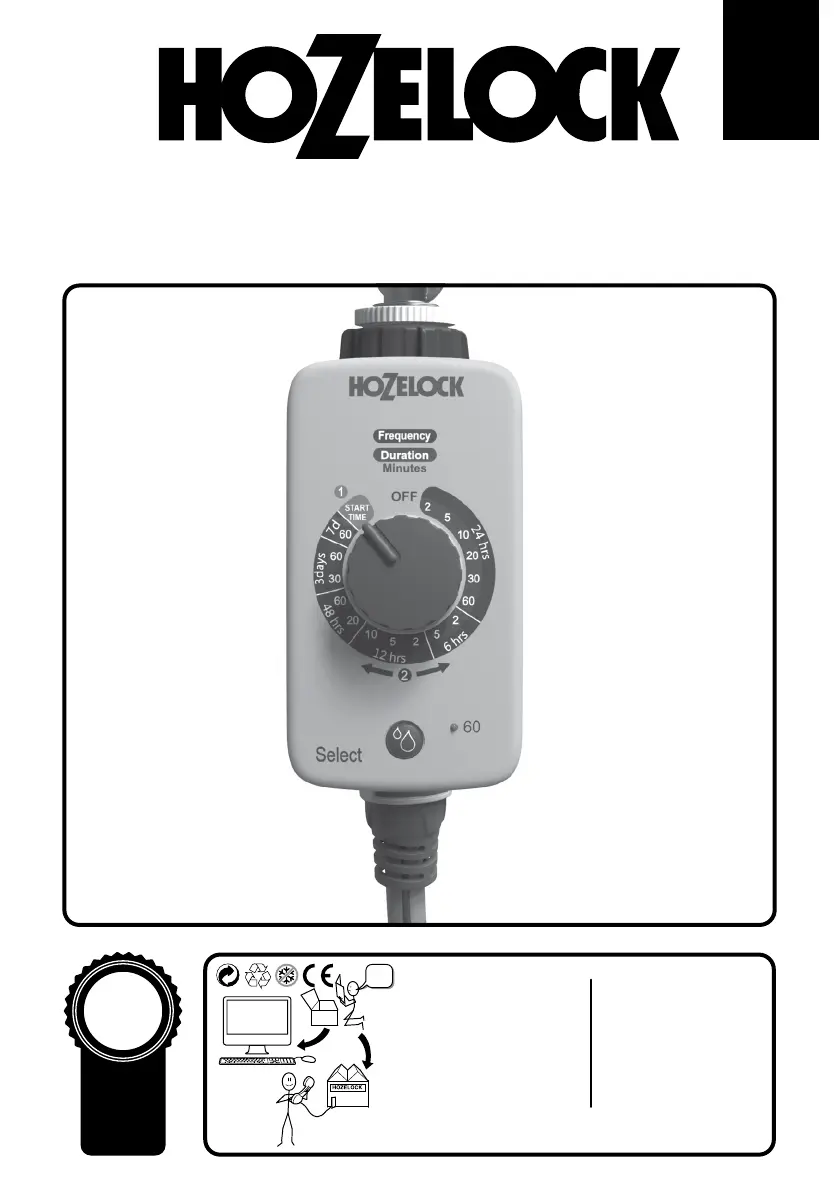
Select Controller
2
Year guarantee
Ans de garantie
Jahre Garantie
Jaar garantie
Años de garantia
Χρόνια εγγύηση
Hozelock-Exel
891 route des Frênes - 69653
Villefranche-sur-Saône Cedex
FRANCE
Hozelock Ltd
Midpoint Park, Birmingham,
B76 1AB. ENGLAND
Tel: +44 (0) 121 313 1122
www.hozelock.com
Réf. 58XXXX
Produktspecifikationer
| Varumärke: | Hozelock |
| Kategori: | Bevattningskontroll |
| Modell: | Select Plus Controller 2224 |
Behöver du hjälp?
Om du behöver hjälp med Hozelock Select Plus Controller 2224 ställ en fråga nedan och andra användare kommer att svara dig
Bevattningskontroll Hozelock Manualer

18 September 2024
18 September 2024
13 September 2024
20 Augusti 2024
17 Augusti 2024
14 Augusti 2024
10 Augusti 2024
9 Augusti 2024
28 Juli 2024
Bevattningskontroll Manualer
Nyaste Bevattningskontroll Manualer
2 Januari 2025
31 December 2025
30 December 2025
15 December 2024
8 Oktober 2024
26 September 2024
26 September 2024
23 September 2024
23 September 2024
23 September 2024