KKT Kolbe BKW450 Bruksanvisning
KKT Kolbe Inte kategoriserad BKW450
Läs gratis den bruksanvisning för KKT Kolbe BKW450 (4 sidor) i kategorin Inte kategoriserad. Guiden har ansetts hjälpsam av 33 personer och har ett genomsnittsbetyg på 4.3 stjärnor baserat på 7 recensioner. Har du en fråga om KKT Kolbe BKW450 eller vill du ställa frågor till andra användare av produkten? Ställ en fråga
Sida 1/4
Micro-Inverter BKW450/600/850/1600
Preparation Before Configuration And Use
NOTE:Connect the micro inverter to the WIFI in the immediate distance (<5m) of the router in advance.
1.Download and install the app "KKT.Control" or "Smart Life" by using a smart device (smartphone or tablet)
by searching for it in the corresponding Android or Apple App Store.
2.Check that your wirelessnetwork device (such as wirelessrouter) is working properly
and connected to theInternet.
3.Connect to the wireless network device with your smart device ("KKT.Control" or "Smart Life" app) at the
installation location of the micro inverter. If you can access the internet normally, follow the instructions for
configuration and use on the next page.
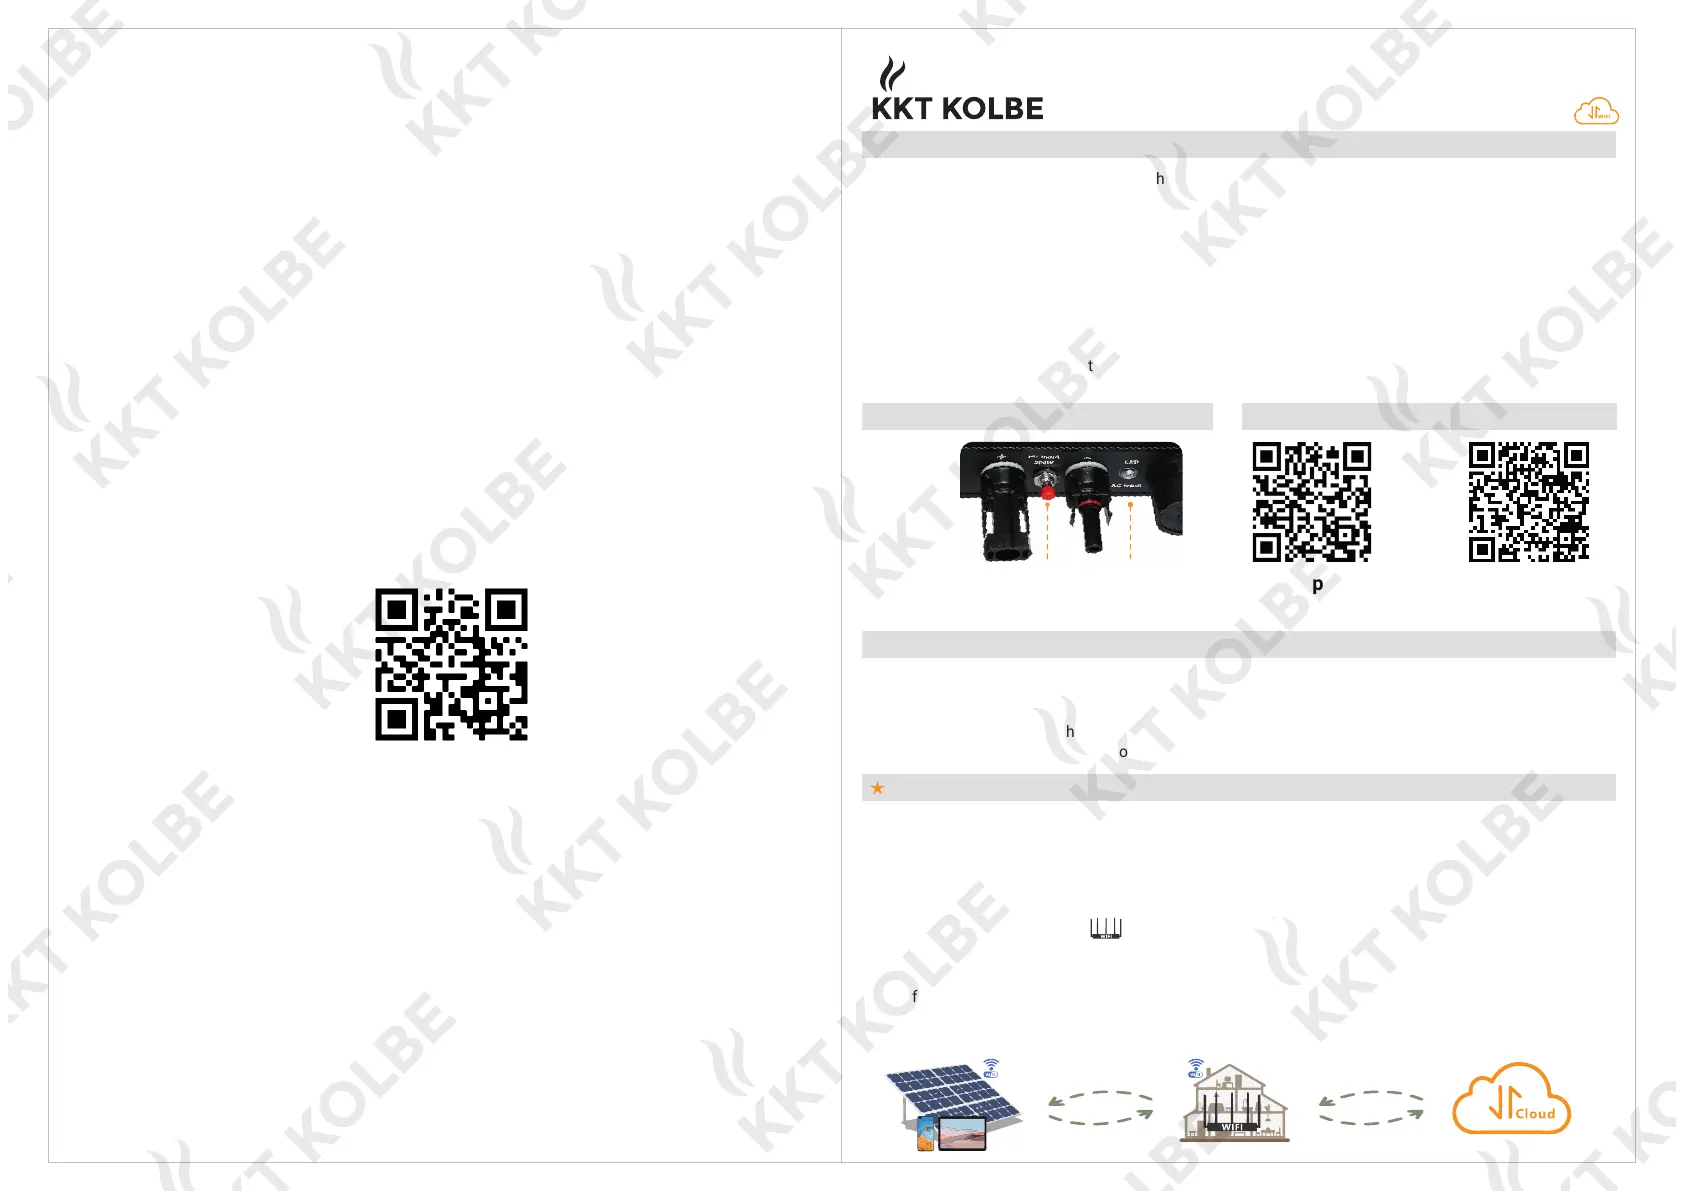
WIFI Status LED Display
iOs Appstore
Hardware DescriptionQR-Code for App-Download
WIFI Set/
Reset Button
WIFI Status
LED Indicator
Example
Android Playstore
www.kolbe.de
Further data and documents can be found on
our website under "Questions & Answers".
KKT KOLBE Küchentechnik GmbH & Co. KG
Ohmstraße 17 | D-96175 Pettstadt | +49 (0) 9502 667930 | [email protected]
WIFI Cloud Monitoring UserManual
READ ME FIRST
** User manual subject to change without notice**
• Note that there is a risk of electric shock whenconnecting the micro-inverter!
• The micro-inverter heats up during operation! Protect yourself accordingly from burns!
• Before configuring WiFi cloud monitoring, please correctly installthe micro inverter, and make it work normally.
• A smart device (smartphone or tablet) withBluetooth function and Android or IOS system
and a wirelessnetwork device (e.g. wireless router) that can provide WiFiandInternet service must be available.
• To configure WLAN cloud monitoring, first switch on the Bluetooth function of the smart device.
• Make sure that your smart device usesthesame WiFinetwork asthe micro inverter to be configuredandthat
it can connect to wirelessnetwork devices andaccess theInternet in the same location of the micro inverter.
• Make sure that thedistance betweenthewirelessnetwork device andthe micro-inverter does not exceed 20 m
andthat there are no or few obstacles.
• The blue light flashes after always on = the WiFi cloud monitoring module is waiting for configuration.
• The blue light off afteralways on = the WiFi cloud monitoring module startsand enters the normal working state.
• The blue light flashes = thenetwork isnot configured or thenetwork cannot connect to the wireless network
device, or the micro inverterhas beendeletedin the
cloud.
• No light= WiFi cloud monitoring is working normally.
Produktspecifikationer
| Varumärke: | KKT Kolbe |
| Kategori: | Inte kategoriserad |
| Modell: | BKW450 |
| Enhetsplacering: | Ingebouwd |
| Typ av operation: | Buttons, Rotary |
| Färg på produkten: | Zwart |
| Dörrgångjärn: | Neer |
| Inbyggd display: | Ja |
| Vikt: | 33000 g |
| Bredd: | 595 mm |
| Djup: | 548 mm |
| Höjd: | 595 mm |
| Nettoskatt: | 2900 W |
| Uppvärmningsfunktion: | Nee |
| Grill: | Ja |
| Sladdlängd: | 1 m |
| Barnlås: | Ja |
| Energie-efficiëntieklasse: | A-20% |
| Förpackningens vikt: | 35000 g |
| Förpackningens bredd: | 650 mm |
| Djuppackning: | 685 mm |
| Förpackningshöjd: | 670 mm |
| Belysning inuti: | Ja |
| Integrerad klocka: | Ja |
| Typ av klocka: | Elektronisch |
| Konvektionsmatlagning: | Ja |
| Ångkokning: | Nee |
| Håll varm funktion: | Nee |
| Rotisserie: | Nee |
| Total inomhuskapacitet (ugnar): | 67 l |
| Antal ugnar: | 1 |
| Lätt att städa: | Ja |
| Kontrollposition: | Voorkant |
| Installationsfackets bredd: | 560 mm |
| Installationsfack djup: | 550 mm |
| Nuvarande: | 13 A |
| Installationsfack höjd (min): | 575 mm |
| Energiförbrukning (konventionell): | 0.89 kWu |
| Energiförbrukning (tvungen konvektion): | 0.79 kWu |
| Att laga: | Ja |
| Ugnsstorlek: | Middelmaat |
| Typ av ugn: | Elektrische oven |
| Total ugnseffekt: | 2900 W |
| Ugn med nettokapacitet: | 67 l |
| Magnetronbereiding: | Nee |
| Över- och undervärme: | Ja |
| Bakplåtsmått: | Ja |
| Effektiv lådyta: | 1150 cm² |
| Skriv timer: | Digitaal |
| Certifiering: | CE, KEMA |
| Installationsfack höjd (max): | 597 mm |
| Snabb värme: | Ja |
| Antal rutnät: | 1 |
| Innermått (B x D x H): | 482 x 420 x 329 mm |
| Maximal temperatur (konvektion): | 270 °C |
| AC-ingångsspänning: | 220-240 V |
| AC-ingångsfrekvens: | 50 - 60 Hz |
| Type beeldscherm: | LED |
| Ugnsavfrostningsfunktion: | Nee |
| Grillyta: | 1150 cm² |
Behöver du hjälp?
Om du behöver hjälp med KKT Kolbe BKW450 ställ en fråga nedan och andra användare kommer att svara dig
Inte kategoriserad KKT Kolbe Manualer

8 Januari 2025
9 September 2024
4 September 2024
4 September 2024
3 September 2024
30 Augusti 2024
27 Augusti 2024
23 Augusti 2024
23 Augusti 2024
22 Augusti 2024
Inte kategoriserad Manualer
Nyaste Inte kategoriserad Manualer
9 April 2025
9 April 2025
9 April 2025
9 April 2025
9 April 2025
9 April 2025
9 April 2025
9 April 2025
9 April 2025
9 April 2025