Kramer VIA Connect3 Bruksanvisning
Kramer ej kategoriserat VIA Connect3
Läs gratis den bruksanvisning för Kramer VIA Connect3 (8 sidor) i kategorin ej kategoriserat. Guiden har ansetts hjälpsam av 15 personer och har ett genomsnittsbetyg på 4.1 stjärnor baserat på 4 recensioner. Har du en fråga om Kramer VIA Connect3 eller vill du ställa frågor till andra användare av produkten? Ställ en fråga
Sida 1/8
VIA CONNECT 3 Quick Start
Kramer EMEA
Netherlands
Stroombaan 16
, The Garden 1181VX
Amstelveen
info_EMEA
@kramerav.com
Kramer Headquarter:
Kramer Israel
Negev 2 St.
Airport City7019900
+972 (0)73
-- 2650200
info_il
@kramerav.com
P/N:
2900-301823QS
Rev:
3
Scan to see
website
VIA CONNECTQuick Guide 3 Start
For Installer
This guide helps you install and use your VIA CONNECT 3 for
the first time.
Connect to www.kramerav.com/product/VIA CONNECT3 to
download the latest user manual and check if firmware
upgrades are available.
Scan to view this
document online
Step 1: Check what’s bin the ox
VIA CONNECT 3
Collaboration Device
1 VESA mounting bracket
1 Quick start guide
1 Power cords for US and EU
1 VESA screw set
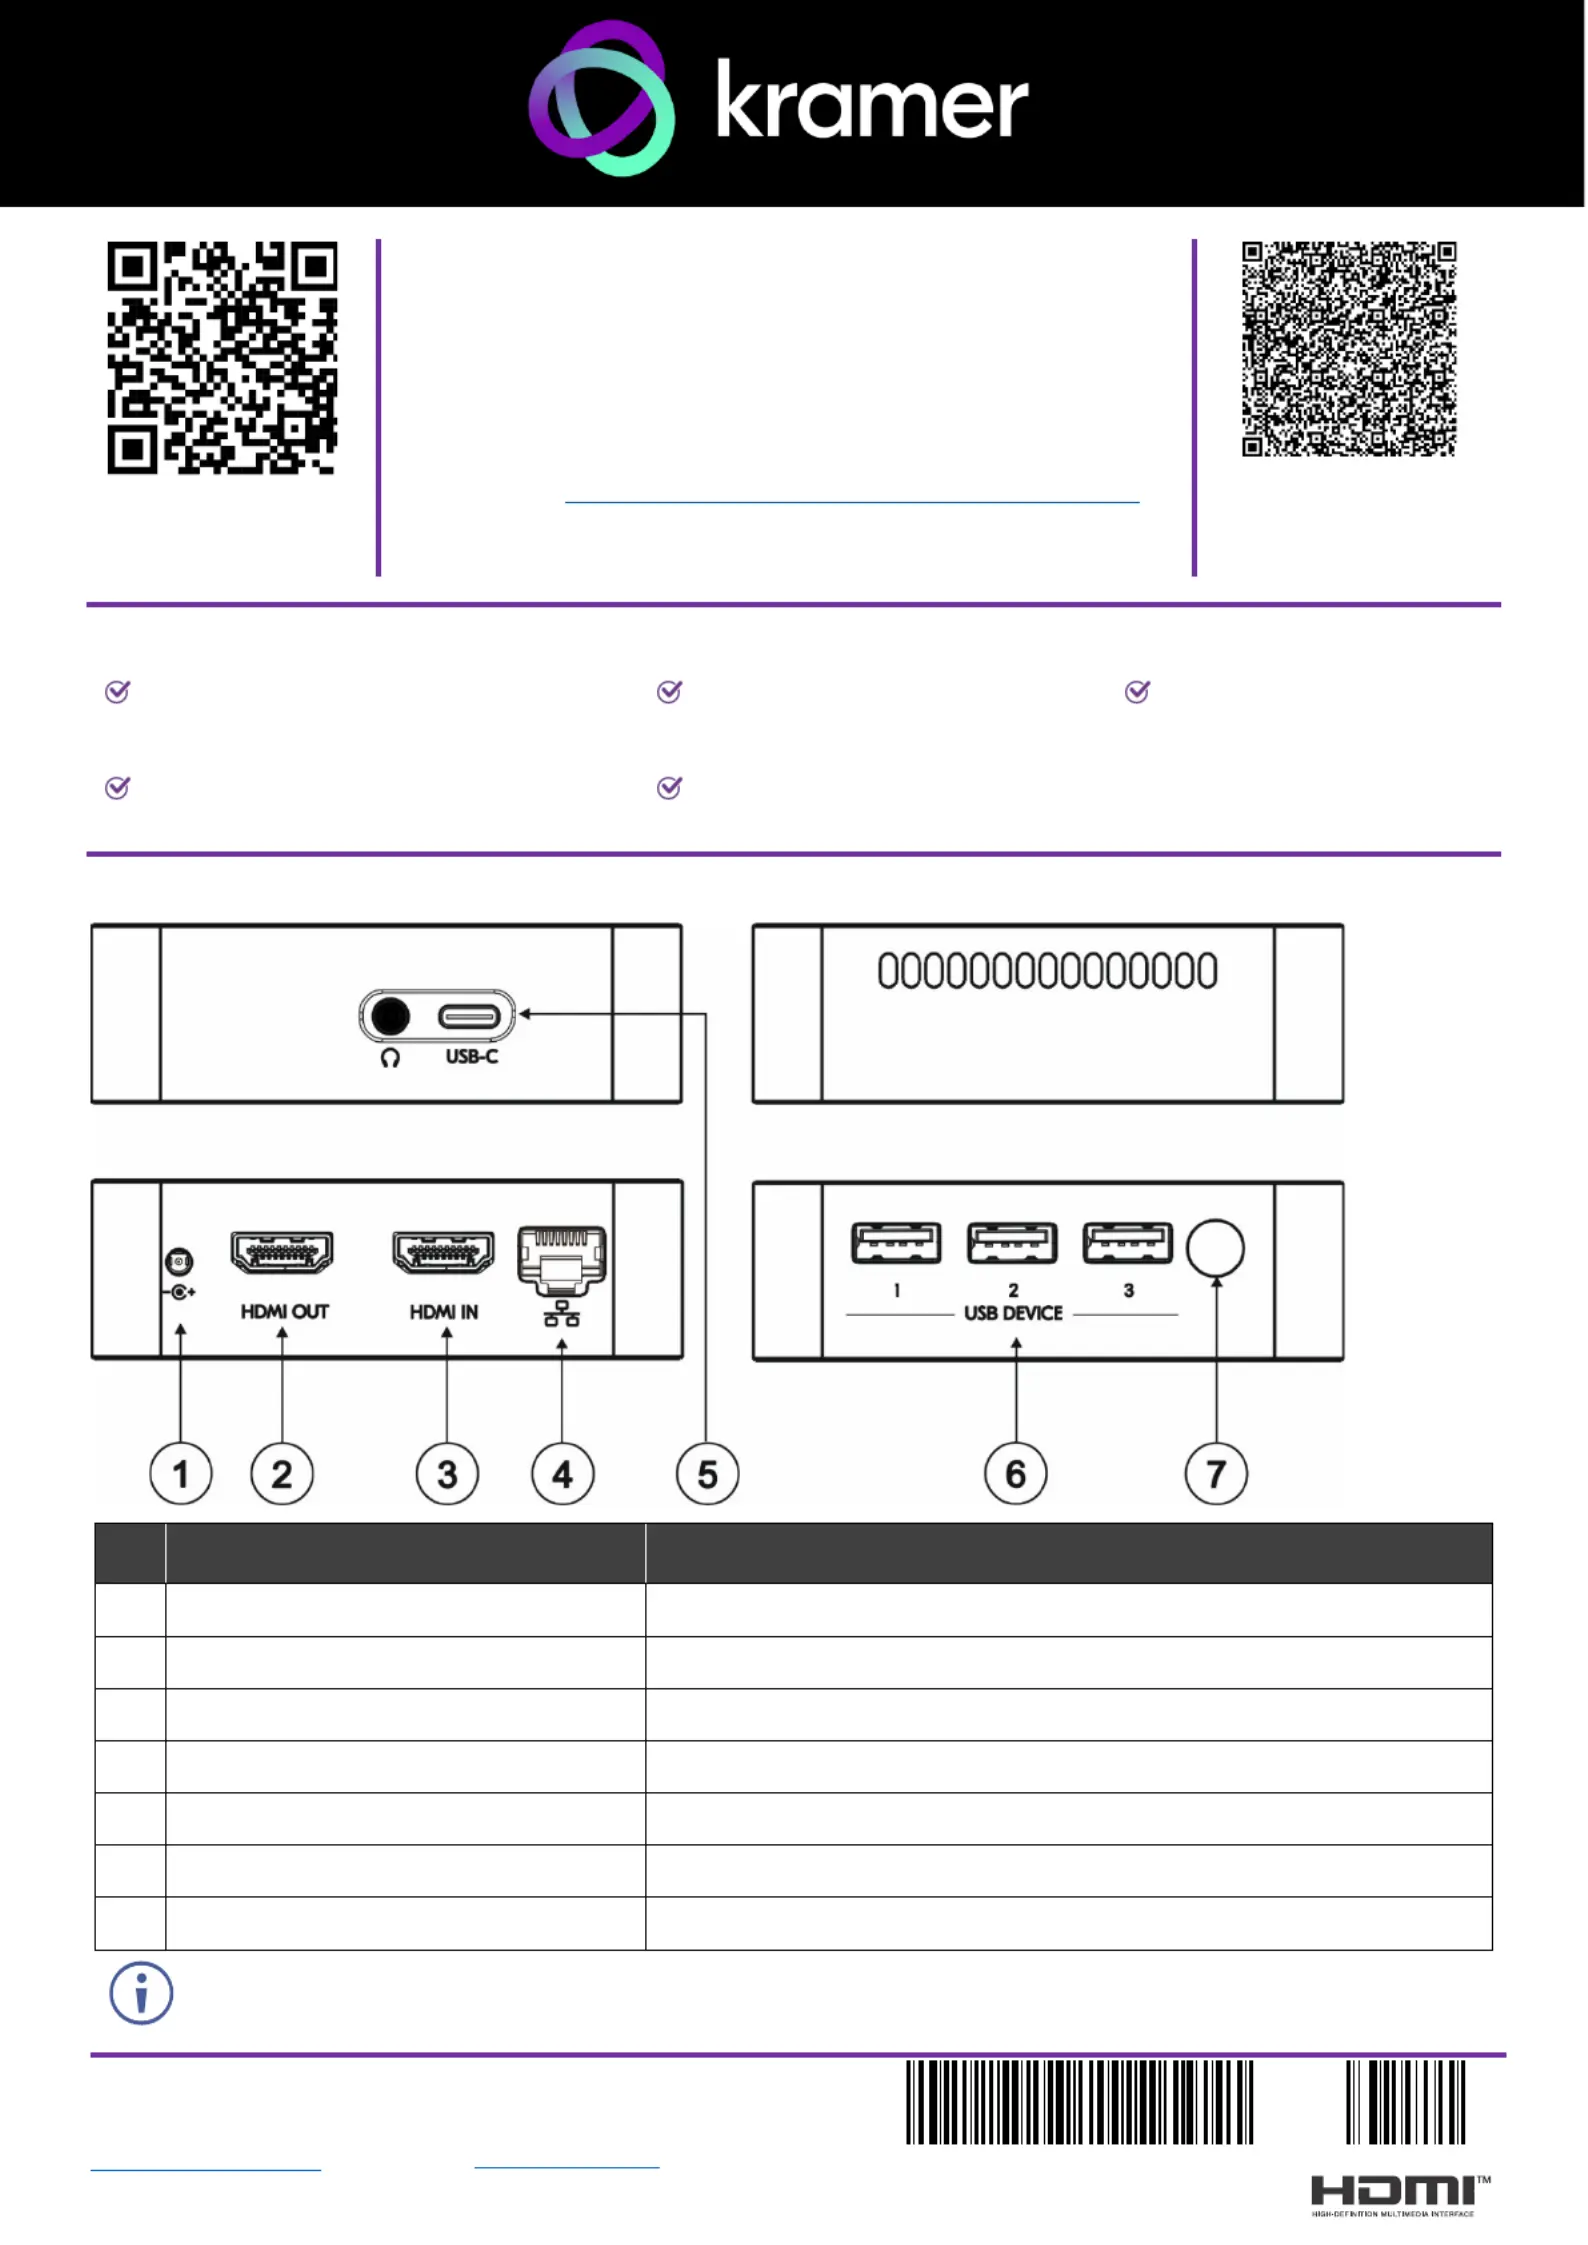
Step 2: 3 Get to know yourVIA CONNECT
# FeatureFunction
1
Power Connector
Connect to the 12V DC power supply.
2
HDMI OUT Connector
Connect to an HDMI sink.
3
HDMI INConnector
Connect to an HDMI source.
4
RJ- 45 Connector
Connect to a LAN (default mode).
5
USB-C Connector
Connect to a -C sUSBource. Also used for Video Out.
6
3 x USB DEVICE 3.0 Connector
Connect to a USB device, for example, a USB speaker.
7
Power Button with LED
Press to power ON or turn OFF the device.
The
analog audiounavailable and portis is covered by rubber.
Produktspecifikationer
| Varumärke: | Kramer |
| Kategori: | ej kategoriserat |
| Modell: | VIA Connect3 |
Behöver du hjälp?
Om du behöver hjälp med Kramer VIA Connect3 ställ en fråga nedan och andra användare kommer att svara dig
ej kategoriserat Kramer Manualer

2 Februari 2026
6 Oktober 2025
6 Oktober 2025
6 Oktober 2025
6 Oktober 2025
24 Augusti 2025
24 Augusti 2025
24 Augusti 2025
24 Augusti 2025
24 Augusti 2025
ej kategoriserat Manualer
Nyaste ej kategoriserat Manualer
3 April 2026
3 April 2026
3 April 2026
3 April 2026
3 April 2026
3 April 2026
3 April 2026
3 April 2026
3 April 2026