LG CP50NS20 Bruksanvisning
LG ej kategoriserat CP50NS20
Läs gratis den bruksanvisning för LG CP50NS20 (4 sidor) i kategorin ej kategoriserat. Guiden har ansetts hjälpsam av 26 personer och har ett genomsnittsbetyg på 4.6 stjärnor baserat på 8 recensioner. Har du en fråga om LG CP50NS20 eller vill du ställa frågor till andra användare av produkten? Ställ en fråga
Sida 1/4
• Please pay attention to handling Electrostatic Sensitive Devices, you may use anti-static
products such as wrist straps, heel straps, mats to protect your body from electrostatic.
• Make sure you have a personal computer with one or two open USB ports before connecting the
drive to your computer.
• Power for all other devices should be turn off before attaching the cables.
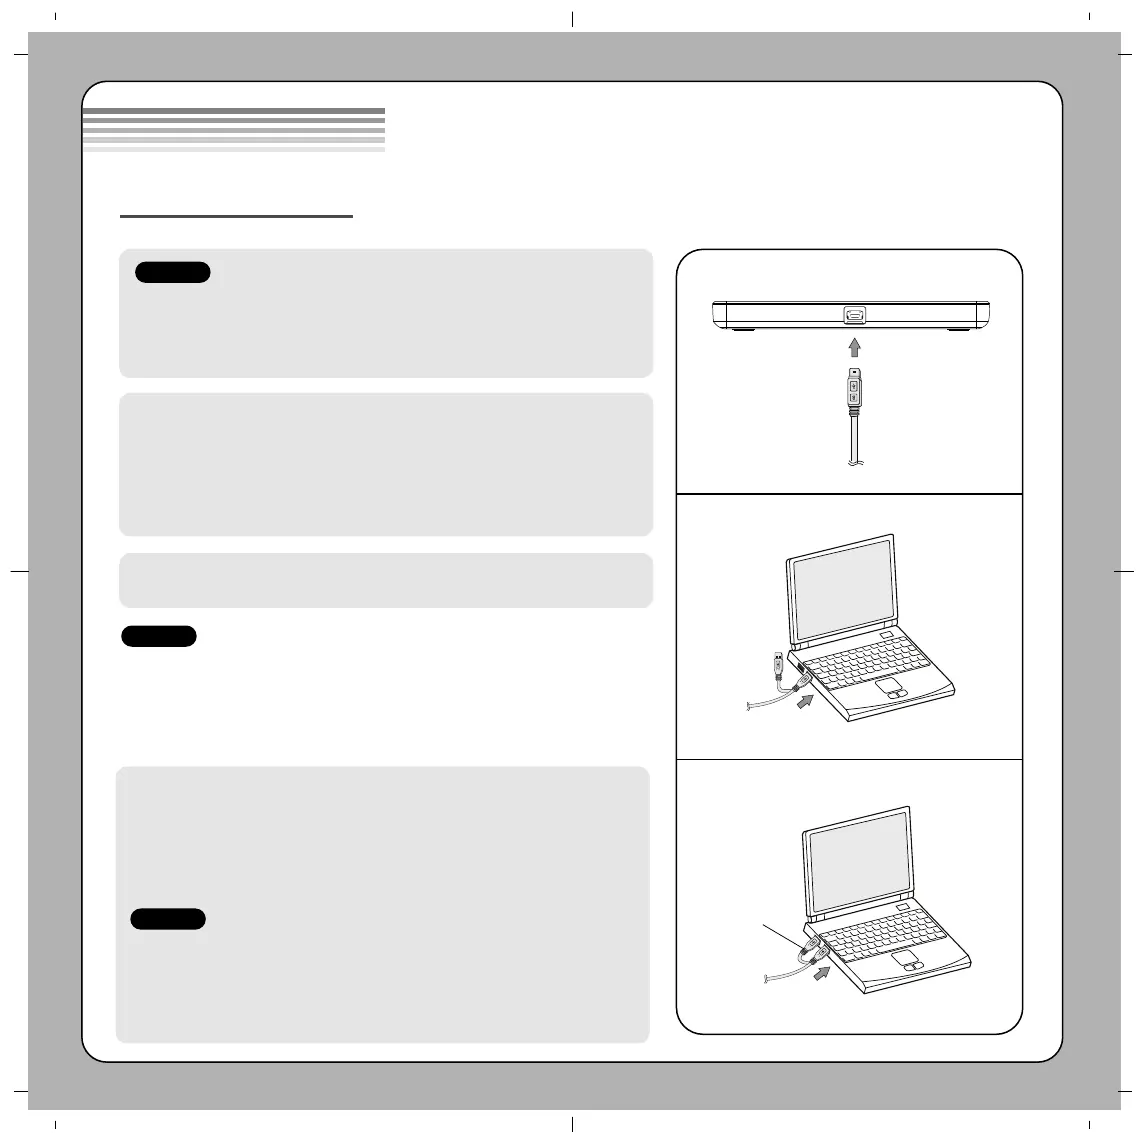
Connect the drive to the computer as shown in figure.
1Connect the USB 2.0 (Ytype) cable to the drive.
2Connect the other end of the USB 2.0 cable to your computer.
3The drive may get its power from the PCUSB power. All systems may not meet USB
power requirements and full performance may not be achieved. In this case, connect to
the USB power cable.
When the computer is ready, confirm that the drive is detected. And then, insert the supplied
software CD into the driveand install the software.
• Please do not connect the USB cables by any means other than specified above.
Using the wrong type of cable with this drive can cause it to malfunction.
• The appliance is not intended for use by young children or infirm persons without supervision.
Young Children should be supervised to ensure that they do not play with appliance.
• If the appliance is supplied from a cord extension set or an electrical portable outlet device, the cord
extension set on electrical portable outlet device must be positioned so that it is not subject to
splashing or ingress of moisture.
Installation
NOTES
NOTES
Connecting to computer or A/V Device.
Hardware Installation
1
2
3
The drive supports both Windows and Mac
®
. To use it properly, please follow directions below.
How to Eject Disc from the drive
•When using with Mac
- Click the eject button located on Mac OS menu or toolbar.
•When using with Windows
- Press the eject button in the front of the product.
*Software CD (for Windows only)
- The Software CD includes DVD software for usage for Windows.
• An application included in the Mac OS must be used to play data records or DVD video discs
through Mac OS.
- When recording data: Finder Burn, iTunes must be used.
- When playing a DVD movie disc: ADVD Player must be used.
• The Mac OS & Windows OS do not include an application that can play Blu-ray movie titles.
Separate playback software for Mac OS must be used to play Blu-ray movie titles through Mac OS.
• DVD/Blu-ray movie titles cannot be recorded because of the copyright protection.
NOTES
USB Power cable
Produktspecifikationer
| Varumärke: | LG |
| Kategori: | ej kategoriserat |
| Modell: | CP50NS20 |
Behöver du hjälp?
Om du behöver hjälp med LG CP50NS20 ställ en fråga nedan och andra användare kommer att svara dig
ej kategoriserat LG Manualer

14 Mars 2026
14 Mars 2026
20 Oktober 2025
19 Oktober 2025
8 Oktober 2025
8 Oktober 2025
7 Oktober 2025
16 September 2025
16 September 2025
16 September 2025
ej kategoriserat Manualer
Nyaste ej kategoriserat Manualer
3 April 2026
3 April 2026
3 April 2026
3 April 2026
3 April 2026
3 April 2026
3 April 2026
3 April 2026
3 April 2026