Logik LID60W14N Bruksanvisning

Logik Diskmaskin LID60W14N

Läs nedan 📖 manual på svenska för Logik LID60W14N (160 sidor) i kategorin Diskmaskin. Denna guide var användbar för 19 personer och betygsatt med 4.5 stjärnor i genomsnitt av 2 användare

Sida 1/160
Installation /Instruction Manual
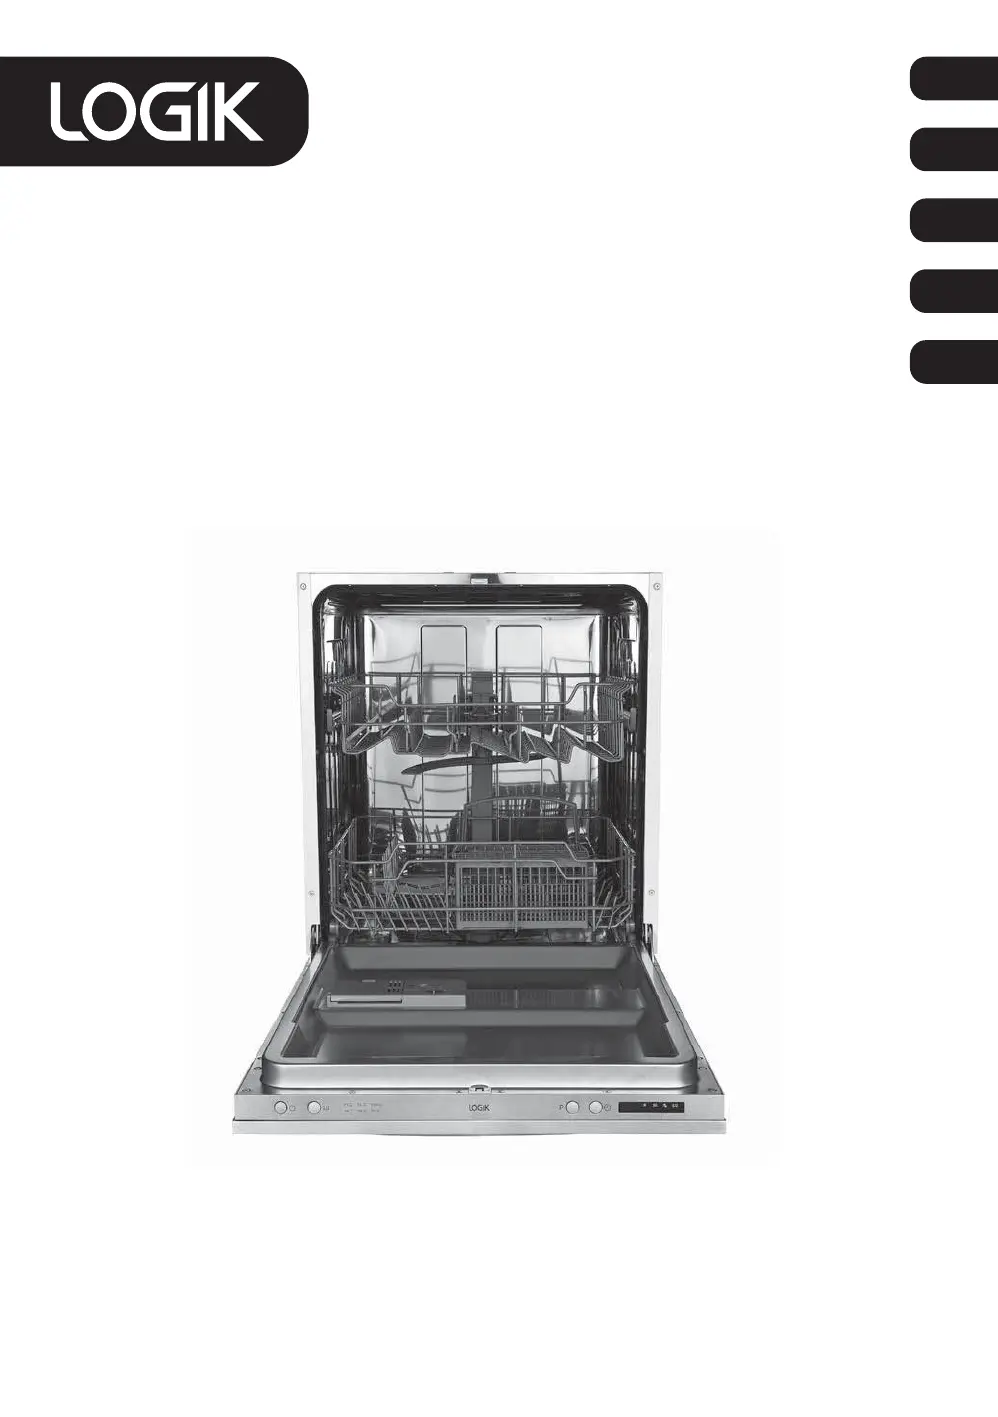
Integrated Dishwasher
Installasjons-/Instruksjonsmanual
Integrert Oppvaskmaskin
Installation-/Instruktionsbok
Integrerad Diskmaskin
Asennus/Käyttöopas
Integroitu-astianpesukone
Installations-/Brugervejledning
Indbygget Opvaskemaskine
GB
NO
SE
FI
DK
LID60W14N
Contents
GB
Safety Warnings ...................................................................................................................................................................8
Unpacking ..........................................................................................................................................................................18
Location .........................................................................................................................................................................................................................19
Installation .........................................................................................................................................................................19
Product Overview ..............................................................................................................................................................26
Front View .....................................................................................................................................................................................................................26
Upper Basket ...............................................................................................................................................................................................................26
Internal View ................................................................................................................................................................................................................26
Rear View .......................................................................................................................................................................................................................26
Lower Basket ................................................................................................................................................................................................................26
Control Panel ...............................................................................................................................................................................................................27
Before Operating ...............................................................................................................................................................28
To Open the Door ......................................................................................................................................................................................................28
To Close the Door .......................................................................................................................................................................................................28
Items Not Suitable for Use in the Dishwasher .................................................................................................................................................28
Adding Detergent Powder or Tablet ...................................................................................................................................................................29
Adding Rinse Aid ........................................................................................................................................................................................................30
Adjusting the Rinse Aid Reservoir........................................................................................................................................................................30
Adding Salt ...................................................................................................................................................................................................................31
Adjusting Salt Consumption ..................................................................................................................................................................................32
Loading the Dishwasher ...................................................................................................................................................33
Before Loading the Dishwasher ............................................................................................................................................................................33
Upper Basket ...............................................................................................................................................................................................................34
Lower Basket ................................................................................................................................................................................................................35
Cutlery Basket .............................................................................................................................................................................................................36
Wash Cycle Table ................................................................................................................................................................37
Starting a Wash Cycle ........................................................................................................................................................38
Changing a Programme ....................................................................................................................................................38
Adding an Extra Dish .........................................................................................................................................................38
At the End of a Programme ...............................................................................................................................................39
Switching O the Unit .......................................................................................................................................................39
Unloading the Dishwasher ...............................................................................................................................................39
Delay Start ..........................................................................................................................................................................39
Half Load ............................................................................................................................................................................40
Cleaning After Use .............................................................................................................................................................40
External Care ................................................................................................................................................................................................................40
Internal Care ................................................................................................................................................................................................................40
Frost Precaution ................................................................................................................................................................41
Maintenance After a Prolonged Period of Non-Operation ............................................................................................42
Hints and Tips ....................................................................................................................................................................42
General Issues .............................................................................................................................................................................................................42
Moving the Dishwasher ....................................................................................................................................................42
Technical Issues ..........................................................................................................................................................................................................44
Disposal of the Dishwasher ..............................................................................................................................................44
Disposal of Packing Material ............................................................................................................................................44
Specications .....................................................................................................................................................................45
Innhold
NO
Sikkerhetsadvarsler ..........................................................................................................................................................10
Pakke opp ...........................................................................................................................................................................46
Plassering ......................................................................................................................................................................................................................47
Installasjon .........................................................................................................................................................................47
Produktoversikt .................................................................................................................................................................54
Sett forfra ......................................................................................................................................................................................................................54
Øvre kurv ......................................................................................................................................................................................................................54
Sett fra innsiden .........................................................................................................................................................................................................54
Sett bakfra ....................................................................................................................................................................................................................54
Nedre kurv ....................................................................................................................................................................................................................54
Kontrollpanel ...............................................................................................................................................................................................................55
Før du begynner ................................................................................................................................................................56
Åpne døren ..................................................................................................................................................................................................................56
Lukke døren .................................................................................................................................................................................................................56
Gjenstander som ikke egner seg for oppvaskmaskinen ..............................................................................................................................56
Legge til oppvaskpulver eller -tablett ................................................................................................................................................................57
Fylle på glansemiddel ..............................................................................................................................................................................................58
Justere glansemiddelbeholderen ........................................................................................................................................................................58
Fylle på salt ...................................................................................................................................................................................................................59
Justere saltforbruk .....................................................................................................................................................................................................60
Sette inn i oppvaskmaskinen ...........................................................................................................................................61
Før du setter inn i oppvaskmaskinen..................................................................................................................................................................61
Øvre kurv ......................................................................................................................................................................................................................62
Nedre kurv ....................................................................................................................................................................................................................63
Bestikkurv .....................................................................................................................................................................................................................64
Oppvasktabell....................................................................................................................................................................65
Starte en vaskesyklus ........................................................................................................................................................66
Endre et program...............................................................................................................................................................66
For å legge til retter ...........................................................................................................................................................66
Ved slutten av et program ................................................................................................................................................67
Slå av enheten ....................................................................................................................................................................67
Ta ut av oppvaskmaskinen ...............................................................................................................................................67
Forsinket start ....................................................................................................................................................................67
Halv oppvask .....................................................................................................................................................................68
Rengjøring etter bruk ....................................................................................................................................................... 68
Utvendig vedlikehold ...............................................................................................................................................................................................68
Innvendig ettersyn ....................................................................................................................................................................................................68
Forholdsregler ved frost ...................................................................................................................................................69
Vedlikehold etter en lang periode uten bruk ..................................................................................................................70
Råd og tips .........................................................................................................................................................................70
Generelle forhold .......................................................................................................................................................................................................70
Flytte oppvaskmaskinen ...................................................................................................................................................70
Tekniske forhold .........................................................................................................................................................................................................72
Avhending av oppvaskmaskinen .....................................................................................................................................72
Avhending av emballasje..................................................................................................................................................72
Spesikasjoner ..................................................................................................................................................................73
Innehållsförteckning
SE
Säkerhetsvarningar ...........................................................................................................................................................12
Packa upp ...........................................................................................................................................................................74
Plats .................................................................................................................................................................................................................................75
Installation .........................................................................................................................................................................75
Produktöversikt .................................................................................................................................................................82
Vy framifrån ..................................................................................................................................................................................................................82
Övre korg ......................................................................................................................................................................................................................82
Insidan ...........................................................................................................................................................................................................................82
Baksida ...........................................................................................................................................................................................................................82
Nedre korgen ...............................................................................................................................................................................................................82
Kontrollpanel ...............................................................................................................................................................................................................83
Innan användning .............................................................................................................................................................84
För att öppna luckan .................................................................................................................................................................................................84
För att stänga luckan ................................................................................................................................................................................................84
Föremål som inte är lämpliga att använda i diskmaskinen ........................................................................................................................84
Lägga till diskmedel eller diskmedelstablett ...................................................................................................................................................85
Sköljmedel ....................................................................................................................................................................................................................86
Inställning sköljmedelsbehållaren .......................................................................................................................................................................86
Lägga till salt ................................................................................................................................................................................................................87
Inställning av saltförbrukningen ..........................................................................................................................................................................88
Ladda diskmaskinen .........................................................................................................................................................89
Innan diskmaskinen laddas ....................................................................................................................................................................................89
Övre korg ......................................................................................................................................................................................................................90
Nedre korgen ...............................................................................................................................................................................................................91
Bestickkorg ...................................................................................................................................................................................................................92
Diskcykeltabell ..................................................................................................................................................................93
Start av diskcykeln ............................................................................................................................................................94
Byte av program ................................................................................................................................................................94
För att lägga rätter ............................................................................................................................................................94
Vid slutet av programmet .................................................................................................................................................95
Stänga av enheten .............................................................................................................................................................95
Urplockning av diskmaskinen ..........................................................................................................................................95
Fördröjd start .....................................................................................................................................................................95
Halvfullt ..............................................................................................................................................................................96
Rengöring efter användning ............................................................................................................................................96
Yttre vård.......................................................................................................................................................................................................................96
Inre vård ........................................................................................................................................................................................................................96
Frostskydd ..........................................................................................................................................................................97
Underhåll efter en lång period utan användning ...........................................................................................................98
Tips och råd ........................................................................................................................................................................98
Allmäna problem .......................................................................................................................................................................................................98
Flyttning av diskmaskinen ...............................................................................................................................................98
Tekniska problem .................................................................................................................................................................................................... 100
Avyttring av diskmaskinen .............................................................................................................................................100
Avyttring av förpackningsmaterial ................................................................................................................................100
Specikationer.................................................................................................................................................................101
Sisältö
FI
Turvallisuusvaroitukset ....................................................................................................................................................14
Pakkauksesta purkaminen .............................................................................................................................................102
Paikka .......................................................................................................................................................................................................................... 103
Asennus ............................................................................................................................................................................103
Tuotteen yleiskatsaus .....................................................................................................................................................110
Näkymä edestä ........................................................................................................................................................................................................ 110
Yläkori ......................................................................................................................................................................................................................... 110
Näkymä sisäl......................................................................................................................................................................................................... 110
Näkymä takaa ........................................................................................................................................................................................................... 110
Alakori ......................................................................................................................................................................................................................... 110
Ohjauspaneelit ......................................................................................................................................................................................................... 111
Ennen käyttöä ..................................................................................................................................................................112
Luukun avaaminen ................................................................................................................................................................................................. 112
Luukun sulkeminen ................................................................................................................................................................................................ 112
Astianpesukoneessa käytettäväksi sopimattomat kohteet ..................................................................................................................... 112
Pesuaineen tai pesuainetabletin lisääminen ................................................................................................................................................ 113
Huuhtelukirkasteen lisääminen ......................................................................................................................................................................... 114
Huuhtelukirkastesäiliön säätö ............................................................................................................................................................................ 114
Suolan lisääminen .................................................................................................................................................................................................. 115
Suolan kulutuksen säätö ...................................................................................................................................................................................... 116
Astianpesukoneen täyttö ...............................................................................................................................................117
Ennen astianpesukoneen täyttöä ..................................................................................................................................................................... 117
Yläkori ......................................................................................................................................................................................................................... 118
Alakori ......................................................................................................................................................................................................................... 119
Ruokailuvälinekori .................................................................................................................................................................................................. 120
Pesuohjelmataulukko .....................................................................................................................................................121
Pesuohjelman ynnistäminen ......................................................................................................................................122
Pesuohjelman muuttaminen ..........................................................................................................................................122
Voit lisätä lautaset ...........................................................................................................................................................122
Pesuohjelman lopussa ....................................................................................................................................................123
Koneen sammuttaminen ................................................................................................................................................123
Astianpesukoneen tyhjentäminen ................................................................................................................................123
Viivekäynnistys ................................................................................................................................................................123
Puolitäyttö .......................................................................................................................................................................124
Puhdistus käytön jälkeen ...............................................................................................................................................124
Ulkopuolen ylläpito ................................................................................................................................................................................................ 124
Sisäpuolen ylläpito ................................................................................................................................................................................................. 124
Jäätymisvarotoimet ........................................................................................................................................................125
Kunnossapito pitkän käyttämättömyysjakson jälkeen ...............................................................................................126
Vihjeitä ja vinkkejä ..........................................................................................................................................................126
Yleisiä ongelmia ...................................................................................................................................................................................................... 126
Astianpesukoneen siirtäminen ......................................................................................................................................126
Tekniset ongelmat .................................................................................................................................................................................................. 128
Astianpesukoneen hävittäminen ...................................................................................................................................128
Pakkausmateriaalin hävittäminen .................................................................................................................................128
Tekniset tiedot .................................................................................................................................................................129
Indholdsfortegnelse
DK
Sikkerhedsadvarsler .........................................................................................................................................................16
Udpakning .......................................................................................................................................................................130
Placering ....................................................................................................................................................................................................................131
Installation .......................................................................................................................................................................131
Produktoversigt ...............................................................................................................................................................138
Set forfra .....................................................................................................................................................................................................................138
Øverste kurv .............................................................................................................................................................................................................. 138
Indeni .......................................................................................................................................................................................................................... 138
Set bagfra ................................................................................................................................................................................................................... 138
Nederste kurv ...........................................................................................................................................................................................................138
Kontrolpanelt ........................................................................................................................................................................................................... 139
Før brug ............................................................................................................................................................................140
Sådan åbnes lågen ................................................................................................................................................................................................. 140
Sådan lukkes lågen ................................................................................................................................................................................................. 140
Emner, der ikke er egnede til vask i opvaskemaskinen ............................................................................................................................. 140
Tilføjelse af opvaskemiddel eller opvaskemiddeltablet............................................................................................................................ 141
Tilføjelse af skyllemiddel ...................................................................................................................................................................................... 142
Justering af skyllemiddelbeholder ................................................................................................................................................................... 142
Tilføjelse af salt ......................................................................................................................................................................................................... 143
Justering af saltforbrug ......................................................................................................................................................................................... 144
Fyldning af opvaskemaskinen........................................................................................................................................145
Før opvaskemaskinen fyldes ............................................................................................................................................................................... 145
Øverste kurv .............................................................................................................................................................................................................. 146
Nederste kurv ...........................................................................................................................................................................................................147
Bestikkurv .................................................................................................................................................................................................................. 148
Skema over vaskecyklus .................................................................................................................................................149
Start af vaskecyklus.........................................................................................................................................................150
Skift af program ...............................................................................................................................................................150
Du kan tilføje plader ........................................................................................................................................................150
Ved programmets afslutning .........................................................................................................................................151
Slukning af enheden .......................................................................................................................................................151
Tømning af opvaskemaskinen........................................................................................................................................151
Udskudt start ...................................................................................................................................................................151
Halv opvask ......................................................................................................................................................................152
Rengøring efter brug ......................................................................................................................................................152
Udvendig pleje ........................................................................................................................................................................................................152
Indvendig pleje ........................................................................................................................................................................................................ 152
Frostsikring ......................................................................................................................................................................153
Vedligeholdelse efter længere periode ude af drift .....................................................................................................154
Gode råd ...........................................................................................................................................................................154
Generelle spørgsmål .............................................................................................................................................................................................. 154
Flytning af opvaskemaskinen ........................................................................................................................................154
Tekniske spørgsmål ................................................................................................................................................................................................ 156
Kassering af opvaskemaskinen ......................................................................................................................................156
Kassering af emballage ...................................................................................................................................................156
Specikationer.................................................................................................................................................................157
8
Safety Warnings
GB
For your continued safety and to reduce the risk of injury or electric shock, please follow all the safety
precautions listed below.
t Read all instructions carefully before using the dishwasher and keep them for future reference.
t Retain the manual. If you pass the dishwasher onto a third party, make sure to include this
manual.
t Keep ventilation openings in the dishwasher enclosure clear of obstructions.
t Choose a location for your dishwasher away from heat sources such as radiators or res.
t Children should be supervised to ensure that they do not play with the dishwasher.
t Keep mains cable out of reach from children.
t This appliance can be used by children aged from 8 years and above and persons with reduced
physical, sensory or mental capabilities or lack of experience and knowledge if they have been
given supervision or instruction concerning use of the appliance in a safe way and understand the
hazards involved. Children shall not play with the appliance. Cleaning and user maintenance shall
not be made by children without supervision.
t Keep children away from detergents and rinse aids. These may cause chemical burns in the
mouth, throat and eyes or asphyxiation.
t Keep children away from the dishwasher when the door is open.
t Switch o and disconnect from the mains supply before tting or removing tools/attachments,
after use and before cleaning.
t Keep your ngers away from moving parts and tted attachments.
t Never use a damaged machine.
t If the mains cable is damaged, it must be replaced by the manufacturer, its service agent or a
qualied technician in order to avoid a hazard.
t Keep the mains cable and plug away from water.
t Never exceed the maximum capacities.
t 2 people are required to lift this dishwasher.
t Only use the dishwasher for its intended domestic use.
t This appliance is intended for indoor household use and similar applications such as:
farm houses and by clients in hotels, motels and other residential type environments;
bed and breakfast type environments;
catering and similar non-retail applications.
WARNING
IT IS HAZARDOUS FOR ANYONE OTHER THAN AUTHORISED SERVICE PERSONNEL TO CARRY
OUT SERVICING OF REPAIRS WHICH INVOLVE THE REMOVAL OF COVERS.
TO AVOID THE RISK OF AN ELECTRICAL SHOCK DO NOT ATTEMPT REPAIRS YOURSELF.
t Do not sit or stand on the door or dish rack.
t Do not move your dishwasher by holding the door or its edges. Hold the dishwasher around its
sides or base when moving it.
t Do not touch the heating element during or immediately after use.
10
Sikkerhetsadvarsler
NO
For din fortsatte sikkerhet, samt for å redusere risikoen for elektrisk st, vennligst følg alle
sikkerhetsinstruksene som er listet opp under.
t Les alle anvisningene nøye før du bruker oppvaskmaskinen og legg dem til side for senere
oppslag.
t Ta vare på håndboken. Hvis du overleverer oppvaskmaskinen til noen andre, må du sørge for at
denne håndboken følger med.
t Hold ventilasjonsåpningene rundt oppvaskmaskinen fri for hindringer.
t Plasser oppvaskmaskinen på en at overate unna varmekilder som varmeovner og åpne
ammer.
t Barn må overvåkes for å unngå at de leker med oppvaskmaskinen.
t Hold strømledningen utenfor barns rekkevidde.
t Dette apparatet kan brukes av barn fra og med 8 år og personer med reduserte fysiske-,
sensoriske- eller mentale evner eller mangel på erfaring og kunnskap hvis de er under tilsyn eller
mottar anvisning om bruk av apparatet på en sikker te og forstår farene dette innebærer. Barn
må ikke leke med apparatet. Rengjøring og normalt vedlikehold må ikke utføres av barn med
mindre de er eldre enn 8 år og under tilsyn. Barn må ikke foreta rengjøring og vedlikehold uten
tilsyn.
t Hold barn unna vaskemidler og glansemidler. Disse kan forårsake kjemiske brannsår i munn, hals
og øyne eller kvelning.
t Hold barn unna oppvaskmaskinen når døren er åpen.
t Slå av og koble fra stikkontakten før montering eller erning av verktøy/tillegg, etter bruk og før
rengjøring.
t Hold ngrene unna deler i bevegelse og montert tilbehør.
t Bruk aldri en skadet maskin.
t Hvis strømledningen er skadet, må den skiftes av produsenten, av produsentens
servicerepresentant eller av en kvalisert tekniker for å unngå fare.
t Hold strømledningen og støpslet unna vann.
t Overstig aldri maksimal kapasitet.
t Det kreves to personer for å løfte denne oppvaskmaskinen.
t Denne oppvaskmaskinen må kun brukes som tilsiktet i husholdning.
t Apparatet er kun beregnet på vanlig innendørs husholdningsbruk og lignende bruksområder som:
bondegårder og i kjøkken som er tilgjengelige for hotellgjester, moteller og lignende
overnattingssteder;
typiske bed & breakfast-etablissementer;
catering og steder som ikke har en butikkfunksjon.
ADVARSEL
DET ER FARLIG FOR ALLE ANDRE ENN AUTORISERT SERVICEPERSONELL Å UTFØRE SERVICE
ELLER REPARASJONER SOM INNEBÆRER FJERNING AV DEKSLER.
FOR Å HINDRE ELEKTRISK STØT MÅ DU IKKE FORSØKE Å REPARERE SELV.
t Ikke sitt eller stå på døren eller stativet.
11
t Ikke ytt oppvaskmaskinen ved å holde i døren eller dørkantene. Hold oppvaskmaskinen rundt
sidene eller i sokkelen når den yttes.
t Ikke ta på varmeelementet under eller straks etter bruk.
t Ikke bruk oppvaskmaskinen med mindre alle paneler er satt riktig på plass. Vær meget forsiktig
hvis du må åpne døren mens et program kjører, da det er fare for at varmt vann spruter ut av
maskinen.
t Ikke sett tunge gjenstander på den åpne døren. Apparatet kan velte.
t Når du setter inn gjenstander som skal vaskes:
t Plasser skarpe gjenstander slik at de ikke skader dørpakningen,
t Advarsel: Kniver og andre redskaper med skarpe kanter må settes i kurven med spissen ned eller
legges horisontalt.
t Ikke la plastgjenstander komme i kontakt med varmeelementet.
t Kontroller at vaskemiddelrommet er tomt etter at vaskesyklusen er ferdig.
t Ikke vask plastgjenstander med mindre de er merket som oppvaskmaskinsikre eller tilsvarende.
t Bruk kun vaskemidler og glansemidler som er ment for en automatisk oppvaskmaskin.
t Andre måter å koble fra strømforsyningen må være bygd inn i ledningsnettet med minst 3 mm
kontaktatskillelse i alle poler.
t Døren må ikke stå åpen da noen kan snuble i den.
t For å spare strøm, må du huske på alltid å slå av oppvaskmaskinen når du er ferdig med den.
Oppvaskmaskinen må ikke etterlates uten tilsyn når den er i bruk.
t Fjern døren til oppvaskrommet når du slutter å bruke en gammel oppvaskmaskin eller kaster den.
t Strømledningen må ikke bøyes eller klemmes for mye under installasjonen.
t Ikke tukle med kontrollene.
t Apparatet må kobles til vannledningen med et nytt slangesett.
t Det maksimale antallet kuverter som kan vaskes er 12.
t Det maksimalt tillatte inngående vanntrykket er 1 MPa, og det minimalt tillatte vanntrykket er
0,04 MPa.
Anvisninger om jording
ADVARSEL: DETTE APPARATET MÅ JORDES.
t Dette apparatet er utstyrt med en strømledning som har en jordleder og et jordet støpsel.
t Støpslet må kobles til en passende stikkontakt som er installert og jordet i henhold til lokale
standarder og krav.
t Feil tilkobling av jordlederen kan føre til elektrisk støt.
t Ledningene i kabelen har følgende farger:
t Grønn og gul = jord,
t Blå = spenningsførende (nøytral (N) i et TN-system),
t Brun = spenningsførende (fase (L) i et TN-system).
t Spør en kvalisert elektriker eller servicerepresentant hvis du er i tvil om apparatet er
korrekt jordet eller hvis støpslet ikke passer.
t Støpslet som følger med apparatet, må ikke modiseres.
13
t Vidrör inte värmeelementen under eller direkt efter användning.
t Använd inte diskmaskinen såvida inte allt omslutande hölje nns på plats. Öppna luck
försiktigt när programmet körs eftersom det nns risk för att hett vatten sprutar ut ur a
t Placera inte tunga föremål på den öppna luckan. Apparaten kan tippa.
t När föremål laddas som skall diskas:
t Placera vassa föremål så att de inte skadar luckans tätning.
t Varning: Knivar och andra redskap med vassa spetsar skall placeras i korgen med sp
eller placeras horisontellt.
t Låt inte plastföremål komma i kontakt med värmeelementet.
t Kontrollera att diskmedelsfacket är tomt när diskningen är avslutad.
t Diska inte plastföremål såvida inte de är märkta att de är diskmaskinssäkra eller likna
t Använd endast diskmedel och sköljmedel som skapats för en automatisk diskmaskin
t Andra sätt att koppla bort från elnätet måste inkorporeras i det fasta ledningsnätet me
mm kontaktseparation i alla poler.
t Luckan bör inte lämnas öppen eftersom det nns risk att man snubblar över den.
t För att spara energi ska du alltid komma ihåg att stänga av diskmaskinen när du anvä
färdigt. Diskmaskinen bör inte lämnas oövervakad när den är i drift.
t Ta bort luckan när diskmaskinen tas ur bruk eller den skall kastas.
t Under installationen får inte elkabeln böjas överdrivet mycket eller på ett farligt sätt
till.
t Mixtra inte med kontrollerna.
t Apparaten skall anslutas till vattenledningen med ny slanguppsättning.
t Maximalt kan 12 kuvert diskas i maskinen.
t Maximalt tillåtet ingående vattentryck är 1Mpa och minimum tillåtet ingående vatten
0,04Mpa.
Jordanslutningsinstruktioner
VARNING: DENNA UTRUSTNING MÅSTE ANSLUTAS TILL JORD.
t Denna produkt är utrustad med en sladd med jordledare och jord kontakt.
t Kontakten måste anslutas till lämpligt uttag installerat och jordat i enlighet med loka
standarder och krav.
t Felaktig anslutning av utrustningens jordledare kan innebära risk för elektrisk
t Ledningarna i sladden är har följande färger:
t grön och gul = jord,
t Blå=neutral
t Brun=ström.
t Rådfråga behörig elektriker eller servicerepresentant om du är osäker på om
utrustningen är ordentligt jordad.
t Modiera aldrig kontakten som medföljer utrustningen.
14
Turvallisuusvaroitukset
FI
Oman turvallisuutesi tähden ja vahinkojen tai sähköiskujen vaaran vähentämiseksi tul
alla annettuja turvallisuusohjeita.
t Lue kaikki ohjeet huolellisesti ennen astianpesukoneen käyttämistä ja säilytä ne my
käyttöä varten.
t Säilytä käyttöopas. Jos luovutat astianpesukoneen kolmannelle osapuolelle, varmis
käyttöopas seuraa mukana.
t Pidä astianpesukoneen tuuletusaukot vapaana kaikista esteistä.
t Valitse astianpesukoneelle paikkaa loitolla lämmönlähteistä kuten lämpöpatteri tai
t Lapsia on valvottava, jotta varmistetaan, etteivät he leiki astianpesukoneella.
t Pidä virtajohto poissa lasten ulottuvilta.
t Tätä laitetta saavat käyttää yli 8-vuotiaat ja sellaiset henkilöt, joiden fyysiset, aistim
henkiset kyvyt ovat alentuneet tai joilla ei ole kokemusta tai tietoutta laitteen käytö
valvotaan ja he saavat ohjeet laitteen turvalliseen käyttöön ja he ymmärtävät, mitä v
laitteen käyttöön liittyy. Lapset eivät saa leikkiä laitteella. Vain yli 8-vuotiaat lapset
puhdistaa laitteen ja suorittaa käyttäjän kunnossapitotehtäviä aikuisen valvonnassa.
saa suorittaa puhdistamista ja kunnossapitoa ilman valvontaa.
t Älä anna pesuaineiden ja huuhtelukirkasteiden joutua lasten käsiin. Ne voivat aiheu
kemiallisia palovammoja suuhun, kurkkuun tai silmiin tai johtaa tukehtumiseen.
t Pidä lapset loitolla astianpesukoneesta, kun luukku on auki.
t Sammuta ja irrota virtapistoke pistorasiasta ennen kuin lisäät tai poistat työkaluja t
lisävarusteita sekä käytön jälkeen ja ennen puhdistamista.
t Älä koske liikkuviin osiin tai kiinnitettyihin lisävarusteisiin.
t Älä koskaan käytä vahingoittunutta laitetta.
t Jos virtajohto on vaurioitunut, valmistajan tai huoltoedustajan tai pätevän asentajan
vaihtaa se vaaran välttämiseksi.
t Pidä virtajohto ja pistoke poissa vedestä.
t Älä koskaan ylitä maksimikapasiteettia.
t Tämän astianpesukoneen nostamiseen tarvitaan kaksi henkilöä.
t Käytä astianpesukonetta vain sen tarkoitettuun kotitalouskäyttöön.
t Tämä laite on tarkoitettu kotitalouksien sisäkäyttöön ja vastaaviin sovelluksiin, kut
maataloissa ja asiakkaiden käytössä hotelleissa, motelleissa ja muissa majoituslai
majoitus- ja aamiainen -tyyppisissä majoituslaitoksissa;
catering- ja vastaavissa ei vähittäismyyntiin tarkoitetuissa käytöissä.
VAROITUS
AINOASTAAN VALTUUTETUT HUOLTOHENKILÖT VOIVAT SUORITT
POISTAMISTA VAATIVIA KORJAUSTOIMENPITEITÄ.
VAARATILANTEIDEN JA SÄHKÖISKUN VAARAN VÄLTTÄMISEKSI Ä
LAITETTA.
t Älä istu tai seiso luukun tai astiatelineen päällä.
t Älä siirrä astianpesukonetta pitämällä kiinni ovesta tai sen reunoista. Pidä astianpe
kiinni sivuilta siirtäessäsi sitä.
15
t Älä kosketa kuumennuselementtiä käytön aikana tai heti sen jälkeen.
t Älä käytä astianpesukonetta, elleivät kaikki suojakannet ole paikoillaan. Avaa luukku
kun pesuohjelma on käynnissä, sillä laitteesta saattaa roiskua ulos kuumaa vettä.
t Älä aseta mitään painavia esineitä avoimen luukun päälle. Laite saattaa kaatua.
t Pestäviä kohteita lisättäessä:
t Sijoita terävät kohteet niin, etteivät ne vahingoita luukun tiivisteitä;
t Varoitus: Veitset ja muut teräväkärkiset keittiövälineet on asetettava koriin kärki alas
asetettava vaaka-asentoon.
t Älä päästä muoviesineitä kosketuksiin kuumennuselementin kanssa.
t Tarkista, että pesuainelokero on tyhjä pesuohjelman suorittamisen jälkeen.
t Älä pese muoviesineitä, jollei niitä ole merkitty konepesunkestäviksi tai vastaavasti.
t Käytä vain automaattiselle astianpesukoneelle tarkoitettuja pesuaineita ja huuhtelukir
t Muut laitteen virransyötöstä irrottamisratkaisut on liitettävä kiinteällä johdotuksella v
mm:n kontaktivälillä kaikilla navoilla.
t Luukkua ei saa jättää puoliksi auki, sillä se voi johtaa laitteen kaatumisvaaraan.
t Muista aina energian säästämiseksi kytkeä astianpesukone pois päältä, kun et enää kä
Astianpesukonetta tulee pitää aina silmällä, kun sitä käytetään.
t Irrota pesuosaston luukku, kun poistat vanhan astianpesukoneen pois käytöstä.
t Asennuksen aikana virtakaapeli ei saa taipua liikaa tai vaarallisesti eikä litistyä.
t Älä peukaloi säätimiä.
t Laite on liitettävä vesijohtoverkkoon uusilla letkusarjoilla.
t Pesupaikka-asetusten enimmäismäärä on 12.
t Suurin sallittu tulovedenpaine on 1 Mpa, ja pienin sallittu 0,04 Mpa.
Maadoitusohjeet
VAROITUS: TÄMÄ LAITE ON MAADOITETTAVA.
t Tässä laitteessa on maadoittava virtajohto ja maadoittava pistoke.
t Pistoke on kytkettävä sopivaan pistorasiaan, joka on asennettu ja maadoitettu paikall
standardien ja vaatimusten mukaisesti.
t Maadoituksen virheellinen kytkentä voi aiheuttaa sähköiskun vaaran.
t Johtojen värimerkinnät ovat seuraavat:
t Vihreä ja keltainen = suojamaa,
t Sininen = nolla,
t Ruskea = vaihejohdin.
t Jos olet epävarma laitteen oikeasta maadoituksesta tai jos pistoke ei sovi oike
pistorasiaan, tarkistuta asia pätevällä sähköteknikolla tai huollolla.
t Älä koskaan muokkaa laitteen mukana tullutta pistoketta.
16
Sikkerhedsadvarsler
DK
For din fortsatte sikkerhed og for at reducere risikoen for skader eller elektrisk stød be
angivelserne herunder.
t Læs omhyggeligt alle anvisninger, inden opvaskemaskinen bruges, og gem dem til
reference.
t Gem brugervejledningen. Hvis du giver opvaskemaskinen videre til tredjemand, sk
også at give vedkommende brugsvejledningen.
t Opvaskemaskinens ventilationshuller skal holdes fri og uhindrede.
t Vælg en placering for opvaskemaskinen, der ikke er for tæt på varmekilder som rad
åben ild.
t Børn skal være under opsyn for at sikre at de ikke leger med opvaskemaskinen.
t Hold el-ledningen væk fra børn.
t Dette apparat må kun bruges af børn over 8 år og personer med nedsatte fysiske, se
eller mentale evner, eller mangel på erfaring eller viden, hvis de er under opsyn elle
instrueret i hvordan dette apparat bruges sikkert og forstår risikoen ved at bruge det
må ikke lege med apparatet. Rengøring og vedligeholdelsesarbejde må ikke udføres
medmindre de er over 8 år og er under opsyn. Rengøring og vedligeholdelsesarbejd
udføres at børn, medmindre de er under opsyn.
t Hold opvaskemiddel og skyllemiddel udenfor børns rækkevidde. Midlerne kan me
forbrændinger i mund, svælg og øjne eller kvælning.
t Hold børn på afstand af opvaskemaskinen når lågen er åben.
t Sluk og træk stikket ud af stikkontakten, inden du anbringer eller erner redskaber/
brug og før rengøring.
t Hold ngrene væk fra bevægelige dele og monteret tilbehør.
t Brug aldrig en maskine, der er beskadiget.
t Hvis el-ledningen er beskadiget, skal den, for at undgå fare, udskiftes af enten fabr
servicerepræsentant eller af en tilsvarende kvaliceret tekniker.
t Hold ledninger og kontakter væk fra vand.
t Overskrid aldrig maksimumkapaciteten.
t Der kræves 2 personer til at løfte opvaskemaskinen.
t Brug kun opvaskemaskinen til dens tilsigtede brug i hjemmet.
t Dette apparat er beregnet til indendørs brug i hjemmet, og til lignende brug på sted
landbrug og af klienter på hoteller, moteller og andre typer indkvartering;
bed and breakfast type miljøer;
catering og lignende ikke-detail anvendelser.
ADVARSEL
DET ER FARLIGT FOR ALLE ANDRE END AUTORISERET SERVICEPE
SERVICERING OG REPARATIONER DER INVOLVERER AFTAGELSE A
FOR AT UNDGÅ RISIKO FOR ELEKTRISK STØD MÅ DU IKKE FORSØ
t Sid eller stå ikke på lågen eller opvaskekurvene.
t Flyt ikke opvaskemaskinen ved at holde i døren eller dens kanter. Hold i opvaskem
holde i siderne eller understykket når den yttes.
GB
18
Unpacking
Remove all items from the packaging. Retain the packaging. If you dispose of it please do so
according to local regulations.
The following items are included:
Lower Hook X 2 ST3.5x45 Screw x 4ST4x14 Countersunk
head Screw x 9
ST3.5x16 Screw x 2
U-shaped Hose Holder x 1
Screw Nuts x 4 ST4x14 Screw x 4 Toe Panel Cover x 1 Instruction Manual
Hole Cover x 2
Detergent Measuring
Spoon x 1
Toe Panel Mounting
Bracket x 2
Cutlery Basket x 1
Condensation Strip x 1
Installation Hook x 2
Measuring Cup x 1
ST3.5x25 Screw x 2
Salt Funnel
Hop Hook x 2
Water Supply HoseThe Main Unit
Thank you for purchasing your new Logik Dishwasher.
You must spend some time reading this installation/instruction manual in order to fully
understand how to install and operate it.
Read all the safety instructions carefully before use and keep this instruction manual for
future reference.
Instruction
Manual
This product has been wet tested to ensure correct operation. As a result some water may
remain inside the unit. This is normal and safe. Remove any water droplets from the exterior if
necessary.
20
INSTALLATION
3. Do not connect the unit to the mains socket
before installation. Ensure you are not
installing the unit right in front of the mains
socket. This is to avoid potential damage to
the back of the unit.
4. The condensation strip must be fitted
to the underside of the worktop above
your dishwasher to protect it against any
moisture. Its purpose is to protect your
worktops underside from steam rising from
the dishwasher.
Remove the backing paper from the
condensation strip.
Leave some space
Stick the Condensation
Strip under the worktop,
where you want to
install the dishwasher.
5. Stick the condensation strip to the
underside of the worktop.
6. For Wooden Worktop Only
Place the Installation Hook to secure the
unit as shown.
Failure to attach the condensation strip
could result in damage to the underside
of your worktop!
Ensure the surface is clean prior to
sticking the condensation strip to the
underside of the worktop.
22
INSTALLATION
10. Install the Aesthetic Panel onto the
dishwasher door. After the aesthetic panel
is installed, the tension of the dishwasher
door spring can be adjusted by rotating the
adjusting bolt. If the tension is right, the
door will remain horizontal in the fully open
position.
Hop hook
ST4*14 Countersunk
head screw
Lower hook
11. Remove the screws on both sides of the
dishwasher door and replace with ST3.5x45
screws. Ensure to tighten the screws and to
secure the Aesthetic Panel.
12. Adjust the bolt to loosen or tighten the
tension of the dishwasher door.
13. Adjust the adjustable feet again to
obtain the optimum levelling of the unit.
(maximum of 5cm)
23
INSTALLATION
14. To secure the dishwasher under the table
top, tighten the screws as shown. Note
their positioning for the different types of
worktops.
589
545.4
36
56.2 100
Wooden Worktop
Synthetic /
Ceramic Worktop
ST3.5x16
Hole Cover
Installation Hook
ST4x14
15. Cut out a 589 mm wide plinth for toe panel.
Tape the supplied toe panel mounting
brackets to the toe panel as shown. Drill the
required holes.
16. Determine the correct position for the
toe panel mounting bracket, remove
the bracket and bend the metal tab. This
ensures that the toe panel won’t slide in
further than you need.
Adjust Height
24
INSTALLATION
17. Attach the toe panel mounting brackets to
the toe panel. Align the screw holes, then
using the 4 screws ST4x14 to secure the toe
panel.
18. Insert the toe panel to the dishwasher.
Water mains
Y-Adaptor
(not included)
Connect
to another
appliance if
required.
Water supply hose
19. Make sure your plumbing is suitable for use
with the dishwasher. If in doubt contact
a qualified plumber. This unit MUST BE
connected to COLD WATER MAINS using the
new water inlet hose. OLD HOSE SETS MUST
NOT BE RE-USED. The water pressure from
the water mains needs to be at a minimum
of 0.04 MPa and a maximum of 1.00MPa.
t Connect one end of the safety water
supply hose to your dishwasher, and
then connect the other end of the hose
to your water mains. Please ensure the
black rubber seal is in place.
t After connecting the hose, turn on your
water mains and check for leaks.
t Connect the dishwasher to the mains
socket.
You may use a Y-Adaptor (not
included)for an additional water
feed for another appliance, for
example a washing machine. This
is only applicable for cold water
mains. A Y-Adaptor is available
from most DIY stores.
About the Safety Supply Hose
The safety supply hose consists of the
double walls. The hose’s system guarantees
its intervention by blocking the flow of
water in case of the supply hose breaking
and when the air space between the
supply hose itself and the outer corrugated
hose is full of water.
25
INSTALLATION
t Do not bend your drain hose.
t You may use the U-shaped drain hose
holder to secure your drain hose and to
avoid bending it.
t Secure the water drain hose to the waste
pipe to avoid it coming off during the
washing process.
U-shaped drain
hose holder water drain
hose
t The waste pipe must only be
connected to the foul drains and not
the surface water drainage system.
t The water drain hose should be placed
between 40 cm and 100 cm from the
floor level and must not be extended,
otherwise the unit may not be able to
expel the waste water properly.
t Please close the hydrant after using.
GB
26
Product Overview
Front View Rear View
Water Inlet
(connect to
supply hose)
Mains Cable
Drain Hose
Upper Basket Lower Basket
SpikesCup Racks
Internal View
Spray Arms
Upper Basket
Lower Basket
Filtering System
Salt Reservoir
Dispenser
Door Handle
Control Panel
GB
27
1. On/O Button
Turn the dishwasher on and o.
2. Button
Press to select the half load washing cycle.
3. Programme Icons
t P1 – Intensive
t P2 – Normal
t P3 – Eco Wash
t P4 – Glass
t P5 – 1 Hour
t P6 – Rapid Wash
4. P Programme Button
Press repeatedly to select your required washing programme.
5. Delay Start button
t Press repeatedly to preset the delay timer and delay the starting time by up to 24 hours.
t Each press of this button increases the delay start time by 1 hour intervals.
6. LED Display
Displays programme, delay start time and fault codes.
7. LED Indicator Lights
Rinse Aid Rell Warning Light
Illuminates when the rinse aid in the dishwasher needs to be relled.
Salt Rell Warning Light
Illuminates when the softening salt in the dishwasher needs to be relled.
Infall Indicator Light
Illuminates when tap is not open.
Indicator Light
Illuminates when the half-load function is selected.
Control Panel
1/2 P
P1 P2 P3
P4 P5 P6
1 2 4 5 63 7
* To comply with Standards of Performance, i.e., EN50242, the economy setting is used as reference.
GB
29
Adding Detergent Powder or Tablet
Only use detergents specifically designed for use in dishwashers. To be more environmentally
friendly, please use no more than the correct amount of detergent. Fill the detergent dispenser
with detergent power or tablet. See the detergent manufacturers instructions for the correct
amount to use. If using tablets read the manufacturers recommendations on the tablet
packaging in order to determine where the tablet should be placed (e.g. cutlery basket,
detergent compartment etc.)
Irritant
Bleach and
Countertop
detergent
Please follow the steps below to fill the detergent dispenser.
1. Push the button on the lid of the detergent
dispenser in the direction of the arrow until
the flap springs open.
2. Fill the detergent dispenser with detergent
powder to both main wash detergent
chamber and pre-wash detergent chamber,
or insert the detergent tablet to the main
detergent chamber. The marking indicates
the filling level.
3. Close the lid firmly so that it clicks into place.
push up from the right side
All programmes with pre-wash need an
additional detergent dosage that must
be placed in the pre-wash detergent
chamber. If using tablets please check
the detergent manufacturers instructions.
Please refer to the wash cycle table. This
detergent will take effect during the pre-
wash phase.
t WARNING! Keep out of the reach of children.
t Irritating to eyes.
t Avoid contact with eyes. In case of contact with eyes, rinse
immediately with plenty of water and seek medical advice.
t If swallowed, seek medical advice immediately.
pre-wash detergent chamber
main wash detergent chamber
GB
30
Adjusting the Rinse Aid Reservoir
The rinse aid reservoir has six settings. Both the
recommended setting and the factory setting is “4”. If the
dishes are not drying properly or are spotted, adjust the dial
to the next higher number until your dishes are spot-free.
Adding Rinse Aid
Rinse aid helps to ensure water does not cling and leave marks on crockery during the drying
phase and helps crockery dry faster after it has been washed. Only pour rinse aid that is for
domestic dishwashers into the reservoir. This model is designed to use liquid rinse aids only.
Please follow the steps below to pour the rinse aid into the storage reservoir, and the amount
will dispense automatically.
1. Turn the cap and open as indicated.
2. When the cap open marking is aligned,
you may lift the cap up.
3. Pour the rinse aid until the rinse aid
indicator turns completely black in colour
and close the cap.
4. Be careful not to overfill the reservoir.
Wipe up any spills.
6
54 3 2
1
MAX
open
rinse aid indicator
6
5432
1
MAX
t If the water hardness in your area is soft, you may not need rinse aid as it may cause white
film to develop on your dishes.
t If you decide to use a detergent tablet, you do not need to add rinse aid into the rinse aid
reservoir.
t Rinse aid refill warning indicator will illuminate when the reservoir is running out of rinse aid
and requires refilling.
t Alternatively, you can judge the amount of rinse aid by checking the rinse aid indicator next to
the reservoirs cap when the indicator is black, it means it is full. When it is clear, it means it is
almost empty.
If there are some rinse aid residue left in the washing compartment or your dishes, please turn
the rinse aid dispenser dial to 1.
GB
31
Adding Salt
If the water in your area is hard, deposits will form on your dishes and utensils. As such, this
appliance contains a salt reservoir for you to reduce the hardness of the water.
Please follow the steps below to pour the salt into the salt reservoir and to correspond to the
water hardness level in your area.
1. Remove the lower basket and unscrew the reservoir cap.
OPEN
open
open
open
2. Place the funnel provided over the salt reservoir. Pour in
approximately 1.5kg of dishwasher salt depending on the
brand used.
3. Fill the reservoir with water until it overflows (first use only).
4. Clean any excess salt from around the reservoir opening and
then screw the cap on again firmly.
5. Run the Rapid” wash programme immediately (without
any crockery in the dishwasher) to remove any traces of salt
from the compartment.
t The salt refill warning indicator on the control panel will illuminate when the reservoir is
running out of salt and requires refilling.
t The salt refill warning indicator will cease to illuminate within a few days, depending on how
quickly the salt dissolves.
t If you decide to use a detergent tablet, you may not need to add salt, this depends upon the
water hardness in your area and the type of tablet being used. Check with your water supplier
and the detergent tablet manufacturers instructions.
GB
32
Adjusting Salt Consumption
Salt consumption must be adjusted to correspond to the water hardness level in your area. If
you don’t know how hard the water in your home is, please ask the company that supplies water
in your area.
It is recommended that adjustments should be made in accordance with the following chart.
Water Hardness Selector
Position
Salt Consumption
(Gram/Cycle)
°dh °fh °Clarke mmol/L
0-5 0-9 0-6 0-0.94 H1 0
6-11 10-20 7-14 1.0-2.0 H2 9
12-17 21-30 15-21 2.1-3.0 H3 12
18-22 31-40 22-28 3.1-4.0 H4 20
23-34 41-60 29-42 4.1-6.0 H5 30
35-55 61-98 43-69 6.1-9.8 H6 60
To optimise your dishwasher for the local water hardness, please follow the steps below and
refer to the above table.
1. Open the door and press the On/Off button to switch on the dishwasher.
2. Press and hold the P program button for 5 seconds until the salt refill warning indicator will
be on periodically.
3. Press the P program repeatedly to adjust the water hardness level: H1 / H2 / H3 / H4 / H5 /
H6.
4. After adjusting the water hardness level, press the On/Off button to save the setting.
1°dH (German degree) = 0.1783 mmol/L
1°fH (French degree) = 0.09991 mmol/L
1°Clark (British degree) = 0.1424 mmol/L
t Do not use everyday table salt or cooking salt as they contain insoluble substances which
could damage the dishwasher.
t Do not pour detergent into the salt container. This will damage the dishwasher.
GB
33
Loading the Dishwasher
Before Loading the Dishwasher
In general, please observe the following notes before loading your cutlery and crockery in the
basket.
t Remove lipstick stains and any food residues from crockery and dishes. Rinse if necessary.
t Dishes and cutlery must not lay inside one another, or cover each other.
t Load your cutlery and crockery so that water can access all surfaces.
t Ensure all items are securely positioned.
t Hollow items such as cups, glasses, pans, etc. must be placed upside down in the basket.
t Wide based items should be placed at an angle so that water can run off them freely.
t The spray arms must not be blocked by items which are too tall or hang through the baskets.
If in doubt, test for free movement by manually rotating the spray arms.
t Ensure that small items cannot fall through the holders in the baskets.
t For safety reasons, do not operate the dishwasher without the dishwasher basket in place.
t Do not wash items soiled with ash, sand, wax, lubricating grease or paint in the dishwasher.
These items can damage the dishwasher. Ash does not dissolve and will be distributed in the
dishwasher.
GB
34
Upper Basket
We recommend using the upper basket for small and
lightweight items such as cups saucers, glasses, dessert
bowls, etc. Shallow pans or casserole dishes can also be
placed in the dishwasher basket.
Long items such as soup ladles, mixing spoons and
long knives should be placed lying down across the
front of the upper basket.
Adjusting the Upper Basket
More space can be created for large items on the upper or lower baskets by adjusting the height
of the upper basket. Lower / raise the upper basket sliding the basket out and replacing it using
the wheels on the rails at the correct height. Ensure the basket is stable after adjusting the
height.
Hinged Cup Rack
To make room for taller items in the upper basket, pull the cup rack downwards. You can then
lean the tall glasses against it. You can also remove it when it is not required for use.
GB
35
22
22
11
11
11
11
11
33
33
5566
44
Loading the Upper Basket for 12 Place Settings
For optimum placement of crockery in the upper basket, please refer to the follow list and the
accompanying image.
Number Item
1 Cups
2 Saucers
3 Glasses
4 Small Serving Bowls
5 Medium Serving Bowls
6 Large Serving Bowls
7 Dessert Dishes
8 Dinner Plates
9 Soup Plates
10 Oval Platter
Lower Basket
We recommend that large and the most difficult to clean
items are placed in the lower basket, such as plates, serving
platters, saucepans, serving bowls, pots, pans, lids etc. We
recommend placing serving dishes and lids at the side of the
basket to avoid blocking the rotation of the spray arms.
Hinged Spikes
The spikes are used for holding plates and a platter. They can
be lowered to make more room for large items. Please refer
below for the steps to lower the spikes.
fold backwards
IN
To prevent water dripping from the upper basket onto the dishes in the lower basket, we
recommend that you empty the lower basket first and then the upper basket.
GB
36
1010 9988
77
77
77
Cutlery Basket
To make unloading much easier, cutlery should be grouped in zones and placed in the cutlery
basket. Please refer to the list and image for optimum placement.
Number Item
1 Soup spoons
2 Forks
3 Knives
4 Teaspoons
5 Dessert spoons
6 Serving spoons
7 Serving fork
8 Gravy ladle
1
2
1
1
2
1
2
2
2
2
2
2
1
2
1
1
2
1
4
4
5
5
4
8
4
5
3
5
4
4
5
5
4
4
5
5
4
7
4
5
3
5
4
4
5
5
1
3
1
3
3
6
3
3
2
3
3
3
6
1
2
1
3
3
6
Loading the Lower Basket for 12 Place Settings
For optimum placement of crockery in the lower basket, please refer to the following list and
image.
Number Item
1 Cups
2 Saucers
3 Glasses
4 Small Serving Bowls
5 Medium Serving Bowls
6 Large Serving Bowls
7 Dessert Dishes
8 Dinner Plates
9 Soup Plates
10 Oval Platter
IN
IN
t Do not let any items extend through the
bottom of baskets.
t To avoid the risk of injury, please load your
knives and forks with handles upwards. Do not
hold them by their sharp edges.
t The cutlery basket comes with covers, and
they are designed for you to load the cutlery
into the appropriate slots. If you use the basket
without the cover, it may reduce the washing
results of your cutlery.
t Please ensure the cover is securely locked to
the basket before operation.
t To comply with Standards of Performance, i.e.
EN50242, all cutlery must be loaded according
to the instructions in this manual.
GB
39
At the End of a Programme
At the end of the programme, the dishwasher will beep for 8 seconds.
1. Press the On/Off button to turn on the dishwasher.
2. Open the door a little to avoid water spillage.
3. Wait for the spray arms to stop spinning.
4. Open the door completely.
5. Let the dishes cool down before removing them, as hot dishes crack easily when hot.
Switching O the Unit
To save energy, remember to switch the dishwasher off using the On/Off button. The
dishwasher will continue to use electricity until it is switched off with the On/Off button.
Unloading the Dishwasher
Allowing dishes to cool down before unloading is important as dishes tend to break and chip
more easily when they are hot. Therefore, if you open the dishwasher door fully after switching
off, it will allow the dishes to cool down much faster.
Delay Start
The starting time of a washing programme can be delayed and adjusted. Please follow the steps
below.
1. Open the dishwasher door and load your soiled dishes and crockery.
2. Press the On/Off button to turn on the dishwasher.
3. Select your preferred programme.
4. Press the Delay Start button repeatedly to select your desired delay period (range up to
24 hours).
5. Close the door and the unit will start the programme at the assigned time automatically.
Unload the lower basket first, followed by the cutlery basket and then the upper basket. This will
prevent water drops from the upper basket from falling on to the dishes in the lower basket.
The condensation strip helps prevent the risk of steam damage to the worktop edging above
the dishwasher. It is advisable to leave the door closed until you are ready to unload the
crockery. Do not leave the door only partially open. Do not leave the appliance unattended with
the door fully open as this could present a trip hazard.
If the dishwasher is not going to be used for a long period of time, e.g. whilst on holiday,
disconnect the unit from the mains supply.
Each press of this button increases the delay start time by 1 hour increments.
GB
40
Half Load
In case you do not have enough dishes for a full load, the half load option can be selected. This
will help save hot water and electricity. Please follow the steps below.
1. Open the dishwasher door and load your soiled dishes and crockery onto the basket.
2. Press the On/Off button to turn on the dishwasher.
3. Select your preferred programme.
4. Press the button, the half load indicator will light up.
5. Close the door and the unit will start the programme.
Cleaning After Use
External Care
The Door and the Door Seal
Clean the door seals regularly with a soft damp cloth to remove food deposits.
When the dishwasher is being loaded, food and drink residues may drip onto the sides of the
dishwasher door. These surfaces are outside the wash cabinet and are not accessed by water
from the spray arms. Any deposits should be wiped off before the door is closed.
The Control Panel
If cleaning is required, the control panel should be wiped with a soft damp cloth ONLY.
Internal Care
Filtering System
The filtering system in the base of the wash cabinet retains coarse debris from the washing
cycle. The collected coarse debris may cause the filters to clog. Check the condition of the filters
regularly and clean them if necessary under running water.
Follow the steps below to clean the filters in the wash cabinet.
1. Ensure the dishwasher is switched off.
2. Turn the coarse filter anti-clockwise and gently lift it out.
3. Rinse all the filters under running water, including the filter cylinder, and then refit all filters
in the reverse order.
t To avoid penetration of water into the door lock and electrical components, do not use a
spray cleaner of any kind.
t Never use abrasive cleaners or scouring pads on the outer surfaces because they may scratch
the finish. Some paper towels may also scratch or leave marks on the surface.
GB
41
Spray Arms
Food particles can get stuck in the spray arm jets
and bearings. The spray arms should be checked and
cleaned regularly:
1. Ensure the dishwasher is switched off.
2. To remove the upper spray arm, hold the nut, turn
the arm clockwise to remove.
3. To remove the lower spray arm, remove the lower
basket, then pull the spray arm upwards.
4. Wash the arms in warm soapy water, and use a soft
brush to clean the jets. Rinse thoroughly.
5. Replace the arms securely.
t Do not over tighten the filters. Put the filters back in sequence securely, otherwise coarse
debris could get into the system and cause a blockage.
t NEVER use the dishwasher without filters in place. Improper replacement of the filter may
reduce the performance level of the appliance and damage dishes and utensils.
4. Gently rescrew the coarse filter in clockwise direction. There will be a slight click when
located correctly.
Frost Precaution
Avoid placing the dishwasher in a location where the temperature can get below 0°C. If your
appliance is left in an unheated place over the winter, you are advised to:
1. Disconnect the unit from the water inlet.
2. Turn on the unit. Select any washing cycle and let it run for 1 minute only. This drains out all
the excessive water that remains in the unit.
3. Disconnect from the mains socket.
4. Empty the dishwasher.
5. Close the dishwashers door.
6. Disconnect the unit from the water drain. Use a suitable receptacle to catch any residual
water in the pipes.
Should you encounter any difficulties with the above steps, please ask a service technician for
assistance.
GB
44
Disposal of the Dishwasher
t When disposing of your old dishwasher, first make it unusable. Disconnect from the
electricity and water supplies, cut off the cable and the plug from the mains cable. Make
the door lock inoperative, so that children cannot accidentally shut themselves in. Make
appropriate arrangements for the disposal of the dishwasher.
t At the end of its working life, the product must not be disposed of as urban waste. It must
be taken to a local authority waste collection centre or to a dealer providing this service.
Disposing of a household appliance separately avoids possible negative consequences
for the environment and health deriving from an inappropriate disposal and enables the
constituent materials to be recovered to obtain significant savings in energy and resources.
As a reminder of the need to dispose of household appliances separately, the product is
marked with a crossed-out wheeled dustbin.
t Please ensure that it presents no danger to children while being stored for disposal.
Disposal of Packing Material
Please dispose of the plastic wrappings and bags safely and keep out of the reach of babies and
young children.
Technical Issues
Technical Problems
Issue Possible Causes Solution
The dishwasher does not start. The door is not properly
closed.
Close the door firmly.
The unit is not connected to
the mains socket.
Connect the mains plug to the mains
socket.
The unit is not switched on. Press the On/Off button and select
a programme.
Error code “E1” displayed. Longer inlet time. t Fauces is not open.
t Water intake is restricted.
t Water pressure is too low.
Error code “E4” displayed. Overflow. t Some element of dishwasher leaks.
The drain pump is not working
properly.
The anti-flooding system has
operated.
t Disconnect from the mains socket.
t Disconnect the water inlet.
t Call a qualified technician.
46
NO
Pakke opp
Fjern alle gjenstander fra emballasjen. Ta vare emballasjen. Ta hensyn til lokale forskrifter om
avfallshåndtering hvis du må kaste emballasjen.
Følgende elementer er vedlagt:
Nedre krok × 2 ST3.5*45 skrue x 4ST4*14 -skrue med
senket hode x 9
ST3.5*16 skrue x 2
U-formet Slangeholder x 1
Skrue Mutter x 4 ST4*14 skrue x 4 Fotpanelet x 1 Instruksjonsmanual
Hulldeksel x 2
Måleskje for
Oppvaskmiddel x 1
Monteringsbrakett for
fotpanel x 2
Bestikkurv x 1
Kondensstrimmel x 1
Installasjonskrok x 2
Målebeger x 1
ST3.5*25 skrue x 2
Salttrakt
Opphengskrok × 2
SikkerhetsvannslangeHovedenheten
Takk for at du kjøpte ny oppvaskmaskin fra Logik.
Ta deg tid til å lese gjennom denne installasjons-/brukerveiledningen for å bli fullt fortrolig
med installasjon og betjening.
Les alle sikkerhetsanvisningene nøye før bruk og behold denne installasjons-/
brukerveiledningen for framtidig referanse.
Instruction
Manual
Dette produktet har blitt testet med vann for å sikre riktig operasjon. Som et resultat av dette,
kan noe vann være igjen i enheten. Dette er normalt og trygt. Fjern eventuelle vanndråper fra
utsiden hvis nødvendig.
47
INSTALLASJON
Plassering
Når du skal velge hvor oppvaskmaskinen
skal stå, må du sørge for at underlaget
er horisontalt og stabilt og at rommet er
godt luftet. Ikke sett oppvaskmaskinen i
nærheten av en varmekilde, f.eks. komfyr,
varmtvannsbereder eller radiator. Svært kalde
omgivelser kan også føre til at maskinen ikke
yter som den skal. Denne oppvaskmaskinen
er ikke beregnet for bruk i en garasje eller
utendørs installasjon.
Ikke dekk til oppvaskmaskinen med noe slags
materiale. Påse at det er åpent rom på sidene
når du installerer.
1. rg for at oppvaskmaskinen er installert av
en kvalifisert tekniker. Se hvilke verktøy som
kreves.
2. rg for at det er nok klarering på hver
side av enheten for å tillate noe sideveis
bevegelse for service når det er nødvendig.
Enhetens høyde er 815 mm. Figuren viser
minstemålene som kreves for å plassere
oppvaskmaskinen mellom monterte
kjøkkenskap.
820
600
580
598
550
815
mål i mm
Installasjon
Alle deler som fjernes må oppbevares for
å kunne foreta en full installasjon senere.
Sørg for at oppvaskmaskinen er slått av og
tom. Vi anbefaler at to personer håndterer
oppvaskmaskinen under installasjonen.

Produktspecifikationer

Varumärke: Logik
Kategori: Diskmaskin
Modell: LID60W14N

Behöver du hjälp?

Om du behöver hjälp med Logik LID60W14N ställ en fråga nedan och andra användare kommer att svara dig


Diskmaskin Logik Manualer

Diskmaskin Manualer

Nyaste Diskmaskin Manualer