Lumens OIP-AC01 Bruksanvisning
Lumens Inte kategoriserad OIP-AC01
Läs gratis den bruksanvisning för Lumens OIP-AC01 (2 sidor) i kategorin Inte kategoriserad. Guiden har ansetts hjälpsam av 24 personer och har ett genomsnittsbetyg på 4.5 stjärnor baserat på 4 recensioner. Har du en fråga om Lumens OIP-AC01 eller vill du ställa frågor till andra användare av produkten? Ställ en fråga
Sida 1/2
www.MyLumens.com
Copyright ©2021 Lumens Digital Optics Inc. All rights reserved.
5100462- SEP. 2021 50
OIP-AC01 Quick Installation Guide
1. PACKAGECONTENTS
6U Rack Chassis
Installation Guide
Power Adapter
Power Connector
M5 Screw p1-x8
Cable Clip p1-x5
(Appearance may vary
depending on country/region
2. Power & System Requirements
Power Requirement: DC 12V, 3A power supply for the cooling fan system.
System Requirement:
The 6U rack chassis requires a minimum of 266.7mm (10.5in) contiguous
free space in the rack for mounting.
With the Cooling Fan System installed, an additional 1U space above the
chassis should be left empty to provide space for air to ow freely.
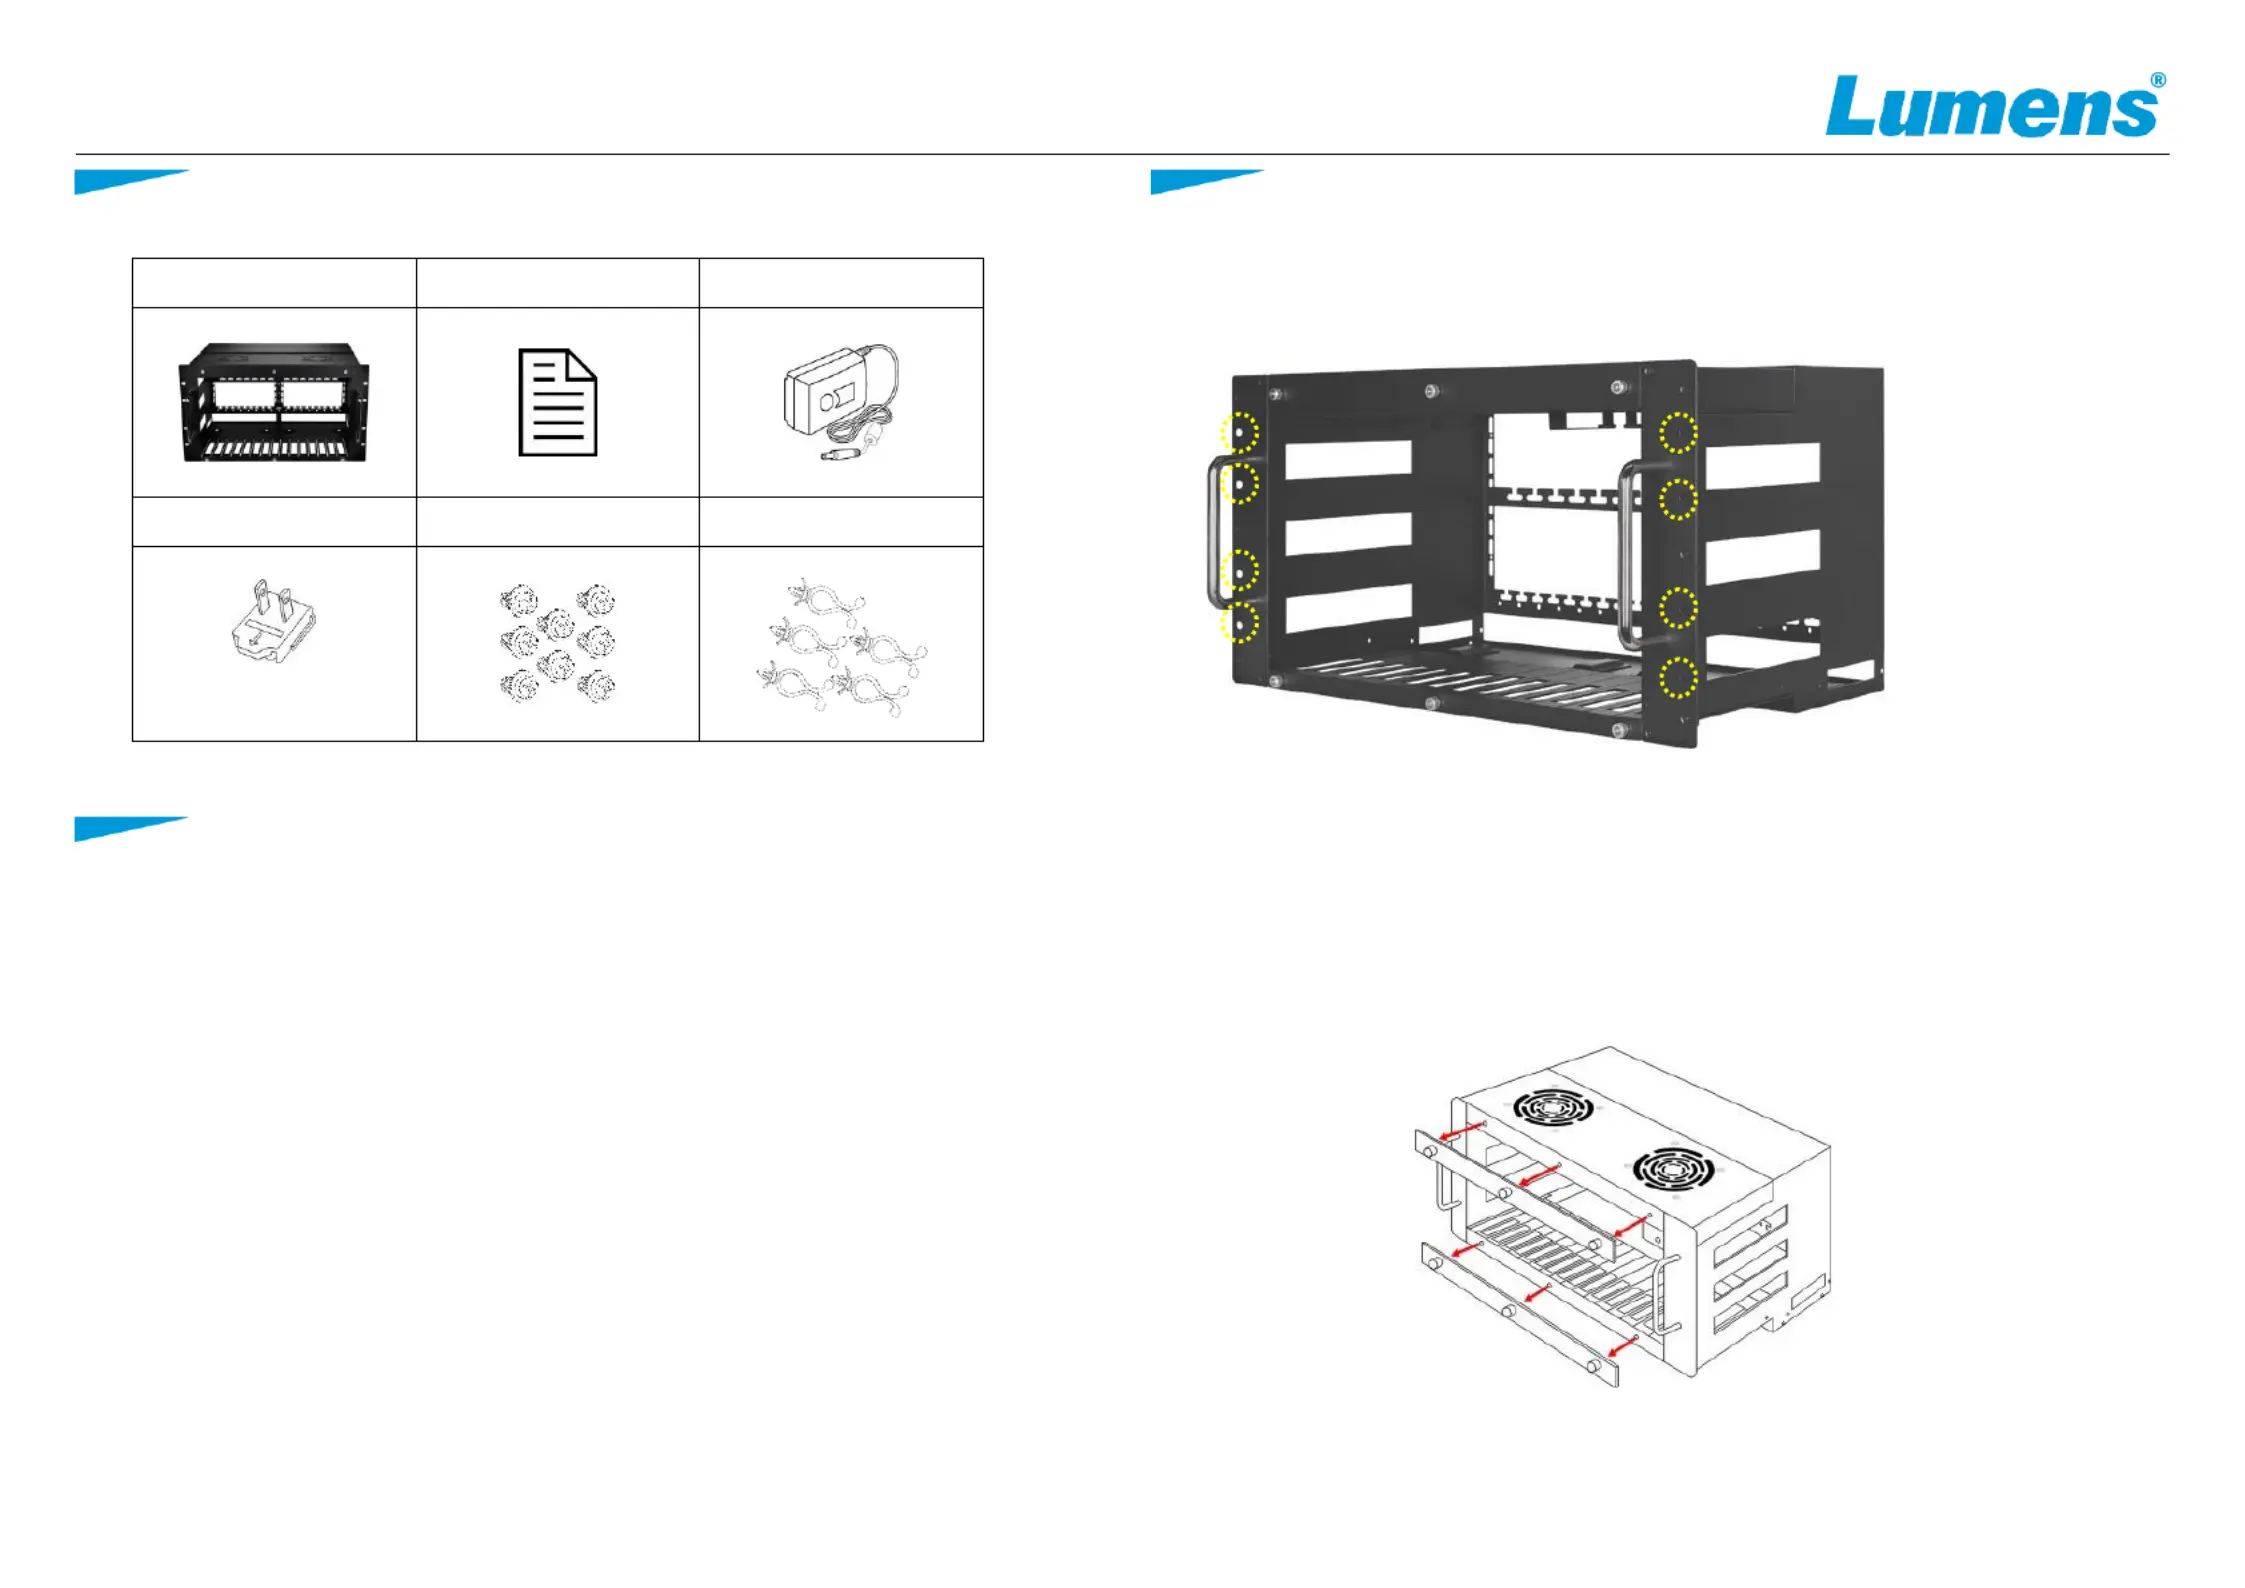
3. Installation Instructions
STEP 1
Install the OIP-AC01 to the rack with M5 Screws*8pcs.
STEP 2
Unscrew the 3 thumbscrews holding the top locking panel in place, and remove
the panel from the front of the chassis. Unscrew the 3 thumbscrews holding the
bottom locking panel in place, and remove the panel from the front of the
chassis.
Note: The thumbscrews are connected to the locking panels with a retention mechanism
and will not come completely free when they have been unscrewed from the chassis.
Produktspecifikationer
| Varumärke: | Lumens |
| Kategori: | Inte kategoriserad |
| Modell: | OIP-AC01 |
Behöver du hjälp?
Om du behöver hjälp med Lumens OIP-AC01 ställ en fråga nedan och andra användare kommer att svara dig
Inte kategoriserad Lumens Manualer

10 Mars 2025
25 September 2024
25 September 2024
25 September 2024
23 September 2024
22 September 2024
22 September 2024
20 September 2024
15 September 2024
14 September 2024
Inte kategoriserad Manualer
Nyaste Inte kategoriserad Manualer
9 April 2025
9 April 2025
9 April 2025
9 April 2025
9 April 2025
9 April 2025
9 April 2025
9 April 2025
9 April 2025
9 April 2025