Luxul XMS-1010P Bruksanvisning
Läs gratis den bruksanvisning för Luxul XMS-1010P (8 sidor) i kategorin Växla. Guiden har ansetts hjälpsam av 14 personer och har ett genomsnittsbetyg på 4.0 stjärnor baserat på 2 recensioner. Har du en fråga om Luxul XMS-1010P eller vill du ställa frågor till andra användare av produkten? Ställ en fråga
Sida 1/8
FoldFoldFold
READ ME FIRST
QUICK INSTALL GUIDE
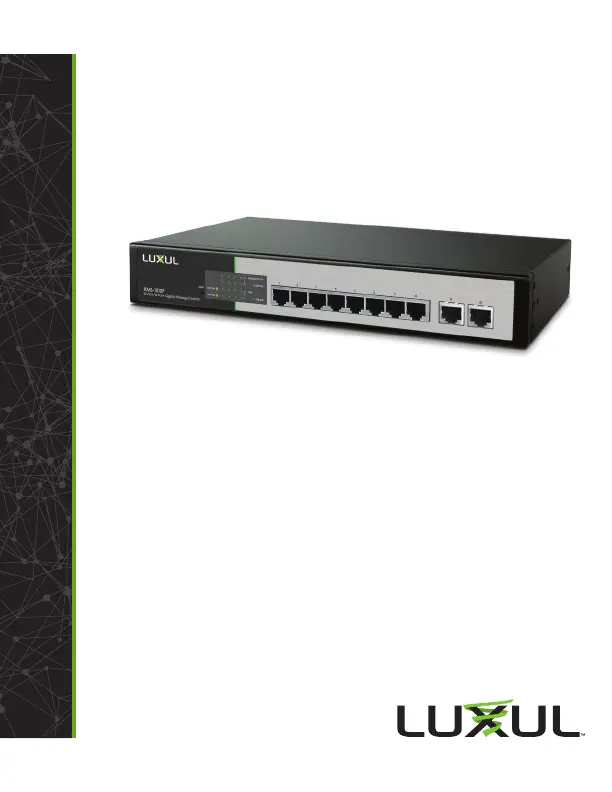
10-Port/8 PoE+ Gigabit
Managed Switch
XMS-1010P
Includes:
XMS-1010P 10-Port/8 PoE+ Gigabit Managed Switch
Rack Mount Kit
Rubber Feet
Power Cord
SETUP AND CONFIGURATION
1
Physical Installation
The XMS-1010P can be rack-mounted or used as a desktop switch. Install the
XMS-1010P in a stable/safe place to avoid any possible damage. Make sure there
is adequate space around the XMS-1010P for ventilation and proper heat dissi-
pation; Luxul recommends at least 4-6 inches around all sides. Avoid placement
in direct sunlight. Do not place heavy articles on the XMS-1010P and verify the
ground connection of the outlet is functioning properly.
Desktop/Shelf Installation
For desktop/shelf installation, attach the four rubber feet to the corner inden-
tations on the bottom of the XMS-1010P, then place the switch horizontally on
a solid, level platform.
Rack Installation
Use the included L brackets for convenient installation in a 19-inch server or
audio rack. As shown below, use four screws to attach the L-shaped brackets
on either sides of the XMS-1010P, and horizontally insert the switch into the
rack. Use your desired hardware to ax the switch supports to the rack.
Attach feet for desktop installation Install brackets for rack-mounting
2
Connecting Ethernet and Power
Ethernet and Power Connections
Use any RJ-45 to connect the XMS-1010P to an Ethernet-enabled device,
including servers, routers or other switches. No crossover cable is necessary.
The XMS-1010P supports 10/100/1000 Mbps Ethernet; 10/100 Mbps half/
full-duplex mode and 1000 Mbps full-duplex mode. All ten RJ-45 ports
support Auto MDI/MDIX and can be used as ordinary ports or as Uplink
ports. Ports 1-8 are PoE+ and are enabled by default.
Use the included power cable to connect the XMS-1010P to a surge protect-
ed outlet. The AC input socket and a power switch are on the rear panel.
The built-in power supply supports 100~240VAC at 50/60Hz.
Network Cabling
Luxul recommends Category-5, super Category-5 or Category-6 unshielded
twisted pair (CAT5/CAT5e/CAT6 UTP). To ensure best performance and
stable data transmission at 1000 Mbps, use Category-6 shielded twisted pair.
cCAUTION:Multiple Uplink channels can create loops, resulting in
networkfailure.Ensure only one Uplink channel exists
between switches or between the XMS-1010P and a router.
nNOTE:When powering up, the port LEDs corresponding to the opti-
cal interface may take a moment to initialize. This is normal
as the XMS-1010P initialization and startup completes.
nNOTE:The XMS-1010P has an internal 130W power supply. For
optimal switch performance, do not exceed 115W combined
consumption of all external PoE devices.
Sales
801-822-5450
sales@luxul.com
Technical Support
801-822-5450
support@luxul.com
LUX-QIG-XMS-1010P-v7 04131712
Copyright and Trademark Notices
No part of this document may be modified or adapted in any way, for any purposes without permission
in writing from Luxul. The material in this document is subject to change without notice. Luxul reserves
the right to make changes to any product to improve reliability, function, or design. No license is granted,
either expressly or by implication or otherwise under any Luxul intellectual property rights. An implied
license only exists for equipment, circuits and subsystems contained in this or any Luxul product.
© Copyright 2017 Luxul. All rights reserved. The name Luxul, the Luxul logo, the Luxul logo mark and Simply
Connected are all trademarks and or registered trademarks of Luxul Wireless, Inc. All other trademarks and
registered trademarks are property of their respective holders.
Produktspecifikationer
| Varumärke: | Luxul |
| Kategori: | Växla |
| Modell: | XMS-1010P |
| Vikt: | 1800 g |
| Bredd: | 292 mm |
| Djup: | 178 mm |
| Höjd: | 44.5 mm |
| LED-indikatorer: | Activity, Link, PoE, Power |
| Snabbstartsguide: | Ja |
| Certifiering: | FCC, IC, CE, RoHS, EN60950 |
| Rackmontering: | Ja |
| Strömförsörjning ingår: | Ja |
| Antal VLAN: | 4094 |
| Full duplex: | Ja |
| Kabeltyper som stöds: | Cat5, Cat5e, Cat6 |
| Produktens färg: | Svart, silver |
| Datahastighet för Ethernet-LAN: | 10,100,1000 Mbit/s |
| Strömförsörjning via Ethernet (PoE) stöd: | Ja |
| Total Power over Ethernet (PoE)-budget: | 130 W |
| Temperatur vid drift: | 0 - 40 ° C |
| Intervall för relativ operativ luftfuktighet: | 10 - 90 % |
| VLAN-stöd: | Ja |
| AC-inspänning: | 100 - 240 V |
| Kabel inkluderad: | AC |
| Växelström Frekvens: | 50 - 60 hz |
| Rackmonteringssats: | Ja |
| Kommunikationsstandarder: | IEEE 802.1D, IEEE 802.1p, IEEE 802.3, IEEE 802.3ab, IEEE 802.3af, IEEE 802.3u, IEEE 802.3x, IEEE 802.3z |
| Stöd för garanterad tjänstekvalitet (QoS): | Ja |
| VLAN-funktioner: | Port-based VLAN |
| Adresstabellstorlek: | - poster |
| Switch kapacitet: | - Gbit/s |
| Antal grundläggande RJ-45 Ethernet-portar: | 10 |
| Typ av grundläggande RJ-45 Ethernet-portar: | Gigabit Ethernet (10/100/1000) |
| Antal Power over Ethernet plus (PoE +)-portar: | 8 |
| Switch typ: | hanterad |
| Strömanslutning: | DC-in-uttag |
| Antal Gigabit Ethernet (koppar)-portar: | 10 |
| Algoritmer för schemaläggning av köer: | Priority queuing (PQ), Weighted Round Robin (WRR) |
| Typ av PoE (Power over Ethernet) som stöds: | PoE+ |
Behöver du hjälp?
Om du behöver hjälp med Luxul XMS-1010P ställ en fråga nedan och andra användare kommer att svara dig
Växla Luxul Manualer

14 Januari 2025
14 Januari 2025
14 Januari 2025
14 Januari 2025
14 Januari 2025
14 Januari 2025
14 Januari 2025
14 Januari 2025
14 Januari 2025
14 Januari 2025
Växla Manualer
Nyaste Växla Manualer
9 April 2025
9 April 2025
7 April 2025
5 April 2025
5 April 2025
5 April 2025
5 April 2025
3 April 2025
3 April 2025
2 April 2025