Pro-Ject Debut PRO Bruksanvisning
Pro-Ject Skivspelare Debut PRO
Läs gratis den bruksanvisning för Pro-Ject Debut PRO (16 sidor) i kategorin Skivspelare. Guiden har ansetts hjälpsam av 30 personer och har ett genomsnittsbetyg på 4.2 stjärnor baserat på 8 recensioner. Har du en fråga om Pro-Ject Debut PRO eller vill du ställa frågor till andra användare av produkten? Ställ en fråga
Sida 1/16
Debut PRO
Setup Guide
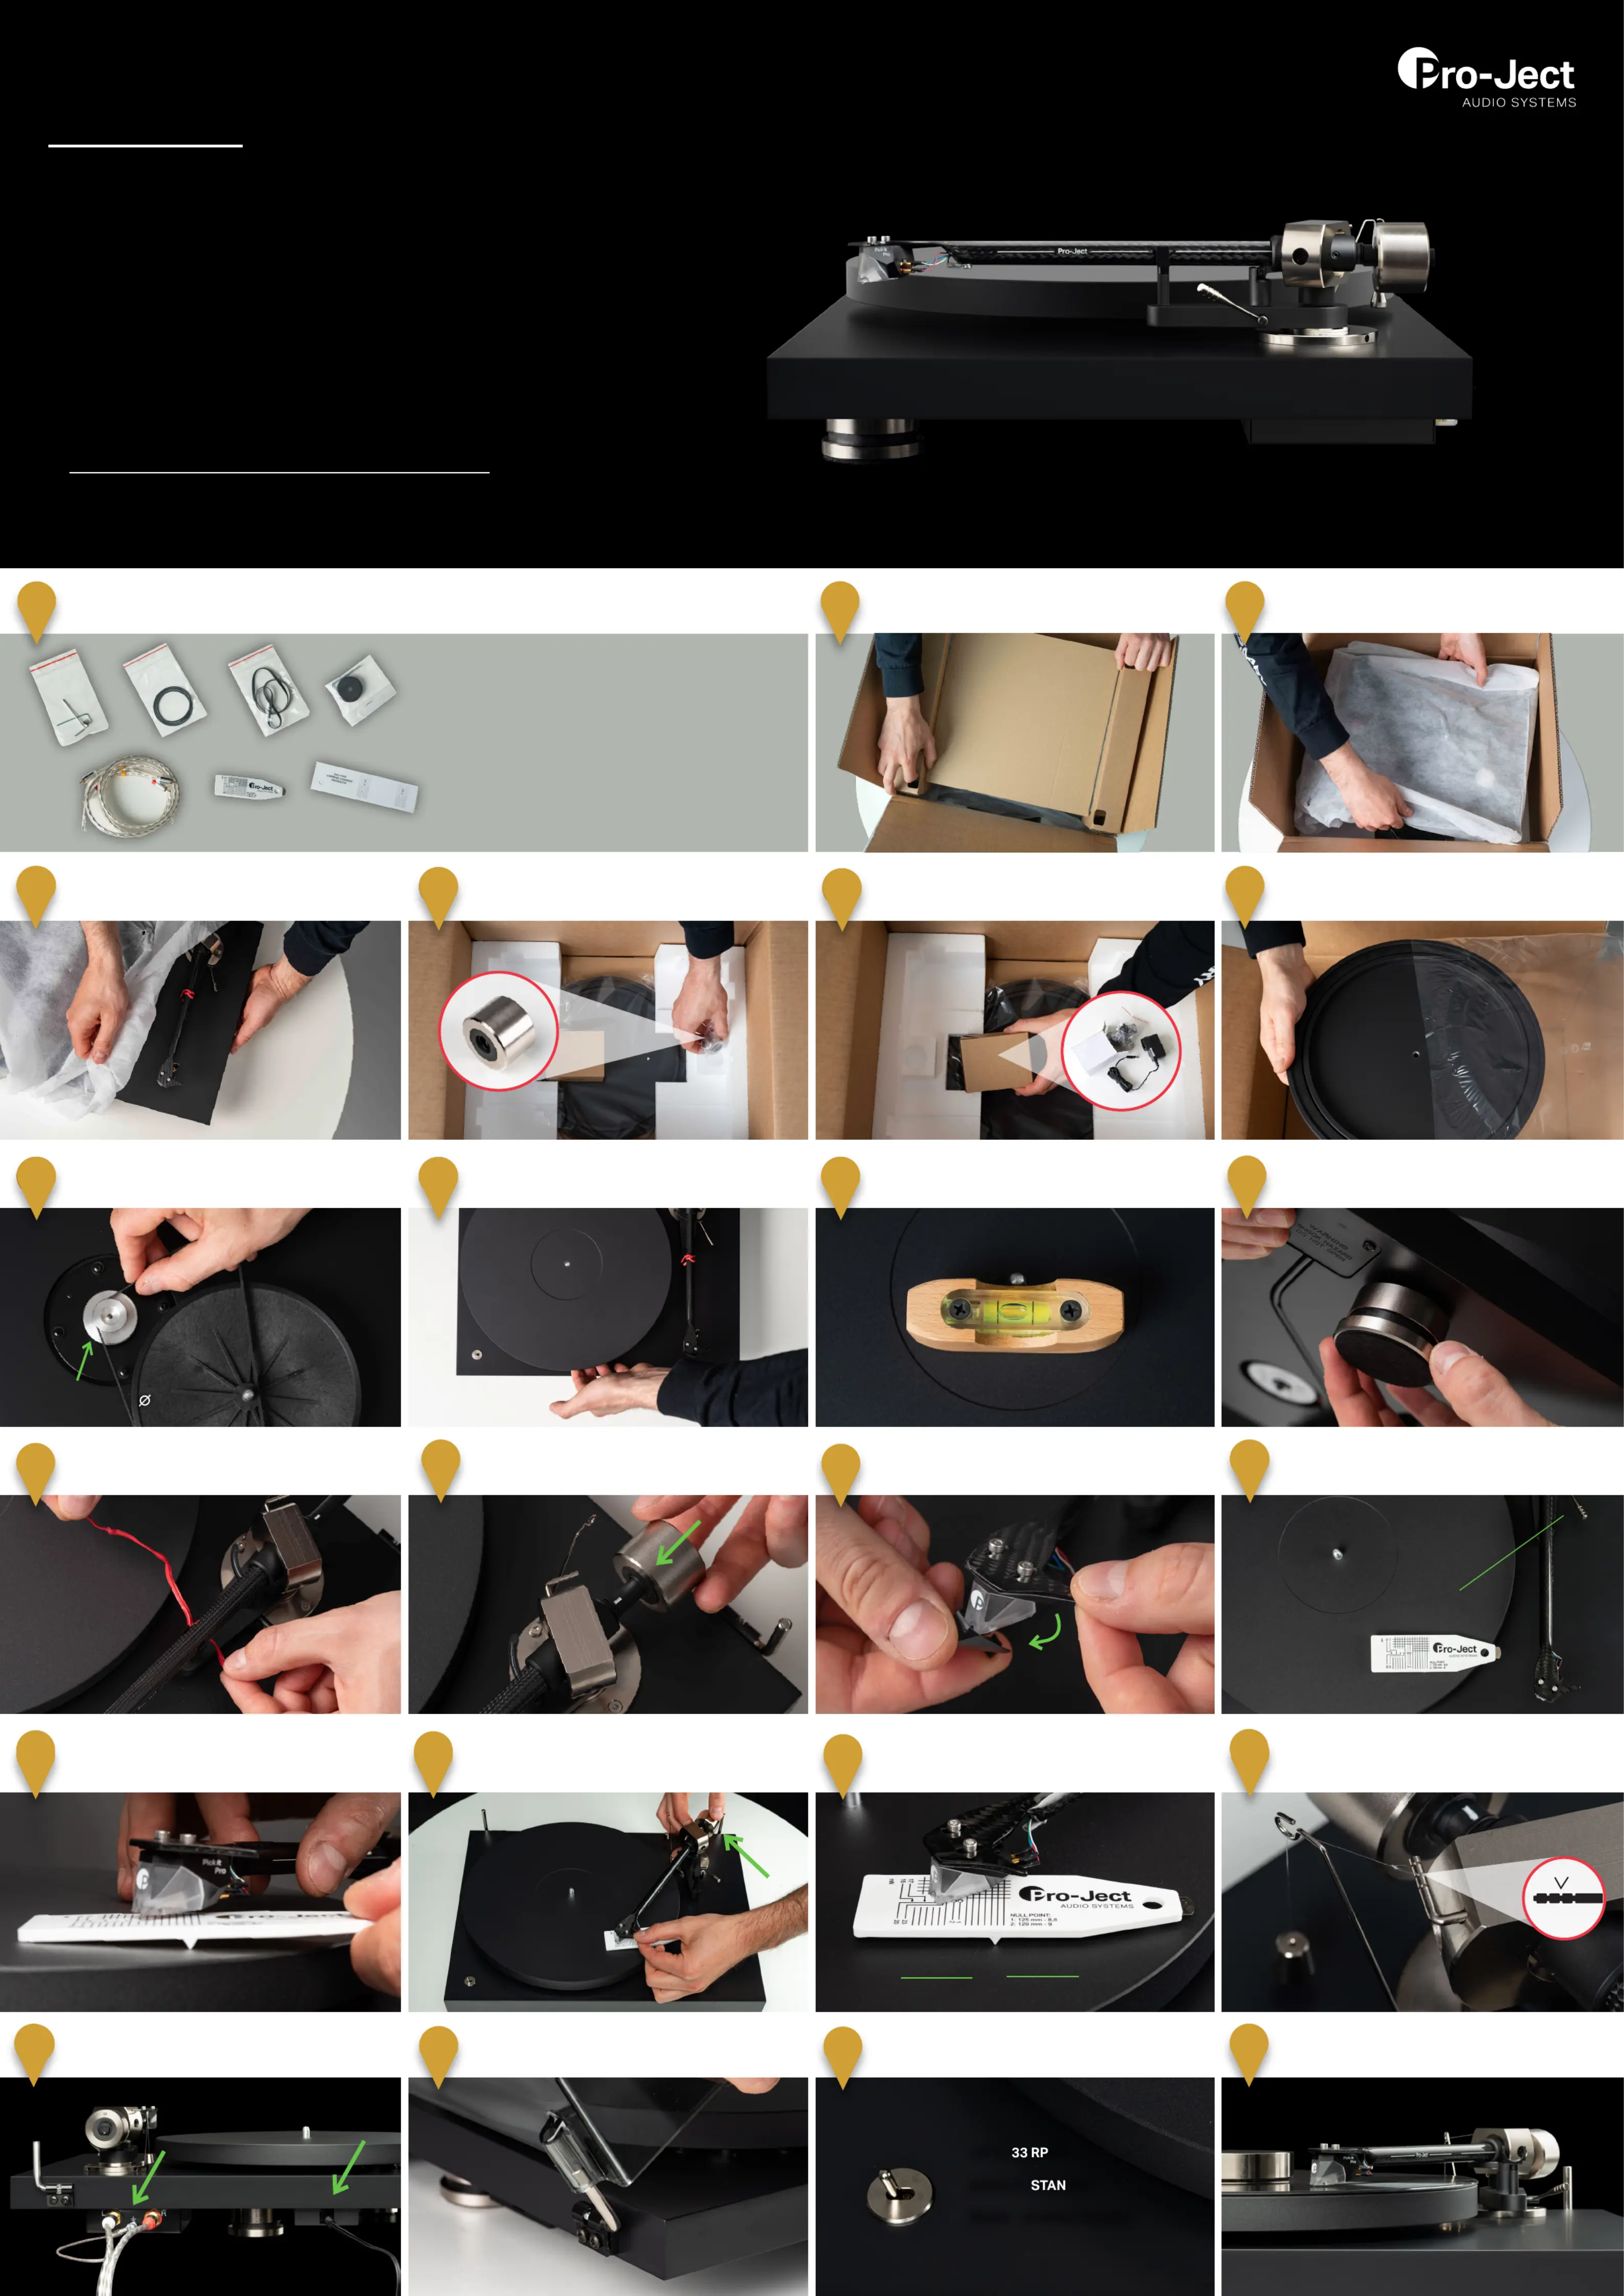
Getting started:
•Make sure to have enough space to unpack your turntable.
•Always unpack and setup in a clean environment.
•Please Do throw away the packaging! If you need NOT
service or want to return your product, please send it
in the original packaging including all inserts. In case of
damage due to alternative packaging your dealer cannot
guarantee a full refund.
•complete manual:
www.project-audio.com/en/product/debut-pro
132
Unpack all items from accessory bag:Remove dust cover carton from the box.
Lift the wrapped turntable out of the box.
a)
b)
c)
d)
e)
f)g)
a) Anti Skating Weight / Allen key
b) Round belt for 78 RPM
c) Standard at belt for 33/45 RPM
d) Adapter for 7“ singles / Allen key
e) Connect it E RCA cable
f) Gauge
g) Cartridge alignment protector
Carefully remove the covering.
5
6
4
7
Unpack the counterweight.
Unpack the power supply.
Unpack the platter.
If necessary, level the turntable by
adjusting the feet.
810
9
Put the at drive belt (c) on the pulley
and sub-platter.
11
Put the platter on the turntable.
The turntable should always be placed on
a at surface. Check with a spirit level.
Large pulleyfor round belt (78 RPM)
Put the counterweight in place.
Put the gauge (f) on the platter.
Remove the stylus protection cover.
12
14
1513
Remove tonearm twist tie.
Lower the tonearm with the lift.
18
Put the loop of the Anti Skating Weight (a)
in the second notch on the tonearm post.
Place the stylus on the gauge.
The stylus should read 20.
16
19
17
Balance the tonearm by turning the counter-
weight forwards and backwards on the rod.
When the gauge stays level, your
tracking force is set correct.
0°
Plug in power supply and Connect it E (e).
Yellow cable marks to the amplier.
20
21
Unpack dust cover and install it.
Connect to your hi-system and
enjoy your music!
23
22
Use the switch to select the
playback speed.
M
RIGHT: 45 RPM / 78 RPM
DBYMIDDLE:
LEFT:
Produktspecifikationer
| Varumärke: | Pro-Ject |
| Kategori: | Skivspelare |
| Modell: | Debut PRO |
Behöver du hjälp?
Om du behöver hjälp med Pro-Ject Debut PRO ställ en fråga nedan och andra användare kommer att svara dig
Skivspelare Pro-Ject Manualer

29 Mars 2026
26 September 2025
11 Augusti 2025
11 Augusti 2025
11 Augusti 2025
10 Augusti 2025
10 Augusti 2025
10 Augusti 2025
10 Augusti 2025
Skivspelare Manualer
Nyaste Skivspelare Manualer
23 Mars 2026
22 Mars 2026
20 Mars 2026
17 Mars 2026
16 Mars 2026
26 Februari 2026
31 Januari 2026
27 Januari 2026
19 Oktober 2025
19 Oktober 2025