Pro1 R251S Bruksanvisning
Läs gratis den bruksanvisning för Pro1 R251S (2 sidor) i kategorin Termostat. Guiden har ansetts hjälpsam av 25 personer och har ett genomsnittsbetyg på 4.7 stjärnor baserat på 9 recensioner. Har du en fråga om Pro1 R251S eller vill du ställa frågor till andra användare av produkten? Ställ en fråga
Sida 1/2
R251S
Installation Manual
Pro1 Technologies
P.O. Box 3377
Springeld, MO 65804
Toll Free : 888-776-1427
Web: www.pro1iaq.com
Hours of Operation: M-F 9AM - 6PM Eastern
Table of Contents
Mounting Locations
Sensor Mounting & Setup
Wiring
Resistance Chart
Specications & Warranty
Page
A trained, experienced
technician must install this
product.
Carefully read these
instructions. You could damage
this product or cause a
hazardous condition if you fail
to follow these instructions.
Una version en espanol de este
manual se puede descargar en
la pagina web de la compania.
Rev. 1809
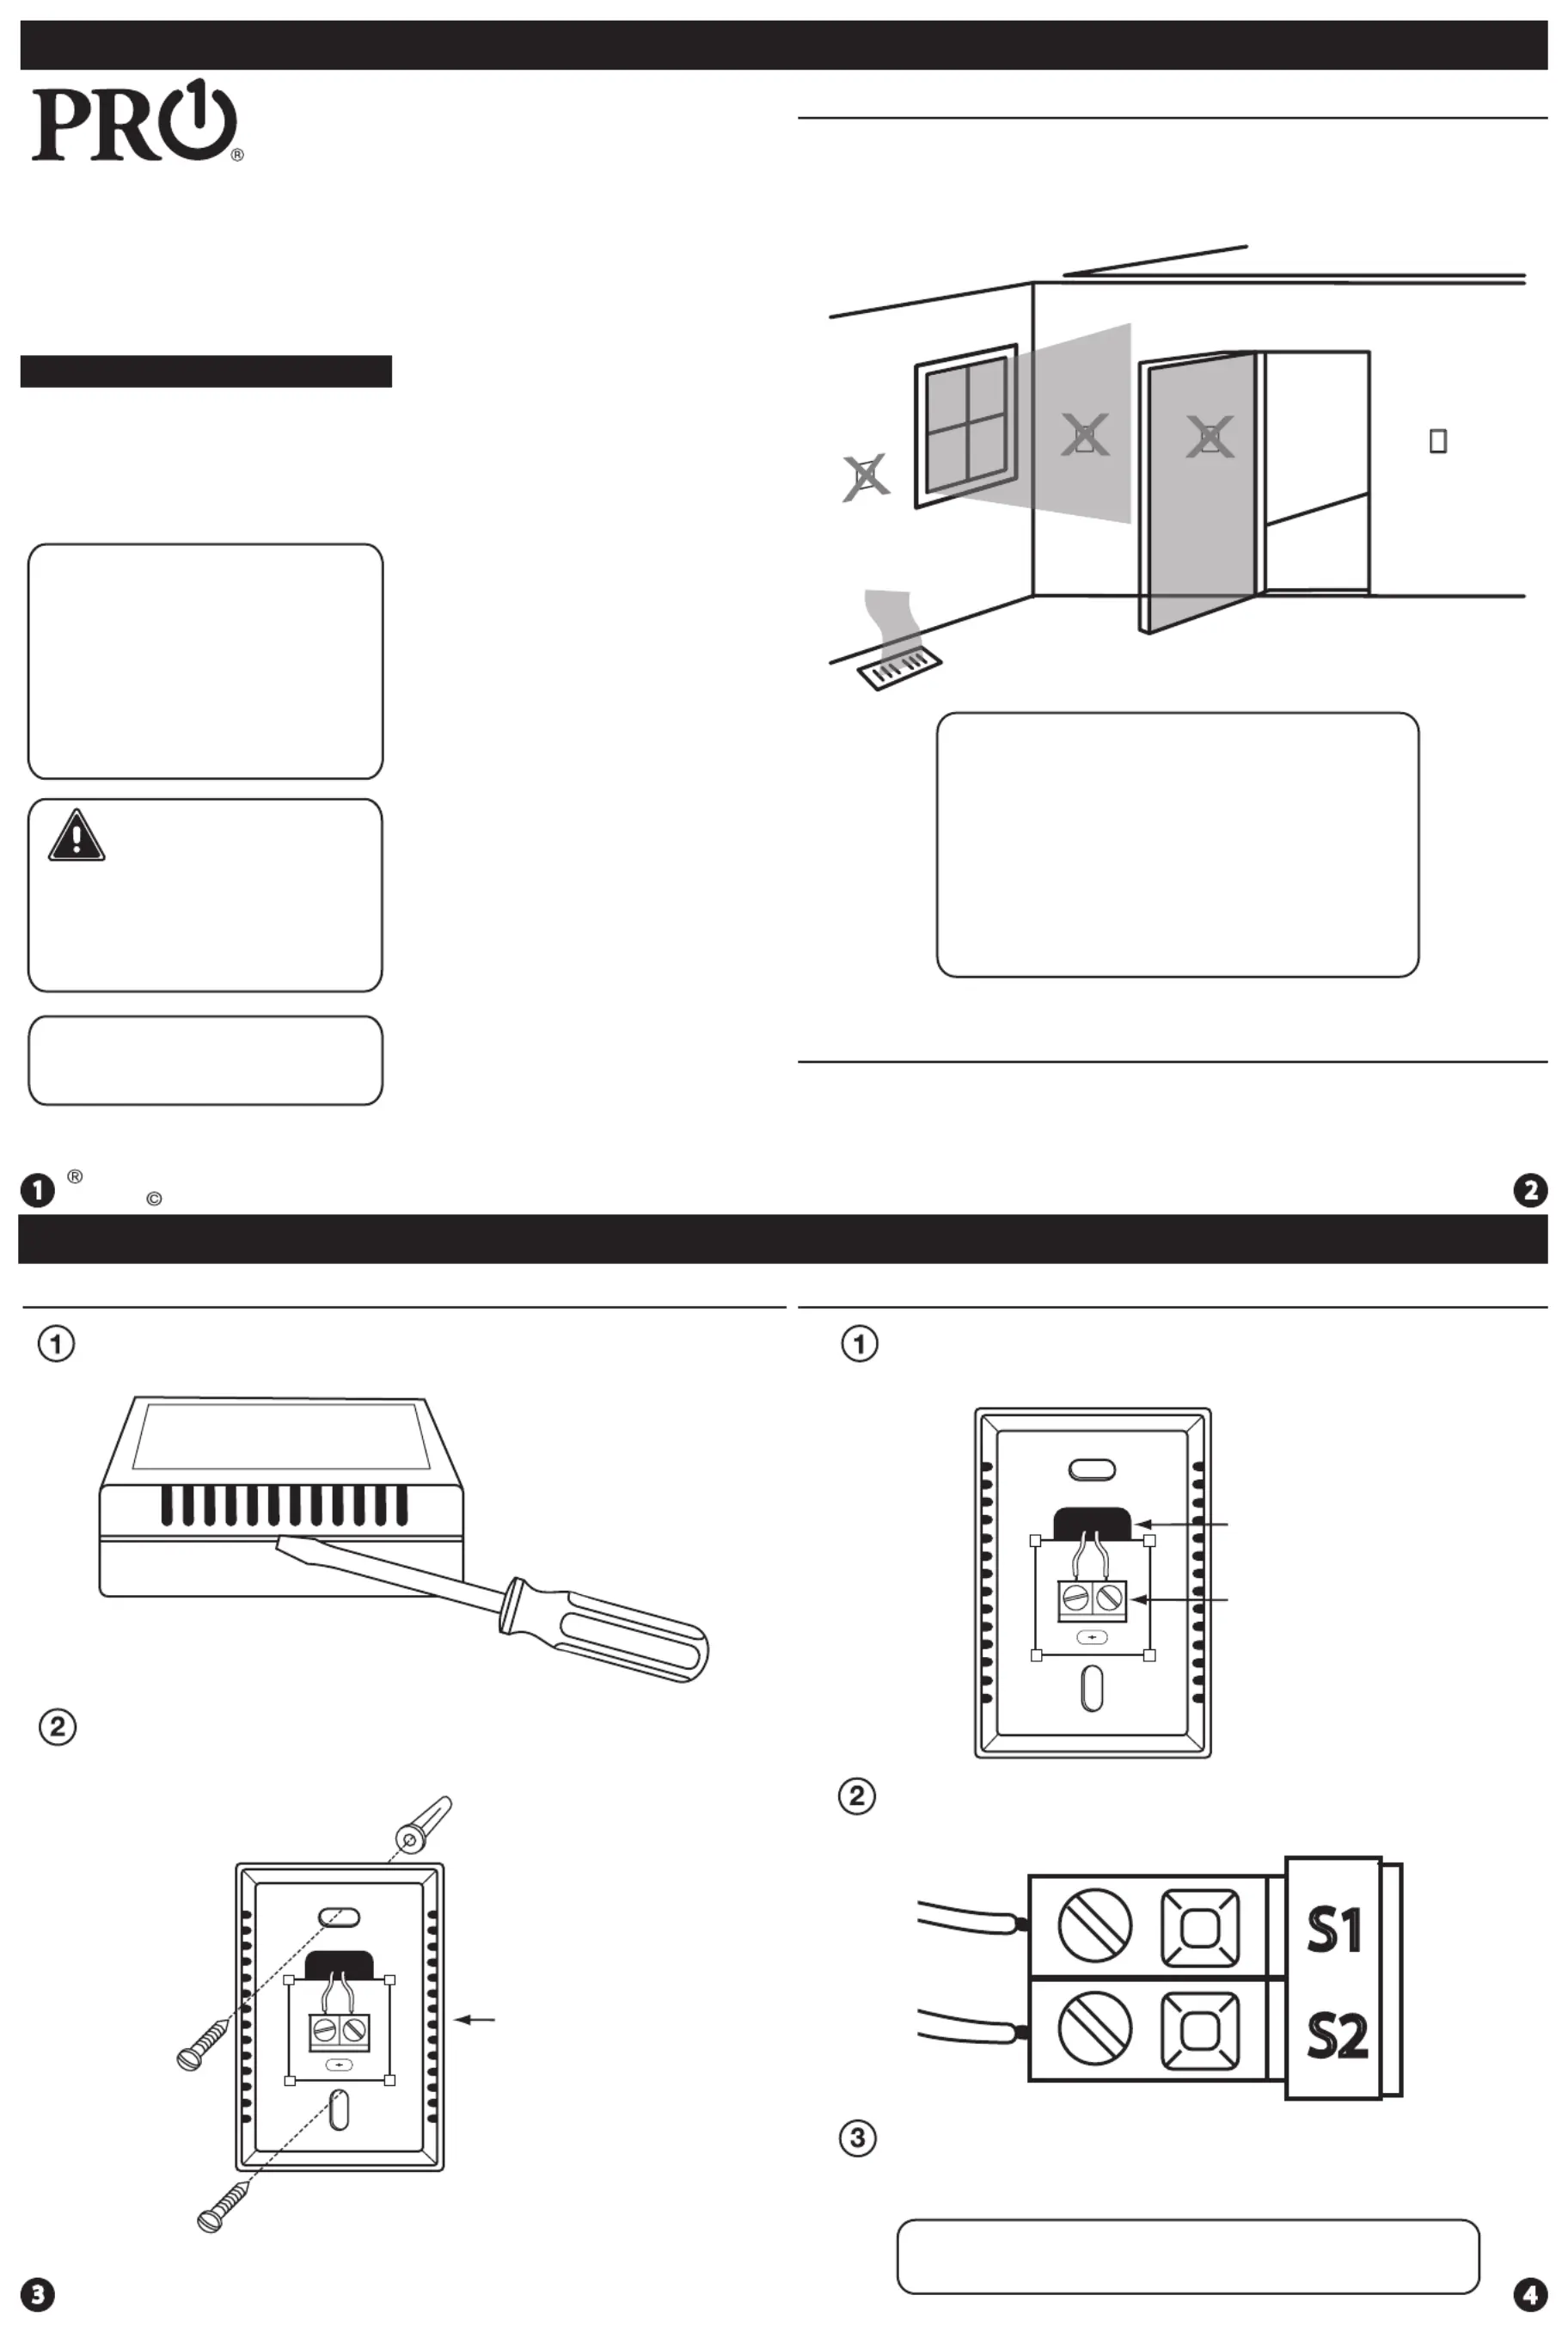
Wall Mount
Mounting Locations
3-4
5-6
7
8
2
Sensor Mounting & SetupSensor Mounting & Setup
Connecting to a Wired Sensor Capable Thermostat
The remote sensor should be mounted or placed approximately 4 to
5 feet above the oor. Select an area with average temperature and
good air circulation.
• Close to hot or cold air ducts
• That are in direct sunlight
• With an outside wall behind the thermostat
• In areas that do not require conditioning
• Where there are dead spots or drafts (in
corners or behind doors)
• Where appliances could radiate heat.
• Near or on hot appliances.
Remote Sensor Locations
Do not mount or place remote
sensors in these locations:
Do not operate the cooling
system if the outdoor
temperature is below 50˚F
(10˚ C) to prevent possible
compressor damage.
Caution: Equipment
Damage Hazard
The range between the remote sensor and the wired sensing master
thermostat is up to 300 feet. The remote sensor should be installed
using 18 AWG thermostat wire.
Wired Range
Remove the cover of the remote sensor
Mount subbase to the wall
Inside view of
subbase or the
remote sensor
Loosen the terminal block screws. Insert wires, then retighten
terminal block screws.
Non-Flammable
Insulation
Terminal Blocks
Connect the remote sensor to the S terminal blocks on the Wired
Sensor Capable Thermostat.
S1
S2
Place non-ammable insulation into wall opening to prevent
drafts.
Note: Refer to your Wired Sensor Capable
Thermostat manual for setup.
U.S. Registered Trademark. Patents pending
Copyright 2017 All Rights Reserved.
NO
NO
NO
YES
Produktspecifikationer
| Varumärke: | Pro1 |
| Kategori: | Termostat |
| Modell: | R251S |
Behöver du hjälp?
Om du behöver hjälp med Pro1 R251S ställ en fråga nedan och andra användare kommer att svara dig
Termostat Pro1 Manualer

2 April 2026
1 April 2026
31 Mars 2026
30 Mars 2026
24 Augusti 2025
24 Augusti 2025
24 Augusti 2025
24 Augusti 2025
24 Augusti 2025
24 Augusti 2025
Termostat Manualer
Nyaste Termostat Manualer
19 Mars 2026
16 Mars 2026
14 Mars 2026
25 Februari 2026
13 Oktober 2025
12 Oktober 2025
12 Oktober 2025
5 Oktober 2025
2 Oktober 2025
2 Oktober 2025