Saris MHS Light Kit Bruksanvisning
Saris ej kategoriserat MHS Light Kit
Läs gratis den bruksanvisning för Saris MHS Light Kit (4 sidor) i kategorin ej kategoriserat. Guiden har ansetts hjälpsam av 42 personer och har ett genomsnittsbetyg på 4.7 stjärnor baserat på 6 recensioner. Har du en fråga om Saris MHS Light Kit eller vill du ställa frågor till andra användare av produkten? Ställ en fråga
Sida 1/4
FOLLOW INSTRUCTIONS
MHS Light Kit # 4695
Assembly Instructions | Instrucciones de montaje | Instructions d’assemblage
LOT CODE
REGISTER YOUR PRODUCT
https://saris.com/pages/product-registration
ASSEMBLY/INSTALLATION VIDEO
https://saris.com/pages/videos
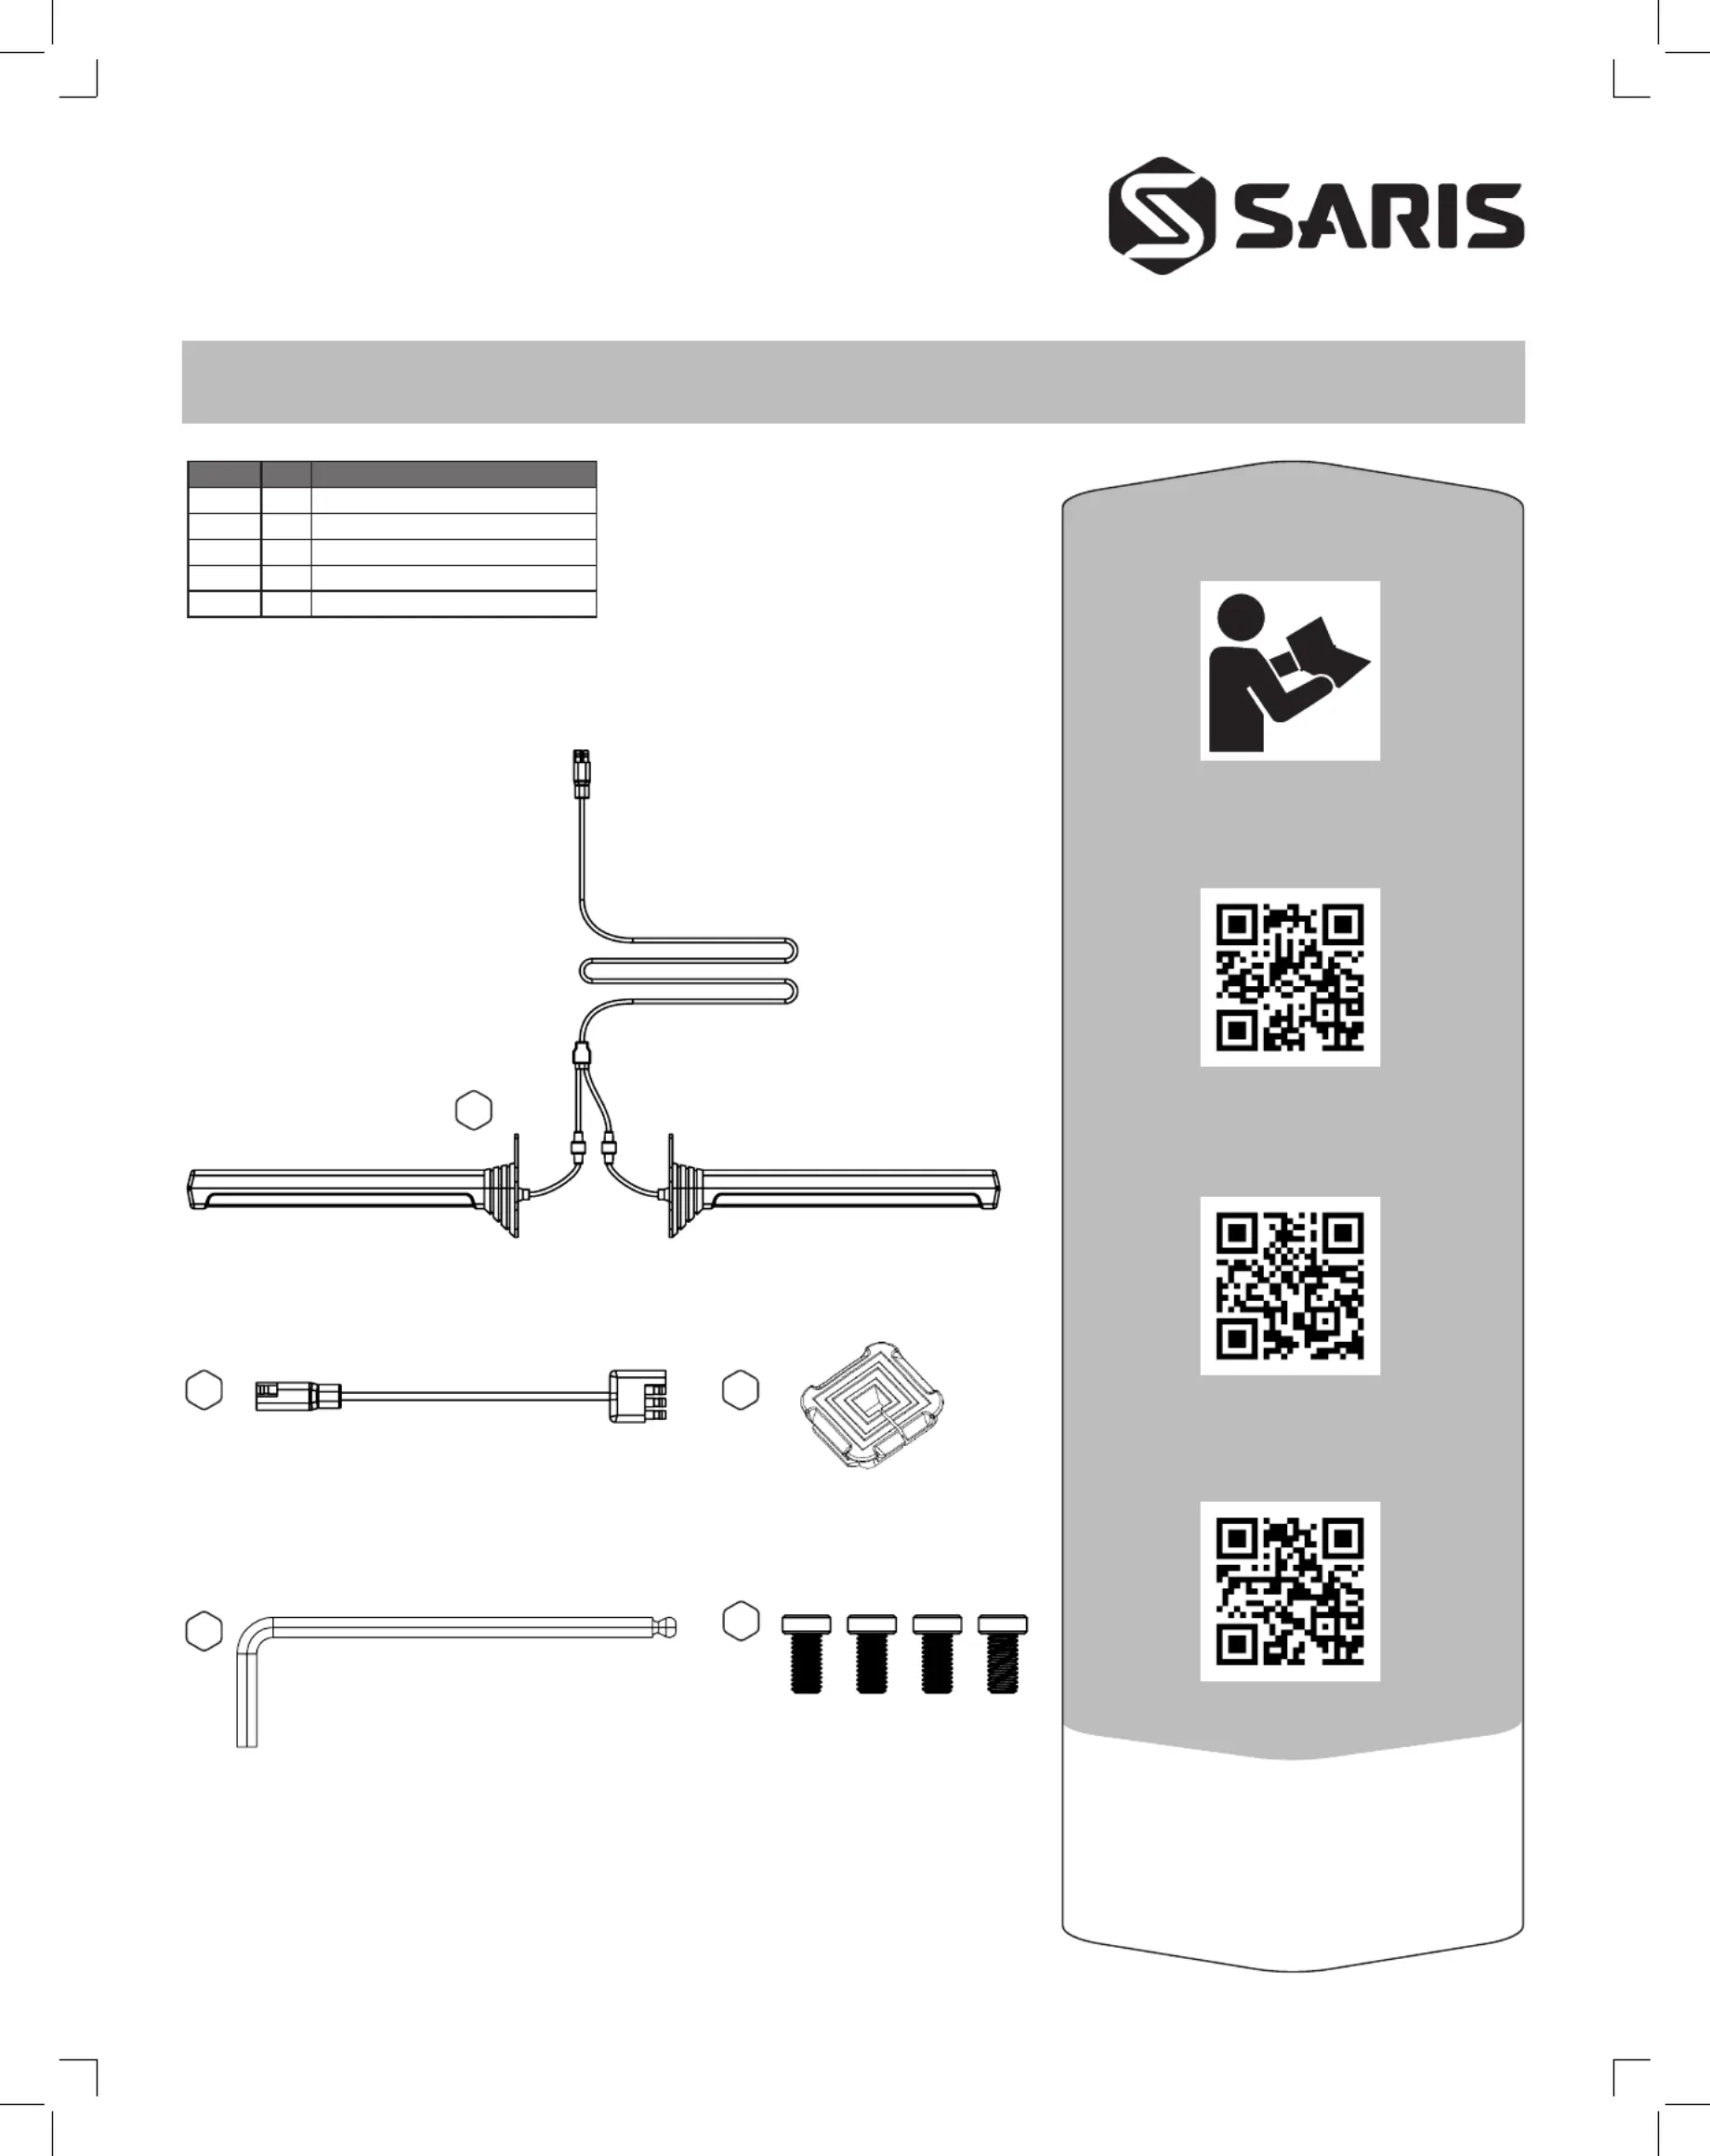
WHAT’S IN THE BOX
LETTERQTYPART DESCRIPTION
A1LED Light Bar set
B14 pin square to 4 pin flat adapter
C2Wire pass through plug
D1Hex Key
E4Bolts 5 mm
FOLLOW INSTRUCTIONS
SARIS FIT GUIDE
https://saris.com/pages/hitch-fit-guide
A
C
E
B
D
Produktspecifikationer
| Varumärke: | Saris |
| Kategori: | ej kategoriserat |
| Modell: | MHS Light Kit |
Behöver du hjälp?
Om du behöver hjälp med Saris MHS Light Kit ställ en fråga nedan och andra användare kommer att svara dig
ej kategoriserat Saris Manualer

19 Mars 2026
10 September 2025
9 September 2025
9 September 2025
9 September 2025
9 September 2025
1 September 2025
31 Augusti 2025
31 Augusti 2025
31 Augusti 2025
ej kategoriserat Manualer
Nyaste ej kategoriserat Manualer
3 April 2026
3 April 2026
3 April 2026
3 April 2026
3 April 2026
3 April 2026
3 April 2026
3 April 2026
3 April 2026