Sierra Designs Stretch Bruksanvisning
Sierra Designs tält Stretch
Läs gratis den bruksanvisning för Sierra Designs Stretch (2 sidor) i kategorin tält. Guiden har ansetts hjälpsam av 61 personer och har ett genomsnittsbetyg på 5.0 stjärnor baserat på 5 recensioner. Har du en fråga om Sierra Designs Stretch eller vill du ställa frågor till andra användare av produkten? Ställ en fråga
Sida 1/2
SIERRA DESIGNS 2011 Cherry Street, Unit 202 Louisville, CO 80027 Phone: 303-262-3050 Fax: 303-262-3051 Toll Free: 800-635-0461
S I E R R A D E S I G N S
insert
incorrect
correct
A
B
C
D
E
F
G
H
I
S
T
VU
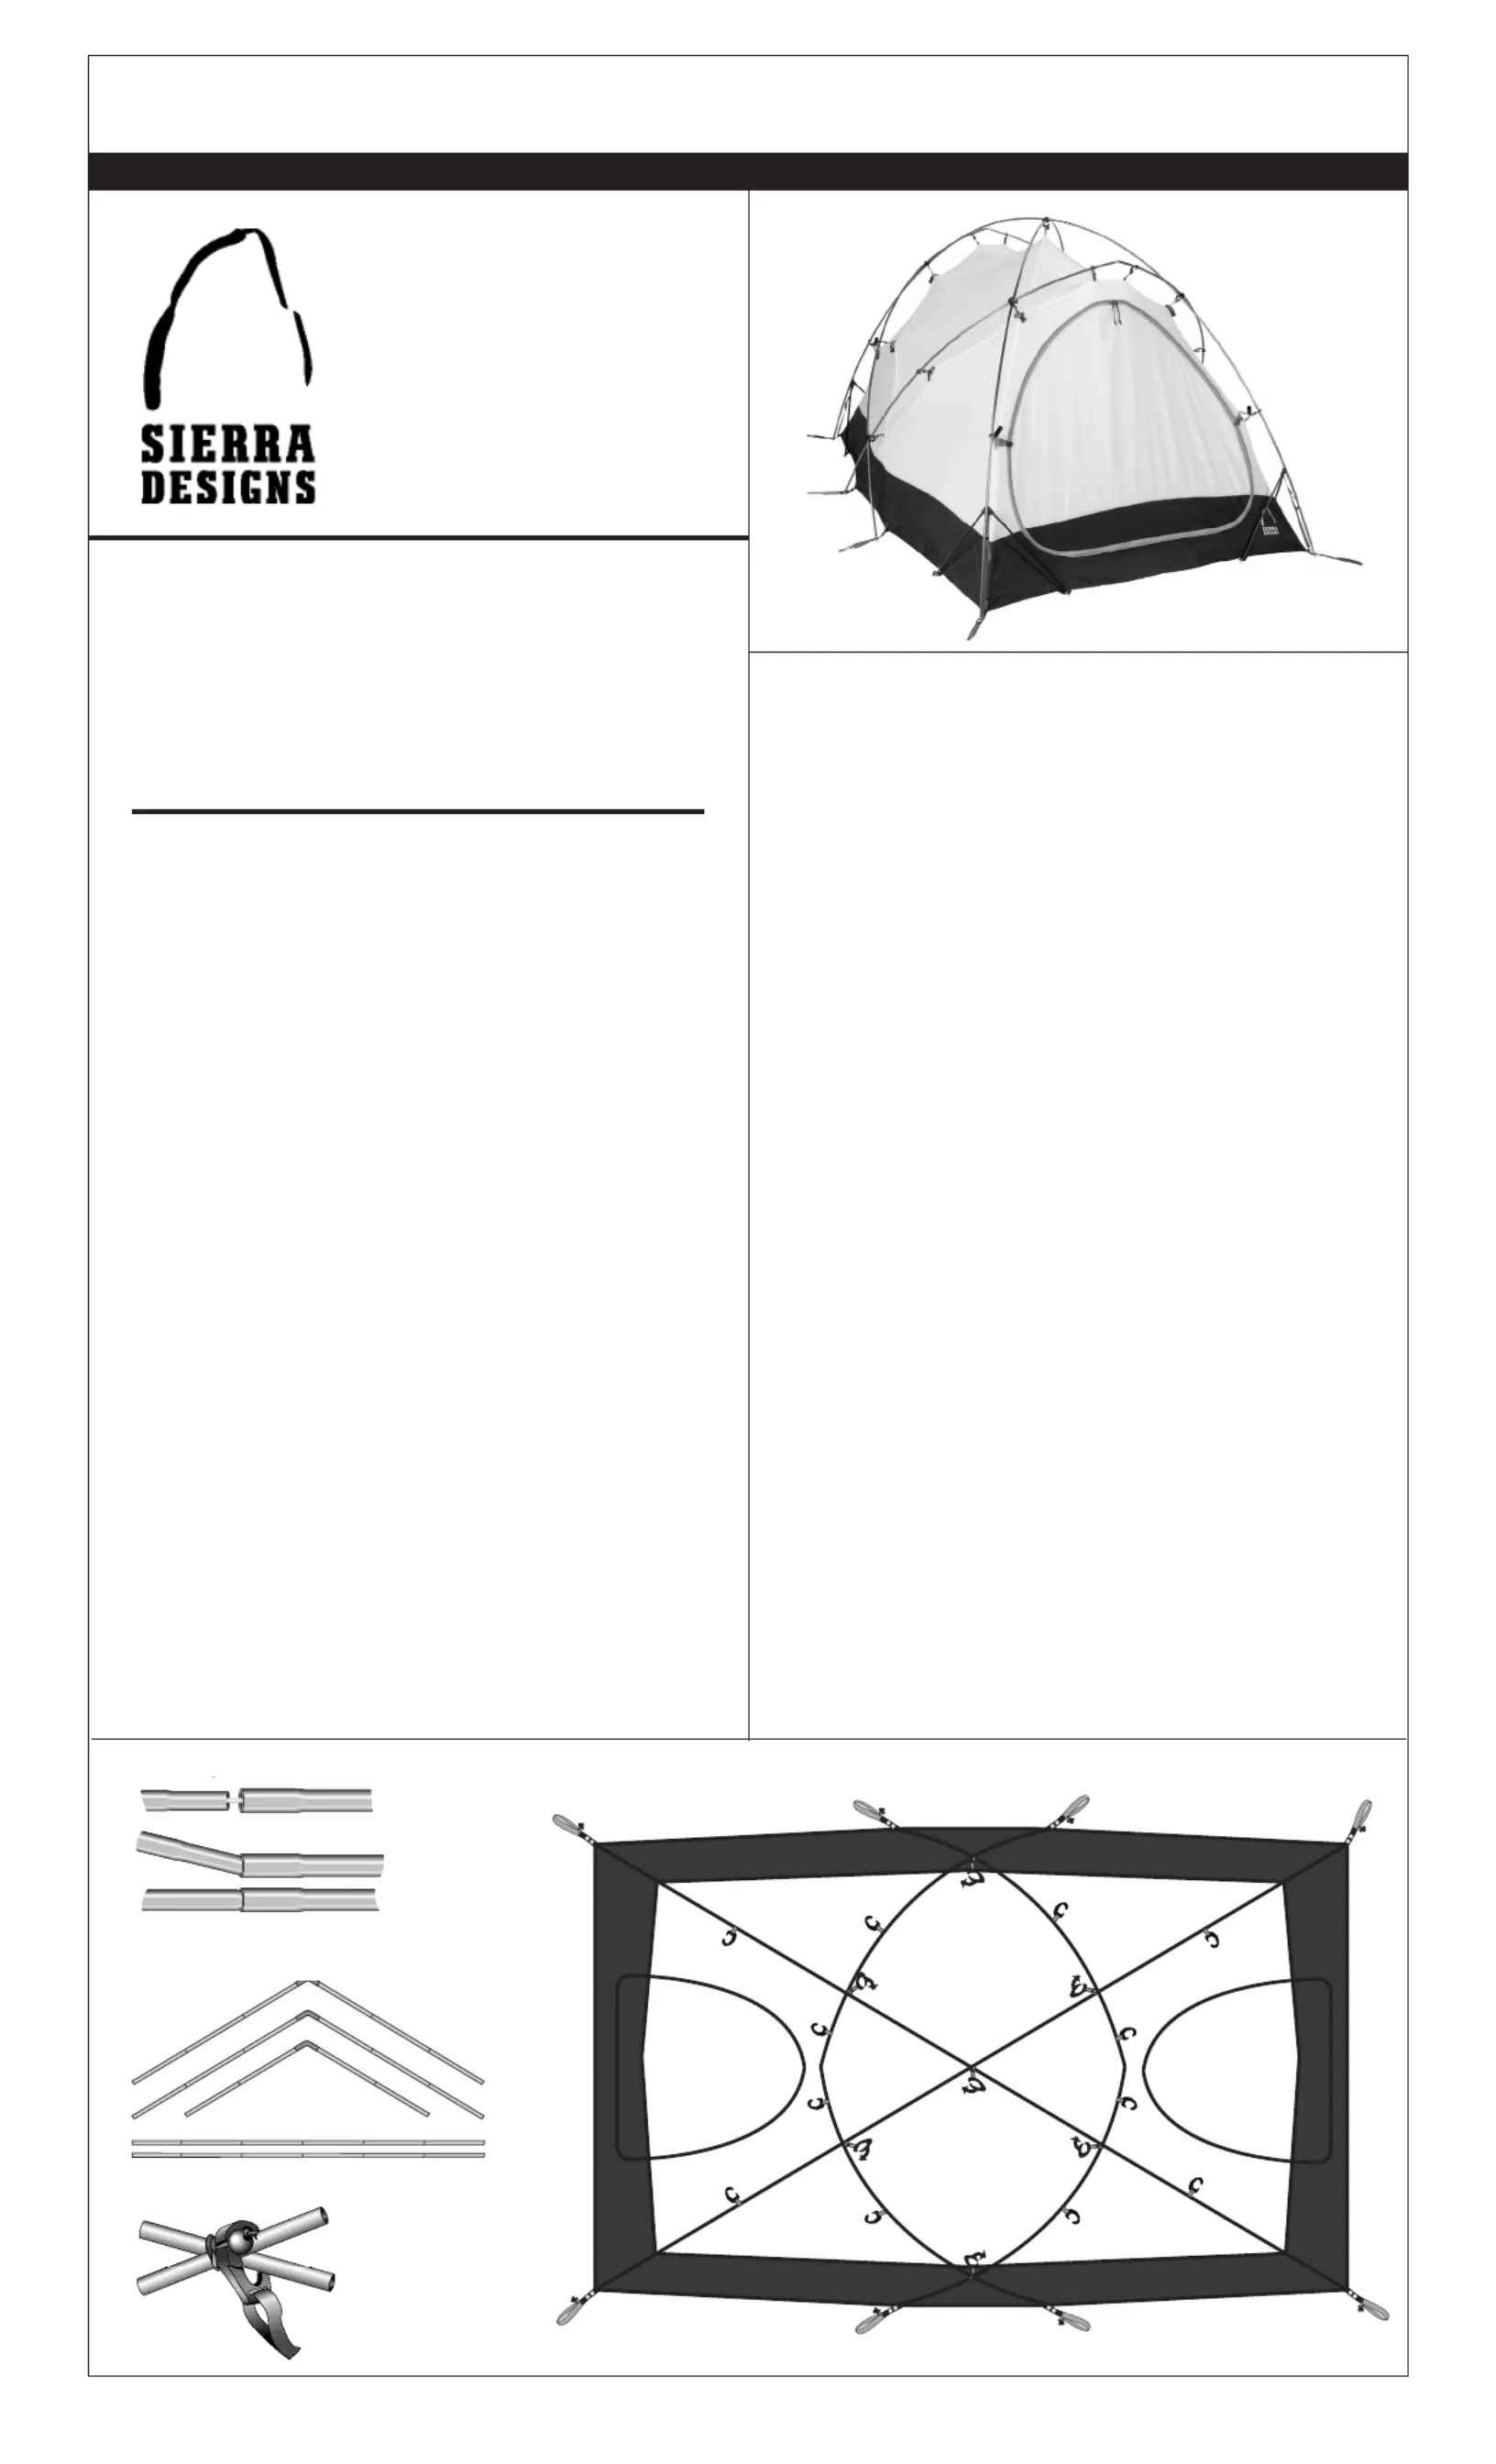
Figure 4 : Clip-Loc
Figure 1: Correct Pole Assembly
Figure 3: Tent Body (top view)
Figure 2: Stretch Tiros 2 Poles
STRETCH TIROS 2
STRETCH TIROS 2 TENT CONTENTS
* Sierra Designs tents include stakes for pitching the body and fly under normal conditions.
Additional stakes may be required in severe conditions.
Tent Body and Rainfly: 1
Tent Poles: 5
Jake’s Corner Assembly
™
: 4
Tent Stakes: 11 *
Guy Cord: 12
Line Tighteners: 12
Stake Sack: 1
Pole Sack: 1
Pitching Instructions: 1
Jake’s Corner Instructions: 1
First Pitch
In order to familiarize yourself with your new tent, we
suggest that you “test pitch” it before embarking on a
wilderness trip.
Select a Site
Look for a level spot that is protected from the wind in
order to ensure sleeping comfort. Clear the area of debris
such as sharp stones and sticks which might abrade or
puncture the tent floor. Choose an area that will drain well
when it rains.
Unfurl the Tent and Assemble the Poles
Unfold the tent and lay the floor flat on the ground with
the door unzipped. Unfold the shock-corded pole sections,
and allow them to spring together. Make sure that the in-
sert of each pole section is fully inserted into the next pole
section. You will have two straight poles, two long arch
poles and one short arch pole for the vestibule (Figure 2).
Stake Out the Floor
Although the Stretch Tiros 2is a completely free standing
tent, always stake out the floor for greater safety, especially
in windy conditions. First, stake each of the webbing loops
at the back of the tent at points G and H (Figure 3). Next,
move to the front of the tent, pull the webbing loops at
points A and B until the tent floor is square and semi-taut
(the tent poles may be damaged if the floor is too taut) and
stake them down. Finally, stake the sides down at points C,
D, E, and F pulling the floor semi-taut when inserting the
stakes into the ground (Figure 3).
Erect the Tent
Insert the tips of one of the straight poles into the grom-
mets at points A and H, and the tips of the second straight
pole into the grommets at points B and G (Figure 3). Pull
the two poles up so they intersect at point I and attach the
Clip-Loc
™
over the intersection of the poles (do not attach
the cord yet). Next, insert one of the long arch poles at
points C and D, arching the pole around the back of the
tent. Repeat this process with the remaining long arch pole
between points E and F. Now that all the poles have been
attached to the tent body, attach the 6 remaining Clip-Locs
to the intersecting pole sections. Hook the four Clip-Locs
nearest to the doors and the two Clip-Locs on each side of
the tent over the pole intersections with their openings
facing the middle of the tent. Now secure the Clip-Locs by
wrapping the cord in the direction crossing the open gate of
the clip. Wrap the cord around the pole intersection two to
four times, depending on desired firmness then secure the
cord into the groove on the backside of the Clip-Loc to hold
them in place (Figure 4). Now attach all remaining Swift
Clips to their corresponding poles for proper set up.
Fly Sheet
You now have one remaining short curved brow pole. Place
the ends of this pole in the buckets at points S and V, or T
and U. Drape the fly over the tent making sure the vesti-
Your Sierra Designs
STRETCH TIROS 2 tent
is very easy to pitch and
maintain. Follow these in-
structions to pitch your tent
quickly, safely and easily.
Produktspecifikationer
| Varumärke: | Sierra Designs |
| Kategori: | tält |
| Modell: | Stretch |
Behöver du hjälp?
Om du behöver hjälp med Sierra Designs Stretch ställ en fråga nedan och andra användare kommer att svara dig
tält Sierra Designs Manualer

2 Augusti 2025
2 Augusti 2025
1 Augusti 2025
1 Augusti 2025
1 Augusti 2025
1 Augusti 2025
1 Augusti 2025
1 Augusti 2025
11 September 2024
7 Augusti 2024
tält Manualer
Nyaste tält Manualer
3 April 2026
18 Mars 2026
18 Mars 2026
11 Mars 2026
10 Mars 2026
4 Mars 2026
4 Mars 2026
4 Mars 2026
4 Mars 2026
3 Mars 2026