Star Micronics TSP143IIILAN Bruksanvisning
Star Micronics
Skrivare
TSP143IIILAN
Läs gratis den bruksanvisning för Star Micronics TSP143IIILAN (36 sidor) i kategorin Skrivare. Guiden har ansetts hjälpsam av 8 personer och har ett genomsnittsbetyg på 5.0 stjärnor baserat på 4.5 recensioner. Har du en fråga om Star Micronics TSP143IIILAN eller vill du ställa frågor till andra användare av produkten? Ställ en fråga
Sida 1/36

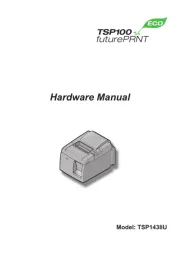
TSP100LAN
Hardware Manual

Trademark acknowledgments
TSP100LAN: Star Micronics Co., Ltd.
Notice
• All rights reserved. Reproduction of any part of this manual in any form whatsoever, without STAR’s express
permission is forbidden.
• e contents of this manual are subject to change without notice.
• All eorts have been made to ensure the accuracy of the contents of this manual at the time of going to press.
However, should any errors be detected, STAR would greatly appreciate being informed of them.
• e above notwithstanding, STAR can assume no responsibility for any errors in this manual.
Copyright
©
2010-2013 Star Micronics Co., Ltd.
Federal Communications Commission
Radio Frequency Interference
Statement
is device complies with Part 15 of the FCC Rules. Operation is subject to the following two conditions: (1) is device
may not cause harmful interference, and (2) this device must accept any interference received, including interference that
may cause undesired operation.
NOTE: is equipment has been tested and found to comply with the limits for a Class A digital device, pursuant to Part
15 of the FCC Rules. ese limits are designed to provide reasonable protection against harmful interference when the
equipment is operated in a commercial environment. is equipment generates, uses and can radiate radio frequency
energy and, if not installed and used in accordance with the instruction manual, may cause harmful interference to radio
communications. Operation of this equipment in a residential area is likely to cause harmful interference in which case
the user will be required to correct the interference at his own expense.
is statement will be applied only for the printers marketed in U.S.A.
FCC WARNING
Changes or modifications not expressly approved by the party responsible for compliance could void the user’s
authority to operate the equipment.
For compliance with the Federal Noise Interference Standard, this equipment requires a shielded cable.
For RF interference suppression, if a ferrite core is provided with this device, ax it to the interface cable
Statement of
e Canadian Department of Communications
Radio Interference Regulationst
is Class A digital apparatus complies with Canadian ICES-003.
Cet appareil numérique de la classe A est conforme à la norme NMB-003 du Canada.
e above statement applies only to printers marketed in Canada.

Please access the following URL
http://www.star-m.jp/eng/dl/dl02.htm
for the latest revision of the manual.
TABLE OF CONTENTS
1. Unpacking and Installation ................................................................................................................... 1
1-1. Unpacking ................................................................................................................................................ 1
1-2. Choosing a place for the printer ........................................................................................................... 2
2. Parts Identication and Nomenclature ................................................................................................ 3
3. Setup ...................................................................................................................................................... 4
3-1. Connecting the Ethernet Cable to the Printer .................................................................................... 4
3-2. Connecting to a Peripheral Unit ........................................................................................................... 5
3-3. Loading the Paper Roll ........................................................................................................................... 6
3-4. Connecting the Ethernet Cable to the PC ......................................................................................... 10
3-5. Connecting the Power Cord ................................................................................................................11
3-6. Turning Power On ................................................................................................................................ 12
4. Attaching the Accessories .................................................................................................................... 13
4-1. Attaching the Holder Plate ..................................................................................................................13
4-2. Attaching the Rubber Feet ................................................................................................................... 15
4-3. Switch Cover Installation .....................................................................................................................16
5. ermal Roll Paper Specication ........................................................................................................ 17
5-1. Roll paper specication ........................................................................................................................17
5-2. Recommended paper ........................................................................................................................... 17
6. Control Panel and Other Functions .................................................................................................... 18
6-1. Control Panel ......................................................................................................................................... 18
6-2. Errors ...................................................................................................................................................... 18
6-3. Self-Printing ..........................................................................................................................................20
7. Preventing and Clearing Paper Jams .................................................................................................. 21
7-1. Preventing Paper Jams .........................................................................................................................21
7-2. Removing Paper Jam ............................................................................................................................21
7-3. Releasing a Locked Cutter (Auto Cutter Mode only) ......................................................................22
8. Periodical Cleaning ............................................................................................................................. 24
8-1. Cleaning the ermal Head ................................................................................................................ 24
8-2. Cleaning the Rubber Roller ................................................................................................................. 24
8-3. Cleaning the Paper Holder and the Surrounding Area ...................................................................24
9. Peripheral Unit Drive Circuit ............................................................................................................. 25
10. Specications ..................................................................................................................................... 27
10-1. General Specications ..........................................................................................................................27
10-2. Auto Cutter Specications ................................................................................................................... 28
10-3. Ethernet Interface ................................................................................................................................. 28
10-4. Electrical Characteristics .....................................................................................................................28
10-5. Environmental Requirements .............................................................................................................29
10-6. Reliability ............................................................................................................................................... 30
11. DIP Switch Settings ........................................................................................................................... 31
Produktspecifikationer
Varumärke: | Star Micronics |
Kategori: | Skrivare |
Modell: | TSP143IIILAN |
Vikt: | 1680 g |
Bredd: | 142 mm |
Djup: | 204 mm |
Höjd: | 132 mm |
Maximal upplösning: | 203 x 203 DPI |
Certifiering: | UL, C-UL, TÜV, FCC, VCCI, EN55022, CE |
Modell: | POS-skrivare |
Maximal rulldiameter: | 83 mm |
Standardgränssnitt: | Ethernet |
Skrivhastighet: | 250 mm/sek |
Produktens färg: | Grå |
Datahastighet för Ethernet-LAN: | 10, 100 Mbit/s |
Temperatur vid drift: | 5 - 45 ° C |
Temperaturintervall (förvaring): | -20 - 60 ° C |
Intervall för relativ operativ luftfuktighet: | 10 - 90 % |
Fuktighet (förvaring): | 10 - 90 % |
Anslutningsteknologi: | Kabel |
Nätverksansluten (Ethernet): | Ja |
Harmonized System (HS)-kod: | 84433210 |
Strömförbrukning: | 1600 mA |
Utskriftsteknologi: | direkt termal |
Skärare: | Ja |
Max utskriftsupplösning, bredd: | 72 mm |
Stöds pappersbredd: | 58/80 mm |
Automatisk sax hållbarhet: | 2 miljoner skär |
Behöver du hjälp?
Om du behöver hjälp med Star Micronics TSP143IIILAN ställ en fråga nedan och andra användare kommer att svara dig
Skrivare Star Micronics Manualer
9 September 2025
4 September 2025
3 September 2025
3 September 2025
11 Augusti 2025
25 September 2024
25 September 2024
9 September 2024
4 September 2024
3 September 2024
Skrivare Manualer
- Renkforce
- Mutoh
- Tomy
- Nisca
- Oki
- EC Line
- Kodak
- Olympia
- AVM
- Nilox
- StarTech.com
- Samsung
- Ultimaker
- Sharp
- Ibm
Nyaste Skrivare Manualer
18 September 2025
18 September 2025
17 September 2025
17 September 2025
17 September 2025
17 September 2025
16 September 2025
16 September 2025
16 September 2025
16 September 2025