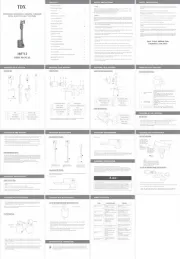
TDX 385712 Bruksanvisning
TDX
dammsugare
385712
Läs gratis den bruksanvisning för TDX 385712 (1 sidor) i kategorin dammsugare. Guiden har ansetts hjälpsam av 13 personer och har ett genomsnittsbetyg på 4.4 stjärnor baserat på 7 recensioner. Har du en fråga om TDX 385712 eller vill du ställa frågor till andra användare av produkten? Ställ en fråga
Sida 1/1

TDX
CORDLESS HANDHELD VACUUM CLEANER
WITH DUST COLLECT STATION
385712
USER
MANUAL
KNOWING MACHINE YOUR
( Package List)
•
l
Host
2
Connect Tube
3
Floor Brush
4 Crevice Nozzle
5
Brush Nozzle
6 Dust Collection Base
7
Dust Collection Duct
8
Dust Bag (3pcs)
FEATURES
OF THE
MACHINE
• Driven a by built-in independent motor at
high
speed,
it is
easy to clear the carpet. floor
crevices, etc. with the combination design of soft and hard nylon of the floor brush.
• Easily illuminates the dust in the corner with the LED front searchlight during working.
• Equipped with the bendable
connect
tube, it is
convenient to
remove the dust hidden
deep in the low dark places such as under the sofa, the bed.
• This product can not be used to absorb water, which will cause d a m a ge to the machine.
• Put back to the dust collection base after use for charging and/or dust collecting.
( The Dust Collection Base)
The dust base charges collection the battery pock and collects garbage in the dust cup
into the dust ba'.3 simultaneously when putting the vacuum cleaner back onto the dust
collection duct (it will stop charging automatically after the battery being fully charged).
When collecting dust, the working status light will flash white. After dust. collecting the
working status light will be solid white.
In the mode, you can press the working button repeatedly for dust collection
until the dust dust in the cup is completely collected clean. Every time the button is
pressed, the base collects dust for 10 seconds.
OPERATION INSTRUCTIONS
( Before The First Use)
• While receiving the package, please check whether all attachments and accessories are
included.
• Please fully charge your vacuum cleaner before using.
• Spend time for natural draft to wipe off smell caused by manufacture.
• In order to avoid circuits overload, please take into consideration that do not plug
in
a
same socket with other appliances.
CLEANING AND MAINTENANCE
11
• It is recommended to replace the once Hepa filter every one to two canmonths. You
replace
it
in advance
if
the suction
is
found to be
insufficient
or you can extend
the
replacement time if the suction is still workable.
NOTE: If you need to clean the filter by water, parts make sure that the filter parts are
completely dry before putting back.
( For The Dust Bag)
Dust Bag
Pull-Tab
----,f----
• When the garbage in the dust bag reaches o certain the capacity, negative pressure
inductor will power the off machine, and the working status light will flash for red 10 times
and then turn solid red.
• Open the dust bag lid, pull the pull-tab upward and replace the dust bag to resume
using.
• The dust bag is a disposable consumable and should not be reused. It is recommended
to replace the dust bog once a month or once every two months. You can replace it
when the suction is found to be you extend insufficient, or can the service time if the
vacuuming
is workable.
CONTENTS
SAFETY INSTRUCTIONS
KNOWING YOUR MACHINE
Package
List
Detail The Host
Detail The Dust Collection Base
Detail
The
Floor Brush
Detail The Display Panel
FEATURES
OF
THE MACHINE
The Vacuum
The Dust Collection Base
OPERATION INSTRUCTIONS
Before The First Use
Assembling The Product
Assembling
The Nozzles
CHARGING INSTRUCTIONS
CLEANING AND MAINTENANCE
For The Brush Floor
For The Air Inlet Hepa Filter & Cyclone Bracket
For
The
Dust
Bag
For The Air Outlet Hepa Filter & Anti-Blocking Cover
ENVIRONMENTAL PROTECTION
ERROR DETECTION
3
3
4
5
5
6
6
6
7
7
7
8
8
9
l O
10
10
11
12
12
•
13
KNOWING MACHINE YOUR
4
(
Detail The Host)
..
l I'
l
I
Power Switch Button 2 Display Panel
3
I
Battery Pack
4
Battery Pack Release Button
5
I
Power Button
6 Host
7
Dust Cup Release Button
8 Air Inlet Hepa Filter
9
I
cyclone Bracket
lO Filter Bracket
ll I
Dust Cup
12
Dust c u p Lid
NOTE:
The
damaged battery
pack
or battery
pack
reaching
the end
of its
lifespan
could be a on replaced with newly one purchased our website.
I
OPERATION INSTRUCTIONS
( Assembling The Product)
l. Connect the host
with the tubealuminum
2. Connect the floor
brush with the aluminum
tube
( Assembling
The Nozzles)
3. Connect the dust
collection duct to the
dust collection base.
Please disassemble the connect tube and install the crevice nozzle nozzle or brush on the
host to suit for different scenes.
crevi c e n o n l e
Suitable for cleaning the nooks and gaps of windows and doors.
CLEANING AND MAINTENANCE
12
( For The Air Outlet Hepa Filter&. Anti-Blocking Cover)
1
'
'
Anti-Blocking
Cover
- .S_,,f _(1,1_},'---_
, _ _ _
Air
Outlet Hepa
Filter
• Clean the garbage in the dust collection duct and the air outlet Hepa filter regularly,
especially when the suction is decreased.
• a Use screwdriver to remove the screws on the anti-blocking cover and take out the
anti-blocking cover, clean up garbage in the duct, and reinstall the anti-blocking
cover.
• Hold down and the pull latch on Hepa filter upward to take it out. Rinse wlth clean
water and dry the Hepa filter before reinstalling.
•
It is recommended to replace the dust bag every months.three
ENVIRONMENTAL
PROTECTION
-
This symbol on the product or on the documents accompanying the product indi-
cates that this appliance may not be treated as household waste. Instead it shall
be
handed
over to
the applicable
collection
point
for
the
recycling of
electrical
and
electronic equipment.
SAFETY INSTRUCTIONS
1
Please read this instruction before carefully use and keep manual together with the invoice
ofter reading. You may need for it reference in days to come.
Any operation runs counter to this manual may lead to appliance damaged or even cause
accidental injury shock like electric or outbreak of o fire.
The company reserves the right to interpret the manual.
This appliance is not intended for children) use by persons (including with reduced physical,
sensory or mental capabilities, or lack of experience and knowledge, been unless they have
given supervision or of instruction concerning use the appliance by a person responsible for
their safety.
•
This appliance is not allowed to use by should be children children and under supervision to
make sure they don't play with this appliance. Cleaning and user maintenance shall not be
made by children without supervision.
•
This product is an indoor household product, please do not use or it outdoors wet places. Do
not touch
plug or machine
with wet
hands.
•
Do not use this appliance ofter its adaptor or battery suffered damages to prevent from fire,
blast or injury. Please check the battery or adaptor before use.
•
Do not the soak main body and electronic accessories in water or solution. Make sure of filter
get drying after daily cleaning up.
•
Please turn off the appliance when you clean the roller brush to ovoid damag e from revolv-
ing brush head.
•
Please do not use the appliance without a complete setup of floor brush (or nozzle), dust
cup and filter.
•
Only the original power adapter can be used (if available) otherwise may catch fire.
•
Do not vacuum water, oil or any flammable liquid. Poisonous solution is suction forbidden.
•
Do not vacuum ashes. Do not inhale smoking burning charcoal, objects, like butt, matchstick.
•
Do not vacuum hard objects, like gloss, nail, coin otherwise ma y dama g e the device.
•
Keep suction inlet away from long hair, baggy clothes or fingers during work. Please do not
put suction
inlet or other accessories towards to
eyes,
ears or mouth.
• Leave
enough
space for
suction inlet and stop using device in
case of
blockage. Clean
in
time if any low suction caused by jam occurs.
•
Do not posit the device lean against unstable places like chair, table to prevent damage
from drop or people injury.
KNOWING MACHINE YOUR
( Detail Parts) The Dust Collection
l
Dust Collection Duct 2 Dust Collection Base
3
Working Status Light
4 Working Button
5
Dust Bag Lid
6
Dust
Bag
7
Protective Screen
8
Protective Cover
( Detail
The
Floor Brush)
l
Cleaning Brush Lock
2
Cleaning Brush
3
Roller Latch Lock
4 Roller Latch
5
Roller Brush
OPERATION
INSTRUCTIONS
Brush nozzle
Suitable for cleaning the fabrics furniture, like bed, sofa.
NOTE: The brush on the brush nozzle could be slid to ada pt to different kinds of garbage. By
pushing the brush inward, the nozzle con suck in larger garbage such beans; as By replac-
ing the brush back, the nozzle can suck in smaller garbage such as dust.
CHARGING INSTRUCTIONS
Before charging, make sure the vacuum cleaner
is
turned off.
once the process of charge the begins, electricity indicator light will light up and flash,
showing the charging status of the battery. When the remaining battery capacity of the
battery pock reaches the corresponding value, the electricity indicator light will be solid.
A full charge will take 4-5 hours. When the battery pack is fully charged, all the three
indicator lights will be solid.
A
NOTE
l. To remove the battery pock, press and the hold battery pock release button and pull
it out from the host.
2. When the battery pack needs to be replaced, dispose of it it or recycle
in
accor-
dance with local ordinances or regulations. In some areas,
it is
illegal to place spent
lithium-ion batteries in the trash or a Return in municipal solid waste stream. spent
batteries to an authorized recycling center or to the retailer for recycling. Contact your
local recycling center for information on where to drop off the spent battery.
3. This battery, like all lithium battery, will naturally decrease
in
capacity over time.
ERROR DETECTION
13
-
Fault Possible Solution Reason
�
-
The suction power is
•
The dust cup is is full or filter
•
Empty the dust cup or clean
blocked the filters
weak
•
The
accessory
blocked
•
Clean the
accessory
• no Battery pack power
•
Fully charge
the battery
pack
•
Fuse protection triggered by
The vacuum will not
over heat
• Restart after temperature
work
•
Blockages to the dust cup or
turns to normal
filter
•
Remove the blockages
The vacuum operates
•
The airflow may be • Check for blockages and clean
with abnormal noise
restricted or blocked the dust cup or the filters
•
Inadequate connection
•
Check if the connection of the
Electricity indicator
between the host and host and charging port is well
lights do not work
charging port • Please contact the qualified
• Battery service problem center to replace or fix it
•
Battery temperature being
• Please charge the device after
Battery overcharges
too low or too high
battery temperature return to
normal
•
Too much garbage in the
•
Replace the dust bag
dust bag
•
Remove the anti-blocking cover
•Accumulated garbage in and clean the trash from the
Low suction power
the duct duct
of base
•
The air outlet Hepa filter
•
Clean and dry the Hepa before
blocked reinstalling
• The protective cover
•
Clean and dry the protective
blocked cover before reinstalling
•
The filter
not
installed
•
Empty the dust cup and
Dust is escaping from
correctly or the dust cup
the vacuum
is full
reassemble the filter system
SAFETY INSTRUCTIONS
• Please charge machine strictly according to instructional way in this manual. Do not
charge machine when the temperature exceed specified range, otherwise battery will be
damaged.
•
Please only use the recommended accessories and replacements.
•
Please do not use all device before the accessories and components are assembled
completely to avoid damages.
• Please pull out the plug if the device is not for used a long time or is under maintenance.
• Do not position the appliance near gas stove, electric stove or any open flames.
•
Do not immerse appliance and its cable or plug
in
water or any other liquid.
• Ensure that children do not touch the cable or appliance.
• Do not position appliance near sharp edge or heating component or any other heat
sources.
• Please clear away all of wrapper and advertise tags before use.
•
This appliance contain a rechargeable battery. Battery recycle should follow local laws
and regulations. It may cause blast if the battery is punctured or placed at high t e m -
peratures.
• Battery may suffer electric leakage in extreme case. If battery liquid gets on skin, wash
by water and soap immediately or neutralize with a as gentle acid (such lemon juice or
vinegar). If battery liquid gets
in
eyes, flush with water for at least some minutes and
coll doctor.
SAVE THESE INSTRUCTION
HOUSEHOLD USE ONLY
KNOWING MACHINE YOUR
(Detail The Display Panel)
2
3
Electricity indicator
lights
Working mode
indicator lights
Power switch button
While working, the indicator corresponding to the
remaining battery capacity of the battery pack will
be solid.
While charging, the indicator will flash until the
remaining battery capacity of the battery pack
reaches the corresponding value.
It
takes
about 4-5
hours to
fully
charge the battery
pack.
When the the left indicator lights up, vacuum works
in MIN mode.
When the right indicator lights up, the vacuum works
in NORMAL mode.
When the two indicator light up, the vacuum works in
MAX mode.
Press the button to switch the power of vacuum
cleaner between
MIN,
NORMAL and MAX mode.
FEATURES OF THE MACHINE
(The Vacuum)
• Three working modes can be switched by pressing the power switch button: suctionhigh
in MAX mode, balanced suction in in NORMAL mode, long endurance MIN mode.
• Advanced filtration with system the HEPA filter for convenient cleaning.
• a Equipped with variety of nozzles to adap t to different doily scenes in life, making clean-
ing more convenient and efficient.
CLEANING AND MAINTENANCE
10
(For The Floor Brush)
To install back the
roller latch, firstly put
this of side the roller
-
latch, then press
,.
down the whole latch.
STEP2: _ _ J .,
Pull this of side
the roller latch
up to remove it.
STEP 4:
Press the cleaning brush lock on the
side of floor brush to pop the cleaning
brush out. Use the cleaning brush to
remove the hair and dust on the roller
brush brush and surface.
STEP 3:Pull out the roller brush.
( For Inlet The Air Hepa Filter&. Cyclone Bracket )
• Press the dust cup release button to detach the dust cup.
• Put your finger inside the net to pull Hepa pull the filter out, then the cyclone bracket out.
• Clean the Hepa filter, cyclone bracket and filter bracket.
• Put the filter parts back into the dust cup. Ensure that the the white side of filterHepa
faces the outside of the dust cup and the blue side faces the inside of the dust cup.
Produktspecifikationer
| Varumärke: | TDX |
| Kategori: | dammsugare |
| Modell: | 385712 |
Behöver du hjälp?
Om du behöver hjälp med TDX 385712 ställ en fråga nedan och andra användare kommer att svara dig
dammsugare TDX Manualer
21 September 2025
dammsugare Manualer
- Nilfisk
- Telefunken
- Conrad
- Topcraft
- FAR
- Saturn
- Numatic
- Maxxworld
- Ghibli
- Kubo
- Onson
- Haier
- Cotech
- Imarflex
- EWT
Nyaste dammsugare Manualer
21 Oktober 2025
21 Oktober 2025
21 Oktober 2025
20 Oktober 2025
20 Oktober 2025
19 Oktober 2025
18 Oktober 2025
17 Oktober 2025
16 Oktober 2025
15 Oktober 2025