TeachLogic Voicelink Plus Bruksanvisning
TeachLogic
Inte kategoriserad
Voicelink Plus
Läs gratis den bruksanvisning för TeachLogic Voicelink Plus (2 sidor) i kategorin Inte kategoriserad. Guiden har ansetts hjälpsam av 29 personer och har ett genomsnittsbetyg på 3.8 stjärnor baserat på 15 recensioner. Har du en fråga om TeachLogic Voicelink Plus eller vill du ställa frågor till andra användare av produkten? Ställ en fråga
Sida 1/2
Quick Start Guide
Getting to Kno our Sound System w Y
Make note of the location of the speakers and ceiling sensor in
your classroom. Ensure that you have unpacked and charged
your battery-powered microphones. Keep this guide handy
for future reference.
Please note that some amplifier/receiver controls will differ.
Refer to their markings, user manual, or our teachlogic.com
for more information on their function.
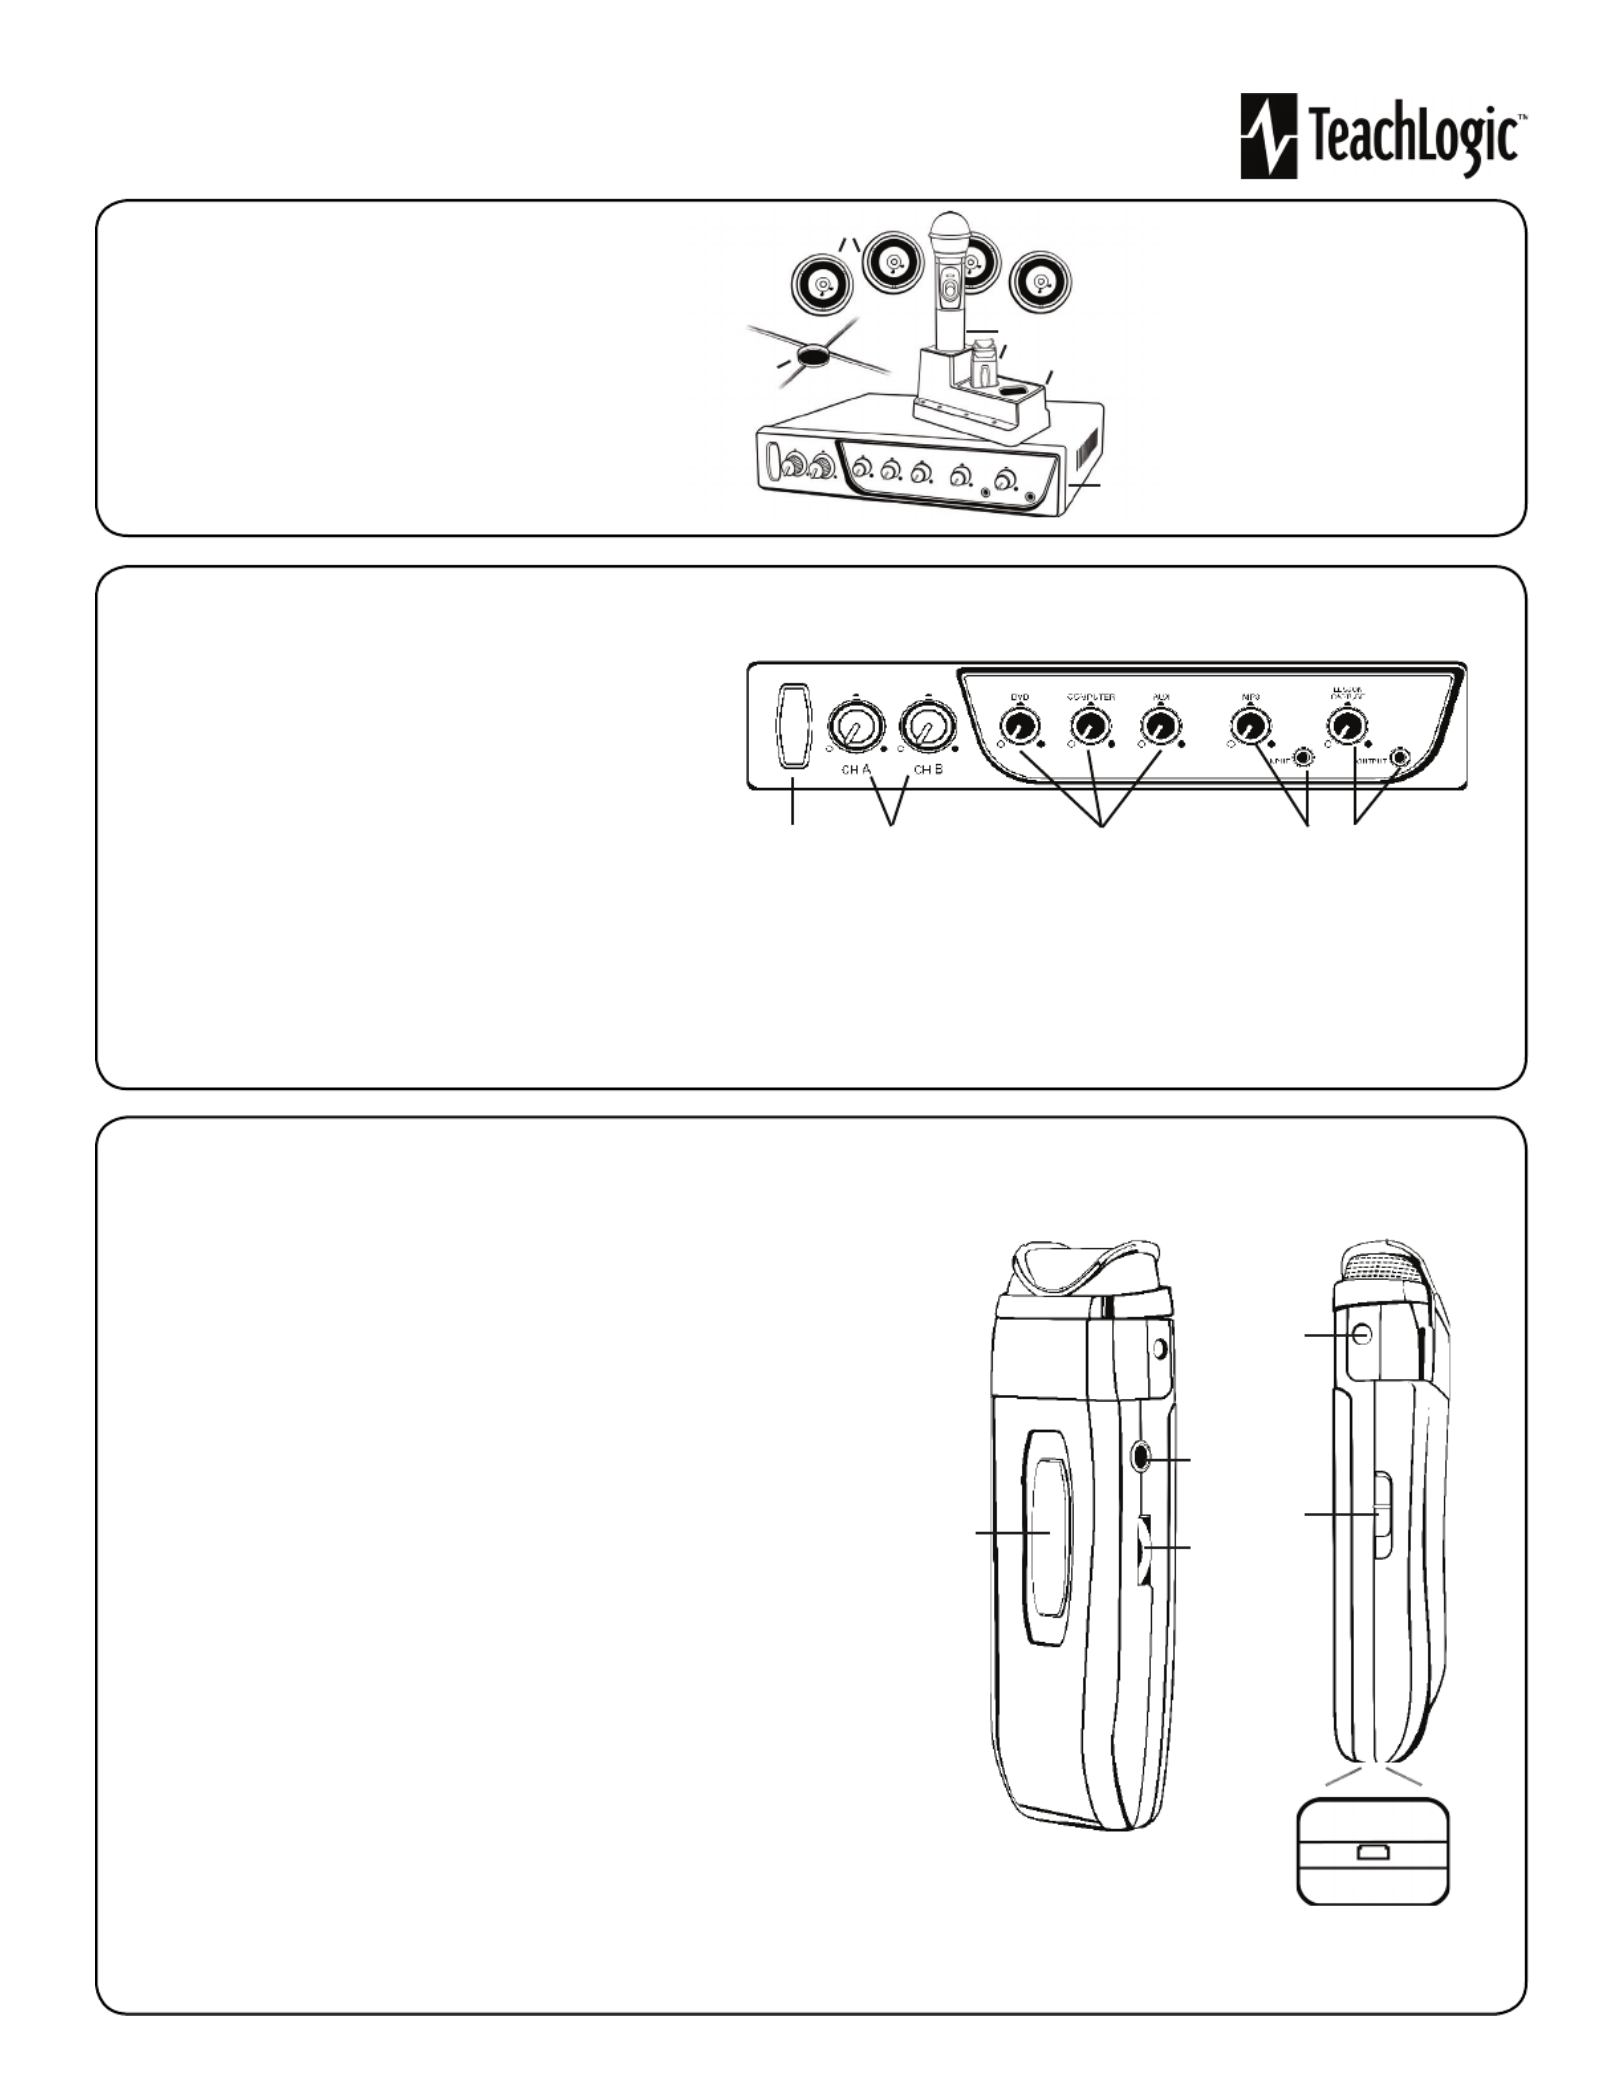
STEP 1. USING THE AMPLIFIER/RECEIVER
1. Speakers
2. Ceiling Sensor
3. Wireless Microphones
4. Microphone battery
charger
5. Receiver/Ampli er
1. Power & Status Indicator
• Red: OFF
• Blue: ON and activated
• Amber: STANDBY
2. Mic Channels/Volume Controls
• Green light: Microphone on and connected to
channel
• No light: Microphone is not on; and/or sensor is not plugged
in; and/or sensor is not receiving mic signal
3. Input Volume Controls
• Controls volume of connected external
devices
1 2 3 4 5
4. Input Jack and Volume Control
• Connects additional external devices to the system (ex. iPhone or mp3 player)
5. Output Volume Control and Output Jack
• Connects devices for recording lessons
(1)
1
2
3
4
5
STEP 2. USING THE SAPPHIRETM PENDANT MICROPHONE
1. Power button and status indicator
• Solid Red: OFF
• Solid Blue: ON
• Solid Purple: External devices quieted
2. Mute microphone: Brie y press power button once ( ashing blue).
Unmute microphone: Brie y press power button again (solid blue).
3. Aux Input: Connects devices (like music player) to microphone.
4. Priority Switch: Changes volume of devices plugged into amp inputs
• To increase/decrease volume level: Slide button up or down
• To immediately quiet volume level of external device: Push button once
• To resume volume level of external device: Push button again
5. Activate Security Alert Feature (when available)
• Hold Priority Switch down for 5 seconds. The power light on the amp will ash green,
then return to solid blue.
6. Gain Switch
• There are 3 levels to adjust your microphone volume.
• Set gain at “Normal”. You may reduce the volume by setting it to -3dB or -6bD if your
mic is too loud.
7. Lanyard attachments
• Microphone should rest where your collar bones meet.
8. USB Charge Port (found on the bottom of the mic)
1
2
3
4, 5
8
6
7
Produktspecifikationer
| Varumärke: | TeachLogic |
| Kategori: | Inte kategoriserad |
| Modell: | Voicelink Plus |
Behöver du hjälp?
Om du behöver hjälp med TeachLogic Voicelink Plus ställ en fråga nedan och andra användare kommer att svara dig
Inte kategoriserad TeachLogic Manualer

21 Februari 2025

21 Februari 2025

24 Augusti 2024

19 Augusti 2024

17 Augusti 2024

14 Augusti 2024

10 Augusti 2024

8 Augusti 2024

31 Juli 2024
Inte kategoriserad Manualer
- MEPROLIGHT
- Walrus Audio
- Trident
- Medela
- Ugreen
- Scandes
- SanDisk
- Indesit
- Pit Boss
- Bigben
- EXSYS
- Parkside
- Napoleon
- Airman
- Technical Pro
Nyaste Inte kategoriserad Manualer

9 April 2025

9 April 2025

9 April 2025

9 April 2025

9 April 2025

9 April 2025

9 April 2025

9 April 2025

9 April 2025

9 April 2025