Trixie 1314 Bruksanvisning
Trixie ej kategoriserat 1314
Läs gratis den bruksanvisning för Trixie 1314 (1 sidor) i kategorin ej kategoriserat. Guiden har ansetts hjälpsam av 18 personer och har ett genomsnittsbetyg på 4.5 stjärnor baserat på 8 recensioner. Har du en fråga om Trixie 1314 eller vill du ställa frågor till andra användare av produkten? Ställ en fråga
Sida 1/1
Einbauanleitung
Breiten Sie die Decke in Ihrem Kofferraum aus und befestigen Sie sie
mithilfe der angebrachten Bänder an den Kopfstützen.
Sie können nun die Decke individuell an den Kofferraum anpassen,
indem Sie die innenliegenden Metallstäbe in die gewünschte Form
biegen und so eine Wanne formen.
Bitte beachten Sie, dass die Metallstäbe nicht beliebig oft gebogen
werden können, da das Material und die Passform der Decke lang-
fristig darunter leiden.
Die Klettbänder unterhalb und seitlich der Decke sowie die Bänder für
die hinteren Kopfstützen sorgen dafür, dass die Decke nicht verrutscht.
Die separate Schürze kann mithilfe der Klettbänder schnell und einfach
angebracht werden. Für die Fahrt lässt sie sich unter Verwendung der
2 enthaltenen Schnallen hochklappen und schützt so die Innen-
verkleidung des Kofferraums. Beim Ein- und Aussteigen des Hundes
schützt die Schürze optimal die Stoßstange.
Instructions de montage
Placez la protection dans votre coffre de voiture, et fixez-là aux appu-
ies-têtes à l’aide des attaches.
Vous pouvez ajuster la protection à votre coffre en courbant les tiges
métalliques intérieures pour lui donner la forme désirée.
Noter que les tiges métalliques ne doivent pas être courbées et
recourbées trop souvent, pour ne pas endommager la forme de la
protection.
Les attaches en crochet et boucle sur le fond et le côté de la
protection assurent un bon maintient sécurisé.
Un rebord séparé peut être fixé et enlevé à l’aide des attaches. Avant
de partir, le rebord se replie vers le haut grâce à deux fixations et
protège ainsi le revêtement intérieur de la porte du coffre. Ce rebord
protège efficacement les pare-chocs au moment des entrées et sor-
ties du chien de la voiture.
Kofferraum-Schondecke
Art.-Nr./item 1314
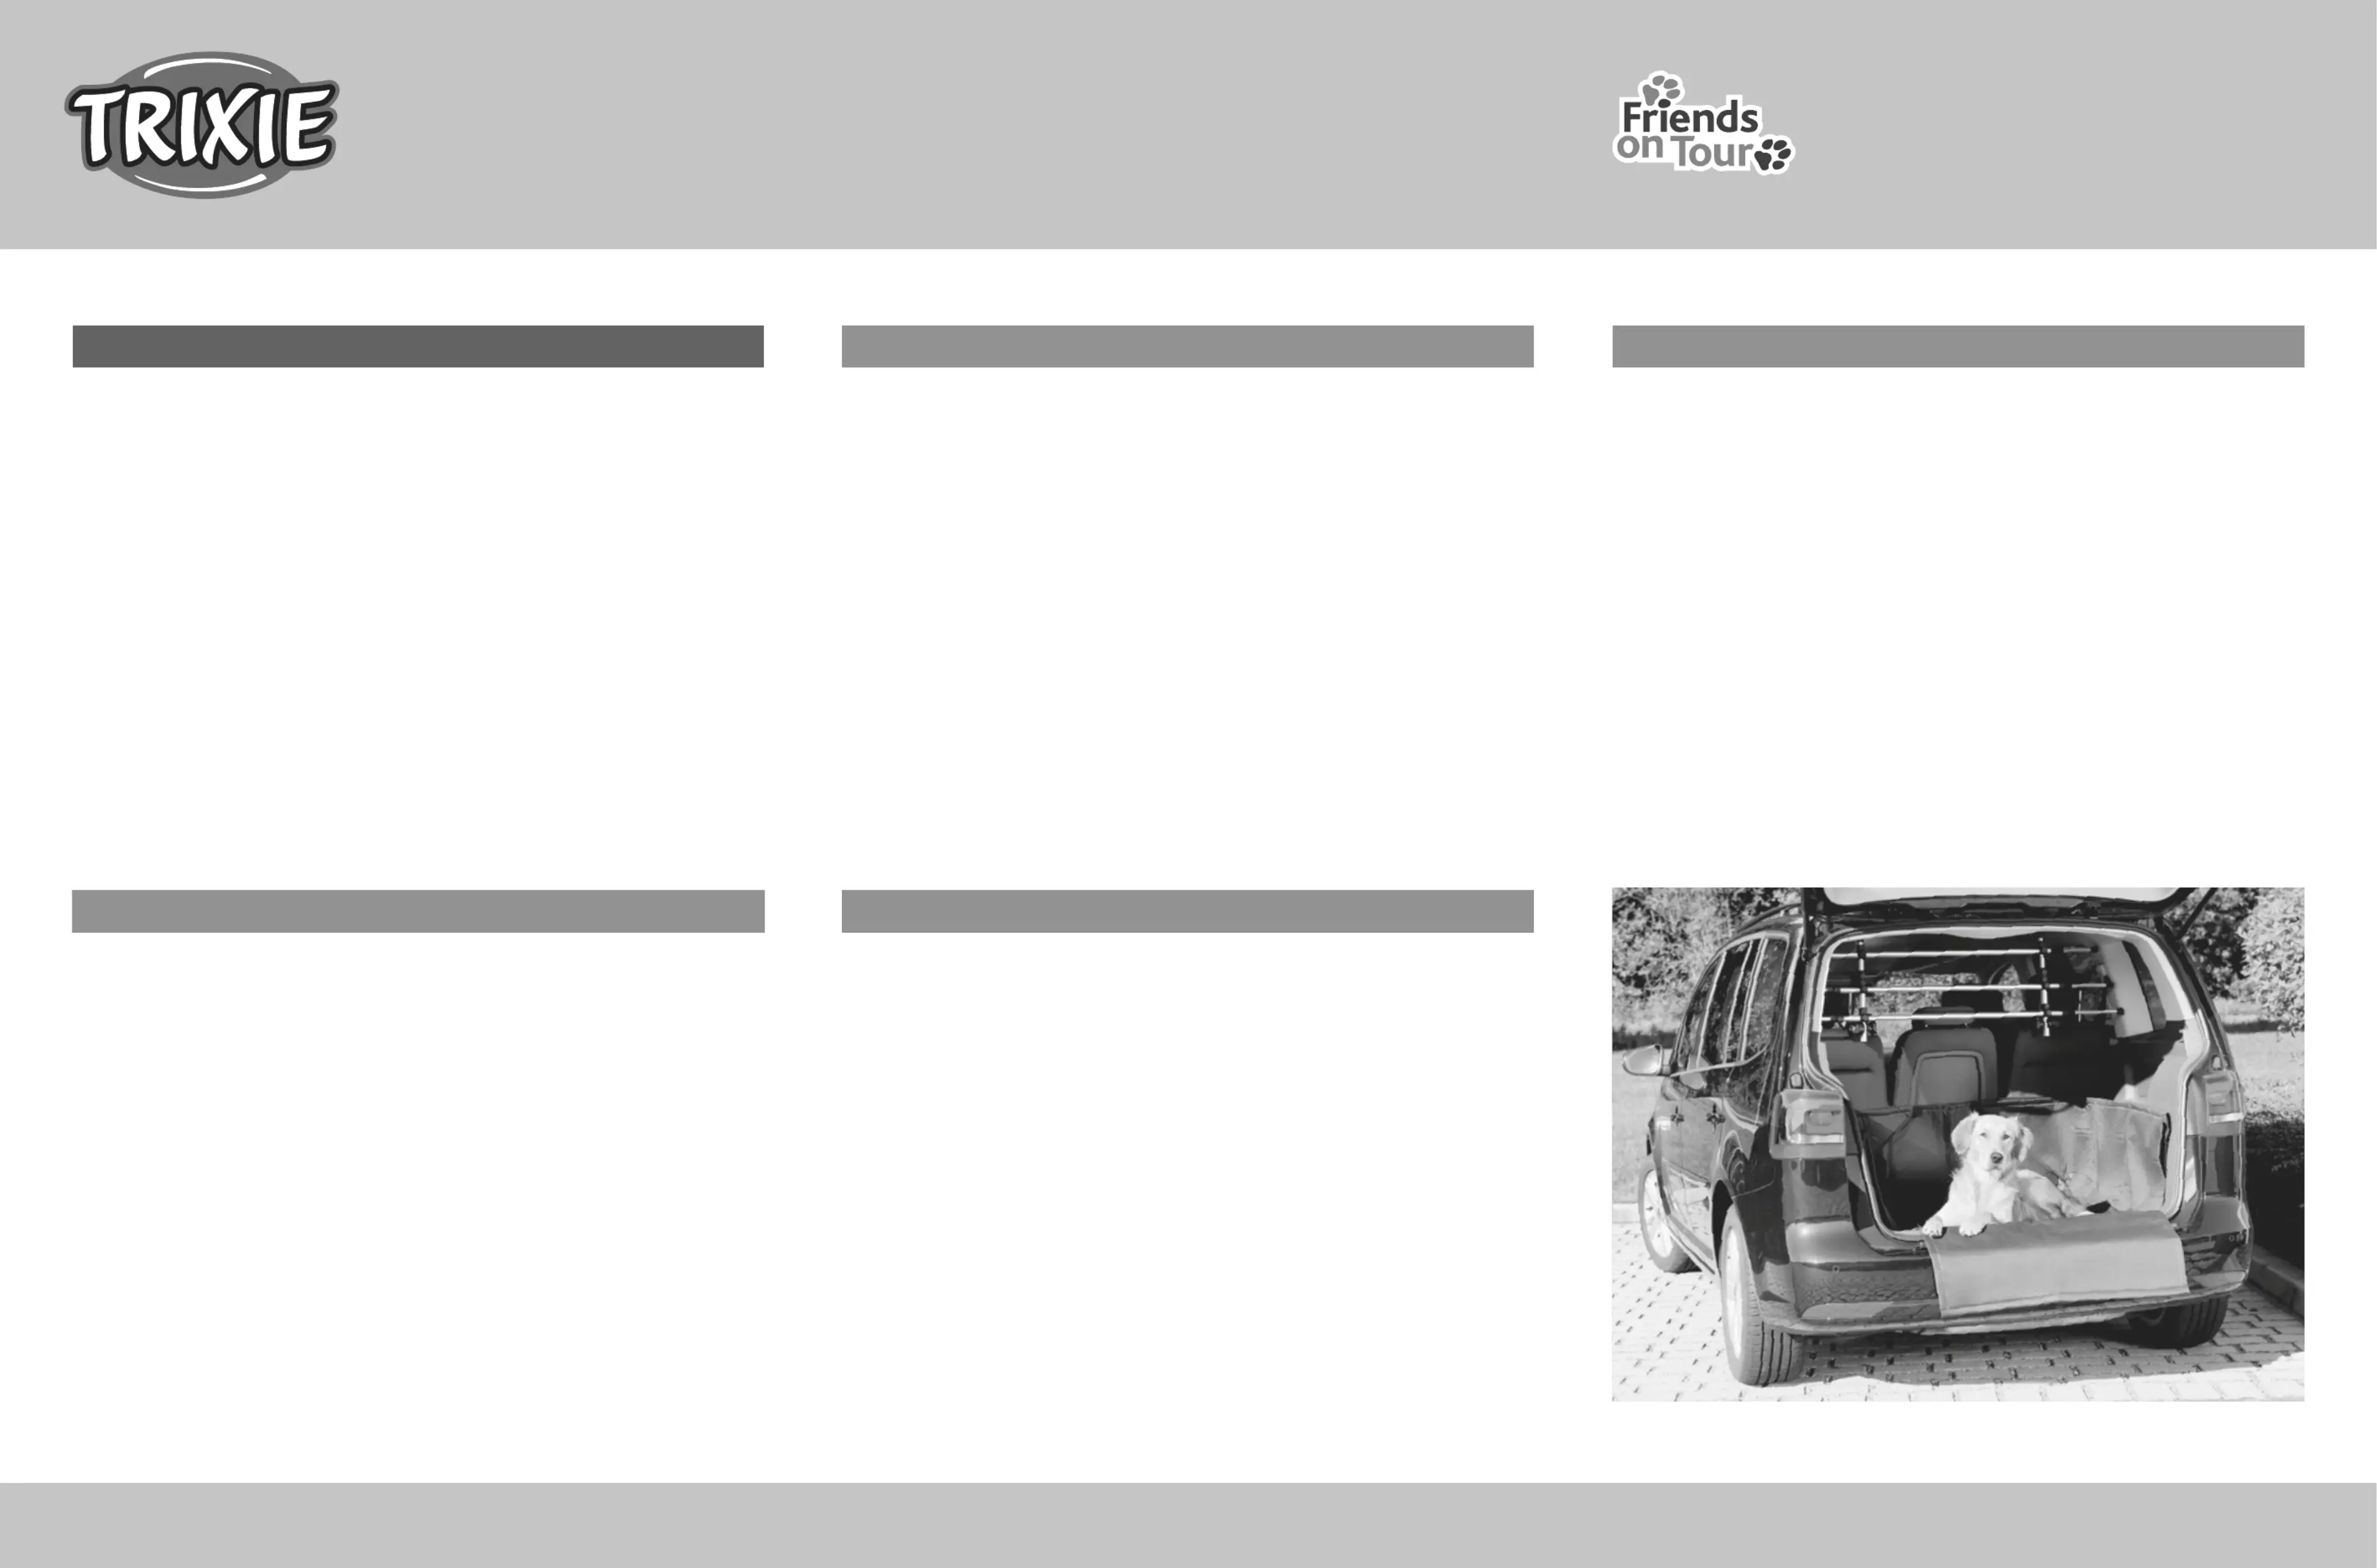
Fitting Instructions
Spread the cover in your car boot and attach it to the head rests using
the bands attached.
You can individually adjust the cover to your car boot by bending the
inside metal rods into the shape you desire to form a tray.
Please note that the metal rods cannot be bent and re-bent too
often, otherwise the material and the correct fit would suffer.
Hook and loop fasteners at the bottom and at the side of the cover
ensure a safe hold.
A separate apron can be fixed and detached again with enclosed
hook and loop fastener. Before starting your trip this apron can be
put up with the help of 2 clasps, so that the boot lid’s interior lining
is protected as well. The apron will help to protect the bumper
while the dog jumps in or out of the car.
Istruzioni per il montaggio
Stendere il telo nel bagagliaio della vostra macchina e fissarlo ai
poggiatesta utilizzando i lacci.
È possibile adattare il telo alla misura del bagagliaio della macchina
piegando le aste in metallo presenti all’interno (per formare un
vassoio).
Si prega di notare che le aste in metallo non possono essere piegate
e ripiegate troppo spesso, altrimenti il materiale e la forma ne
soffrirebbero.
Una maggiore tenuta può essere data dalle chiusure a strap presenti
nella parte inferiore e ai lati della protezione.
Un ulteriore telo, facile e veloce da attaccare con la chiusura a strap,
vi permette di proteggere il paraurti mentre il cane scende o sale nel
bagagliaio. Prima di partire con l’automobile, potete sollevarlo e
fissarlo ai lati della coperta grazie a due ganci in modo da proteggere
anche la parte interna del portellone.
Instrucciones de montaje
Despliegue la funda en su maletero y engánchela a los respaldos
traseros usando las tiras incluidas.
Puede ajustar individualmente la funda a su maletero doblando las
varillas metálicas internas en la forma que desee formando una
bandeja.
Por favor, considere que las varillas metálicas no se pueden doblar y
volver a doblar con demasiada frecuencia, p1-ya que el material sufre
esfuerzos que repercuten en el ajuste final.
Los cierres adhesivos en la base y los laterales de la funda aseguran
una sujeción segura.
Puede poner y quitar una extensión por separado con los cierres adhesi-
vos. Antes de empezar el trayecto esta extensión se puede instalar con
la ayuda de dos ganchos, de modo que el revestimento interno del
maletero también se queda protegido. Esta extensión ayudará a prote-
ger el parachoques cuando el perro salta fuera o dentro del coche.
TRIXIE Heimtierbedarf · Industriestraße 32 · 24963 Tarp · GERMANY · www.trixie.de
Produktspecifikationer
| Varumärke: | Trixie |
| Kategori: | ej kategoriserat |
| Modell: | 1314 |
| Produkttyp: | Mjukt skydd för bagageutrymme |
| Bredd: | 1640 mm |
| Djup: | 1250 mm |
| Material: | Nylon |
| Modell: | Mjukt skydd för bagageutrymme |
| Vattentålig: | Ja |
| Produktens färg: | Svart |
| Enkel installation: | Ja |
| Lätt att ta bort: | Ja |
| Enkel montering: | Ja |
Behöver du hjälp?
Om du behöver hjälp med Trixie 1314 ställ en fråga nedan och andra användare kommer att svara dig
ej kategoriserat Trixie Manualer

18 Mars 2026
17 Mars 2026
15 Mars 2026
14 Mars 2026
14 Mars 2026
22 Juli 2025
20 Juli 2025
20 Juli 2025
19 Juli 2025
19 Juli 2025
ej kategoriserat Manualer
Nyaste ej kategoriserat Manualer
3 April 2026
3 April 2026
3 April 2026
3 April 2026
3 April 2026
3 April 2026
3 April 2026
3 April 2026
3 April 2026