Uniden D3280 Bruksanvisning
Läs gratis den bruksanvisning för Uniden D3280 (26 sidor) i kategorin Telefon. Guiden har ansetts hjälpsam av 18 personer och har ett genomsnittsbetyg på 4.8 stjärnor baserat på 8 recensioner. Har du en fråga om Uniden D3280 eller vill du ställa frågor till andra användare av produkten? Ställ en fråga
Sida 1/26
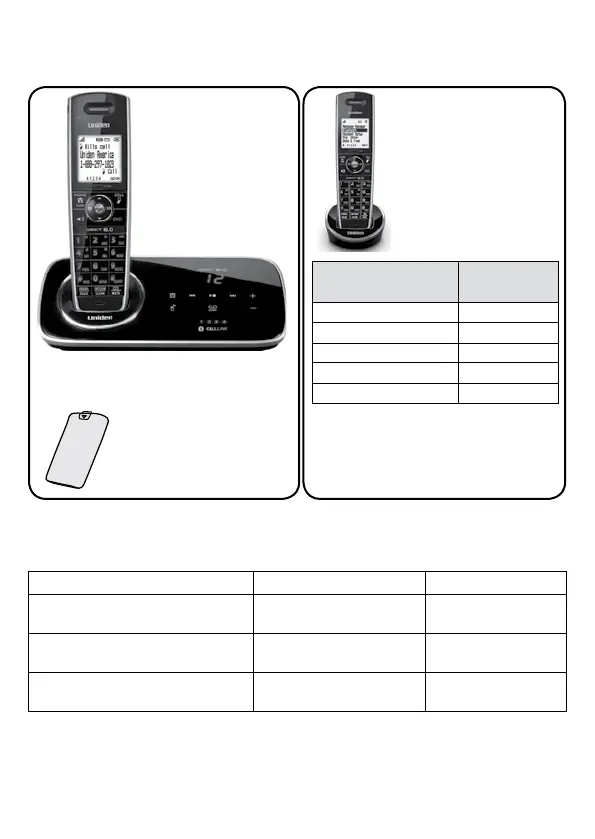
D3280 base with
answering system
and cordless
handset
Battery
cover
Accessory handset
and charger
If you purchased
model number:
You should
have:
D3280None
D3280-21 of each
...
...
D3280-11-1110 of each
D3280-12-1211 of each
* If the model number ends in R,
your package includes a DRX100
range extender. Refer to the
DRX100 User’s Guide for details.
You will also nd:
Not pictured:
Rechargeable battery
(BT-1022)
AC adapter (PS-0034)
Telephone cord
Belt clip
If any items are missing or damaged, contact our Customer Care Line immediately.
Never use damaged products!
Need help? Get answers 24/7 at our website:www.uniden.com.
If You...Contact Uniden’s...Phone Number
have a question or problemCustomer Care Line*
817-858-2929 or
800-297-1023
need a replacement part or an
accessory
Parts Department*800-554-3988
need special assistance due to a
disability
Accessibility Help Line
800-874-9314
(voice or TTY)
* During regular business hours, Central Standard Time; see our website for detailed business hours.
♦
♦
D3280 Series User's Guide
What's in the box?
Not pictured:
Rechargeable battery
(BT-1022)
Belt clip
Battery cover
AC adapter (PS-0035)
© 2011 Uniden America Corp. Printed in Vietnam
Ft. Worth, Texas U01UN219BZZ(0)
Produktspecifikationer
| Varumärke: | Uniden |
| Kategori: | Telefon |
| Modell: | D3280 |
Behöver du hjälp?
Om du behöver hjälp med Uniden D3280 ställ en fråga nedan och andra användare kommer att svara dig
Telefon Uniden Manualer

27 September 2025
27 September 2025
27 September 2025
27 September 2025
27 September 2025
26 September 2025
26 September 2025
26 September 2025
26 September 2025
26 September 2025
Telefon Manualer
Nyaste Telefon Manualer
2 April 2026
2 April 2026
27 Mars 2026
26 Mars 2026
16 Mars 2026
14 Mars 2026
13 Mars 2026
4 Mars 2026
30 Januari 2026
25 Januari 2026