EXSYS EX-3516 Bruksanvisning
EXSYS Kontroller EX-3516
Läs gratis den bruksanvisning för EXSYS EX-3516 (10 sidor) i kategorin Kontroller. Guiden har ansetts hjälpsam av 27 personer och har ett genomsnittsbetyg på 5.0 stjärnor baserat på 4 recensioner. Har du en fråga om EXSYS EX-3516 eller vill du ställa frågor till andra användare av produkten? Ställ en fråga
Sida 1/10
1
Thank you for purchasing this 4-Port SATA3 RAID/HyperDuo PCIe Card.
It is designed to support up to 4 SATA3 ports in RAID 0 and RAID 1,
RAID 0+1 modes and HyperDuo modes for SSD (Solid State Drive) and
hard drive combination. It supports SATA3 SSD and hard drives with up
to 6.0Gbps data rate. It is an ideal solution to add new SATA3 SSD and
hard drives for your system.
Features:
Supports 1-lane 5.0Gb/s PCI Express Gen.2 Data Transfer Rate
Built-in 4 Internal SATA3 Ports
Supports RAID 0,1, 0+1 and HyperDuo (Safe or Capacity) Modes
Supports Windows based RAID GUI (Marvell Storage Utility, MSU)
Supports SATA3 transfer rate up to 6.0Gb/s (600Mbytes/sec)
Supports RAID 1 Rebuild by BIOS Setup Utility
Supports Windows 2003, 2008, XP, Vista and Win 7
EX-3516
4-Port SATA3 RAID/HyperDuo
PCIe(x2) Card
1. Introduction
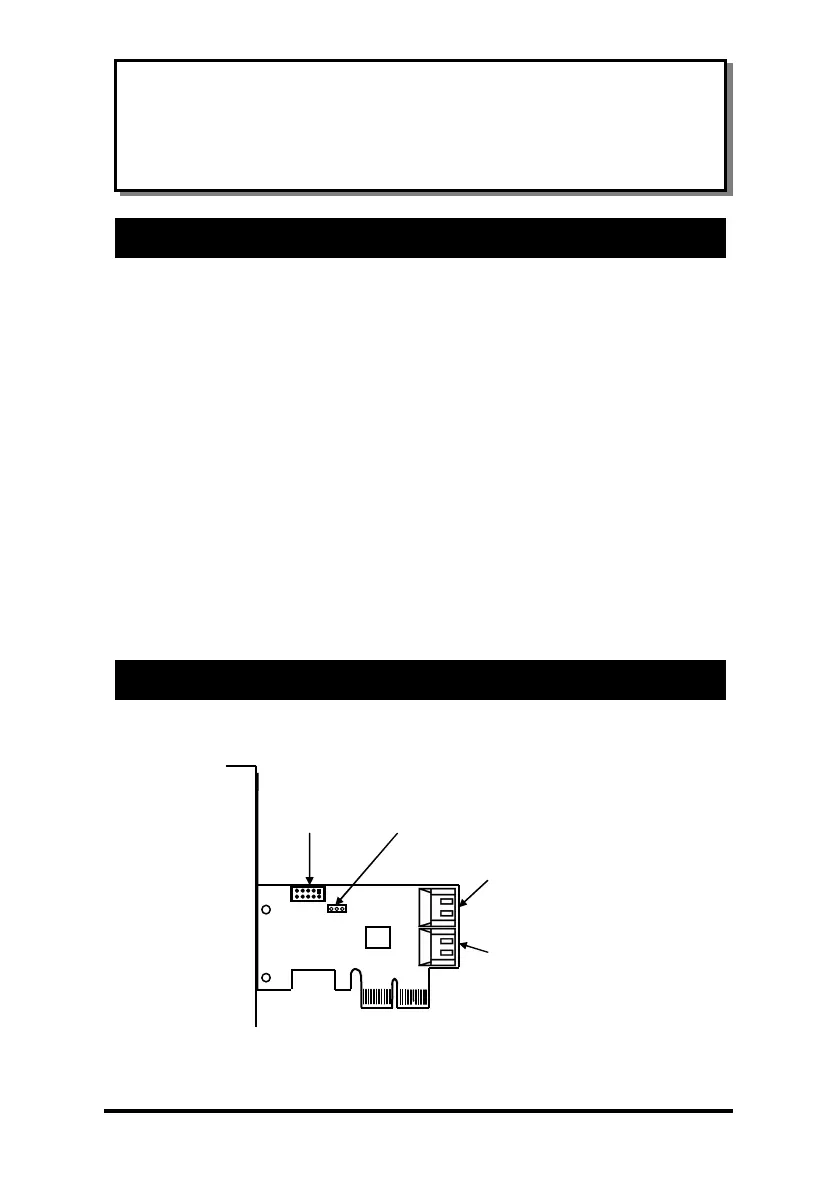
2. Board Layout
JP1 BIOS
Enable/Disable
Jumper
J1: SATA3 Ports
UP: Port 1
Down: Port 0
J2:
LED
Connector
J3: SATA3 Ports
UP: Port 3
Down: Port 2
Produktspecifikationer
| Varumärke: | EXSYS |
| Kategori: | Kontroller |
| Modell: | EX-3516 |
Behöver du hjälp?
Om du behöver hjälp med EXSYS EX-3516 ställ en fråga nedan och andra användare kommer att svara dig
Kontroller EXSYS Manualer

18 September 2024
18 September 2024
18 September 2024
18 September 2024
18 September 2024
Kontroller Manualer
Nyaste Kontroller Manualer
2 April 2026
1 April 2026
28 Mars 2026
15 Mars 2026
14 Mars 2026
1 Mars 2026
19 Februari 2026
6 Februari 2026