Gira 549103 Bruksanvisning
Läs gratis den bruksanvisning för Gira 549103 (10 sidor) i kategorin mottagare. Guiden har ansetts hjälpsam av 55 personer och har ett genomsnittsbetyg på 4.0 stjärnor baserat på 4 recensioner. Har du en fråga om Gira 549103 eller vill du ställa frågor till andra användare av produkten? Ställ en fråga
Sida 1/10
Wireless top unit, blinds control button, 1-gang
Order No. : 5491 ..
Operating instructions
1 Safety instructions
Electrical devices may only be mounted and connected by electrically skilled
persons.
Serious injuries, fire or property damage possible. Please read and follow manual fully.
Danger of electric shock. Always disconnect before carrying out work on the devise or
load. In so doing, take all the circuit breakers into account, which support dangerous
voltages to the device and or load.
These instructions are an integral part of the product, and must remain with the end
customer.
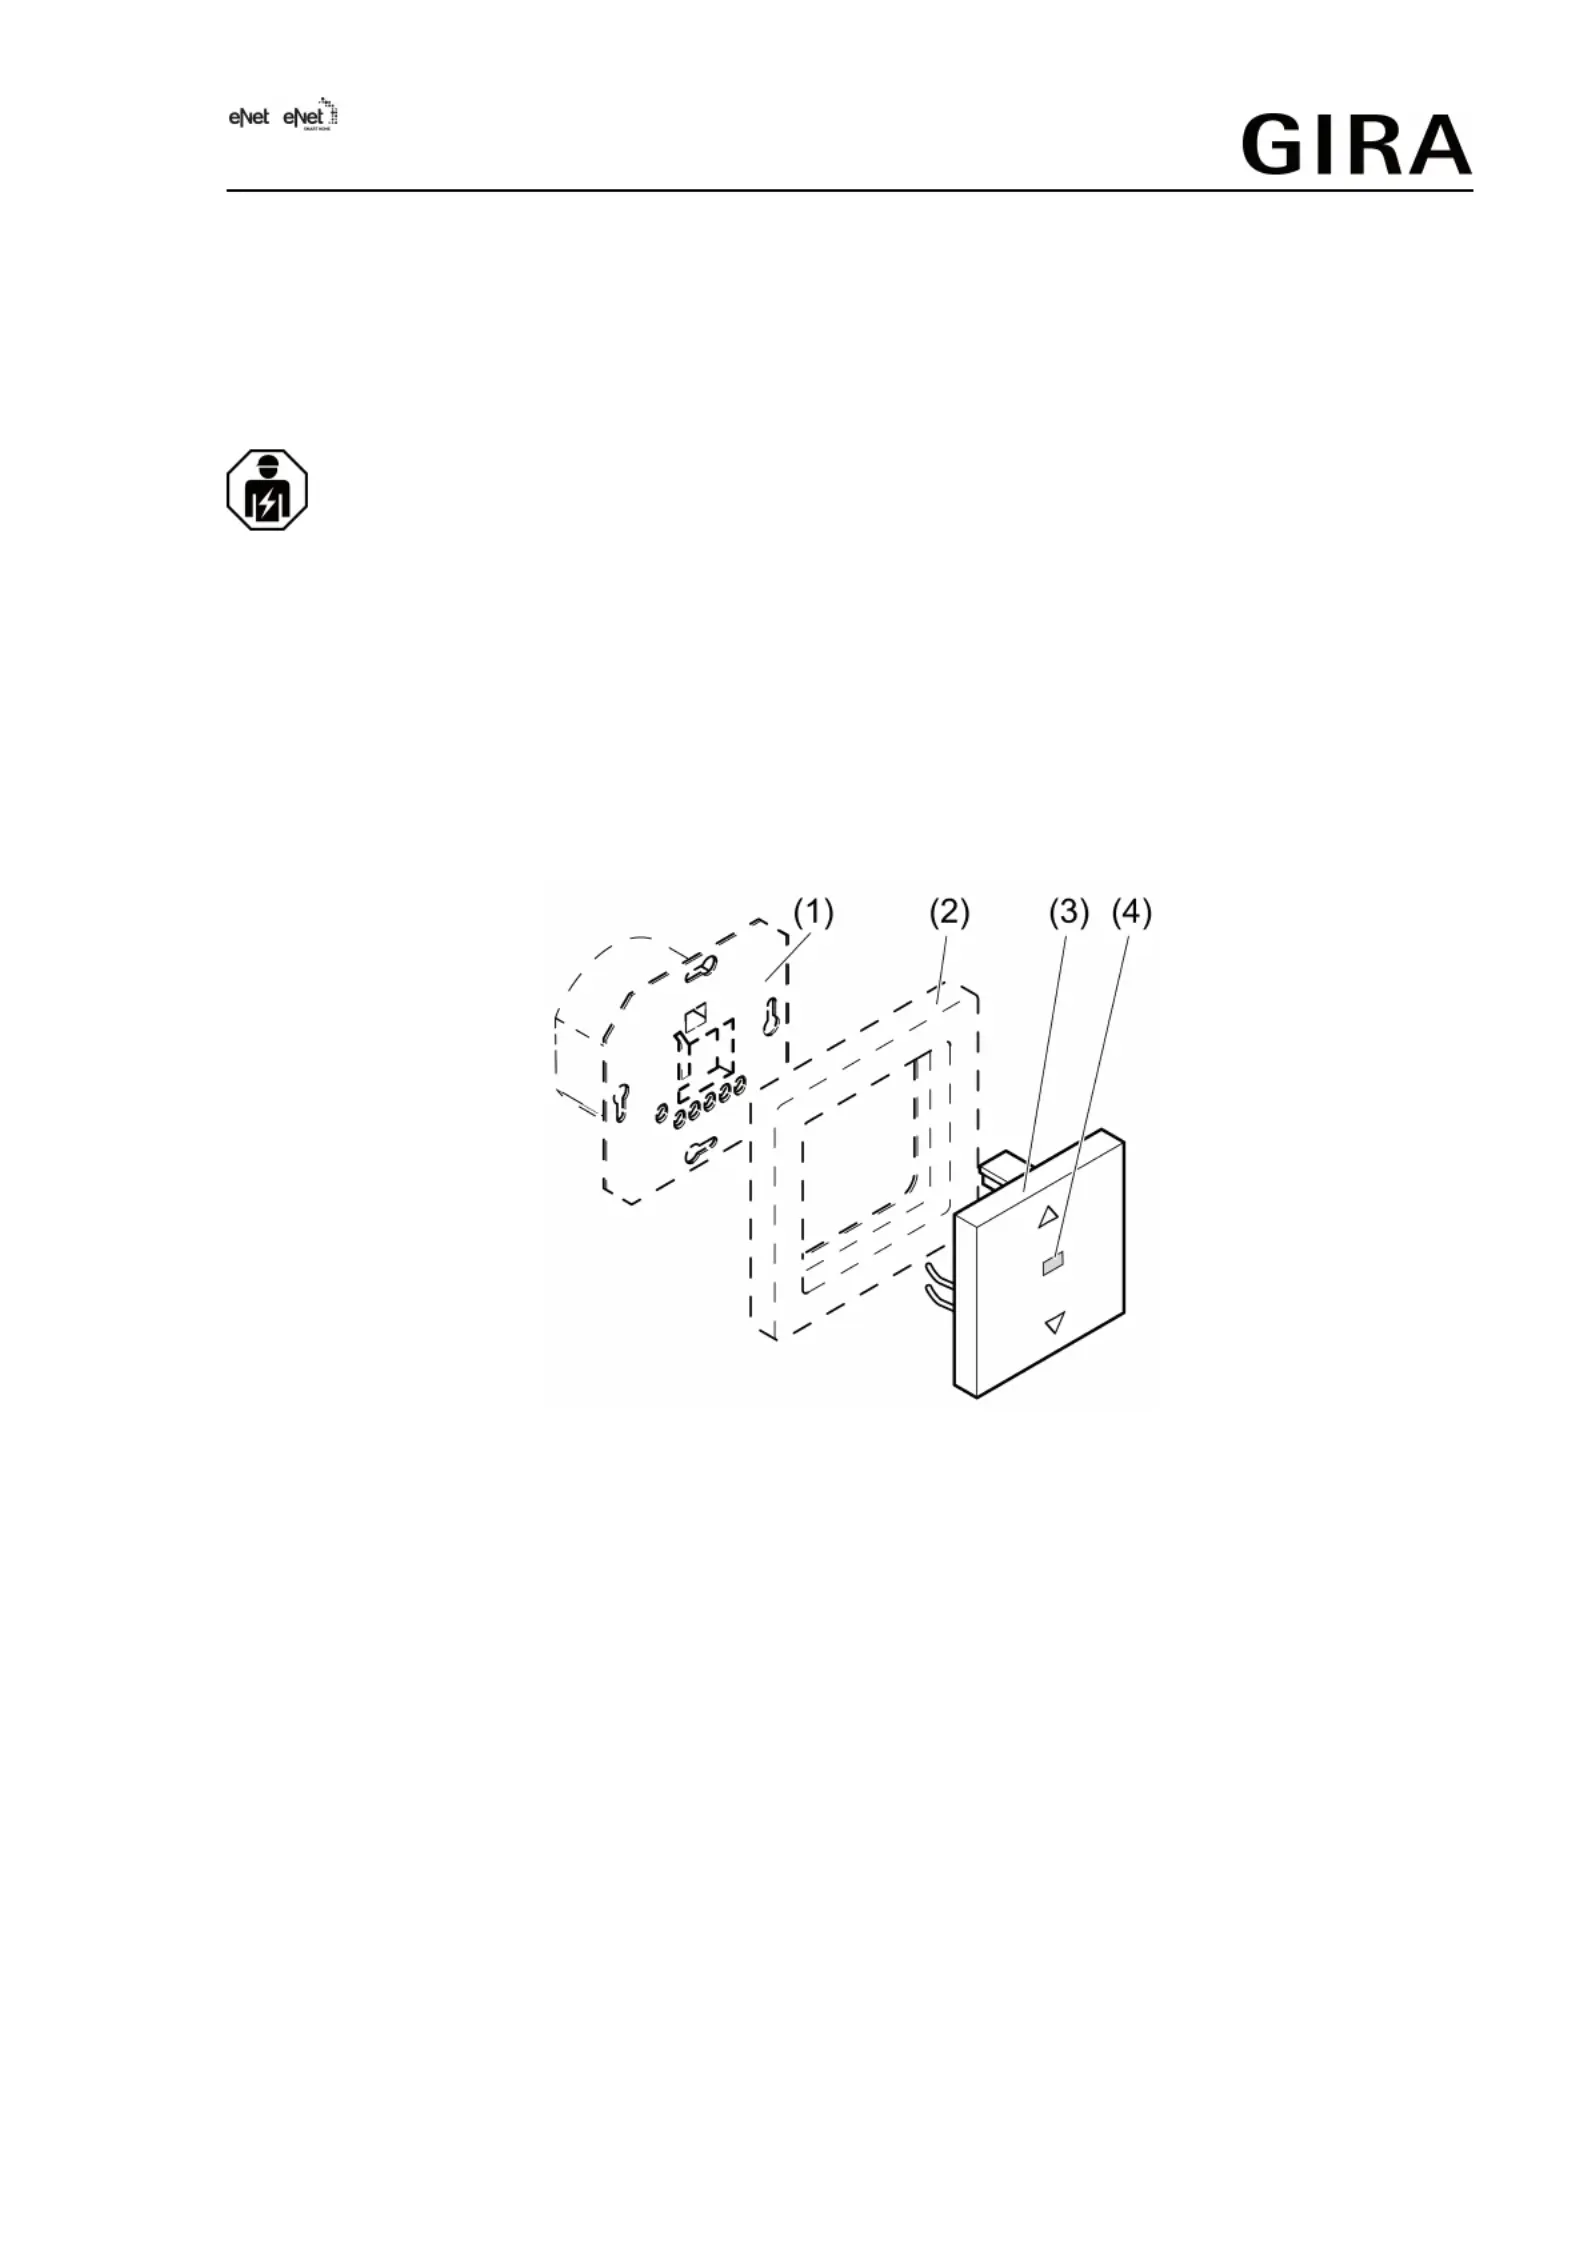
2 Device components
Figure 1: Device components
(1)FM insert
(2)Frame
(3)Radio button
(4)Status LED
3 Function
Intended use
-Manual and radio-controlled operation of electrically-driven Venetian blinds, shutters and
awnings
-Operation with suitable eNet radio transmitters
-Mounting on venetian blind insert (accessories)
Product characteristics
-Positioning of the blind/shutter via scene request
-Position for sun protection and twilight
-Status feedback to radio transmitter
-Blind/shutter running time can be saved
-Status indicator via LED
1/9
3258262222.03.2017
Wireless top unit, blinds control button, 1-gang
10864996
Produktspecifikationer
| Varumärke: | Gira |
| Kategori: | mottagare |
| Modell: | 549103 |
| Gränssnitt: | RF Trådlös |
| Produktens färg: | Vit |
| Temperatur vid drift: | -5 - 45 ° C |
| Material, hölje: | Rostfritt stål |
| Anslutningsteknologi: | Trådlös |
| Arbetsfrekvens: | 868.0 - 868.6 MHz |
| Sändningsområde: | 0 - 100 m |
| Statusåterkoppling: | Ja |
Behöver du hjälp?
Om du behöver hjälp med Gira 549103 ställ en fråga nedan och andra användare kommer att svara dig
mottagare Gira Manualer

28 Juli 2025
31 Juli 2024
mottagare Manualer
Nyaste mottagare Manualer
2 April 2026
2 April 2026
1 April 2026
1 April 2026
31 Mars 2026
31 Mars 2026
29 Mars 2026
29 Mars 2026
28 Mars 2026
28 Mars 2026