Hotpoint HA6IC16B4M6H0 Bruksanvisning
Hotpoint Diskmaskin HA6IC16B4M6H0
Läs gratis den bruksanvisning för Hotpoint HA6IC16B4M6H0 (8 sidor) i kategorin Diskmaskin. Guiden har ansetts hjälpsam av 22 personer och har ett genomsnittsbetyg på 4.1 stjärnor baserat på 3 recensioner. Har du en fråga om Hotpoint HA6IC16B4M6H0 eller vill du ställa frågor till andra användare av produkten? Ställ en fråga
Sida 1/8
EN
Quick Guide
1
THANK YOU FOR BUYING AHOTPOINT ARISTON PRODUCT.
In order to receive amore complete assistance, please
register your appliance on:www.hotpoint.eu/register
SETTING MENU
1. Switch on the appliance by pressing the button.ON-OFF
2. Hold the Settings (Half Load ) button for 3 seconds, until you hear
a beep and the display shows „SEt”.
3. After one second the rst available setting (letter „”) will be displayed.
4. Press PREVIOUS/NEXT to scroll through the list of available settings
(see table below), then press START/Pause to view and change the
value of the currently selected setting.
5. Press PREVIOUS/NEXTto change the value, then press START/Pause
to save the new value or return to the main menu.
6. To change another setting, repeat points 4 and 5.
7. Press or wait 30 seconds to exit the menu.ON-OFF
LETTER
SETTING
VALUES
(Default - )*in bold
Cycle Counter - number of washing cycles
carried out by the dishwasher.
Eg. 25 cycles: 25;
Eg. 13.947 cycles:
13_947
(scrolling
for 3 times)
Water Hardness Level(see “SETTING THE WA-
TER HARDNESS” and “WATER HARDNESS TABLE”)
1 | 2 | | 4 | 53
Rinse Aid Level
(see “ADJUSTING THE DOSAGE OF RINSE AID”)
0 | 1 | 2 | 3 | 4 | 5
ActiveDry(see “OPTIONS AND FUNCTIONS”)
“1” = On, “0” = O
1 | 0
Sound
“1” = On, “0” = O
1 | 0
Factory Settings - START/Pausepress to re-
store to the factory default all the values of the
settings included in the settings menu.
-
*) The default value does not apply to the Cycle Counter.
FILLING THE SALT RESERVOIR
The use of salt prevents the formation of LIMESCALE on
the dishes and on the machine’s functional components.
The salt reservoir is located in the lower part of the dish-
washer (under the lower rack on the left side).
• It is mandatory that the salt reservoir never be empty.
• It is important to set the water hardness.
• Salt must be lled when the SALT REFILL indicator light on the control
panel is lit.
1. Remove the lower rack and unscrew the reservoir cap (anticlockwise).
2. Position the funnel (see gure)and ll the salt reservoir right up to its
edge (approximately 0,5 kg); it is not unusual for alittle water to leak out.
3. Only the rst time you do this: ll the salt reservoir with water.
4. Remove the funnel and wipe any salt residue away from the opening.
Make sure the cap is screwed on tightly so that no detergent can get into
the container during the wash program (this could damage the water sof-
tener beyond repair).
Run aprogram every time as soon as you completed relling the salt
reservoir to avoid corrosion.
WATER SOFTENING SYSTEM
Water softener automatically reduces water hardness, consequently pre-
venting scale buildup on the heater, contributing also to better cleaning ef-
ciency. This system regenerates itself with salt, therefore it is required
to rell the salt container when empty.
The frequency of regeneration depends on the water hardness level setting
- regeneration takes place once per Eco cycles with the water hardness 4-6
level set to . The regeneration process occurs at the beginning of the cycle 3
with additional fresh water.
• Single regeneration consumes ~3 L of water;
• Takes up to 5 additional minutes for the cycle;
• Consumes below 0.005 kWh of energy.
A
B
FILLING THE RINSE AID DISPENSER
Rinse aid makes dish DRYING easier. The rinse aid dis-
penser Ashould be lled when the RINSE AID REFILL
indicator light in the control panel is lit.
1. Open the dispenser by pressing and pulling up B
the tab on the lid.
2. Pour in the rinse aid (max. 110 ml), making sure it
does not overow from the dispenser. If this hap-
pens, clean the spill immediately with adry cloth.
3. Press the lid down until you hear aclick to close it.
NEVER pour the rinse aid directly into the appli-
ance tub.
D
C
FILLING THE DETERGENT DISPENSER
To open the detergent dispenser use the opening
device C. Introduce the detergent into the dry dis-
penser D only. Place the amount of detergent for
pre-washing directly inside the tub.
1. When measuring out the detergent refer to the
mentioned earlier information to add the proper
quantity. Inside the dispenser , there are indicaD-
tions to help the detergent dosing.
2. Remove detergent residues from the edges of the dispenser and close
the cover until it clicks.
3. Close the lid of the detergent dispenser by pulling it up until the closing
device is secured in place.
The detergent dispenser automatically opens up at the right time accord-
ing to the program.
Usage of detergent not designed for dishwashers may cause malfunc-
tion or damage to the appliance.
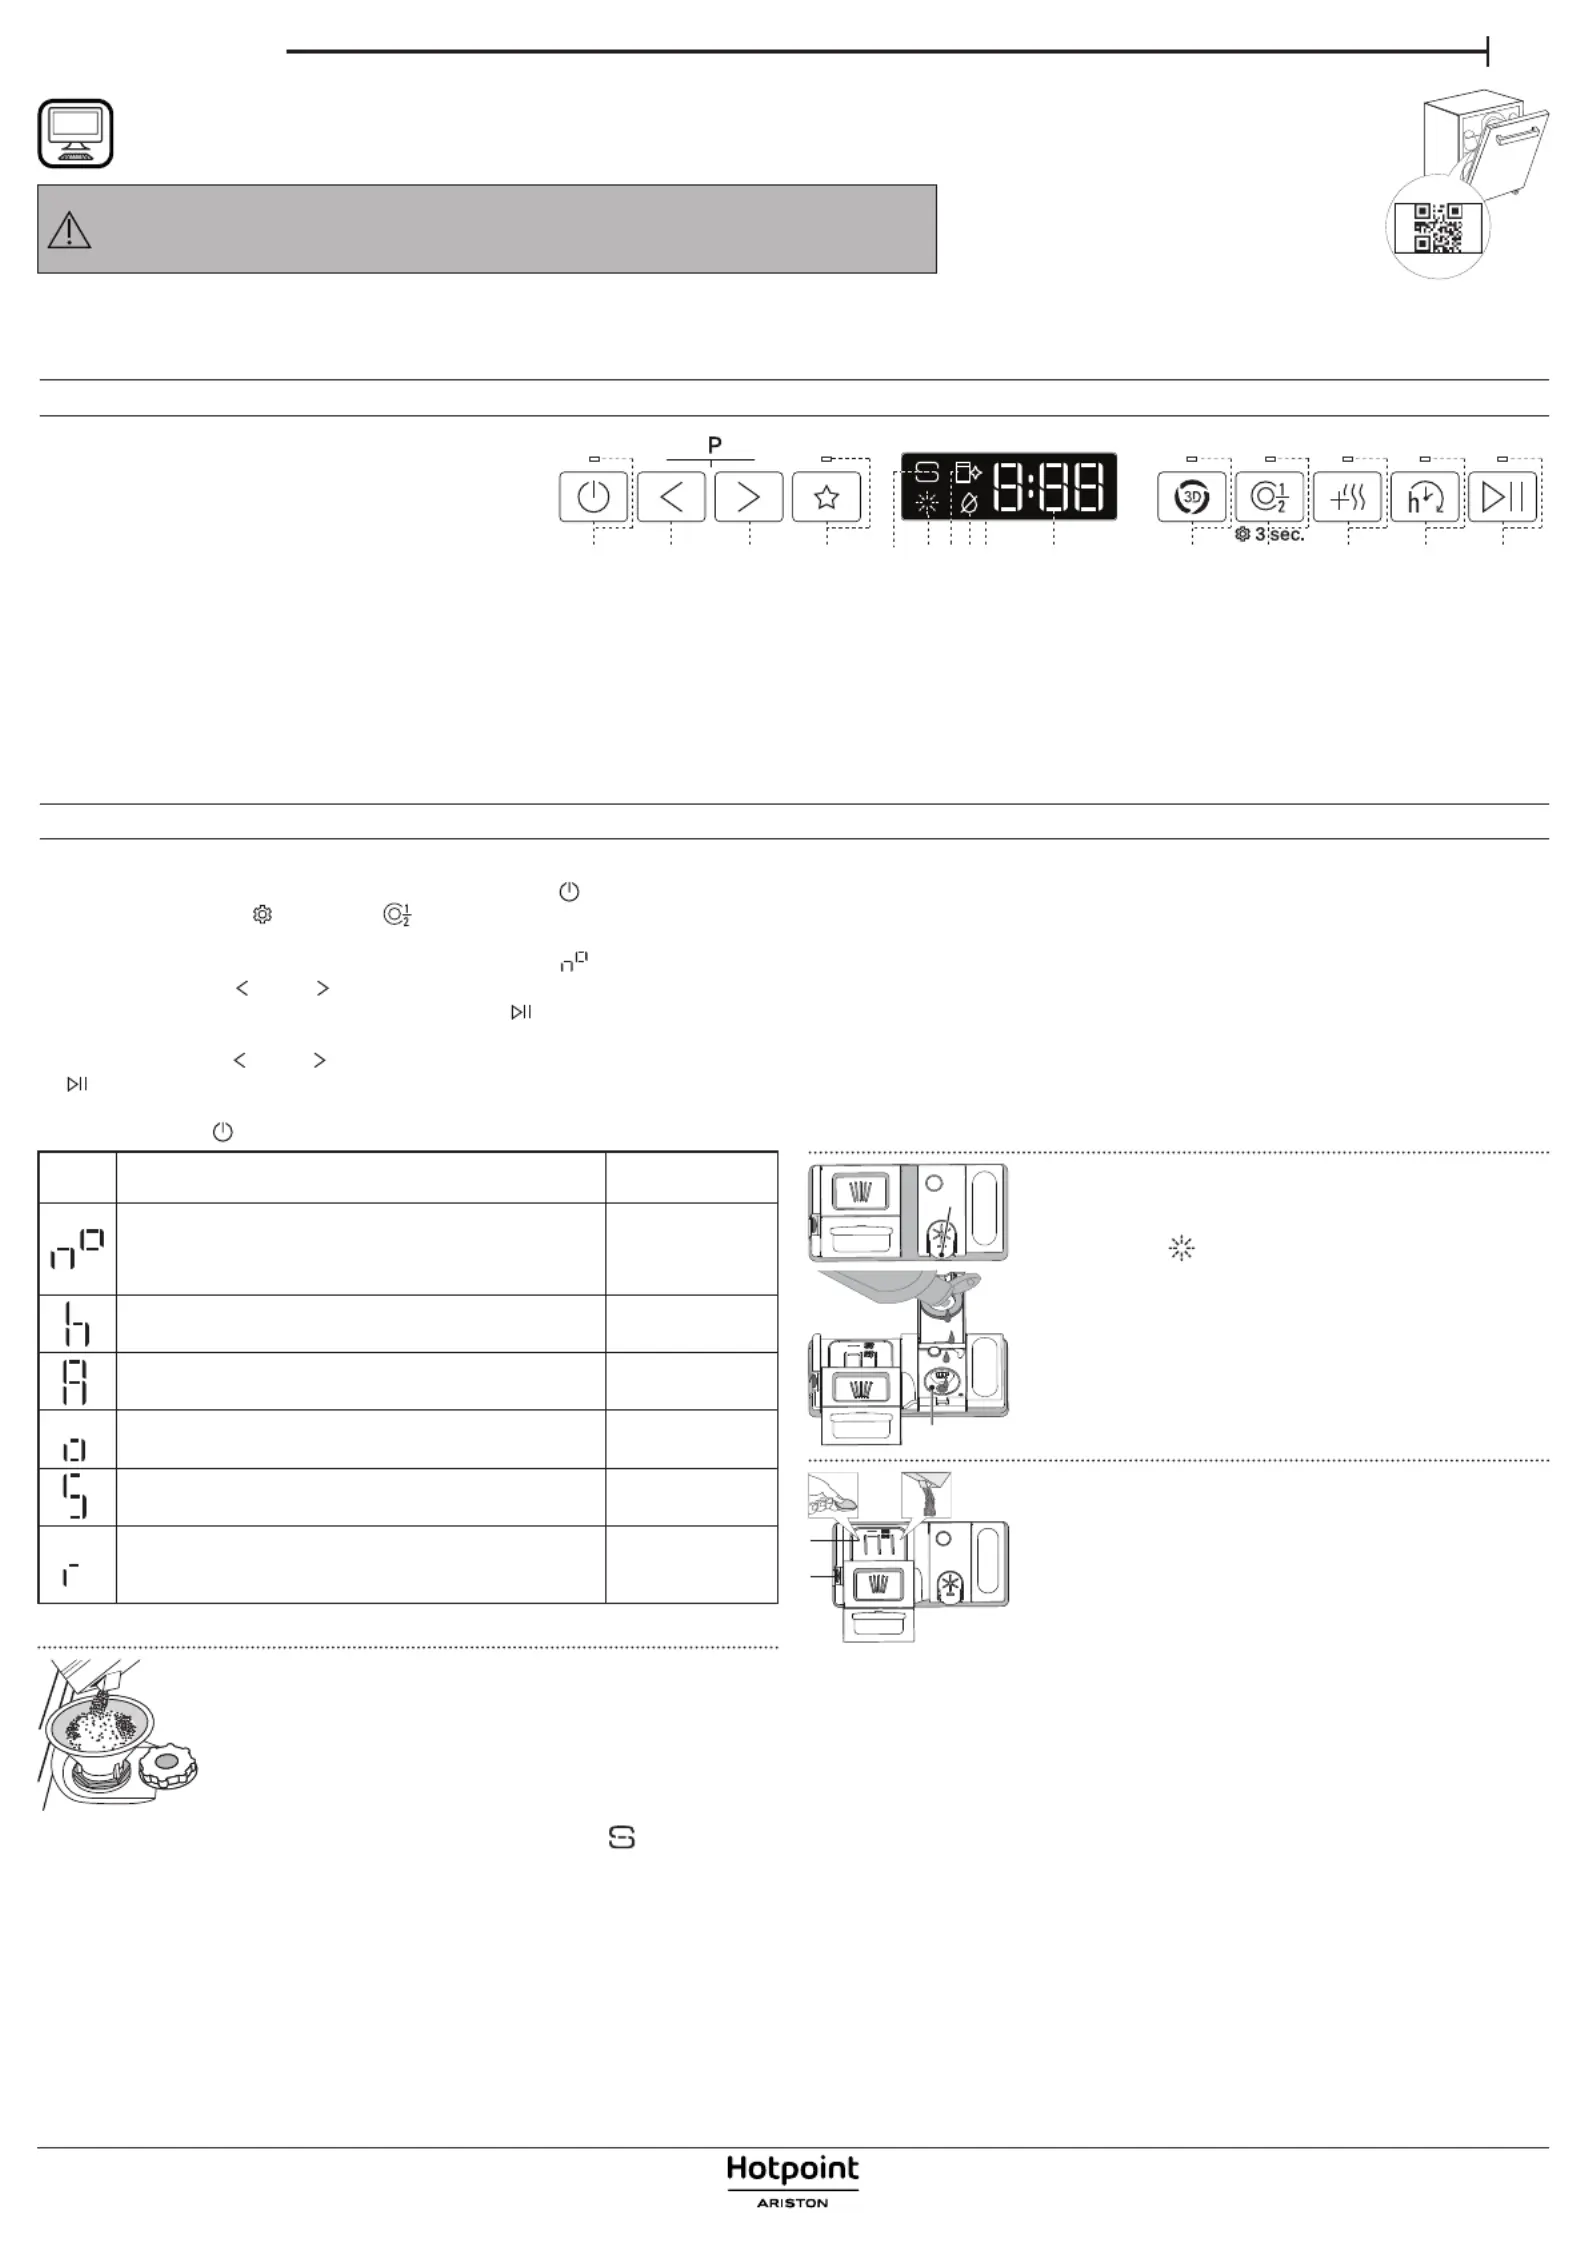
CONTROL PANEL
FIRST TIME USE
More information in the Daily Reference Guide on website.
Before using the appliance carefully read Safety and Installation Instructions.
After installation, please remember to remove all transport protection parts from
the dishwasher.
1. ON-OFF/Reset button with indicator light
2. PREVIOUSprogram button
3. NEXTprogram button
4. FAVOURITEprogram button
with indicator light
5. Salt reservoir empty indicator light
6. Rinse Aid reservoir empty indicator light
7. DESCALE indicator light
8. ClosedWater Tap indicator light
9. Display
10. Program numberremaining time and indicator
11. 3D Zone Wash option button with indicator light
12. Half Loadoption button with indicator light/ - 3 sec. pressSettings
13. Extra Dryoption button with indicator light
14. Delayoption button with indicator light
15. START/Pause button with indicator light
1234
111213
14
15
5678910
PLEASE SCAN THE
QR CODE ON YOUR
APPLIANCE IN
ORDER TO HAVE
MORE DETAILED
INFORMATION
Produktspecifikationer
| Varumärke: | Hotpoint |
| Kategori: | Diskmaskin |
| Modell: | HA6IC16B4M6H0 |
Behöver du hjälp?
Om du behöver hjälp med Hotpoint HA6IC16B4M6H0 ställ en fråga nedan och andra användare kommer att svara dig
Diskmaskin Hotpoint Manualer

13 Augusti 2025
3 Augusti 2025
29 Juli 2025
29 Juli 2025
19 Juli 2025
18 Juli 2025
18 Juli 2025
18 Juli 2025
7 Juli 2025
6 Juli 2025
Diskmaskin Manualer
Nyaste Diskmaskin Manualer
3 April 2026
2 April 2026
2 April 2026
2 April 2026
1 April 2026
1 April 2026
1 April 2026
1 April 2026
1 April 2026
1 April 2026