NightStick NSR-9940XL Bruksanvisning
NightStick Ficklampa NSR-9940XL
Läs gratis den bruksanvisning för NightStick NSR-9940XL (2 sidor) i kategorin Ficklampa. Guiden har ansetts hjälpsam av 34 personer och har ett genomsnittsbetyg på 4.7 stjärnor baserat på 7 recensioner. Har du en fråga om NightStick NSR-9940XL eller vill du ställa frågor till andra användare av produkten? Ställ en fråga
Sida 1/2
Bayco Products, Inc. • 640 South Sanden Blvd. • Wylie, TX 75098 • 1-800-233-2155 • 1-469-326-9400 • www.nightstick.com
INS-NSR-9940XL-21
Instruction Manual
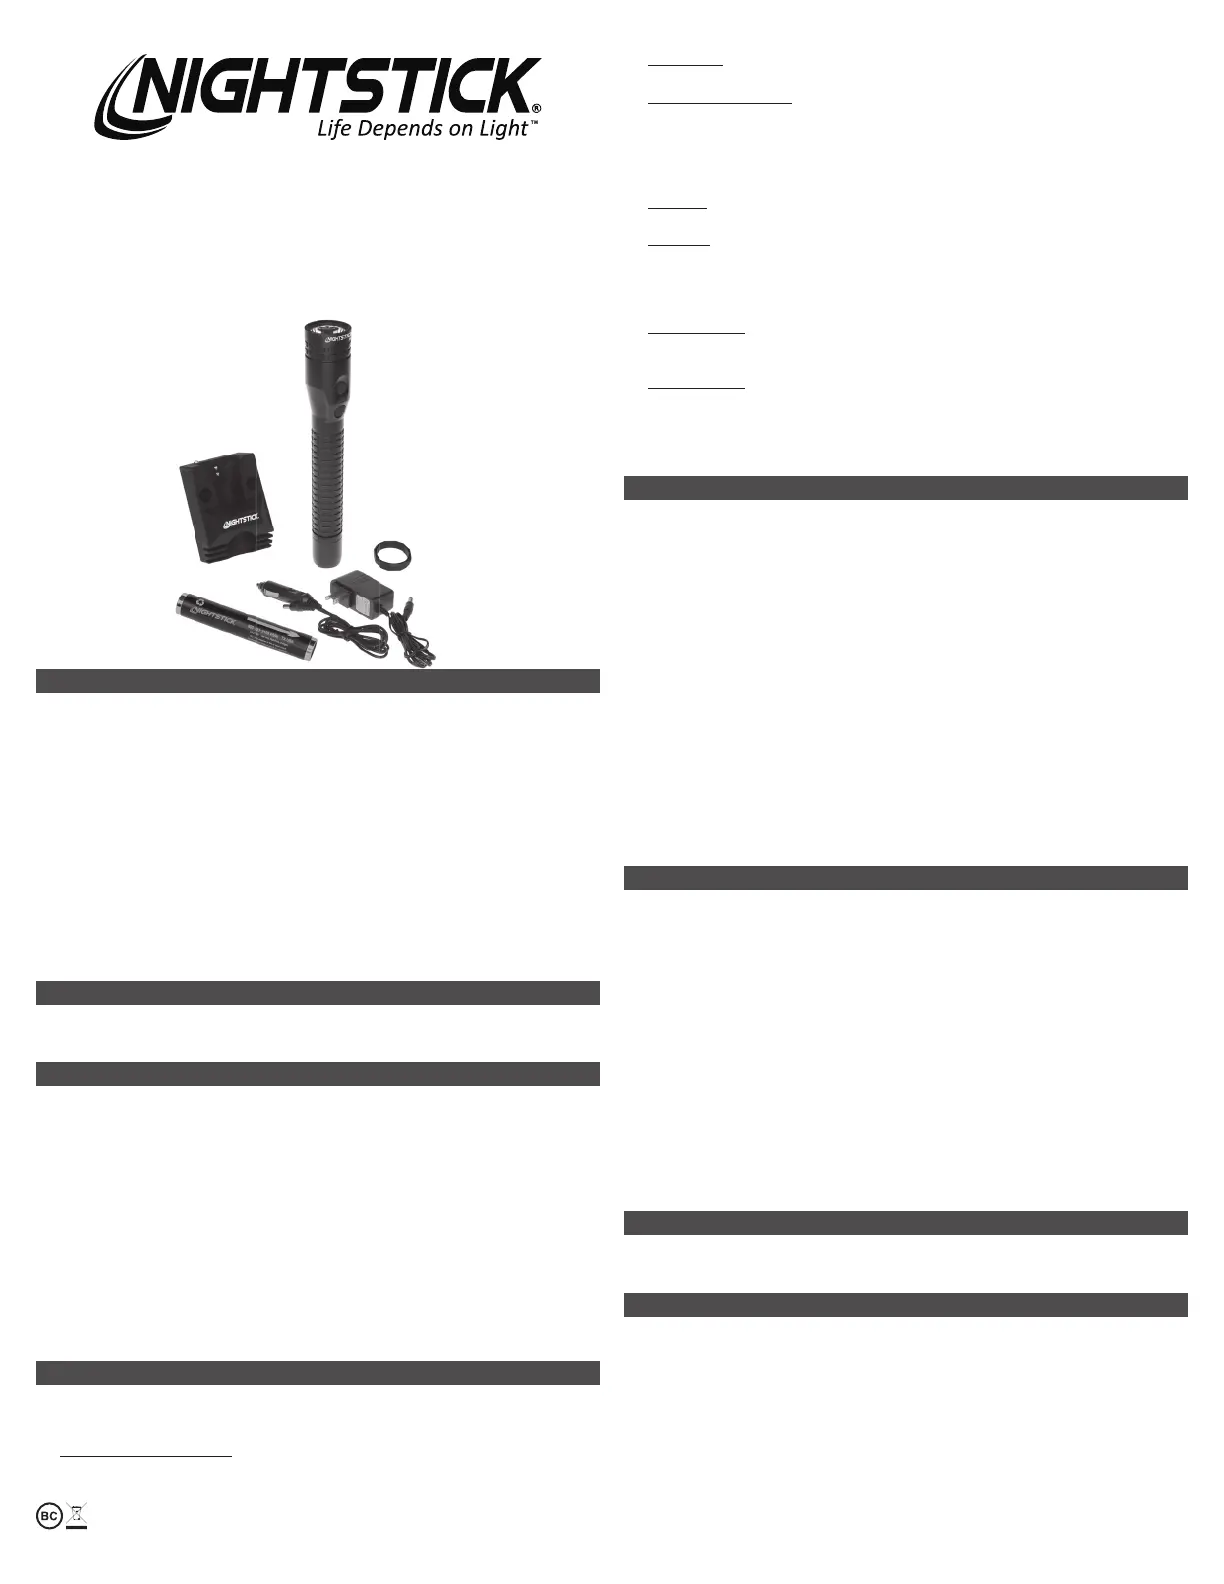
NSR-9940XL
US PATENT 9,713,217
Be sure to charge the 9940XL fully before the rst use. A battery is fully charged when the
charger light is green.
WARNINGS
yLithium-ion batteries must be used and charged properly. Improper use can result in
serious injury, re, or death.
yNOT FOR USE IN HAZARDOUS LOCATIONS. Do not use this product in explosive
atmospheres, near ammable liquids, or where explosion proof or intrinsically safe lighting
is required.
yDO NOT use this product in the proximity of vehicles or equipment when there is a risk of
ammable liquids coming into contact with the ashlight.
yLight can become hot while on. To prevent damage DO NOT cover or place next to any
potentially ammable materials while in use.
yDo not leave the battery in direct sunlight or use or store the battery inside cars in hot weather.
yDo not expose the battery to water or salt water, or allow the battery to get wet.
yDo not store the battery with metallic objects that may cause a short circuit.
yImmediately discontinue use of the battery if the battery emits an unusual smell, feels hot,
changes color, changes shape or appears abnormal in any way.
yKeep out of the reach of children.
INITIAL USE
Fully charge the 9940XL before the rst use, or if the battery is new or has been unused for
several months. The maximum charge time required is approximately 6 hours.
CHARGER INPUT: 12 VDC Max
DAILY USE
yUse only the supplied Nightstick charger, battery and AC or DC adapter. For best
performance, charge the 9940XL when the ashlight beam starts to dim.
yConnect the AC power adapter to the charger. The LED indicator will not be illuminated
at this point.
yWith the ashlight facing forward, snap the 9940XL into the charger until the contacts snap
into place.
yThe LED indicator changes to constant red indicating the 9940XL is properly inserted into
the charger and is in fact charging. The LED indicator remains red until the battery is fully
charged. At full charge, the LED indicator turns green.
yThe total time to full charge the 9940XL varies depending on the remaining charge in the
battery pack.
yTo con rm a full charge, keep the 9940XL in the charger and turn it on. The LED indicator
will change to red. Turn off the 9940XL. If the 9940XL is fully charged, the LED indicator will
turn green. If not, it remains red until the charge is completed and the LED indicator turns
green. The 9940XL will now be fully charged.
OPERATION
The 9940 has seven light modes: momentary ashlight, full brightness ashlight, medium
brightness ashlight, low brightness ashlight, oodlight, dual-light and strobe. The 9940 has
two body switches providing access to all modes.
Momentary Flashlight Mode: Lightly press the top body switch or the tail-cap switch for
momentary operation. Release the switch to turn the light off.
Constant-on: Press the top body switch or the tail-cap switch until it clicks and then release
for constant-on in high-brightness mode. Press and release either switch to turn the light off.
Select Brightness Level: Press and hold down the top body switch or the tail-cap switch.
The light will cycle from high to medium to low and then back up again at a rate of approximately
one mode per second. The light will continue to cycle up and down through the various modes
as long as the switch is held down. When the desired brightness level is reached, simply
release the switch, and the light will remain in that brightness mode. Press and release either
switch to turn the light off.
Floodlight: Press the bottom body switch until it clicks and then release for oodlight mode.
Press and release the bottom body switch again to turn the light off.
Dual-Light: Dual-Light allows the user to turn on both the Flashlight (at any brightness
level) and the Floodlight, at the same time. First select the appropriate brightness level of the
ashlight using the directions above. Next press and release the bottom switch to activate the
oodlight. Both the Flashlight and the Floodlight are now running. Press and release both the
top/tail-cap and bottom body switches to turn the light off.
Strobe Function: From off or any mode, rapidly double click the top body switch or the tail-
cap switch to activate the strobe function running at full brightness. Press and release either
switch to turn the light off.
Strobe Warning: Exposure to strobing lights may cause dizziness, disorientation, and
nausea. A very small percentage of people suffer from photosensitive epilepsy and may
experience seizures or blackouts triggered by strobing lights. For more information from the
EPILEPSY FOUNDATION about photosensitivity and seizures, please visit www.epilepsy.
com. Anyone who has had symptoms linked to this condition should consult a doctor before
using this product.
WARRANTY
LIMITED LIFETIME WARRANTY
Bayco Products, Inc. warrants this product to be free from defects in workmanship and
materials for the original purchaser’s lifetime. The Limited Lifetime Warranty includes the
LEDs, housing and lenses. Rechargeable batteries, chargers, switches, electronics and
included accessories are warranted for a period of two years with proof of purchase. Normal
wear and failures which are caused by accidents, misuse, abuse, faulty installation and
lightning damage are excluded.
We will repair or replace this product should we determine it to be defective. This is the
only warranty, expressed or implied, including any warranty of merchantability or tness for a
particular purpose.
For a complete copy of the warranty, go to www.baycoproducts.com/bayco-product-
support/warranties. Retain your receipt for proof of purchase.
Mode d’emploi
NSR-9940XL
Assurez-vous de charger la 9940XL à bloc avant de l’utiliser pour la première fois. La
batterie est chargée à bloc quand le voyant du chargeur est vert.
AVERTISSEMENTS
yLes batteries au lithium-ion doivent être utilisées et rechargées correctement. Une
mauvaise utilisation peut causer des blessures graves, un incendie ou la mort.
yNE PAS UTILISER DANS DES ENDROITS DANGEREUX. Ne pas utiliser ce produit dans
des atmosphères explosibles, à proximité de liquides in ammables, ou un endroit antidé agrant
ou un emplacement dont un éclairage à sécurité intrinsèque est requis.
yNE PAS utiliser ce produit à proximité de véhicules ou équipements quand il y a risque de
liquides in ammables entrant en contact avec la lampe de poche.
yLa lumière peut être chaude lorsqu’elle est allumée. Pour éviter tout dommage NE PAS
couvrir ou placer à proximité de matériaux potentiellement in ammables pendant qu’elle est
allumée.
yNe pas laisser la batterie en contact direct avec les rayons de soleil ou utiliser ou conserver la
batterie à l’intérieur des autos lorsqu’il fait chaud.
yNe pas mettre la batterie dans l’eau ou l’eau salée. La batterie ne doit jamais être mouillée.
yNe pas conserver la batterie avec des objets métalliques qui peuvent causer un court-circuit.
yCesser immédiatement d’utiliser la batterie si elle émet une odeur inhabituelle, semble
chaude, change de couleur ou de forme ou paraît anormal.
yGarder hors de la portée des enfants.
UTILISATION INITIALE
Chargez la 9940XL à bloc avant la première utilisation ou si la batterie est neuve ou n’a pas
été utilisée depuis plusieurs mois. La durée maximale de charge requise est d’environ 6 heures.
ENTRÉE CHARGEUR: 12 VDC Max
UTILISATION QUOTIDIENNE
yUtilisez exclusivement le chargeur, la batterie et l’adaptateur c.a ou c.c Nightstick fournis.
Pour de meilleurs résultats, chargez la torche électrique 9940XL quand le faisceau lumineux
commence à s’affaiblir.
yConnectez l’adaptateur de courant c.a. au chargeur. Le voyant LED ne sera alors pas allumé.
yLa torche électrique orientée vers l’avant, faites glisser la 9940XL dans le chargeur jusqu’à
ce que les contacts s’emboîtent.
yLe voyant LED passe au rouge, ce qui indique que la 9940XL est correctement insérée
Produktspecifikationer
| Varumärke: | NightStick |
| Kategori: | Ficklampa |
| Modell: | NSR-9940XL |
Behöver du hjälp?
Om du behöver hjälp med NightStick NSR-9940XL ställ en fråga nedan och andra användare kommer att svara dig
Ficklampa NightStick Manualer

6 Oktober 2025
6 Oktober 2025
6 Oktober 2025
6 Oktober 2025
6 Oktober 2025
6 Oktober 2025
6 Oktober 2025
6 Oktober 2025
6 Oktober 2025
6 Oktober 2025
Ficklampa Manualer
Nyaste Ficklampa Manualer
12 Mars 2026
11 Mars 2026
3 Mars 2026
2 Mars 2026
26 Februari 2026
23 Februari 2026
4 Februari 2026
4 Februari 2026
3 Februari 2026
1 Februari 2026