Noctua NF-A14x25 G2 LS-PWM Bruksanvisning
Noctua kylsystem för dator NF-A14x25 G2 LS-PWM
Läs gratis den bruksanvisning för Noctua NF-A14x25 G2 LS-PWM (2 sidor) i kategorin kylsystem för dator. Guiden har ansetts hjälpsam av 57 personer och har ett genomsnittsbetyg på 4.9 stjärnor baserat på 6 recensioner. Har du en fråga om Noctua NF-A14x25 G2 LS-PWM eller vill du ställa frågor till andra användare av produkten? Ställ en fråga
Sida 1/2
Scan this code to display
multilingual manuals on
your phone.
NOCTUA NF-A14x25 G2 LS-PWM
INSTALLATION MANUAL
Caution: Do not overtighten radiator screws! The total
compressive load on all 4 screws must not exceed 30kg
(equivalent to ~0.15 − 0.25Nm torque with typical
M3 or UNC 6-32 screws). Be extra careful with M4 or fine
threads as they can produce a higher compressive load with
lower torque.
Caution: Please remove the protective paper from the inside
of the fan frame before use.
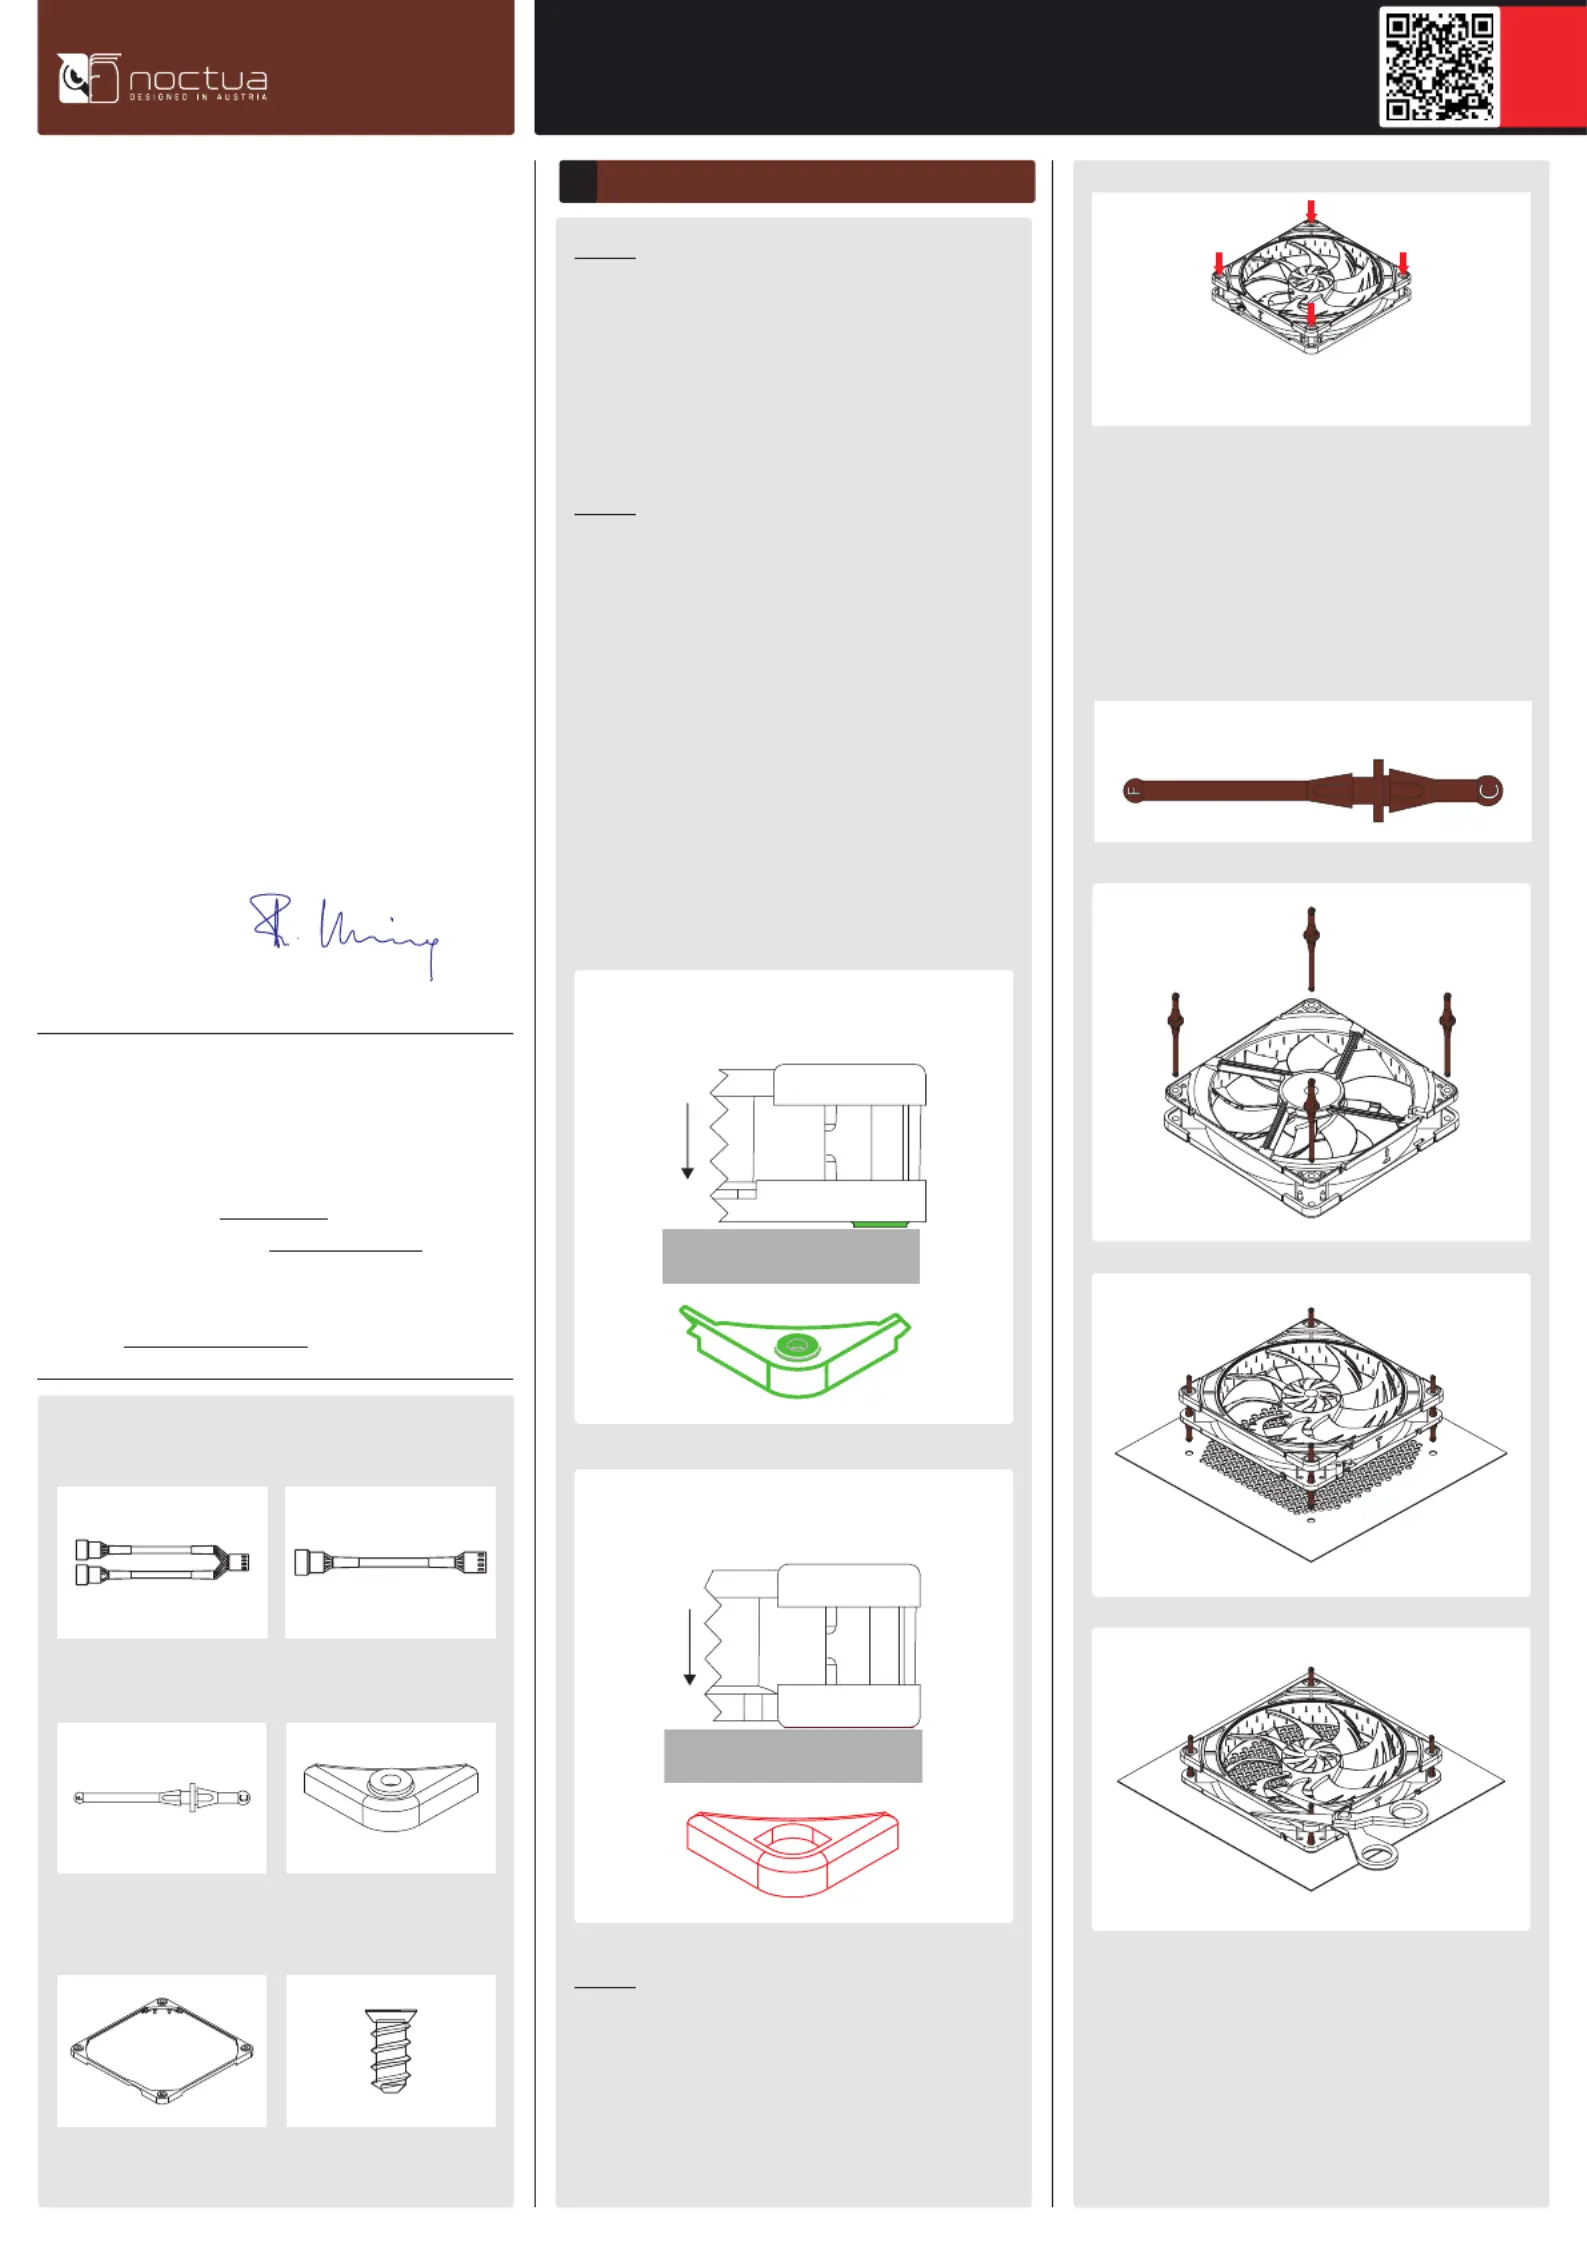
For installing the NF-A14x25 G2 LS-PWM on a CPU
heatsink or watercooling radiator, please use the fan
mounting mechanism supplied with said product (fan clips,
screws, etc.).
Caution: The NF-A14x25 G2 is a high-precision device with
extremely strict tolerances. Therefore, it is critical to avoid
excessive forces acting onto the frame when installing the
fan on water cooling radiators:
On the outlet side of the fan, only use anti-vibration pads
and gaskets with rings around the mounting hole when
installing the fan with the outlet side facing the radiator
(“push” orientation). These rings reduce the load onto the
frame significantly.
Do not use pads or gaskets without load-relief rings on the
outlet side of the fan in “push” configurations! On the inlet
side, both types can be used.
When installing the NF-A14x25 G2 LS-PWM as a case fan,
you can either use the supplied mounting screws or NA-AV2
silicone anti-vibration mounts.
For installing the fan using the NA-AV2 mounts, please first
pull the F side through the fan’s mounting holes and then
pull the C side through the mounting holes of the case:
F = fan side C = case side
NO
Inlet side: regular pads
Application
(e.g. radiator)
Outlet side: gasket or pads
with load-relief rings
Inlet side: regular pads
Airow
Airow
Application
(e.g. radiator)
Outlet side: regular pads
YES
Installation
1
7.5kg max. compressive load
per screw (30kg total)
If the long ends of the mounts are in the way, you can use
scissors to cut them after installation. Note that this will
then make them difficult to reinstall in the future.
If you prefer anti-vibration mounts with flat case-side ends,
please purchase the optional NA-AV4 mounts.
This document includes some instructions for installing,
running and cleaning your NF-A14x25 G2 LS-PWM.
Should you encounter any difficulties, please check the
FAQs on our website (faqs.noctua.at) and don’t hesitate to
contact our support team at support@noctua.at.
Multilingual versions of this manual are available on our
website: www.noctua.at/manuals
Dear customer,
Thank you very much for choosing the Noctua NF-A14x25
G2 LS-PWM.
Our fans are renowned for their impeccable quality and
outstanding longevity and like all Noctua fans, the
NF-A14x25 G2 LS-PWM features an MTTF rating of more
than 150,000 hours that’s backed up with our 6-year
manufacturer’s warranty.
Each Noctua fan is double-checked for flawless operation
by our quality control team before it leaves the factory and
I’m confident that you will be able to sense some of the
research, attention and care we’ve put into making this
product.
Enjoy your NF-A14x25 G2 LS-PWM!
Yours sincerely,
Roland Mossig, Noctua CEO
Included mounting parts:
NA-RC9
Low-Noise Adaptor (L.N.A.)
4x NA-AVP1-LR
load-relief anti-vibration pads
(pre-installed)
4x NA-AV2
anti-vibration mounts
NA-YC1
4-pin PWM splitter cable
NA-AVG2-LR
anti-vibration gasket
4x fan screws
Produktspecifikationer
| Varumärke: | Noctua |
| Kategori: | kylsystem för dator |
| Modell: | NF-A14x25 G2 LS-PWM |
Behöver du hjälp?
Om du behöver hjälp med Noctua NF-A14x25 G2 LS-PWM ställ en fråga nedan och andra användare kommer att svara dig
kylsystem för dator Noctua Manualer

13 Augusti 2025
16 Juli 2025
16 Juli 2025
16 Juli 2025
16 Juli 2025
15 Juli 2025
15 Juli 2025
14 Juli 2025
kylsystem för dator Manualer
Nyaste kylsystem för dator Manualer
26 Mars 2026
25 Mars 2026
25 Mars 2026
21 Mars 2026
19 Mars 2026
18 Mars 2026
17 Mars 2026
17 Mars 2026
16 Mars 2026
16 Mars 2026