Pryme BLU BT-523-V2 Bruksanvisning
Pryme
ej kategoriserat
BLU BT-523-V2
Läs gratis den bruksanvisning för Pryme BLU BT-523-V2 (2 sidor) i kategorin ej kategoriserat. Guiden har ansetts hjälpsam av 23 personer och har ett genomsnittsbetyg på 3.6 stjärnor baserat på 12 recensioner. Har du en fråga om Pryme BLU BT-523-V2 eller vill du ställa frågor till andra användare av produkten? Ställ en fråga
Sida 1/2

Pairing with a Wireless PTT Button
The PRYMEBLU Advanced Adapter is compatible
with a few different wireless PTT buttons:
• PRYMEBLU BT-PTT2, which uses conventional BT.
• PRYMEBLU BT-PTT-Z or PRYMEBLU BT-PTT-ZU, which use a
special form of BT called BT Low Energy (BLE).
To pair the adapter with a PTT button, follow these steps:
* Power off any wireless headset or audio accessory that
has previously been paired to the PRYMEBLU Advanced Adapter.
* Power off the BT PTT button that you intent to use with the PRYMEBLU Advanced Adapter.
* Power off the radio that the PRYMEBLU Advanced Adapter is connected to. Wait at least three seconds.
* Turn the radio on while holding down the Talk button on the PRYMEBLU Advanced Adapter.
* Continue to hold the Talk button down until the status LED begins to flash two times per second.
(You may need to angle your finger off to the side of the Talk button to see the LED.) Note that the
LED on the adapter may show several single flashes before shows double flashes. This can take
approximately three to five seconds.
* Release the Talk button. The PRYMEBLU Advanced Adapter is now in audio accessory pairing mode.
To enter PTT pairing mode, proceed to the next step.
* Press and release the Talk button again. The LED on the PRYMEBLU Advanced Adapter will now change
to three flashes per second. The PRYMEBLU Advanced Adapter is now in Push-to-Talk pairing mode.
* IF YOU ARE USING A CONVENTIONAL PTT BUTTON (BT-PTT2): Place the button into pairing mode by
pressing down the PTT button and pressing the power switch. Continue to hold the button down
until the LED on the BT-PTT2 flashes two times per second.
* IF YOU ARE USING A BT LOW ENERGY BUTTON (BT-PTT-Z, BT-PTT-ZU): Power the button on
using the slide switch and then press and release the PTT button two to three times.
* Keep the PRYMEBLU Advanced Adapter and wireless PTT button close to each other and wait a few seconds.
* Once the devices are paired with each other, the LED on the PRYMEBLU Advanced Adapter will revert to
one flash every second.
* You can now power back on the headset or audio accessory that you previously paired with the
PRYMEBLU Advanced Adapter and let it reconnect.
* Once the audio accessory has reconnected, pressing the PTT on the wireless button will cause the radio
to transmit.
Reconnecting to a Previously Paired Headset or PTT Button
Once the PRYMEBLU Advanced Adapter has been successfully paired to a wireless audio accessory and/or
PTT button, it will remember that connection. You only need to complete the pairing process for each
device once.
If the wireless accessory is powered off or loses connection, the adapter will attempt to re-establish the
link as long as both turned on and in within range of each other. Re-establishing this connection can take
10-60 seconds.
QUICK START
1. Connect the PRYMEBLU Radio Adapter to a compatible two-way radio.
2. Pair the PRYMEBLU Radio Adapter with a compatible wireless audio accessory.
3. Pair a PRYMEBLU Wireless Push-to-Talk button with the PRYMEBLU Advanced Adapter (optional).
4. Connect a wired Push-to-Talk button or wired audio accessory to the Quick-Disconnect accessory
port on the PRYMEBLU Radio Adapter (optional).
5. Test and use.
2
3 4
Advanced BT Adapter
Applicable Models: All multipin BT-5xx-V2 models
Made in Taiwan
FCC ID: N2E-xxxxx
PRYME® and PRYMEBLU® are trademarks owned by PRYME Radio Products,
Brea CA. All other product or service names are the property of their respective owners.
© 2021 PRYME Radio Products, Brea CA. All Rights Reserved
Federal Communication Commission Interference Statement
Federal Communication Commission Interference Statement
This equipment has been tested and found to comply with the limits for a Class B
digital device, pursuant to Part 15 of the FCC Rules. These limits are designed to
provide reasonable protection against harmful interference in a residential
installation. This equipment generates uses and can radiate radio frequency
energy and, if not installed and used in accordance with the instructions, may
cause harmful interference to radio communications. However, there is no
guarantee that interference will not occur in a particular installation. If this
equipment does cause harmful interference to radio or television reception, which
can be determined by turning the equipment off and on, the user is encouraged to
try to correct the interference by one of the following measures:
-Reorient or relocate the receiving antenna.
-Increase the separation between the equipment and receiver.
-Connect the equipment into an outlet on a circuit different from that to which
the receiver is connected.
-Consult the dealer or an experienced radio/TV technician for help.
FCC Caution: Any changes or modifications not expressly approved by the party
responsible for compliance could void the user's authority to operate this
equipment.
This device complies with Part 15 of the FCC Rules. Operation is subject to the
following two conditions: (1) This device may not cause harmful interference, and
(2) this device must accept any interference received, including interference that
may cause undesired operation.
This equipment complies with FCC RF radiation exposure limits set forth for an
uncontrolled environment. To maintain compliance with FCC RF exposure
compliance requirements, please avoid direct contact to the transmitting antenna
during transmitting.
RF Exposure Warning!
Please keep product 20cm away from your
body or bystander during the radio operation.
The typical handheld two-way radios were
certified under mobile usage condition
(i.e. keep 20cm away from the user body)
and use of such radio closer than 20cm may
exceed the US RF exposure limit
and shall be avoided.
Version 2.00 FEBRUARY 2021
911 Mariner St., Brea, CA 92821
PH: 714.257.0300 FAX: 714.257.0600
TOLL FREE: 800.666.2654
WWW.PRYME.COM
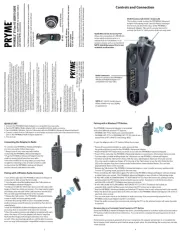
Controls and Connection
Radio Connector
This port connects the PRYMEBLU
Advanced AdapterAdapter to a
compatible two-way radio.
NOTE: BT-583-V2 model shown.
Other models may vary slightly
in appearance.
Multi-Function Talk Switch / Status LED
This button is used to place the PRYMEBLU Advanced
Adapter into pairing mode. The LED flashes messages
that let the user knowthe status of the PRYMEBLU
Advanced Adapter. This switch can also be used to
activate the Push-To-Talk function of the two-way radio.
BT-583
BT-PTT-Z (mini)
(Optional Push-To-Talk button sold separately.)
PRYMEBLU® BT-5xx-V2 USER’S GUIDE
ADVANCED BT ADAPTER portable radios for
with MULTIPIN connectors
The PRYMEBLU advanced adapter allows you to use a compatible
wireless headset or other audio accessory with your
portable two-way radio.
Quick Disconnect Accessory Port
Allows the connection of a PRYME QD
series wired accessory such as a
remote Push-to-Talk button, or an
audio accessory such as an earphone.
NOTE: Quick Disconnect Port is not
available on all models.
Connecting the Adapter to Radio
To connect your PRYMEBLU Advanced Adapter
to a two-way radio, follow these steps:
* Always turn off your two-way radio before
connecting the PRYMEBLU Advanced Adapter.
* Plug the PRYMEBLU Advanced Adapter into the
audio accessory jack of your two-way radio.
* On some models of two-way radio, you may need
to tighten a retaining screw or fasten a latch in order
to ensure that the PRYMEBLU Advanced Adapter
remains securely attached to the radio
Pairing with a Wireless Audio A essorycc
* Turn off the radio that the PRYMEBLU Advanced Adapter is
connected to. Wait at least three seconds.
* Turn the radio on while holding down the Talk button on
the PRYMEBLU Advanced Adapter.
* Continue to hold the Talk button down until the status LED
begins to flash two times per second. (You may need to angle
your finger off to the side of the Talk button to see the LED.)
This can take approximately three to five seconds.
* Release the Talk button. The PRYMEBLU Advanced Adapter
is now in audio accessory pairing mode.
* Activate the pairing mode on your compatible wireless
audio accessory using the process provided by that device’s
manufacturer.
* Keep the PRYMEBLU Advanced Adapter and wireless audio
accessory close to each other and wait a few seconds.
* Once the audio accessory and adapter are paired with each
other, the status LED on the adapter will show a long blue
flash and then begin to flash approximately once every
second. Once successfully paired, you will be able to operate
your two-way radio using your compatible wireless accessory.
Produktspecifikationer
| Varumärke: | Pryme |
| Kategori: | ej kategoriserat |
| Modell: | BLU BT-523-V2 |
Behöver du hjälp?
Om du behöver hjälp med Pryme BLU BT-523-V2 ställ en fråga nedan och andra användare kommer att svara dig
ej kategoriserat Pryme Manualer
18 Augusti 2025
18 Augusti 2025
18 Augusti 2025
18 Augusti 2025
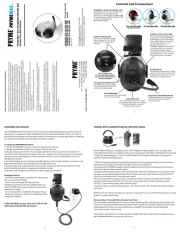
1 Juli 2025
12 Juni 2025
ej kategoriserat Manualer
- Kaiser
- Beaba
- AXTRA
- BMAX
- Toshiba
- Creality
- Smart-AVI
- Active Intent Fitness
- AmpliVox
- Seaga
- Jupio
- Start International
- S.M.S.L
- High One
- Easymaxx
Nyaste ej kategoriserat Manualer

23 Oktober 2025
23 Oktober 2025
23 Oktober 2025
23 Oktober 2025
23 Oktober 2025

23 Oktober 2025

23 Oktober 2025

23 Oktober 2025
23 Oktober 2025
23 Oktober 2025