Reflecta 23122 Bruksanvisning
Reflecta Platt panelstöd 23122
Läs gratis den bruksanvisning för Reflecta 23122 (7 sidor) i kategorin Platt panelstöd. Guiden har ansetts hjälpsam av 8 personer och har ett genomsnittsbetyg på 4.0 stjärnor baserat på 4 recensioner. Har du en fråga om Reflecta 23122 eller vill du ställa frågor till andra användare av produkten? Ställ en fråga
Sida 1/7
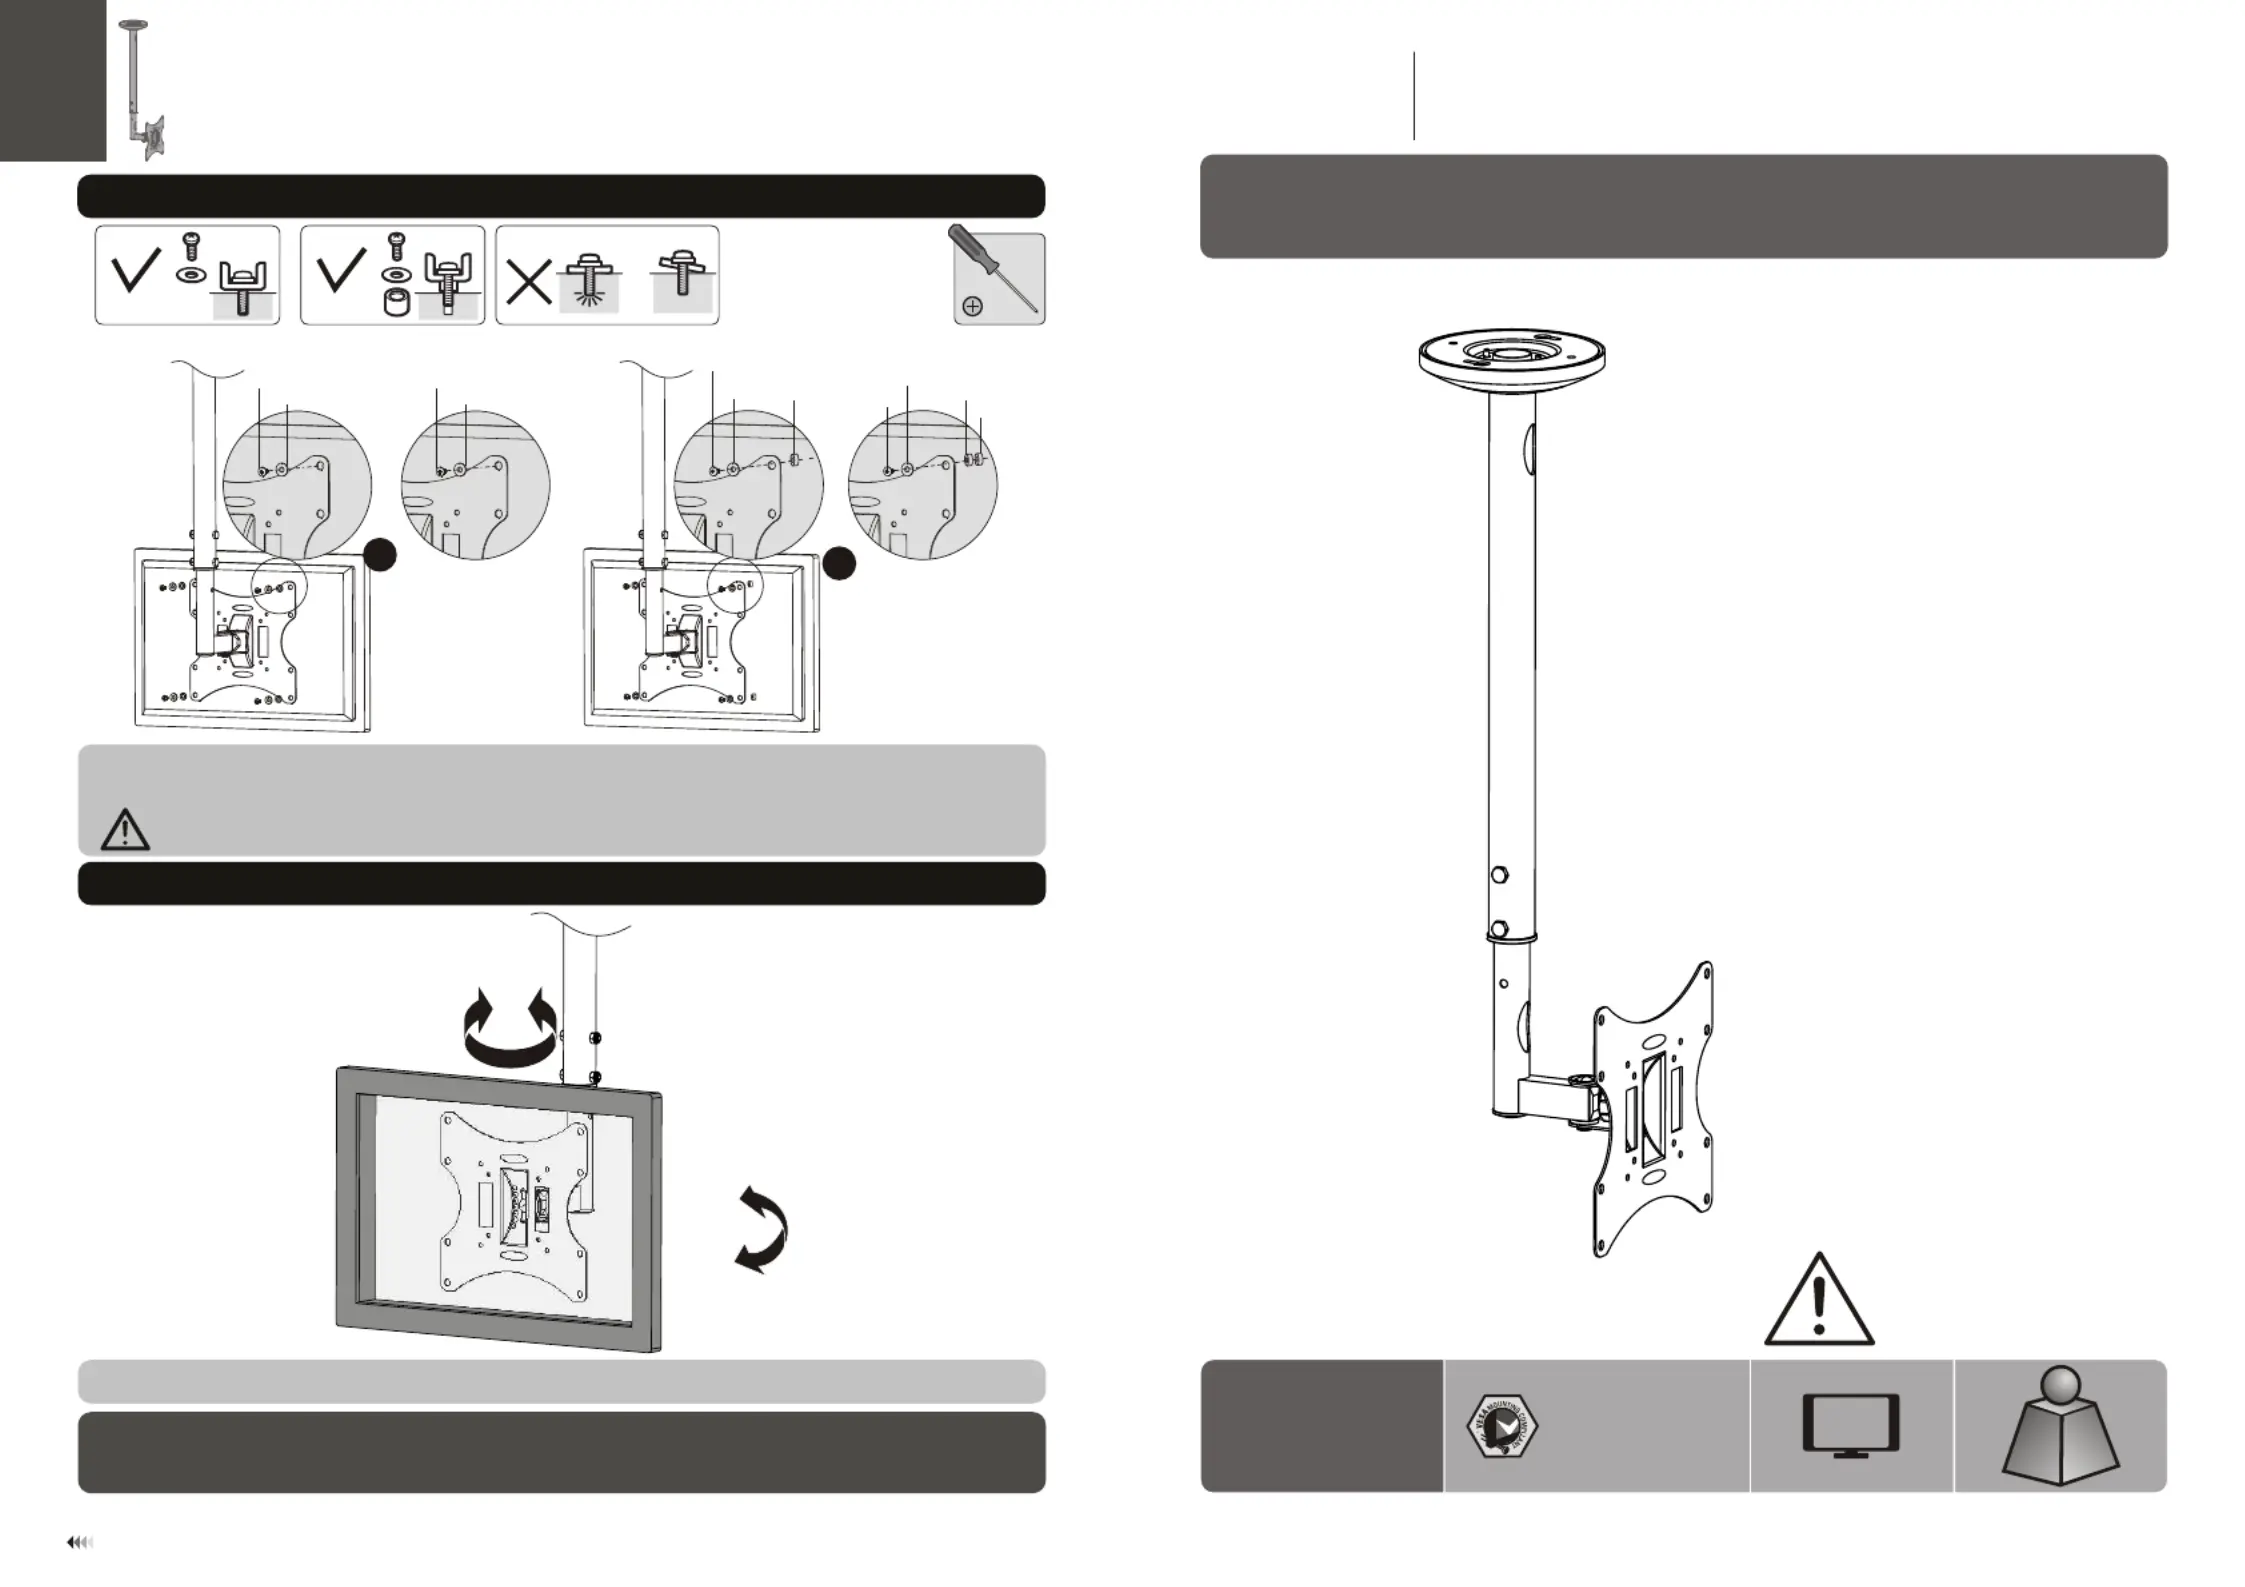
6. Installing the Display
INSTALLATION MANUAL
LCD Ceiling Mount
23122
42"
MAX
75x75/100x100
200x100/200x200
ISSUED: MAY. 2015
3
3
3
30
0
0
0k
k
k
kg
g
g
g
(
(
(
(6
6
6
66
6
6
6l
l
l
lb
b
b
bs
s
s
s)
)
)
)
R
R
R
RATE
ATE
ATE
ATED
D
D
D
30kg
(66lbs)
RATED
7. Adjustment
Use the tilt adjusting knob to adjust your display to the desired angle then tighten it.
Maintenance
• Check that the bracket is secure and safe to use at regular intervals(at least every three months).
• Please contact your dealer if you have any questions.
M-A
M-B
M-E
180°
+20°
-20°
Tighten all screws but do not over tighten.
Lift the display and match the holes on your display with the holes on the mount. Secure your display to
the mount by tightening screws.
Note: Choose the appropriate screws, washers and spacers (if necessary) according to the type of screen.
M-D
M-F
M-G
M-G
M-D
M-F
M-G
TV
TV
TVTV
M-C
M-D
M-F
or
or
7
CAUTION:DO NOT EXCEED
RATED LISTED WEIGHT. SERIOUS
INJURY OR PROPERTY DAMAGE
MAY OCCUR!
reflecta gmbh
Merkurstrasse 8
72184 Eutingen i.G.
Germany
mail@reflecta.de
www.reflecta.de
Produktspecifikationer
| Varumärke: | Reflecta |
| Kategori: | Platt panelstöd |
| Modell: | 23122 |
| Färg på produkten: | Blue, Grey |
| Vikt: | 190 g |
| Bredd: | 72.5 mm |
| Snäll: | Draagbare streepjescodelezer |
| Internationell säkerhetskod (IP): | IP30 |
| Typ av strömkälla: | USB |
| Inspänning: | 5 V |
| Förvaringstemperatur: | -20 - 60 °C |
| Streckkoder som stöds (1D): | Code 128, Code 39, Code 93, EAN 2, EAN 5, EAN-13, EAN-8, MSI, Plessey, Telepen, U.P.C. |
| Standardgränssnitt: | USB |
| Rotationsvinkel: | 90 ° |
| Drifttemperatur (TT): | 0 - 50 °C |
| Relativ luftfuktighet i drift (VV): | 0 - 95 procent |
| Maximal skärmstorlek: | 37 " |
| Minsta skärmstorlek: | 17 " |
| 2D (matris och staplade) streckkoder stöds: | Aztec Code, Codablock, Data Matrix |
| Ljusnivåer (direkt solljus): | 0 - 100000 Lux |
| Arbetsavstånd: | 34 mm |
| Optisk sensorupplösning: | - Pixels |
| Lutningsvinkel: | -20 - 20 ° |
| Maxvikt: | 30 kg |
| Produktens färg: | Silver |
| Monteringssätt: | Tak |
| Gränsssnitt för panelmontering: | 50 x 50,75 x 75,100 x 100,200 x 100,200 x 200 mm |
| Antal displayer som stöds: | 1 |
| Monteringsgränssnitt kompatibilitet (min): | 50 x 50 mm |
| Monteringsgränssnitt kompatibilitet (max): | 200 x 200 mm |
Behöver du hjälp?
Om du behöver hjälp med Reflecta 23122 ställ en fråga nedan och andra användare kommer att svara dig
Platt panelstöd Reflecta Manualer

4 Augusti 2024
28 Juli 2024
Platt panelstöd Manualer
Nyaste Platt panelstöd Manualer
8 April 2025
3 April 2025
3 April 2025
3 April 2025
3 April 2025
3 April 2025
3 April 2025
3 April 2025
3 April 2025
3 April 2025