Russound CA4-KP Bruksanvisning
Russound Inte kategoriserad CA4-KP
Läs gratis den bruksanvisning för Russound CA4-KP (2 sidor) i kategorin Inte kategoriserad. Guiden har ansetts hjälpsam av 50 personer och har ett genomsnittsbetyg på 5.0 stjärnor baserat på 9 recensioner. Har du en fråga om Russound CA4-KP eller vill du ställa frågor till andra användare av produkten? Ställ en fråga
Sida 1/2
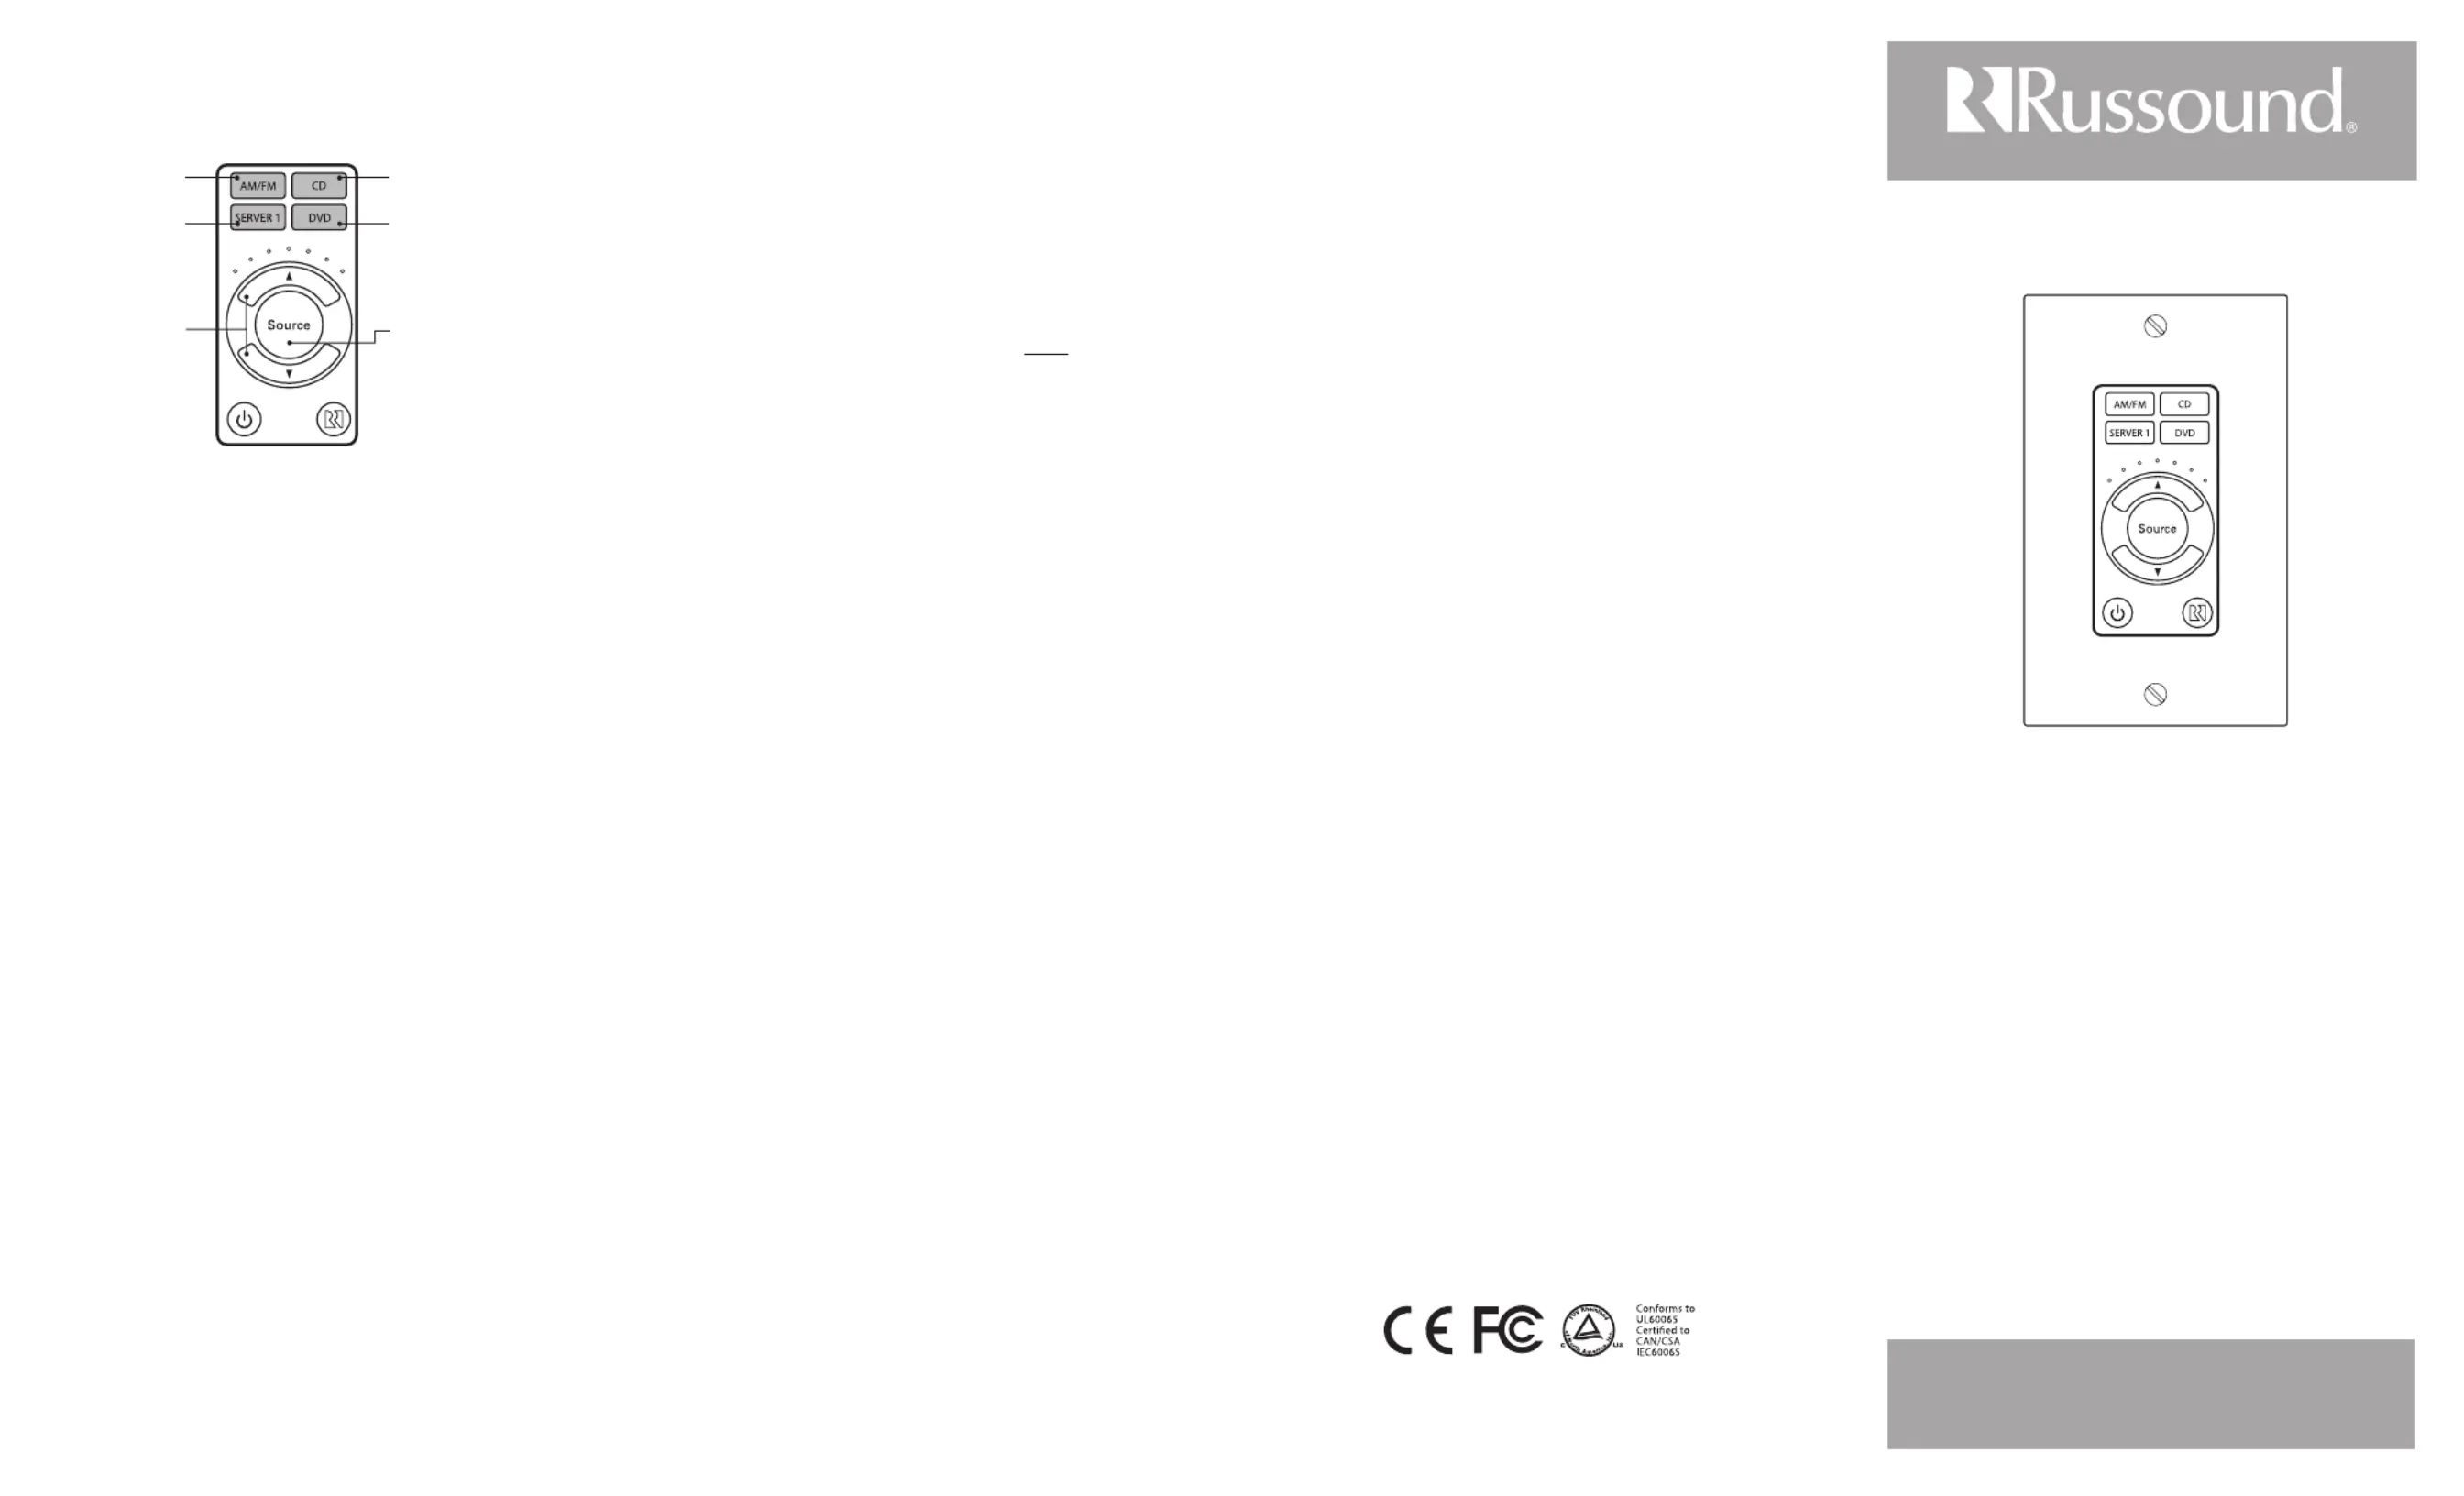
CA4-KP
Keypad for the CA4 Multizone Controller
Installation and User Manual
Overview
The Russound CA4-KP is an in-wall keypad used with the CA4
controller in a multiroom audio system. The CA4-KP provides
source selection and volume control with backlit push buttons,
and an IR window to receive remote control signals for source
control.
The volume up/down buttons control the speakers in the same
zone as the keypad. Typical installations place one CA4-KP in
each room of the CA4 system.
Key Features
Adjustable bass, treble, loudness, Party Mode and all o for •
total control
Built-in IR receiver with IR conrmation LED•
IR control of sources via CA4-RC optional remote control•
Source Grouping•
Specications
Dimensions:1.8" x 1.2" x 4.1" ( 46 x 30 x 105 mm)
Weight:0.1 lb. (0.05 kg)
Keypad ports: 1
Keypad Cables: CAT-5 - RJ-45 termination
Max cable length:Wall port to keypad 240' (73.2m)
Safety Instructions
1. Read Instructions - All the safety and operating instructions should be
read before the appliance is operated.
2. Retain Instructions - The safety and operating instructions should be
retained for future reference.
3. Heed Warnings - All warnings on the appliance in the operating
instructions should be adhered to.
4. Follow Instructions - Follow all operating and user instructions.
5. Water and Moisture - The appliance should not be used near water;
for example, near a bathtub, washbowl, kitchen sink, laundry tub, in a wet
basement, or near a swimming pool.
6. Wall Mounting - The appliance should be mounted to a wall as
recommended by the manufacturer.
7. Heat - The appliance should be situated away from heat sources such as
radiators, heat registers, stoves, or other appliances (including ampliers)
that produce heat.
8. Power Sources - The appliance should be connected to a power supply
only of the type described in the operating instructions or as marked on
the appliance.
9. Grounding or Polarization - Precaution should be taken so that the
grounding or polarization means of an appliance is not defeated.
10. Object and Liquid Entry - Care should be taken so that objects do not
fall and liquids are not spilled into the enclosure through the openings.
11. Damage Requiring Service - The appliance should be serviced by
qualied service personnel when:
The power supply cord or the plug has been damaged;
Objects have fallen, liquid has been spilled into the appliance;
The appliance has been exposed to rain;
The appliance does not appear to operate normally; or
The appliance has been dropped or the enclosure is damaged.
12. Servicing - The user should not attempt to service the appliance
beyond that described in the operating instructions. All other servicing
should be referred to qualied service personnel.
13. Care – From time to time you should wipe o the front panel with a
soft dry cloth.
Limited Warranty
The Russound CA4-KP is fully guaranteed for two (2) years from the date
of purchase against all defects in materials and workmanship. During this
period Russound will replace any defective parts and correct any defect
in workmanship without charge for either parts or labor. For this warranty
to apply, the unit must be installed and used according to its written
instructions. If service is necessary, it must be performed by Russound.
Russound assumes no responsibility for defects resulting from abuse or
servicing performed by an agency or person not specically authorized
in writing by Russound. Damage to or destruction of components due to
improper use voids the warranty. In these cases the repair will be made
at the owner’s expense. Accidental damage and shipping damage are not
considered defects under the terms of the warranty. To return for repairs,
the unit must be shipped to Russound at the owner’s expense, along with a
Return Authorization number and documentation explaining the nature of
the service required. Any product returned without prior written permission
will be returned to sender. Russound sells products only through authorized
Dealers and Distributors to ensure that customers obtain proper support
and service. Any Russound product purchased from an unauthorized dealer
or other source, including retailers, mail order sellers and online sellers will
not be honored or serviced under existing Russound warranty policy. Any
sale of products by an unauthorized source or other manner not authorized
by Russound shall void the warranty on the applicable product.
Copyright ©2008 Russound® All rights reserved. All trademarks are
the property of their respective owners. Russound is not responsible for
typographical errors or omissions. Specications are subject to change
without notice.
Russound, Inc. 5 Forbes Rd., Newmarket, NH 03857, USA
tel603.659.5170•fax603.659.5388www.russound.com
technical support: 866.888.7466 e-mail: [email protected]
28-1305 6/16/08
Basics
The User Menu allows the user to adjust the audio properties
and features of a particular zone. The audio features that can
be adjusted are: Bass, Treble, and Loudness. Additional features
that are selectable are Source Grouping and All ON Participation.
The Source windows will illuminate to indicate the option ready
for adjustment.
To enter the User Menu, press and hold the Source button for
3-seconds when the keypad is powered on. Another 3-second
press and hold of the Source button (or a 9-second time-out)
will return the keypad to regular operation.
The top left (Source 1) button will temporarily blink to
indicate “Bass" is ready for adjustment. Subsequent presses
of the Source button will toggle through Treble (Source 2),
Loudness (Source 3), Source Grouping (Source 4), and All ON
Participation (all four Sources lit).
Setting Bass and Treble
Enter the User Menu.1.
Press the source button to select Source 1 (upper left) for 2.
Bass or Source 2 (upper right) for Treble. The windows will
blink the option available for adjustment.
Press the volume up or down to adjust the settings. The 3.
LEDs above the volume up button will indicate the change.
The middle LED will ash when at.
Either press the Source button to go to the next option or 4.
exit the User Menu by a 3-second press of the source button
or a time-out.
Setting Loudness
Enter the User Menu.1.
Press the source button to select Source 3 (lower left) for 2.
Loudness. The window will blink. Press the volume up button
to turn the feature ON, or the volume down button to turn it
OFF. The far right hand volume LED will indicate ON and the
far left hand volume LED will indicate OFF.
Either press the Source button to go to the next option or 3.
exit the User Menu by a 3-second press of the source button
or a time-out.
Setting Source Grouping
Enter the User Menu. Only zones connected to the same 1.
controller can be grouped.
Press and release the source button to cycle to and select 2.
Source 4 (lower right). The window will blink.
Pressing the volume up button will activate the feature and 3.
pressing the volume down button deactivates the feature.
The far right hand volume LED will indicate ON and the far
left hand volume LED will indicate OFF.
Exit the User Menu by a 3-second press of the source button 4.
or a time-out.
Go to another keypad connected to the 5. same controller and
repeat the procedure to link the zones. Any source changes
on any of the linked keypads will be tracked and updated
on all source linked keypads. Volume control remains
independent as well as zone ON and OFF.
Conditions/ Notes
If the keypad is disabled to respond to the All ON command •
and is OFF when the All ON command is issued, it will not
respond to the command. If it is turned ON while Party Mode
is active on the system or was ON prior to Party Mode being
initiated, it will automatically be entered into Party Mode as
a non-Master.
If the keypad is enabled to respond to the All ON Participation •
command and is OFF when the All ON command is issued, it
will turn on and enter into Party Mode as a non-Master.
The keypad issuing the All ON command will be the master •
keypad and be able to control the source selection for other
zones.
Non-Master keypads in Party Mode cannot change the source. •
They will all show and follow the source choice of the Master
keypad. If a user tries to change sources with a non-Master
keypad, the source and volume up / down buttons will blink
three times to indicate the error.
Non-Master keypads can be turned OFF by a press and release •
of the Power button. Any keypad (Master or non-Master) can
issue an All OFF command.
Turning the Master keypad OFF will exit Party Mode.•
A non-Master keypad cannot issue an All ON command. •
Press and hold Source
button to enter or exit
User Menu. Press to
cycle through options
Press Volume Up
or Down buttons
to adjust setting
Source window will blink to indicate the
option that is ready for adjustment
Source 2 / Treble
Source 1 / Bass
Source 4
Source Grouping
Source 3
Loudness
All Sources Lit
All ON Participation
Setting All ON Participation
Enter User Menu. The default is All ON Participation Enabled.1.
Press and release the source button, until all the source 2.
buttons are lit. It will cycle through each individual source
and then all sources will be lit.
Press the Volume Up button to turn the feature ON, or the 3.
Volume Down button to turn the feature OFF. The far right
hand volume LED will be lit to indicate that the keypad is
enabled to respond, or the far left hand volume LED will
indicate that the keypad will not respond to the All ON
command.
Either press the Source button to go to the next option or 4.
exit the User Menu by a 3-second press of the source button
or a time-out.
CA4-KP User Menu
Produktspecifikationer
| Varumärke: | Russound |
| Kategori: | Inte kategoriserad |
| Modell: | CA4-KP |
Behöver du hjälp?
Om du behöver hjälp med Russound CA4-KP ställ en fråga nedan och andra användare kommer att svara dig
Inte kategoriserad Russound Manualer

25 September 2024
25 September 2024
25 September 2024
25 September 2024
25 September 2024
25 September 2024
25 September 2024
21 September 2024
21 September 2024
21 September 2024
Inte kategoriserad Manualer
Nyaste Inte kategoriserad Manualer
9 April 2025
9 April 2025
9 April 2025
9 April 2025
9 April 2025
9 April 2025
9 April 2025
9 April 2025
9 April 2025
9 April 2025