Dormakaba Auditcon T52 Bruksanvisning
Dormakaba
ej kategoriserat
Auditcon T52
Läs gratis den bruksanvisning för Dormakaba Auditcon T52 (4 sidor) i kategorin ej kategoriserat. Guiden har ansetts hjälpsam av 27 personer och har ett genomsnittsbetyg på 4.8 stjärnor baserat på 14 recensioner. Har du en fråga om Dormakaba Auditcon T52 eller vill du ställa frågor till andra användare av produkten? Ställ en fråga
Sida 1/4

(P/N) 3045.025 Rev 0G
2
/ • © copyright 2005 - 2019 22
dormakaba USA Inc.
Page 1 of 4
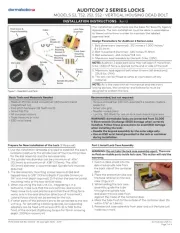
INSTALLATION INSTRUCTIONS
Prepare for New Installation of the Lock (If Required)
1. Use the installation template provided to establish the exact
locations (relative to the spindle hole) of the mounting holes
for the dial assembly and the lock assembly.
2. The spindle hole diameter can be a minimum of .406”
(10.3mm) to a maximum of .438” (11.1mm). The .406”
(10.3mm) diameter is recommended. Spindle hole must be
deburred.
3. The dial assembly mounting screws require drilled and
tapped holes to 3/8” (9.5mm) depth if possible (minimum
1/4” or 6.4mm depth required.) Drill either the two horizontal
mounting holes or the two vertical holes.
4. When mounting the lock unit (i.e., integrating it in a
boltwork), make sure that the lock bolt has clearance to
freely move to its end positions and that the shifting force
works only in the axial direction (direction of movement).
Lateral forces should not be exerted on the lock.
5. If other parts of the boltwork are to be connected to the lock
unit (e.g., for activating a blocking device), corresponding
adapters can be fixed with screws (#10-32 or M4) to the
front of the lock bolt (tightening torque for 15mm screwing
depth: 200Ncm maximum).
Part I: Install Lock Case Assembly
WARNING: Do not take the lock case assembly apart. There are
no field servicable parts inside lock case. This action will void the
warranty.
1. Insert a cable shield into the
deburred spindle hole from
the back side of the container
door.
2. Place the protective tube over
the tube retainer on the lock
case. (Figure 2)
3. While holding the lock case
assembly, guide the tube
through the spindle hole
and place the lock case flush
against the inside of the container door.
4. Mark the tube flush to the outside of the container door (to
within 1/16” or 1.6mm).
5. Remove lock case assembly from door and cut the tube just
inside your mark.
The installation instructions are the basis for Security Agency
Approvals. The lock installation must be done in accordance
to these instructions in order to maintain the labeled
approval level.
Design Parameters for Auditcon 2 Series Locks
1. Bolt dimensions (nominal): .312 inches x 1.000 inches/
8 x 25.4mm
2. Bolt movement (nominal): .465 inches/11.8mm
3. Bolt extension: .465 inches/11.8 mm
4. Maximum load movable by the bolt: 5 lbs. (22N)
NOTE: Auditcon 2 dead bolt locks may not open if more than
5 lbs. (22N) of force is applied to the end or side of the bolt.
5. Maximum load against bolt when thrown (all directions):
224.8 lbs. (1kN)
6. The lock can be fitted to safes or vault doors of any
material.
NOTE: As is the case with all mechanical and electronic
locking devices, the container and boltworks must be
designed to protect the lock.
AUDITCON
®
2 SERIES LOCKS
MODELS 52, T52, 252, 552 VERTICAL HOUSING DEAD BOLT
Basic Tools and Materials Needed
• Medium Phillips head screwdriver (#2) (recommend
magnetized tip)
• Fine pitch hacksaw (32 teeth/inch)
• Small flat file
• All-purpose scissors
• Tape measure or ruler
• ESD wrist band
Recommended, but not required:
• Torque screwdriver (30 inch-pounds/3.4 newton-meters
capacity)
• Small vise grip
• Needle-nosed pliers
• Loctite
®
262 (Red) for use on lock case mounting screws
WARNING: dormakaba locks are protected from 25,000
V Electrostatic Discharge (ESD) damage when correctly
installed. Follow these precautions to avoid ESD damage
when installing the lock:
• Handle the keypad assembly by the outer edge only.
• Use an ESD wrist band grounded to the lock or container
during installation.
Figure 2
Figure 1 - Dead Bolt Lock Parts
Front Cover &
Keypad Assembly
Spindle
Clip
Spindle Mounting
Screw
Lock Case
Assembly
Lock Case
Mounting
Screws (4)
Spindle
& Tube
Cable
Shields (2)
Front Cover
Mounting
Screws (3)
Keypad/Base
Mounting
Screws (2)
Cable
Dial Label
Dial
- Rev G
Produktspecifikationer
| Varumärke: | Dormakaba |
| Kategori: | ej kategoriserat |
| Modell: | Auditcon T52 |
Behöver du hjälp?
Om du behöver hjälp med Dormakaba Auditcon T52 ställ en fråga nedan och andra användare kommer att svara dig
ej kategoriserat Dormakaba Manualer
13 Augusti 2025
11 Augusti 2025
10 Augusti 2025
10 Augusti 2025
10 Augusti 2025
10 Augusti 2025

10 Augusti 2025
10 Augusti 2025

10 Augusti 2025
10 Augusti 2025
ej kategoriserat Manualer
- Amazon
- Trotec
- ZOTAC
- Hozelock
- EHO
- Anchor Audio
- Basetech
- HiFi ROSE
- Elation
- Enttec
- Kino Flo
- Scotsman
- Block
- Paragon
- Hama
Nyaste ej kategoriserat Manualer

23 Oktober 2025
23 Oktober 2025
23 Oktober 2025
23 Oktober 2025

23 Oktober 2025
23 Oktober 2025

23 Oktober 2025

23 Oktober 2025

23 Oktober 2025
23 Oktober 2025